To install a roof solar water heater, start by evaluating your roof's suitability, ensuring proper orientation and structural integrity. Gather necessary tools and materials, including safety gear and solar components. Choose a prime location for the solar collector, then install mounting brackets and secure the panels. Set up the circulation pump and temperature sensors, connecting them to your existing plumbing system. Insulate all pipes and connections to maximize efficiency. Finally, test and commission the system, checking for leaks and proper operation. By following these steps, you'll be well on your way to harnessing solar energy for your hot water needs. The detailed process awaits, promising a rewarding DIY project.
Assess Your Roof's Suitability
Before you immerse yourself in installing a solar water heater, it's important to evaluate your roof's compatibility. Start by examining the roof's orientation and angle. Ideally, your roof should face south, southeast, or southwest to maximize sun exposure. The ideal roof pitch for solar collectors is between 30 and 45 degrees, but a range of 15 to 60 degrees can still work effectively.
Next, investigate your roof's structural integrity. Confirm it can support the additional weight of the solar water heating system. Check for any damage, leaks, or weak spots that need repair before installation.
Consider the roof's age and remaining lifespan; it's best to install solar panels on a roof with at least 10-15 years of life left.
Evaluate the available space on your roof. Solar water heaters typically require 40-100 square feet of unobstructed area. Take note of any chimneys, vents, or skylights that might interfere with panel placement.
Gather Necessary Tools and Materials
With your roof's suitability confirmed, it's time to gather the essential tools and materials for your solar water heater installation.
You'll need a mix of standard household tools and specialized equipment for this project. Start by collecting basic items like a drill, screwdriver set, wrench set, pliers, and a utility knife.
Don't forget safety gear, including gloves, safety glasses, and a sturdy ladder.
For the solar water heater itself, you'll need:
- Solar collector panels
- Mounting brackets and hardware
- Storage tank with heat exchanger
- Circulation pump and controller
Additionally, gather plumbing supplies such as copper pipes, fittings, solder, and flux.
You'll also need insulation for the pipes and tank. If you're installing an active system, make sure you have the appropriate electrical wiring and connectors.
Before beginning, double-check that you have all necessary permits and that your materials comply with local building codes.
It's vital to have everything on hand before starting the installation to avoid delays or complications. If you're unsure about any components, consult the manufacturer's guidelines or seek advice from a professional solar installer.
Choose Optimal Solar Collector Location
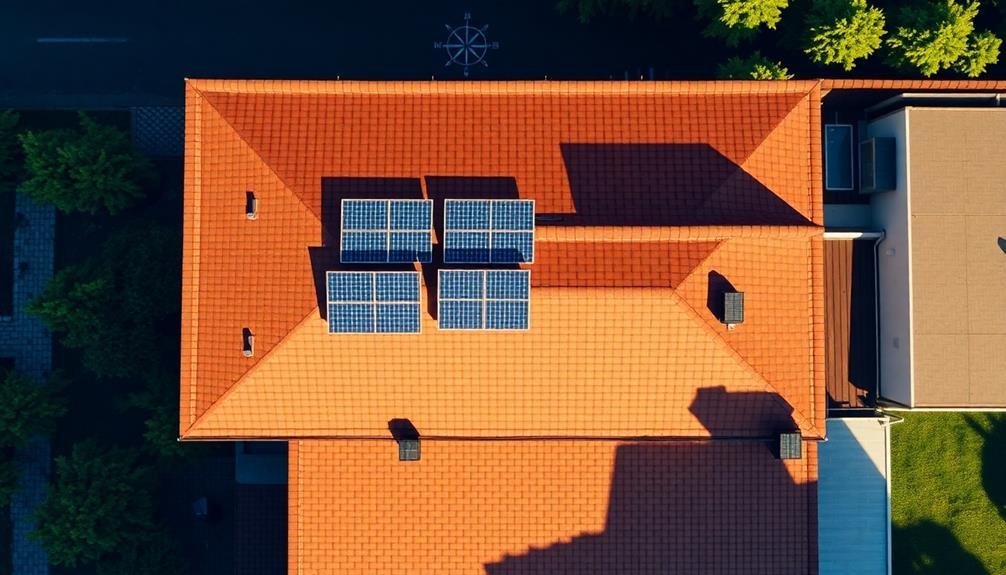
The heart of your solar water heating system lies in its collector placement. To maximize efficiency, you'll need to carefully select the ideal location for your solar collectors.
Start by identifying a south-facing roof area that receives unobstructed sunlight for most of the day. This orientation guarantees maximum sun exposure throughout the year.
Consider the pitch of your roof, aiming for an angle between 30 and 45 degrees for best performance. If your roof's pitch doesn't fall within this range, you may need to use mounting brackets to adjust the collector's angle.
Avoid areas with potential shading from nearby trees, buildings, or other structures that could reduce sunlight exposure.
Assess the structural integrity of your chosen location, confirming it can support the weight of the solar collectors and associated equipment.
Check for any obstructions like vents, chimneys, or skylights that might interfere with installation. Also, consider the proximity to your existing water heater to minimize pipe runs and heat loss.
Install Mounting Brackets
Now that you've selected the ideal location for your solar collectors, it's time to secure them in place. Installing mounting brackets is essential for the stability and safety of your solar water heater system.
Begin by marking the exact positions for the brackets on your roof, ensuring they align with the rafters or trusses for maximum support.
Before drilling any holes, double-check your measurements and use a level to confirm the brackets will be perfectly straight. When you're ready to install, follow these steps:
- Drill pilot holes through the roof's surface and into the rafters.
- Apply a generous amount of roofing sealant around each hole.
- Secure the mounting brackets using lag bolts and washers.
- Cover the bolt heads and surrounding area with additional sealant.
Ensure that each bracket is firmly attached and can support the weight of the solar collectors.
If you're uncomfortable working on your roof or lack the necessary tools, it's best to hire a professional installer. They'll have the expertise to properly secure the mounting brackets without compromising your roof's integrity or voiding any warranties.
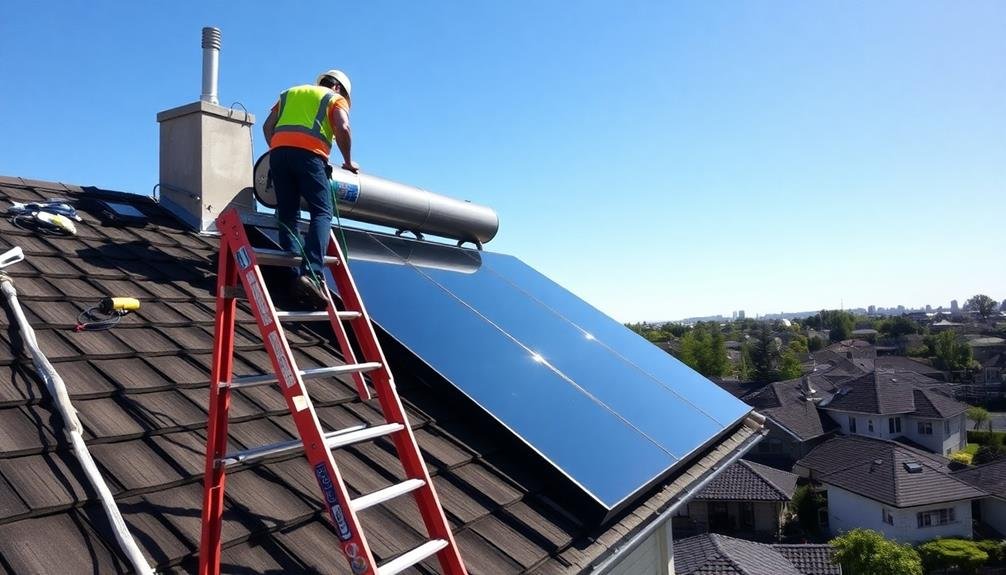
Secure Solar Collector Panels
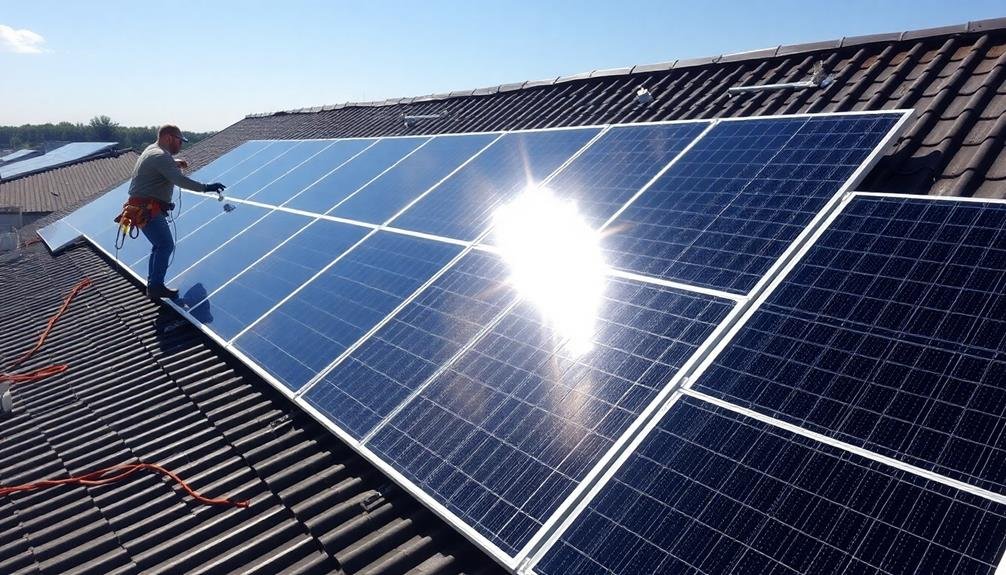
After installing the mounting brackets, it's time to secure your solar collector panels.
Begin by carefully lifting each panel onto the roof, using a ladder or scaffolding for safe access. It's best to have at least two people for this task to guarantee proper handling and prevent damage.
Align the first panel with the mounting brackets, making sure it's level and properly positioned. Use the manufacturer-provided hardware to attach the panel to the brackets, typically bolts or clamps. Tighten them securely, but be careful not to overtighten and risk damaging the panel.
Once the first panel is in place, connect any necessary plumbing or electrical connections before installing the next panel. This may include attaching flexible hoses or wiring for temperature sensors. Follow the manufacturer's instructions carefully for these connections.
Repeat the process for any additional panels, making certain they're properly aligned and securely fastened.
Check that all panels are level and evenly spaced. Finally, double-check all connections and attachments to ensure everything is tight and secure. This will help prevent leaks and guarantee peak performance of your solar water heating system.
Connect Plumbing to Storage Tank
When connecting your solar water heater's plumbing to the storage tank, you'll need to plan the pipe routing carefully.
Install valves and fittings according to your system's design, ensuring proper flow and control.
Once you've completed the connections, thoroughly check for any leaks to guarantee a watertight system.
Pipe Routing and Layout
Planning your pipe routing and layout is essential for efficiently connecting your solar collectors to the storage tank. You'll need to carefully consider the path your pipes will take from the roof to the storage area. Aim for the shortest possible route to minimize heat loss and reduce material costs.
Use insulated copper pipes for both hot and cold water lines to maintain water temperature and prevent freezing in colder climates.
When planning your pipe layout, keep these key points in mind:
- Maintain a slight slope in the piping to allow for proper drainage and prevent air pockets.
- Use supports every 6 feet to secure pipes and prevent sagging.
- Install expansion joints to accommodate thermal expansion and contraction.
- Place isolation valves at key points for easy maintenance and repairs.
As you route the pipes, avoid areas prone to physical damage or extreme temperatures. If pipes must pass through walls or ceilings, use proper flashing and sealants to prevent leaks and maintain your home's insulation.
Don't forget to include an air vent at the system's highest point to release trapped air and guarantee smooth operation. With careful planning and execution, your pipe routing will contribute to an efficient and long-lasting solar water heating system.
Valve and Fitting Installation
With your pipe routing planned, it's time to connect the plumbing to your storage tank. Begin by installing the necessary valves and fittings to guarantee proper water flow and system control.
Start with the cold water inlet, attaching a shut-off valve, pressure relief valve, and check valve. These components will regulate water pressure and prevent backflow.
Next, install a temperature and pressure relief valve on the hot water outlet. This vital safety feature protects against excessive pressure or temperature buildup.
Don't forget to add an expansion tank to accommodate water expansion as it heats.
For the solar loop connections, install ball valves on both the supply and return lines. These allow you to isolate the solar collectors for maintenance.
Add a drain valve at the lowest point of the system for easy draining when needed.
Use thread sealant or Teflon tape on all threaded connections to prevent leaks.
Tighten fittings securely but avoid over-tightening, which can damage threads.
Install unions at strategic points to simplify future maintenance and repairs.
Leak-Proof Connections Check
Once you've installed all the necessary valves and fittings, it's vital to check for leaks before proceeding. This step guarantees your solar water heater system operates efficiently and prevents potential water damage.
Begin by visually inspecting all connections, looking for any signs of moisture or dripping. Then, pressurize the system with water and carefully examine each joint and fitting.
To conduct a thorough leak-proof connections check, follow these steps:
- Close all valves and turn off the main water supply
- Attach a pressure gauge to the system and slowly increase the pressure
- Monitor the gauge for any pressure drops, which may indicate a leak
- Use soapy water on connections to identify small leaks through bubbling
If you discover any leaks, tighten the connections or replace faulty components as needed.
Don't skip this important step, as even minor leaks can lead to significant issues over time. Once you're confident that all connections are secure and leak-free, you can move on to connecting the plumbing to the storage tank.
This final connection will complete the installation of your roof solar water heater system.
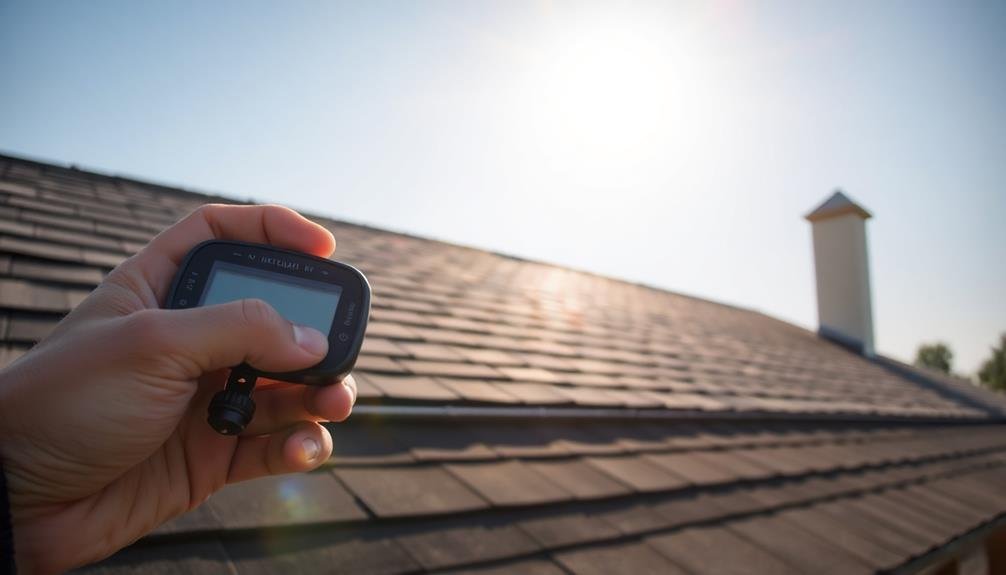
Install Temperature Sensors
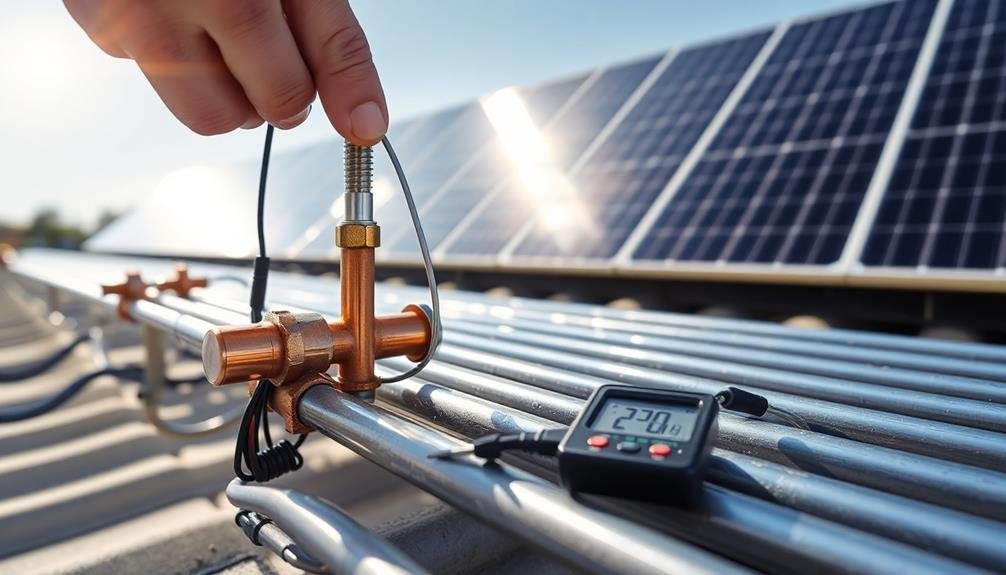
Temperature sensors are essential components of your solar water heating system. They monitor the water temperature in your storage tank and the solar collector, allowing the controller to regulate the system's performance efficiently.
To install these sensors, you'll need to locate the designated ports on your tank and collector. Start by identifying the sensor ports on your storage tank. These are typically found near the top and bottom of the tank. Clean the ports and apply a small amount of thermal paste to the sensor tips for better heat transfer. Insert the sensors into the ports and secure them tightly using the provided fittings or compression nuts.
Next, locate the sensor port on your solar collector. It's usually positioned near the outlet pipe. Follow the same process as with the tank sensors, ensuring a snug fit to prevent any leaks.
Once all sensors are in place, carefully route the sensor wires to your system controller. Avoid sharp bends or potential pinch points, and use UV-resistant cable ties to secure the wires along their path.
Connect the wires to the appropriate terminals on your controller, following the manufacturer's wiring diagram. Double-check all connections before powering on the system.
Set Up Circulation Pump
To set up your circulation pump effectively, you'll need to focus on proper placement, wiring, and connections.
First, position the pump near your solar water heater's storage tank, ensuring it's easily accessible for maintenance.
Next, carefully wire the pump to your system's control panel, following the manufacturer's instructions and local electrical codes.
Proper Pump Placement
Circulation is key when setting up your solar water heater's pump. Proper pump placement guarantees efficient water flow and ideal heat transfer. You'll want to position the pump strategically to maximize its performance and minimize energy loss.
When determining the ideal location for your circulation pump, consider these vital factors:
- Accessibility: Place the pump where you can easily reach it for maintenance and repairs.
- Proximity to tanks: Install the pump close to both the solar collector and storage tank to reduce pipe length and heat loss.
- Vertical positioning: Mount the pump below the storage tank's water level to prevent air locks and guarantee proper priming.
- Vibration isolation: Use rubber mounts or a solid base to minimize noise and vibration transfer.
Remember to install the pump in a dry, protected area to prevent water damage and extend its lifespan. Avoid placing it in direct sunlight or areas prone to freezing temperatures.
Make sure there's enough clearance around the pump for proper ventilation and heat dissipation. If possible, position the pump indoors to shield it from the elements.
Wiring and Connections
Once you've found the ideal location for your circulation pump, it's time to focus on the wiring and connections.
Start by ensuring you have all the necessary materials, including electrical wire, wire nuts, and a weatherproof junction box. Turn off the main power supply before beginning any electrical work.
Connect the pump to your home's electrical system using appropriate gauge wire. Run the wire from the pump to the junction box, making sure it's properly secured and protected from the elements.
Inside the junction box, connect the pump wires to your home's electrical wires using wire nuts, ensuring a secure connection.
Install a dedicated circuit breaker for the pump in your main electrical panel. This will provide protection and allow you to easily shut off power to the pump when needed.
Consider adding a timer or controller to automate the pump's operation, maximizing energy efficiency.
Don't forget to properly ground the pump and all electrical components. This is essential for safety and proper functioning.
Once all connections are made, seal the junction box to protect it from moisture and debris. Double-check all your work before restoring power to the system.
Insulate Pipes and Connections

Proper insulation of pipes and connections is essential for maximizing your solar water heater's efficiency. It reduces heat loss, protects against freezing, and guarantees that the heated water reaches your taps at the desired temperature. You'll need to insulate all exposed pipes, both hot and cold, as well as the connections between components.
Start by measuring the length and diameter of all pipes that require insulation. Choose high-quality pipe insulation that's appropriate for your climate and the temperatures your system will reach.
When insulating, pay special attention to:
- Outdoor pipes: These are most vulnerable to temperature fluctuations and weather exposure.
- Joints and fittings: Use insulation tape or specialized fitting covers to prevent heat loss at these points.
- Valves and gauges: Insulate around these components carefully, guaranteeing they remain accessible for maintenance.
- Storage tank: If it's not pre-insulated, add an insulation jacket to maintain water temperature.
Wrap the insulation tightly around the pipes, securing it with zip ties or insulation tape. Confirm there are no gaps or exposed sections.
For added protection, consider using a weather-resistant covering over the insulation in outdoor areas. This extra layer will shield the insulation from UV rays and physical damage, prolonging its effectiveness.
Test and Commission System
After completing the installation, you'll need to test and commission your solar water heater system.
Start by verifying all connections are secure and leak-free, then run an initial water test to guarantee proper flow and pressure.
Verify All Connections
Before powering up your solar water heater, it's vital to verify all connections and commission the system properly. Start by double-checking all plumbing connections, confirming they're tight and leak-free. Inspect the solar collector for secure mounting and proper alignment. Verify that the storage tank is correctly installed and insulated.
Next, focus on the electrical connections. Ascertain all wiring is properly connected and insulated, following local electrical codes. Check that the controller is securely mounted and correctly wired to the sensors, pump, and power source. Don't forget to verify the grounding of all components for safety.
Once you've confirmed all connections, it's time to commission the system:
- Fill the system with water and check for leaks
- Purge air from the pipes and collectors
- Test the pump's operation and flow rate
- Verify the controller's settings and sensor readings
After completing these steps, run the system for a few hours to confirm everything functions correctly. Monitor temperatures, pressure, and flow rates during this initial operation.
If you notice any issues, address them immediately before putting the system into regular use. By thoroughly verifying all connections and properly commissioning your solar water heater, you'll guarantee peak performance and longevity.
Run Initial Water Test
Once all connections have been verified, it's time to run an initial water test to confirm your solar water heater is functioning correctly.
Begin by opening the cold water supply valve to fill the system. As the tank fills, check for any leaks at pipe joints, fittings, and connections. Listen for unusual sounds, such as gurgling or hissing, which may indicate air in the system.
Next, turn on a hot water tap in your home and let it run until you get a steady flow of water. This process helps purge air from the pipes.
While the water is running, inspect the solar collectors on your roof for any signs of leakage.
Now, check the temperature gauge on your storage tank. The water temperature should start to rise as the system begins to heat. Monitor this over the next few hours on a sunny day.
If you've installed a pump, verify it's operating as intended.
Monitor System Performance
With your solar water heater installed and initially tested, it's important to monitor its performance over time. Regularly check the system's efficiency, water temperature, and overall functionality to guarantee it's operating at its best. Keep an eye on your energy bills to gauge the impact of your solar water heater on your household's energy consumption.
To effectively monitor your system's performance:
- Record daily water temperatures at different times
- Track energy usage and compare it to previous months
- Inspect the collector and storage tank for any visible issues
- Monitor the pump and controller for proper operation
Pay attention to any sudden changes in water temperature or energy consumption, as these may indicate potential problems. If you notice a significant drop in performance, check for leaks, damaged insulation, or faulty components.
Clean the collector periodically to maintain peak efficiency, and flush the system annually to prevent mineral buildup.
Don't hesitate to contact a professional if you encounter any issues you can't resolve on your own. Regular maintenance and monitoring will help extend the lifespan of your solar water heater and guarantee you're maximizing its benefits for years to come.
Frequently Asked Questions
How Long Does a Solar Water Heater Typically Last?
You can expect your solar water heater to last between 15 to 30 years, depending on maintenance and quality. With proper care, it'll serve you well for decades. Regular check-ups and repairs can extend its lifespan even further.
Can I Install a Solar Water Heater in a Cold Climate?
Yes, you can install a solar water heater in a cold climate. You'll need to choose a system designed for freezing temperatures and guarantee proper insulation. It's crucial to use antifreeze fluid and employ adequate freeze protection measures.
What Maintenance Is Required for a Solar Water Heater?
You'll need to regularly clean the collectors, check for leaks, and inspect valves and connections. Don't forget to flush the system annually, maintain proper antifreeze levels, and guarantee the pump's working correctly. Consult your manual for specific instructions.
How Much Money Can I Save on Energy Bills With Solar Heating?
You'll save considerably on energy bills with solar heating. Your savings depend on your location, energy usage, and system size. You could cut your water heating costs by 50-80%, potentially saving hundreds of dollars annually.
Are There Government Incentives or Rebates for Installing Solar Water Heaters?
Yes, you'll often find government incentives for solar water heaters. Check your local and federal programs for rebates, tax credits, and grants. They can greatly reduce your installation costs and improve your long-term savings.
In Summary
You've now successfully installed your roof solar water heater! Remember, regular maintenance is key to keeping your system running efficiently. Check for leaks, clean the panels, and inspect connections periodically. You'll soon enjoy the benefits of lower energy bills and reduced carbon footprint. If you encounter any issues, don't hesitate to consult a professional. Congratulations on taking this eco-friendly step towards sustainable living!


Leave a Reply