Natural ventilation can cool your home and cut energy costs without relying on air conditioning. You'll need to understand principles like stack effect and cross-ventilation to maximize airflow. Start by evaluating your home's current airflow patterns and identifying opportunities for improvement. Create cross-ventilation pathways by strategically opening windows and removing obstacles. Harness the stack effect by utilizing temperature differences between floors. Optimize window placement and consider DIY solutions like wind catchers or night flushing techniques. Don't forget the cooling power of plants, both indoors and out. With these strategies, you'll be well on your way to a naturally cooler, more energy-efficient home.
Understanding Natural Ventilation Principles
Three key principles govern natural ventilation: stack effect, cross ventilation, and the Bernoulli effect. Understanding these principles will help you harness nature's power to cool your home efficiently.
The stack effect relies on temperature differences to create airflow. As warm air rises, it creates a low-pressure area at the bottom of your home, drawing in cooler air through lower openings. To maximize this effect, you'll want to create vertical pathways for air movement, such as stairwells or atrium spaces.
Cross ventilation occurs when wind enters your home through one opening and exits through another. To optimize this, you'll need to position windows or vents on opposite sides of a room or building. The size and placement of these openings can greatly impact airflow efficiency.
The Bernoulli effect describes how air pressure decreases as wind speed increases. You can use this principle by designing your home's exterior to channel wind, creating areas of low pressure that draw air out of your house.
Assessing Your Home's Airflow
Now that you're familiar with natural ventilation principles, it's time to analyze your home's current airflow patterns. Start by observing how air moves through your living spaces. On a breezy day, open all windows and doors, then use incense sticks or smoke pencils to trace air movement. Pay attention to areas where air seems stagnant or flows poorly.
Next, identify your home's prevailing wind direction. This information will help you optimize window placement and ventilation strategies. You can use online resources, local weather data, or simply observe flag movements in your area over time.
Consider these factors when analyzing your home's airflow:
- Room layout and obstacles that might impede air movement
- Window size, location, and orientation relative to wind direction
- Existing ventilation features like vents, fans, or skylights
- Surrounding landscape elements that affect airflow
Once you've gathered this information, you'll be better equipped to implement effective natural ventilation solutions.
Creating Cross-Ventilation Pathways
Cross-ventilation pathways are essential for effective natural cooling in your home. To create these pathways, you'll need to strategically open windows and doors on opposite sides of your living space.
Start by identifying the prevailing wind direction in your area, then open windows on the windward side to let cool air in and those on the leeward side to let warm air out.
For maximum efficiency, guarantee there's a clear path between the openings. Remove obstacles like furniture or large plants that might obstruct airflow.
If you have a multi-story home, take advantage of the stack effect by opening windows on different floors. Cool air will enter through lower windows and push warm air out through upper ones.
Consider installing window fans to boost air movement, especially on calm days. Place them in windows facing the prevailing wind to draw in cool air.
You can also use interior doors to direct airflow between rooms. Keep doors open in areas you want to cool and close them in spaces you don't.
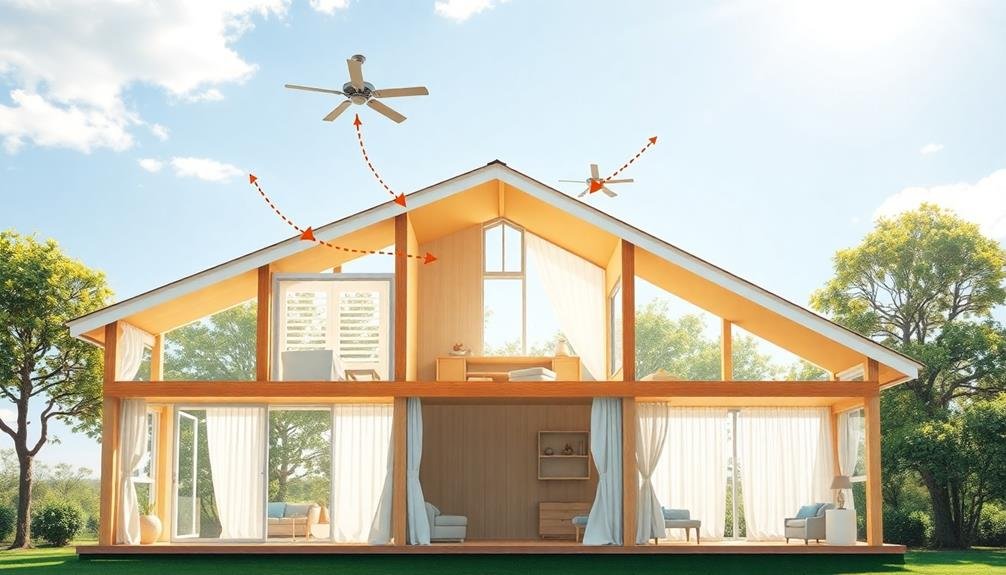
Harnessing Stack Effect Cooling
For effective stack effect cooling, you'll need to understand how warm air naturally rises in your home. This principle allows you to create a passive cooling system by strategically placing openings at different heights. As hot air escapes through upper-level windows or vents, it draws cooler air in from lower levels, creating a natural airflow.
To harness the stack effect in your home:
- Install operable windows or vents near the roof or in upper floors
- Create low-level openings on the cooler sides of your house
- Guarantee a clear pathway for air to flow between lower and upper openings
- Consider adding a solar chimney or attic fan to enhance the effect
You can maximize the stack effect by increasing the height difference between intake and exhaust openings. In multi-story homes, open stairwells can serve as excellent channels for vertical air movement.
During hot days, keep lower windows shaded and upper windows exposed to sunlight to intensify the temperature difference and boost airflow.
Optimizing Window Placement
Placing windows strategically is key to maximizing natural ventilation in your home. You'll want to create a cross-breeze by positioning windows on opposite sides of a room or across the house. This allows cool air to enter from one side and push warm air out the other.
Consider the prevailing wind direction in your area and place larger windows on the windward side to capture more airflow. Install smaller windows on the leeward side to create a pressure difference, enhancing air movement. Don't forget about vertical placement; windows at different heights can improve stack effect ventilation.
Here's a quick guide to window placement for ideal ventilation:
| Room Type | Window Placement | Benefits |
|---|---|---|
| Living Room | Large windows on opposite walls | Maximizes cross-ventilation |
| Bedroom | High and low windows | Enhances stack effect cooling |
| Kitchen | Windows near cooking areas | Removes heat and odors efficiently |
| Bathroom | High operable window | Improves privacy and ventilation |
| Stairwell | Top and bottom windows | Creates vertical air movement |
DIY Wind Catchers
You can create your own wind catcher to enhance natural ventilation in your home.
Start by designing a simple vertical shaft with an opening at the top to catch prevailing winds and direct them downward into your living space.
When constructing your wind catcher, consider using lightweight materials like wood or PVC pipes, and place it strategically on your roof or in an area with unobstructed airflow for maximum efficiency.
Design and Construction Basics
Building a DIY wind catcher involves three key elements: the tower, the catching area, and the outlet. The tower's height should exceed your roofline to capture unobstructed airflow. For the catching area, design a wide opening facing the prevailing wind direction. The outlet directs air into your living space, typically through windows or vents.
When constructing your wind catcher, consider these essential factors:
- Materials: Use lightweight, weather-resistant options like aluminum or treated wood.
- Size: Scale your wind catcher to your home's dimensions and ventilation needs.
- Insulation: Incorporate insulation to prevent heat gain in hot climates.
- Adjustability: Include movable louvers or dampers for airflow control.
Start by creating detailed plans, ensuring your design complies with local building codes. Construct a sturdy base and frame, then attach the catching area and outlet components.
Install screens to keep out debris and insects. Paint or seal your wind catcher to protect it from the elements. Finally, test your creation and make adjustments as needed for ideal performance.
With proper design and construction, your DIY wind catcher can greatly improve your home's natural ventilation and reduce energy costs.
Placement for Maximum Efficiency
Now that you've mastered the basics of wind catcher design and construction, it's time to focus on ideal placement. To maximize efficiency, you'll want to position your wind catcher where it can capture the most air movement.
Start by identifying the prevailing wind direction in your area. Place your wind catcher on the windward side of your home, typically facing north or northeast in many regions. Confirm it's not blocked by nearby structures or trees.
Height matters too. The higher your wind catcher, the more unobstructed wind it'll capture. Aim for at least 1-2 meters above your roof line. If possible, install it on the highest point of your home.
Consider multiple wind catchers for larger spaces or to create cross-ventilation. Place one on the windward side to catch incoming breezes and another on the leeward side to expel warm air.
Don't forget about interior placement. Position furniture and partition walls to guide airflow through your living spaces. Keep doorways and hallways clear to allow for unimpeded air movement.
Night Flushing Techniques
One of the most effective natural cooling strategies, night flushing, harnesses cool nighttime air to reduce indoor temperatures during hot summer days. To implement night flushing in your home, you'll need to create a consistent airflow pattern that expels warm indoor air and draws in cooler outdoor air.
Start by opening windows and doors on opposite sides of your house after sunset when the outside temperature drops below the indoor temperature. Use fans to enhance air circulation, placing them strategically to create a cross-breeze.
Throughout the night:
- Monitor indoor and outdoor temperatures
- Adjust window openings to maintain ideal airflow
- Use window fans to exhaust warm air from upper floors
- Consider installing whole-house fans for more efficient cooling
As the sun rises, close all windows and doors to trap the cool air inside. Draw curtains or blinds to minimize heat gain during the day.
You'll notice a significant difference in your home's temperature, reducing the need for air conditioning and lowering energy costs. Night flushing works best in climates with cool nights and hot days, so adapt this technique to your local weather patterns for maximum effectiveness.
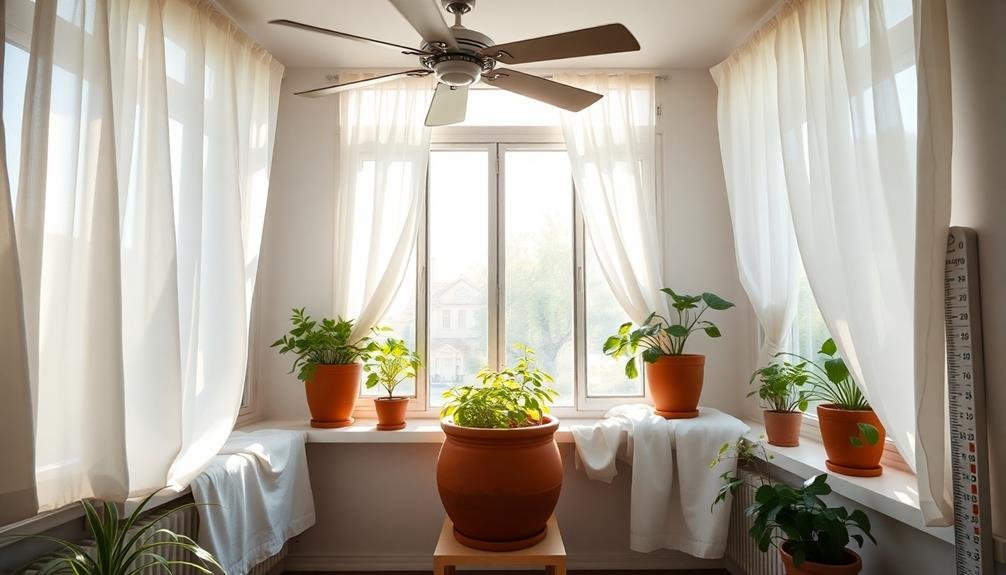
Natural Cooling With Plants
You can harness the power of plants to naturally cool your living spaces.
Consider planting shade-providing tree species around your home to block direct sunlight and reduce heat gain.
Inside, you'll benefit from air-purifying plants that not only absorb heat but also improve indoor air quality.
Shade-Providing Tree Species
Several tree species excel at providing natural shade and cooling for your home. When selecting shade trees, take into account their mature size, growth rate, and canopy spread. Deciduous trees are often ideal, as they offer shade in summer and allow sunlight through in winter.
Some excellent shade-providing tree species include:
- Maple trees (Acer spp.): Fast-growing with dense canopies, especially Sugar and Red Maples
- Oak trees (Quercus spp.): Long-lived with wide, spreading canopies, like White and Red Oaks
- Elm trees (Ulmus spp.): Vase-shaped with arching branches, such as American and Siberian Elms
- Linden trees (Tilia spp.): Pyramidal shape with fragrant flowers, including American and European Lindens
Plant these trees on the south, southwest, or west sides of your home for maximum cooling effect.
Make sure you've got enough space for the tree's mature size and that it won't interfere with power lines or foundations.
Remember to take into account your local climate and soil conditions when selecting trees.
Indoor Air-Purifying Plants
While outdoor trees provide excellent shade, indoor plants can also contribute to natural cooling and air purification. Certain species are particularly effective at removing toxins from the air and increasing humidity, which can help cool your home naturally.
Consider adding snake plants (Sansevieria) to your bedroom, as they release oxygen at night and filter out formaldehyde. For your living areas, try peace lilies, which are excellent at removing various pollutants and increasing humidity.
Spider plants are another great choice, as they're easy to care for and effective at removing carbon monoxide and xylene. In your home office, place a rubber plant or ficus, both of which are adept at filtering out harmful chemicals.
For bathrooms, aloe vera plants thrive in humid environments and help purify the air. Don't forget about the kitchen – herbs like basil and mint not only purify the air but also provide fresh ingredients for cooking.
To maximize the cooling and purifying effects of these plants, place them strategically near windows and in areas with good airflow. You'll enjoy cleaner air and a more comfortable home environment.
Earth Tubes for Passive Cooling
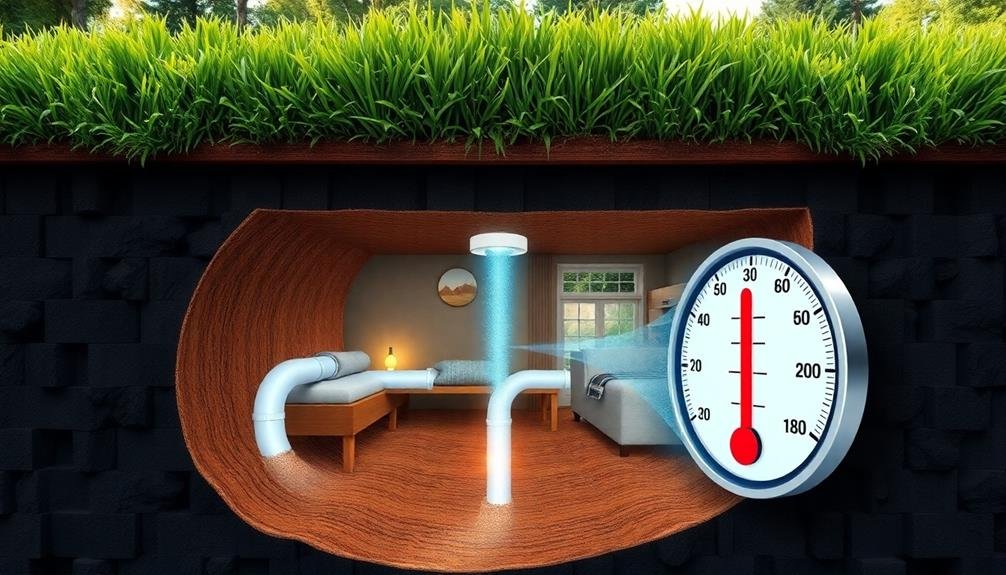
Earth tubes offer a unique and efficient method of passive cooling for your home. This system utilizes the earth's constant temperature to cool air before it enters your living space. By burying large pipes several feet underground, you can create a natural air conditioning system that requires minimal energy input.
To implement earth tubes in your home, you'll need to:
- Dig trenches for the pipes, typically 6-10 feet deep
- Install PVC or concrete pipes with a diameter of 4-8 inches
- Guarantee proper slope for condensation drainage
- Connect the pipes to your home's ventilation system
The cool air from the earth tubes can greatly reduce your home's cooling costs during hot summer months. As air travels through the underground pipes, it's naturally cooled by the surrounding soil before entering your home. This process can lower incoming air temperature by 10-20 degrees Fahrenheit, depending on your climate and soil conditions.
While earth tubes require a substantial initial investment, they can provide long-term energy savings and improved indoor air quality.
Consider consulting with a professional to determine if this passive cooling method is suitable for your property and local regulations.
Solar Chimneys: Design and Installation
Solar chimneys offer another effective method for natural ventilation in your home. These passive systems use solar energy to create a natural updraft, drawing hot air out of your living spaces and promoting cooler air circulation.
To design a solar chimney, start by selecting a south-facing wall or roof area that receives ample sunlight. Create a tall, narrow shaft with dark-colored interior surfaces to absorb heat. Install a glass or clear plastic cover on the exterior to trap solar radiation. At the base, add vents that connect to your home's interior.
When installing, guarantee proper sealing and insulation to maximize efficiency. Place intake vents near the floor in rooms you want to cool. As the chimney heats up, it'll create a pressure difference, pulling hot air up and out while drawing cooler air in through lower vents.
You can enhance your solar chimney's performance by incorporating thermal mass materials like concrete or water-filled containers. These absorb heat during the day and release it at night, extending the chimney's operation hours.
Consider adding fans for additional airflow on particularly hot days or in larger spaces.
Evaporative Cooling Methods
A cool oasis in the desert exemplifies the power of evaporative cooling. This natural phenomenon can be harnessed to cool your home efficiently.
Evaporative cooling works by passing hot, dry air over water, causing it to evaporate and absorb heat in the process. You'll find this method particularly effective in arid climates.
To implement evaporative cooling in your home, consider these DIY options:
- Install a swamp cooler, which pulls hot air through water-soaked pads
- Create a mist cooling system for your patio or outdoor areas
- Place bowls of water near windows or in front of fans
- Hang damp sheets or towels in doorways or windows
You can enhance the effectiveness of these methods by combining them with proper insulation and shading techniques.
Don't forget to keep windows open to allow hot air to escape and maintain air circulation.
You'll notice a significant temperature drop without relying on energy-intensive air conditioning.
By embracing evaporative cooling, you're not only saving on energy costs but also reducing your carbon footprint.
It's a win-win for both your comfort and the environment.
Maintaining Your Natural Ventilation System
To keep your natural ventilation system running efficiently, you'll need to perform regular cleaning and inspections.
Don't forget to adjust your system for seasonal changes, as air flow requirements can vary throughout the year.
Regular Cleaning and Inspection
Maintaining the efficiency of your natural ventilation system requires regular cleaning and inspection. You'll need to perform these tasks at least twice a year, preferably in spring and fall.
Start by examining all vents, windows, and openings for any obstructions or debris. Remove dust, cobwebs, and leaves that may have accumulated over time.
Next, check the functionality of your ventilation components:
- Confirm windows open and close smoothly
- Verify that vents are unobstructed and operating correctly
- Inspect weatherstripping for signs of wear or damage
- Test fans and other mechanical components for proper operation
Don't forget to clean your window screens, as they can collect dust and pollen, reducing airflow. Wash them with mild soap and water, then rinse thoroughly.
While you're at it, wipe down windowsills and frames to prevent mold growth.
If you've installed wind catchers or solar chimneys, pay special attention to these features. Check for any structural damage, loose parts, or signs of wear.
Clean the surfaces to maintain their effectiveness in directing airflow.
Adjusting for Seasonal Changes
As seasons change, so do the requirements for your natural ventilation system. You'll need to adjust your approach to maintain ideal airflow and comfort throughout the year.
In summer, focus on maximizing cool air intake. Open windows and vents during cooler nighttime hours to let in fresh air, and close them during the day to trap the coolness inside. Use light-colored curtains or blinds to reflect sunlight and reduce heat gain. Consider installing awnings or external shades to further block direct sunlight.
During winter, prioritize heat retention while still ensuring adequate ventilation. Limit window openings to short periods for air exchange, and use trickle vents or slightly cracked windows to maintain airflow without excessive heat loss. Seal any drafts around windows and doors to prevent cold air infiltration.
In spring and fall, take advantage of milder temperatures by keeping windows open more frequently. Use cross-ventilation techniques to encourage air movement throughout your home. Adjust window openings based on wind direction and strength to enhance airflow.
Remember to modify your ceiling fan direction seasonally: clockwise in winter to circulate warm air, and counterclockwise in summer for a cooling effect.
Frequently Asked Questions
How Much Can I Save on Energy Bills With Natural Ventilation?
You can save 10-30% on your energy bills with natural ventilation. It'll reduce your reliance on air conditioning, lowering electricity costs. The exact savings depend on your climate, home design, and how effectively you implement ventilation strategies.
Can Natural Ventilation Effectively Cool Multi-Story Homes or Apartments?
Yes, you can effectively cool multi-story homes or apartments with natural ventilation. You'll need to create airflow paths between floors, using windows, vents, and stairwells. It's most effective when you combine it with proper insulation and shading.
Are There Any Health Risks Associated With Natural Ventilation Systems?
While natural ventilation can improve air quality, you should be aware of potential risks. You're exposed to outdoor pollutants, allergens, and humidity. It's also important to take into account security concerns when leaving windows open, especially on lower floors.
How Do I Combine Natural Ventilation With Existing Air Conditioning Systems?
You can combine natural ventilation with your existing AC by using a hybrid approach. Open windows during cooler hours, use ceiling fans, and program your thermostat to work in tandem with natural airflow. This'll reduce your AC usage and energy costs.
What Are the Best Materials for DIY Natural Ventilation Projects?
You'll want to use lightweight, durable materials for DIY natural ventilation projects. Consider bamboo, wood slats, or recycled plastics for vents. Mesh screens keep out insects. Weatherproof fabrics work well for awnings or shade sails. Don't forget weatherstripping for sealing.
In Summary
You've now got the tools to harness nature's cooling power in your home. By understanding airflow principles and implementing strategies like cross-ventilation, stack effect, and earth tubes, you'll create a comfortable living space while reducing energy costs. Don't forget to optimize window placement and consider adding solar chimneys or evaporative cooling methods. With regular maintenance, your DIY natural ventilation system will keep you cool for years to come. Embrace these eco-friendly solutions and enjoy the breeze!


Leave a Reply