You can build your own batch solar water heater to harness free energy from the sun and cut utility costs. Start by understanding the basics of these simple, integrated collector-storage systems. Gather essential materials like an insulated tank, copper piping, and absorber plates. Choose a south-facing location with maximum sun exposure. Construct an insulated box, install the water tank, and add heat-absorbing materials. Test for leaks, mount the heater securely, and implement proper maintenance routines. With careful planning and execution, you'll have an efficient, cost-effective solar water heating system. The following steps will guide you through the entire process.
Understanding Batch Solar Water Heaters
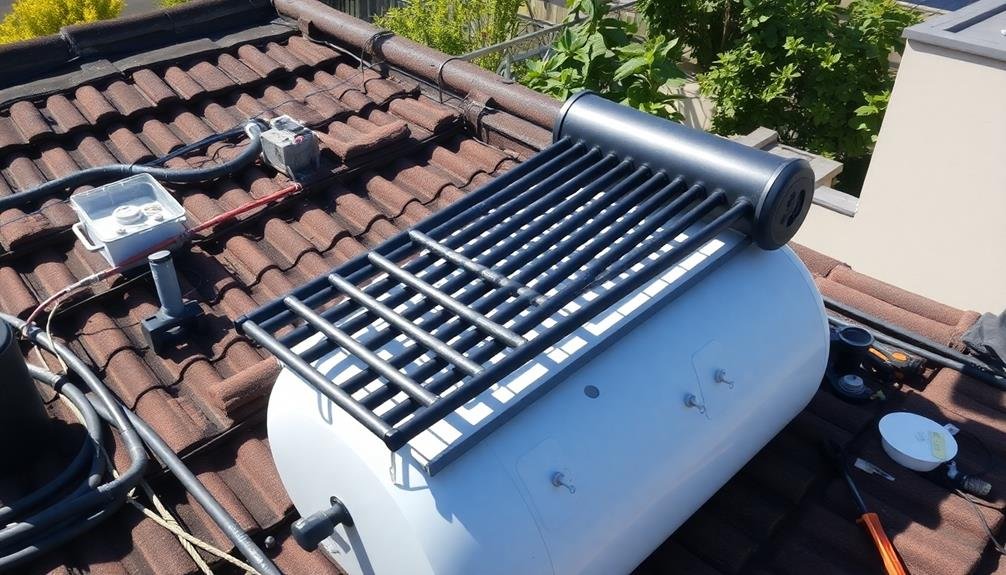
While solar water heaters come in various types, batch heaters are among the simplest and most cost-effective options for DIY enthusiasts. These systems, also known as integrated collector-storage (ICS) units, combine the solar collector and water storage tank into a single component.
You'll find that batch heaters are particularly well-suited for warm climates and seasonal use.
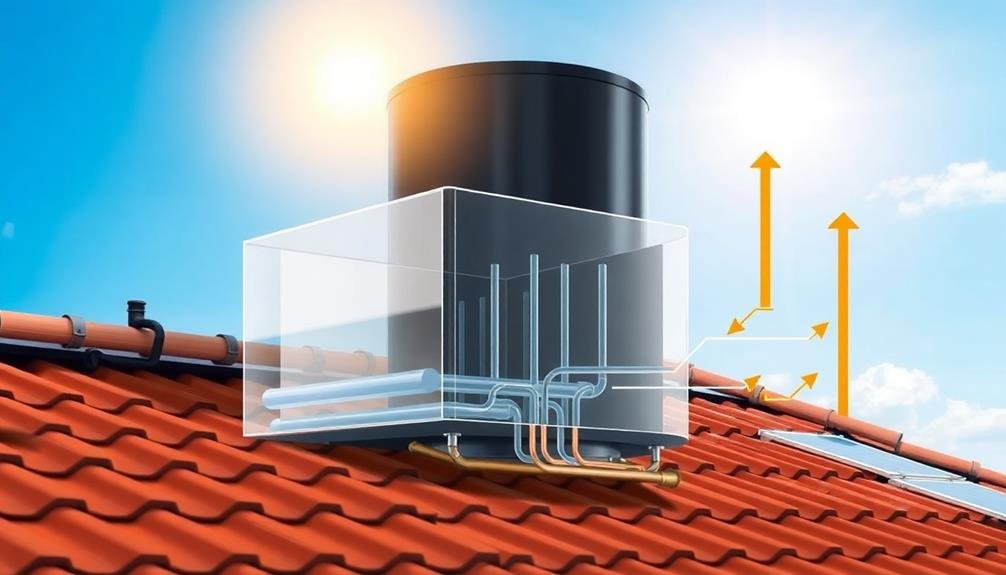
The basic principle behind a batch heater is straightforward: a dark-colored tank absorbs sunlight, heating the water inside. This tank is typically insulated on the sides and back, with a glazed front to allow maximum solar exposure.
As you use hot water, cold water enters the bottom of the tank, creating a natural circulation.
One of the main advantages of batch heaters is their simplicity. You won't need pumps or complex controls, making them easier to construct and maintain.
However, they're less efficient in cold climates and can suffer from heat loss at night. To mitigate this, you can add insulating covers or implement a drain-back system.
When designing your batch heater, consider factors like your local climate, water demand, and available sunlight to optimize its performance.
Required Materials and Tools
Before you begin building your solar water heater, you'll need to gather all the necessary components and tools.
Start by compiling a thorough list of essential parts, including the storage tank, collector panel, piping, and insulation materials.
Then, make sure you have the required tools on hand, such as a drill, pipe cutter, and soldering equipment.
Essential Components List
Typically, building a solar water heater requires a specific set of materials and tools. You'll need a large, insulated tank to store the heated water, along with copper piping to circulate it. For the collector, you'll require a wooden frame, glass or plexiglass cover, and dark-colored absorber plates. Don't forget insulation materials like fiberglass or foam board to maximize heat retention.
As for tools, you'll need basic carpentry equipment such as a saw, drill, and measuring tape. Plumbing tools like pipe cutters, soldering equipment, and wrenches are vital for connecting the system. Safety gear, including gloves and goggles, is essential when handling materials and tools.
Here's a quick reference table of essential components:
| Materials | Tools |
|---|---|
| Insulated tank | Saw and drill |
| Copper piping | Pipe cutter |
| Absorber plates | Soldering iron |
Necessary Tools Inventory
To kick off your solar water heater project, you'll need an extensive inventory of tools and materials. Start by gathering basic hand tools: a hammer, screwdrivers (both flathead and Phillips), pliers, wire cutters, and a utility knife.
You'll also need measuring tools like a tape measure, level, and square. For cutting and shaping materials, include a hacksaw, drill with various bits, and a hole saw kit.
Don't forget safety equipment: work gloves, safety glasses, and a dust mask. You'll need painting supplies, including brushes, rollers, and trays.
For plumbing connections, have a pipe wrench, adjustable wrench, and Teflon tape on hand. A caulking gun and weatherproof silicone sealant are essential for waterproofing.
For the collector box, you'll need wood or metal cutting tools depending on your chosen material. If you're working with copper piping, include a pipe cutter and soldering equipment.
For insulation, you'll want a staple gun and utility knife. Finally, make certain you have ladders or scaffolding for roof installation, and don't forget fasteners like screws, nails, and bolts in various sizes to assemble your solar water heater components.
Selecting an Ideal Location
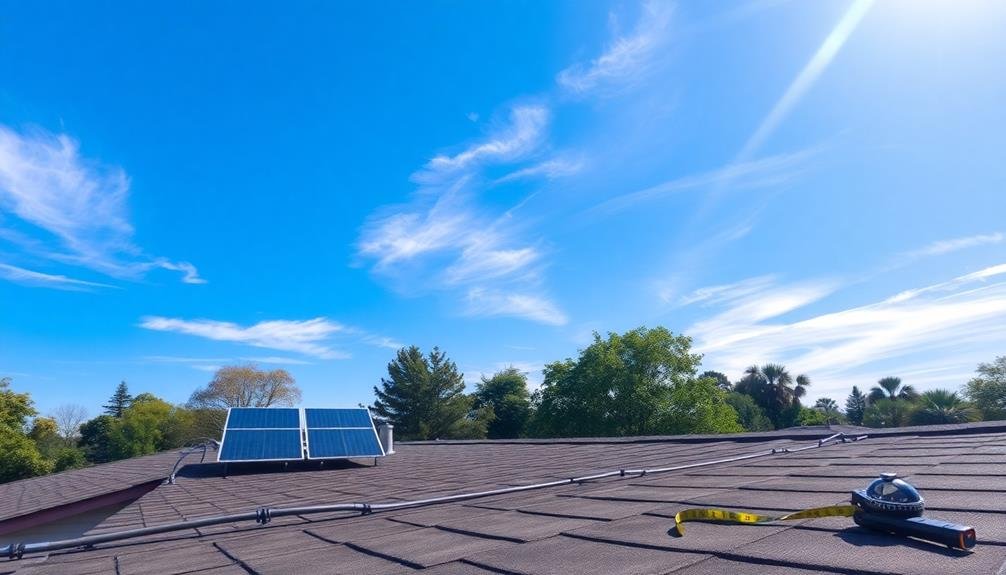
The ideal location for your solar water heater can make or break its efficiency. You'll want to choose a spot that maximizes sun exposure throughout the day. Typically, this means a south-facing area with minimal shade from trees, buildings, or other obstructions.
Consider the path of the sun across your property and how it changes seasonally.
When selecting your location, keep these key factors in mind:
- Proximity to your home's existing plumbing
- Structural support for the heater's weight
- Accessibility for maintenance and cleaning
- Local building codes and regulations
Don't forget to factor in the angle of your solar collector. For year-round use, it should be tilted at an angle equal to your latitude plus 15 degrees.
If you're primarily using it during summer months, tilt it at your latitude minus 15 degrees.
Building the Insulated Box
Crafting the insulated box forms the foundation of your solar water heater. Begin by selecting a sturdy, weather-resistant material like marine-grade plywood or recycled plastic lumber for the box's frame. Cut the pieces to size, guaranteeing they'll fit your chosen location and accommodate your water tank.
Assemble the frame using waterproof wood glue and stainless steel screws. Next, line the interior with reflective material, such as aluminum foil or mylar, to maximize heat retention. Install a layer of rigid foam insulation on all sides, including the bottom, to minimize heat loss.
Cut a piece of tempered glass or polycarbonate sheeting to fit the box's top opening. This transparent cover will allow sunlight to penetrate while trapping heat inside. Seal the edges with silicone caulk to prevent water infiltration.
Create a hinged lid or removable panel for easy access to the water tank. Install weather stripping around the edges to guarantee a tight seal. Finally, apply a waterproof sealant to all exterior joints and surfaces to protect against moisture damage.
Your insulated box is now ready to house the water tank and plumbing components of your solar water heater.
Installing the Water Tank
As you install the water tank, you'll need to focus on positioning it for maximum heating efficiency.
You'll want to implement proper insulation and weatherproofing techniques to maintain water temperature and protect the system from the elements.
Positioning for Optimal Heating
Once you've assembled your solar collector, it's time to focus on positioning the water tank for maximum efficiency. The ideal placement will guarantee your solar water heater captures the most sunlight throughout the day, maximizing heat absorption and energy savings.
Consider these key factors when positioning your water tank:
- Orientation: Face the collector south in the Northern Hemisphere or north in the Southern Hemisphere
- Tilt angle: Adjust the tilt to match your latitude for year-round use, or your latitude plus 15 degrees for winter enhancement
- Shade avoidance: Guarantee no trees, buildings, or other structures cast shadows on the collector during peak sunlight hours
- Proximity to point of use: Place the tank as close as possible to where you'll use the hot water to minimize heat loss
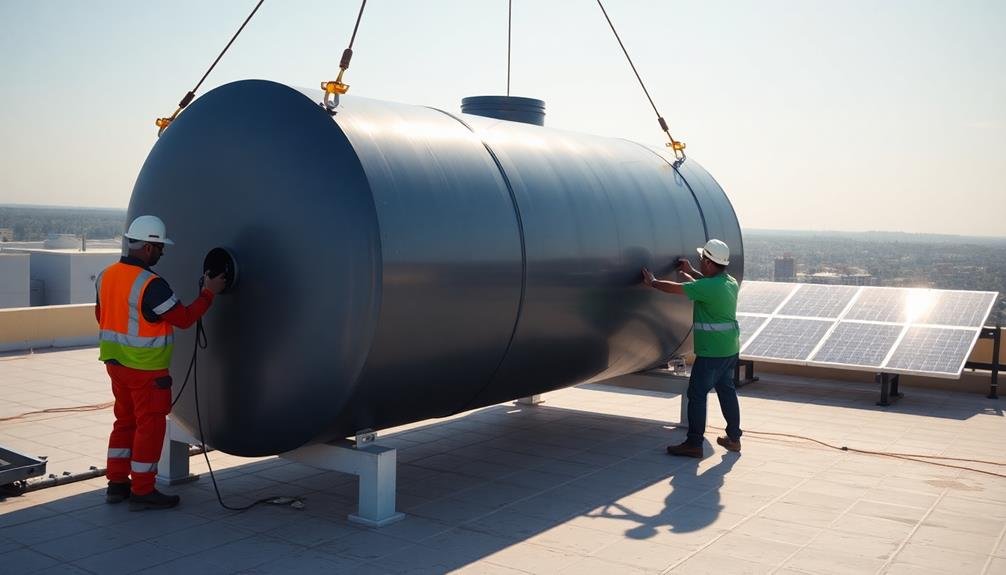
Mount your water tank securely on a sturdy, level surface that can support its weight when full.
If you're installing it on a roof, consult a structural engineer to verify the roof can bear the load. For ground installations, create a solid concrete pad or use pressure-treated lumber to build a raised platform.
Guarantee easy access for maintenance and repairs, and don't forget to insulate exposed pipes to prevent heat loss.
Insulation and Weatherproofing Techniques
Protect your solar water heater from the elements with proper insulation and weatherproofing. Start by wrapping the water tank in a high-quality insulation material, such as fiberglass or foam insulation. Confirm you cover every inch of the tank, paying special attention to corners and seams. Secure the insulation with weatherproof tape or straps to prevent it from shifting or falling off.
Next, create a weatherproof enclosure for your solar water heater. Use marine-grade plywood or corrosion-resistant metal sheeting to build a sturdy box around the tank and collector. Seal all joints and seams with silicone caulk to prevent water infiltration.
Install a hinged lid for easy access to the tank when needed. Apply a weatherproof sealant or paint to the exterior of the enclosure to further protect it from moisture and UV rays.
Don't forget to include ventilation to prevent condensation buildup inside the box. Install small, screened vents near the top and bottom of the enclosure to allow air circulation while keeping out insects and debris.
Connecting Pipes and Valves
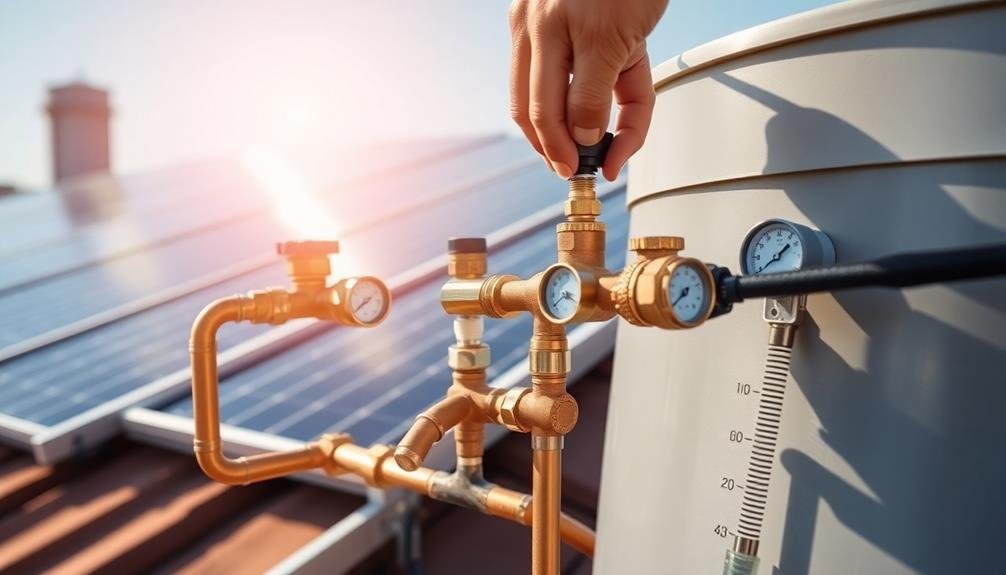
With the insulation and weatherproofing complete, it's time to focus on connecting the pipes and valves for your solar water heater.
You'll need to install the inlet and outlet pipes, as well as a pressure relief valve for safety. Start by attaching the cold water inlet pipe to the bottom of the tank and the hot water outlet pipe to the top. Use thread seal tape on all connections to prevent leaks.
Next, install the pressure relief valve on the tank's side, ensuring it's positioned correctly to release excess pressure if needed. Connect the valve's discharge pipe and direct it downward to a safe location.
For ideal performance and safety, consider adding these components:
- Temperature and pressure gauge
- Drain valve for maintenance
- Isolation valves for easier servicing
- Anti-scald mixing valve to prevent burns
Once you've installed all necessary pipes and valves, it's essential to test the system for leaks. Turn on the water supply and check all connections thoroughly.
If you notice any leaks, tighten the fittings or replace faulty components. Remember to insulate exposed pipes to minimize heat loss and protect against freezing in colder climates.
Attaching the Glazing Cover
According to the plan, it's time to attach the glazing cover to your solar water heater. This vital step will help trap heat and protect the absorber plate. You'll need a sheet of tempered glass or UV-resistant polycarbonate, sized to fit your collector box.
First, clean the edges of your collector box thoroughly. Apply a bead of silicone caulk around the perimeter where the glazing will sit. Carefully place the glazing onto the caulk, ensuring it's centered and level. Press down gently to create a good seal.
Secure the glazing with glazing strips or aluminum angle brackets. Pre-drill holes in the collector box frame, being careful not to crack the glazing. Attach the strips or brackets using stainless steel screws, working your way around the perimeter.
For added weather protection, apply a second bead of silicone caulk along the outer edge where the glazing meets the frame. Smooth it with a wet finger for a neat finish.
Allow the caulk to cure fully before moving or testing your solar water heater. This glazing cover will greatly enhance your heater's efficiency and longevity.
Connecting Plumbing and Valves
When connecting your solar water heater's plumbing, you'll need to focus on proper valve placement to control water flow and temperature.
Consider pipe sizing carefully to guarantee efficient water movement and heat transfer throughout the system.
To prevent leaks, you'll want to use appropriate sealing techniques and high-quality fittings at all connection points.
Proper Valve Placement
Proper valve placement plays an essential role in guaranteeing your solar water heater functions efficiently and safely. You'll need to install several types of valves at key points in your system to control water flow, pressure, and temperature.
Start by placing a shutoff valve at the cold water inlet to isolate the system when needed. Next, install a pressure relief valve on the hot water outlet to prevent dangerous pressure buildup. A temperature and pressure relief valve should be positioned at the top of your storage tank for added safety.
Don't forget these vital valve placements:
- Check valve on the cold water inlet to prevent backflow
- Drain valve at the bottom of the storage tank for maintenance
- Mixing valve to blend hot and cold water, preventing scalding
- Isolation valves on both sides of the pump for easy servicing
Remember to use appropriate valves for your system's pressure and temperature ratings. Teflon tape or pipe dope should be applied to all threaded connections to guarantee a leak-free seal.
Pipe Sizing Considerations
In light of the importance of efficient water flow, choosing the right pipe size for your solar water heater is vital. You'll need to take into account the system's capacity, flow rate, and pressure requirements. Generally, 3/4-inch copper pipes are suitable for most residential solar water heaters, but larger systems may require 1-inch pipes.
When sizing your pipes, keep in mind that smaller diameters increase water velocity but also create more friction, while larger diameters reduce friction but may lead to heat loss. It's essential to balance these factors for peak performance. Here's a quick reference guide for pipe sizing:
| System Size | Recommended Pipe Size | Max Flow Rate |
|---|---|---|
| Small | 1/2 inch | 5 GPM |
| Medium | 3/4 inch | 10 GPM |
| Large | 1 inch | 20 GPM |
Don't forget to account for the distance between your solar collector and storage tank. Longer pipe runs may require larger diameters to maintain adequate flow. Additionally, verify that your pipe size matches the inlet and outlet connections on your solar collector and storage tank. If necessary, use reducers or expanders to shift between different pipe sizes seamlessly.
Leak Prevention Techniques
Vigilance in leak prevention is essential when connecting plumbing and valves in your solar water heater system. Proper sealing techniques and high-quality materials will guarantee your system operates efficiently without water loss.
When joining pipes and fittings, use Teflon tape or pipe thread compound to create watertight connections. Apply these sealants carefully, following the manufacturer's instructions for best results.
For valve connections, choose models designed for your specific pipe type and size. Install ball valves at key points in your system to allow for easy maintenance and isolation of components if leaks occur. Don't forget to use rubber gaskets or O-rings where appropriate to enhance sealing.
To further prevent leaks:
- Use pipe hangers and supports to reduce stress on joints
- Avoid over-tightening connections, which can damage threads or fittings
- Conduct pressure tests before fully operating the system
- Regularly inspect connections for signs of corrosion or wear
Adding Heat Absorbing Materials
To maximize your solar water heater's efficiency, you'll need to add heat-absorbing materials to the collector. The most common and effective option is to paint the inside of the collector black. Use a high-temperature, matte black paint designed for solar applications. This dark surface will absorb more sunlight and convert it into heat more efficiently than lighter colors.
Another effective method is to add a layer of copper or aluminum sheet metal to the bottom of the collector. These metals conduct heat well and will help distribute it evenly throughout the water. You can secure the metal sheet with waterproof adhesive or small screws, ensuring a good thermal connection with the collector's base.
Consider adding heat-absorbing stones or pebbles to the bottom of the collector. Dark-colored rocks like basalt or slate work best. They'll absorb heat during the day and continue to radiate it into the water even after the sun sets. Make sure to clean the stones thoroughly before adding them to prevent contamination.
For advanced DIYers, you might explore selective surface coatings or heat-absorbing films designed specifically for solar collectors. These materials can greatly boost your heater's performance but may require more specialized application techniques.
Testing for Leaks
Leak detection is an essential step in building your solar water heater. You'll want to guarantee your system is watertight before adding the final components and putting it into operation.
Start by filling the tank with water and carefully inspecting all joints, connections, and seams for any signs of moisture. Pay close attention to welded areas and pipe fittings, as these are common leak points.
To thoroughly test for leaks, you'll need to pressurize the system. Here's what you should do:
- Connect a pressure gauge to the tank's outlet
- Use a pump to pressurize the system to about 30 PSI
- Monitor the pressure for at least an hour
- Check for any pressure drops, which indicate a leak
If you detect a leak, mark its location and drain the system. Repair the leak using appropriate methods such as tightening fittings, applying sealant, or rewelding joints.
After repairs, refill the tank and repeat the pressure test to confirm the leak has been resolved. Remember, even small leaks can lead to significant water loss and reduced efficiency over time, so it's imperative to address all issues before proceeding with the final assembly of your solar water heater.
Mounting the Solar Heater
Proper mounting of your solar water heater is essential for maximum performance and longevity. Choose a location that receives ample sunlight throughout the day, ideally facing south in the Northern Hemisphere. Confirm the mounting surface is sturdy enough to support the heater's weight when filled with water.
You'll need to create a frame or rack to hold the heater at the best angle, typically equal to your latitude plus 15 degrees. Use weather-resistant materials like aluminum or treated wood for the frame. Secure the frame to your roof or ground-mounted structure using appropriate fasteners and sealants to prevent leaks.
When mounting the heater, consider ease of maintenance and potential future repairs. Leave enough space around the unit for access. If you're installing on a roof, use roof jacks or standoffs to elevate the heater slightly, allowing air circulation and preventing water accumulation.
Don't forget to insulate any exposed pipes to minimize heat loss. Use UV-resistant insulation for outdoor sections.
Maintenance and Performance Tips

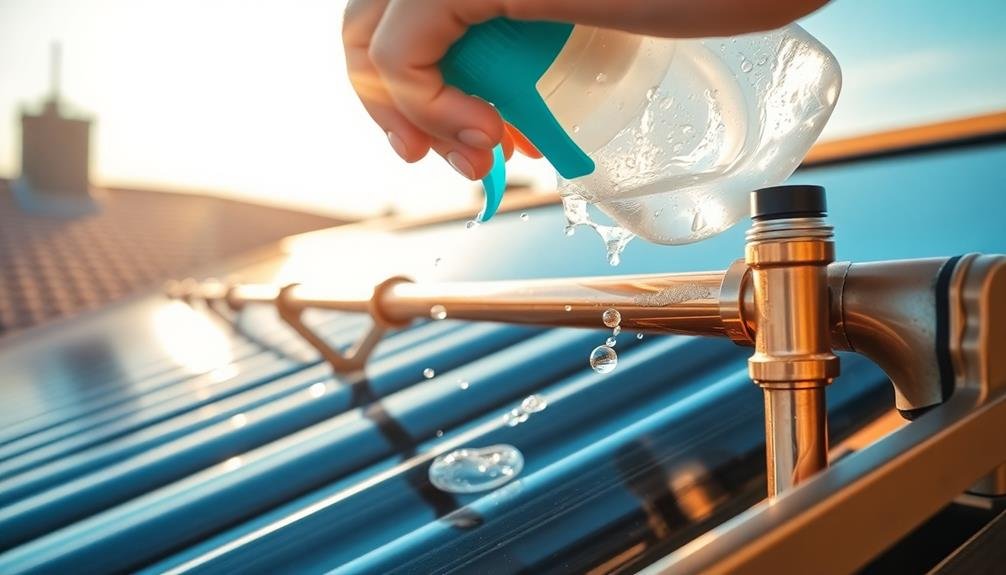
Regular maintenance is essential for keeping your solar water heater operating at peak efficiency. Inspect your system every six months, checking for leaks, loose connections, and any signs of wear or damage.
Clean the collector surface with a soft cloth and mild soap to remove dirt, dust, and debris that can reduce its effectiveness. Don't forget to examine the insulation around the storage tank and pipes, replacing it if necessary to prevent heat loss.
To maximize your solar water heater's performance:
- Adjust the collector angle seasonally for ideal sun exposure
- Flush the system annually to remove sediment buildup
- Install a timer to run the circulation pump during peak sunlight hours
- Use low-flow fixtures to conserve hot water and extend its availability
Monitor your energy bills to track the system's efficiency over time. If you notice a significant decrease in performance, it may be time for a professional inspection.
In colder climates, consider adding antifreeze to the system to prevent freezing during winter months. Remember to check the pressure relief valve regularly and replace the sacrificial anode rod in the storage tank every 3-5 years to protect against corrosion.
With proper care, your solar water heater can provide reliable hot water for many years.
Frequently Asked Questions
How Long Does It Take to Build a Batch Solar Water Heater?
You can build a batch solar water heater in about 1-2 days. It'll depend on your skill level, available materials, and the complexity of your design. Don't forget to factor in time for planning and gathering supplies.
Can I Use a Batch Solar Water Heater in Cold Climates?
You can use a batch solar water heater in cold climates, but it's less efficient. You'll need to insulate it well and may require a backup heating system. Consider draining it during freezing temperatures to prevent damage.
What's the Average Lifespan of a DIY Batch Solar Water Heater?
You'll typically see a DIY batch solar water heater last 10-15 years with proper maintenance. However, your system's lifespan can vary depending on materials used, construction quality, and local climate conditions. Regular upkeep will extend its longevity.
How Much Money Can I Save Annually With a Batch Solar Heater?
You'll save $100-$300 annually on water heating costs with a batch solar heater. Your savings depend on your location, system size, and current energy prices. It's a cost-effective way to reduce your utility bills.
Are There Any Local Regulations or Permits Required for Installation?
You'll likely need permits for your solar heater installation. Check with your local building department for specific regulations. They may require plans, inspections, or zoning approval. Don't skip this step to avoid fines or removal orders.
In Summary
You've now learned how to build your own batch solar water heater. With proper planning and execution, you'll enjoy free, eco-friendly hot water. Remember to regularly check for leaks, clean the glass cover, and adjust the angle seasonally for best performance. Don't forget to insulate pipes and consider a backup system for cloudy days. By maintaining your DIY solar heater, you'll maximize its efficiency and lifespan, saving money and reducing your carbon footprint.


Leave a Reply