You can install electric radiant floor mats yourself with some basic DIY skills and careful planning. Start by gathering necessary tools and materials, then prepare your subfloor thoroughly. Plan your mat layout carefully, considering room dimensions and furniture placement. Install an insulation layer before securing the mats to the subfloor. Test the system thoroughly and apply thinset mortar over the mats. Choose appropriate flooring material that conducts heat well, such as tile or stone. Finally, perform a final inspection and activate the system gradually. While it's a manageable project, proper preparation and attention to detail are essential for a successful installation. The following steps will guide you through the process in more depth.
Gather Necessary Tools and Materials
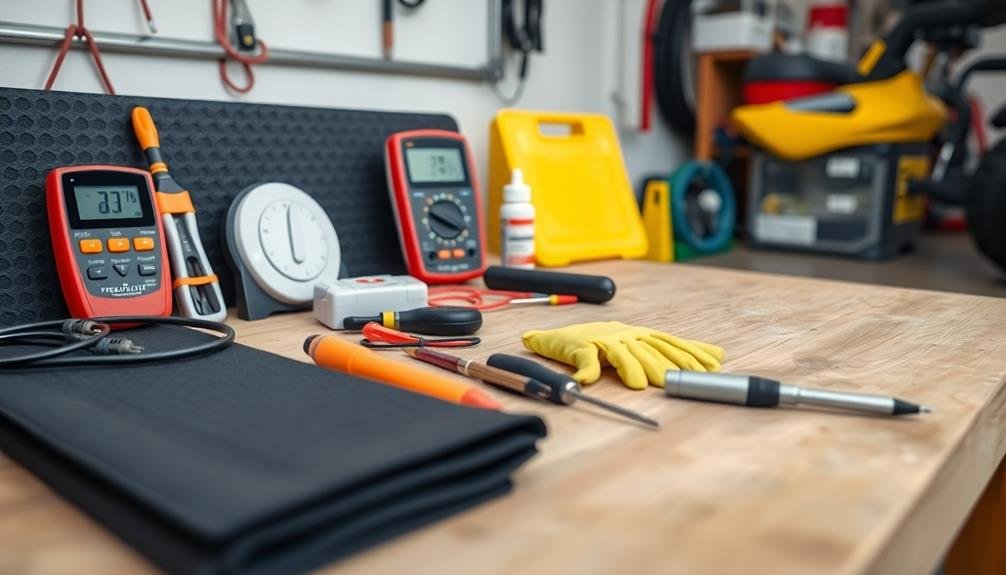
Before diving into the installation process, you'll need to gather all the essential tools and materials. Start by acquiring the electric radiant floor mats, which come in various sizes and wattages.
You'll also need a thermostat specifically designed for floor heating systems. Don't forget the floor sensor that connects to the thermostat to monitor temperature.
For installation, you'll require a multimeter to test the mats, a circuit tester to verify electrical safety, and a digital ohmmeter to measure resistance.
Grab a pair of scissors for trimming the mats if necessary, and electrical tape for securing connections. You'll need wire strippers, wire nuts, and a voltage tester for electrical work.
For floor preparation, gather a notched trowel, latex-modified thinset mortar, and a mixing bucket. You may need a self-leveling compound if your subfloor isn't perfectly even.
Don't forget safety gear like gloves, safety glasses, and knee pads. A tape measure, pencil, and graph paper will help with layout planning.
Prepare the Subfloor
To guarantee a successful installation of your electric radiant floor mats, you'll need to start with a properly prepared subfloor. Begin by thoroughly cleaning the existing subfloor, removing any debris, dust, or old adhesive. Use a vacuum and damp mop to assure a pristine surface.
Next, inspect the subfloor for any cracks, holes, or unevenness. Fill in any imperfections with a suitable patching compound and sand the area smooth once it's dry.
Check the subfloor's moisture content using a moisture meter. If it's too high, you'll need to address the issue before proceeding. Consider applying a moisture barrier if necessary.
Confirm the subfloor is completely level by using a long straightedge or laser level. If you find any high or low spots, use a self-leveling compound to create an even surface.
Here are some additional tips for subfloor preparation:
- Test the subfloor's structural integrity by walking on it and listening for squeaks or feeling for movement
- Remove any baseboards or trim to allow for proper installation along the walls
- Mark the locations of heating vents, electrical outlets, and plumbing fixtures on the subfloor
Once you've completed these steps, your subfloor will be ready for the installation of your electric radiant floor mats.
Plan Mat Layout

Before installing your electric radiant floor mats, you'll need to carefully plan their layout.
Start by accurately measuring your room's dimensions and considering the placement of furniture to guarantee ideal heat distribution.
Once you've determined the best coverage areas, mark out the heating zones on your subfloor to guide your mat installation.
Measure Room Dimensions Accurately
Accurate measurements are essential when planning your electric radiant floor mat layout. Start by clearing the room of all furniture and obstacles to guarantee unobstructed access. Use a laser measure or tape measure to determine the room's length and width, taking multiple measurements at different points to account for any irregularities.
Don't forget to measure alcoves, closets, or other recessed areas that you'll want to heat.
Create a detailed floor plan on graph paper, using a scale of 1/4 inch per foot. Mark the location of fixed elements like cabinets, toilets, and built-in furniture. These areas won't need heating, so you'll want to exclude them from your mat layout. Measure and note the distances between walls and fixed objects, as well as any irregular angles or curves in the room's shape.
When measuring, keep these tips in mind:
- Always measure twice to confirm accuracy
- Account for door swings and thresholds
- Note the location of floor vents, drains, or other obstacles
Consider Furniture Placement
Thoughtful consideration of furniture placement is essential when planning your electric radiant floor mat layout. You'll want to focus on heating the areas where you and your family spend the most time, while avoiding spaces occupied by large, stationary furniture pieces.
Start by sketching your room's layout, including the placement of major furniture items like sofas, beds, and dressers. These heavy pieces typically don't need heating underneath them, as they block the warmth from circulating. Instead, concentrate on open floor areas and high-traffic zones where you'll benefit most from the radiant heat.
Consider leaving a 6-inch gap between the mats and walls or fixed cabinetry to allow for future flexibility. Don't forget to account for areas in front of vanities, kitchen sinks, and other spots where you frequently stand.
For bedrooms, prioritize the floor space around the bed rather than directly under it.
If you're planning any future room reconfigurations, it's wise to install mats in those potential areas now. This foresight will guarantee your heated floor remains functional and efficient, even if you rearrange your furniture down the line.
Mark Heating Zones
Once you've considered furniture placement, it's time to mark your heating zones and plan the mat layout. Begin by measuring your room accurately and creating a scaled drawing on graph paper. This visual representation will help you determine the best placement for your electric radiant floor mats.
Identify areas where you want consistent warmth, such as in front of sinks, showers, or frequently used spaces. Mark these zones on your drawing, guaranteeing you leave appropriate clearance around fixtures and cabinets. Remember that heating mats can't be installed under permanent fixtures or where nails might be driven into the floor.
When planning your layout, consider these key points:
- Mats can be cut and turned, but the heating element inside can't be cut
- Leave a 3-inch gap between mats and walls to prevent overheating
- Avoid placing mats in closets or under large pieces of furniture
Once you've marked your heating zones, sketch out the mat placement on your drawing. This will serve as your guide during installation and help you calculate the total square footage of mats needed.
Double-check your measurements and confirm your plan covers all desired areas efficiently before proceeding to the next step.
Install Insulation Layer
You'll need to select the right insulation material for your radiant floor system, considering factors like thermal resistance and moisture protection.
Once you've chosen your insulation, measure the floor area carefully and cut the insulation to fit, ensuring full coverage.
Secure the insulation in place using an appropriate adhesive or fastening method, creating a solid foundation for your radiant floor mats.
Choose Proper Insulation Material
Insulation plays an essential role in maximizing the efficiency of your electric radiant floor mats. When choosing the proper insulation material, you'll want to take into account factors like thermal resistance (R-value), moisture resistance, and compressive strength.
Look for materials specifically designed for underfloor heating systems, as they'll provide ideal performance.
Some popular insulation options include:
- Extruded polystyrene (XPS) foam boards
- Polyisocyanurate (polyiso) panels
- Cork underlayment
XPS foam boards are an excellent choice due to their high R-value, moisture resistance, and durability. They're also easy to cut and install.
Polyiso panels offer similar benefits but with an even higher R-value per inch. Cork underlayment is a natural, eco-friendly option that provides good insulation and sound dampening properties.
When selecting your insulation, make certain it's compatible with your flooring type and meets local building codes. Reflect on the thickness of the insulation as well, as it'll affect the overall height of your floor.
Measure and Cut Insulation
After selecting the appropriate insulation material, it's time to measure and cut it to fit your floor space. Begin by measuring the room's dimensions accurately, accounting for any nooks or irregularities. Add a few inches to each measurement to guarantee full coverage and allow for potential errors.
Lay out your insulation material on a clean, flat surface. Transfer your measurements to the insulation, using a straight edge and marker. Double-check your measurements before cutting to avoid waste. Use a sharp utility knife or insulation cutter to make clean, straight cuts along your marked lines.
For oddly shaped areas or obstacles like pipes, create paper templates first. Trace these onto your insulation and cut carefully. When fitting insulation around electrical outlets or fixtures, leave a small gap to prevent overheating.
As you cut, wear protective gear like gloves and a dust mask. Work in a well-ventilated area to minimize exposure to insulation particles.
Once all pieces are cut, dry-fit them in the room to guarantee proper coverage and make any necessary adjustments before proceeding with installation.
Secure Insulation in Place
With your insulation pieces cut and ready, it's time to secure them in place. Begin by thoroughly cleaning the subfloor, removing any dust or debris that could interfere with adhesion.
Apply a thin layer of adhesive to the back of each insulation piece using a notched trowel. Carefully position the insulation on the subfloor, starting from one corner and working your way across the room.
Press each piece firmly into place, guaranteeing there are no gaps between sections. Use a roller to smooth out any air bubbles and promote better adhesion. For areas around pipes or other obstacles, cut small slits in the insulation to fit snugly around them.
Once all pieces are in place, allow the adhesive to dry according to the manufacturer's instructions.
To guarantee a successful installation, keep these tips in mind:
- Wear gloves to protect your hands from adhesive and insulation fibers
- Use a sharp utility knife for clean, precise cuts when fitting insulation around obstacles
- Stagger the seams of insulation pieces to create a more stable surface
After the insulation is secure, you're ready to move on to the next step: installing the electric radiant floor mats.
Secure Mats to Subfloor
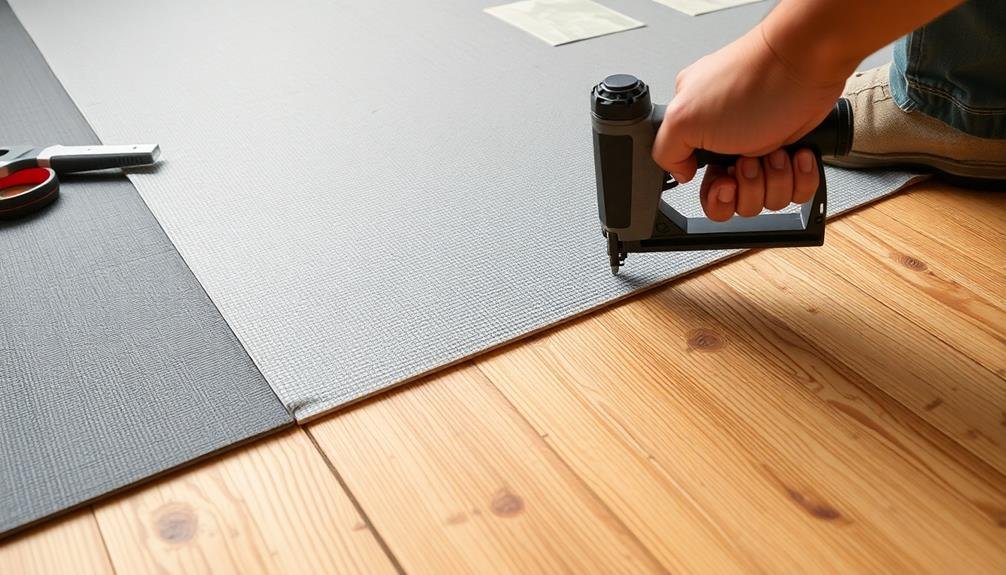
Once you've laid out your electric radiant floor mats, it's crucial to secure them properly to the subfloor.
Begin by using a staple gun to fasten the mesh edges of the mats. Place staples every 6 to 8 inches along the perimeter, making sure they don't penetrate the heating wires. For added stability, apply thin-set mortar or self-leveling compound over the mats.
Before applying adhesive, test-fit the mats to verify proper coverage and positioning. When you're satisfied, use a notched trowel to spread a thin layer of mortar or compound evenly across the subfloor.
Carefully press the mats into the adhesive, smoothing out any air bubbles or wrinkles as you go. Pay extra attention to corners and edges, ensuring they're fully adhered.
For areas where stapling isn't possible, use hot glue to secure the mats. Apply small dots of glue sparingly, avoiding direct contact with the heating elements.
Once the mats are in place, allow the adhesive to dry completely according to the manufacturer's instructions. This typically takes 24 to 48 hours.
After drying, conduct a final resistance test to confirm the heating elements weren't damaged during installation.
Connect Electrical Wiring
Connecting the electrical wiring is a critical step in installing your electric radiant floor mats. You'll need to follow the manufacturer's instructions carefully and guarantee all connections are secure.
Start by identifying the cold lead wire from your mat system and running it through the conduit to your thermostat location. Make sure you've left enough slack for easy connections.
At the thermostat, you'll connect the system's wires to the appropriate terminals. Typically, you'll have:
- A power wire (usually red)
- A neutral wire (usually white)
- A ground wire (usually green)
Double-check all connections and use wire nuts to secure them. If you're not comfortable working with electrical components, it's best to hire a licensed electrician for this step.
Once the wiring is complete, install the thermostat according to the manufacturer's guidelines. Be sure to program it correctly for peak performance of your radiant floor system.
Don't forget to test the system before laying your final flooring material. Turn it on and use a multimeter to verify proper voltage and resistance. If everything checks out, you're ready to move on to the next step in your installation process.
Install Floor Temperature Sensor
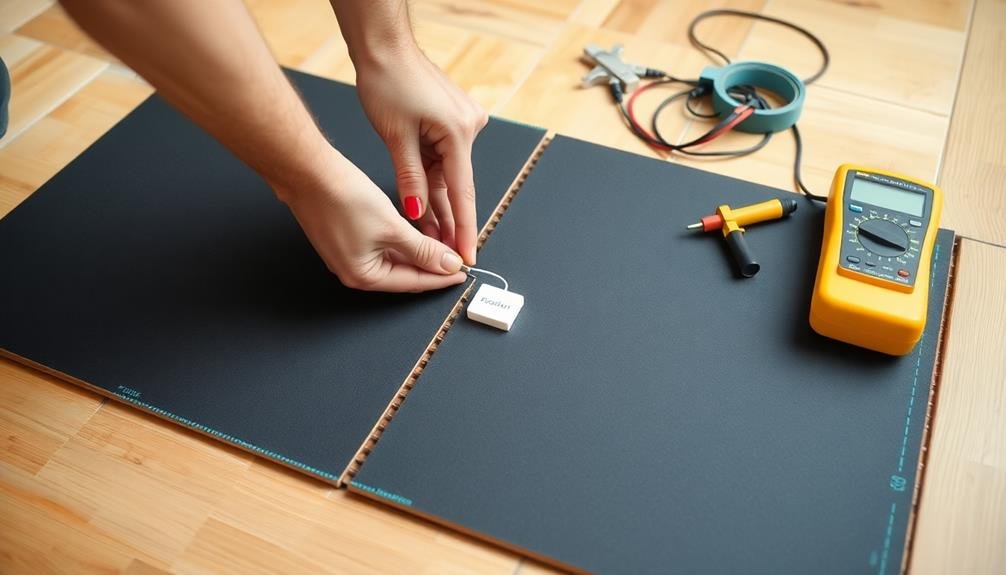
The floor temperature sensor is a crucial component of your radiant heating system. It guarantees accurate temperature control and prevents overheating.
To install the sensor, you'll need to place it between two heating cables, about 6 inches from the wall.
Start by creating a small channel in the floor for the sensor wire. Use a chisel or utility knife to carefully cut a groove from the thermostat location to the sensor placement area. Clean out any debris from the channel.
Next, insert the sensor probe into the channel, making sure it's centered between two heating cables. Don't let the sensor touch the heating elements. Secure the sensor in place with hot glue or tape, making sure it's flush with the floor surface.
Run the sensor wire through the channel back to the thermostat location. Be careful not to damage the wire during this process.
Once the wire is in place, seal the channel with thin-set mortar or floor leveling compound.
Test the System
After completing the installation, it's crucial to test your radiant floor heating system thoroughly.
Begin by checking all electrical connections to verify they're secure and properly insulated. Then, use a multimeter to measure the resistance of the heating mats, comparing the readings to the manufacturer's specifications. If the values match, you're on the right track.
Next, turn on the system and set the thermostat to its highest setting. Wait for about 30 minutes, then carefully check the floor temperature with an infrared thermometer. You should feel warmth evenly distributed across the heated areas. If you notice any cold spots, it could indicate a problem with the mat or connections.
During this testing phase, keep an eye out for these potential issues:
- Unusual noises or smells coming from the floor
- Sudden spikes in your electricity bill
- Inconsistent heating patterns across the floor
If everything checks out, gradually lower the thermostat to your desired temperature and monitor the system's performance over the next few days.
Remember to consult the user manual for specific testing procedures and troubleshooting tips. If you encounter any problems you can't resolve, don't hesitate to contact a professional electrician or the manufacturer's support team for assistance.
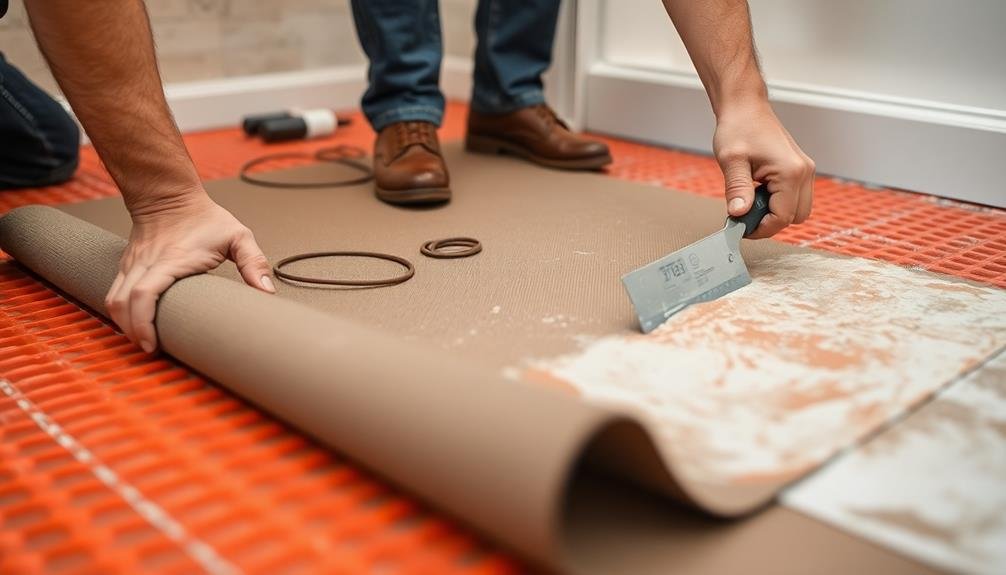
Apply Thinset Mortar
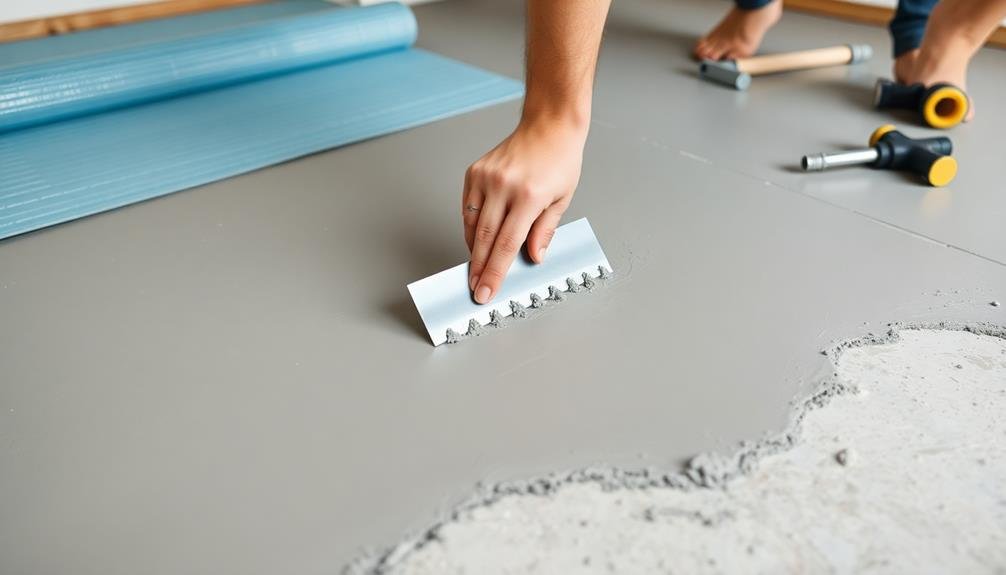
Once you've laid out and secured the heating mats, it's time to apply the thinset mortar. This step is essential for ensuring proper heat transfer and protecting the mats.
Start by mixing the thinset according to the manufacturer's instructions. Use a notched trowel to spread an even layer of mortar over the mats, working in small sections to prevent premature drying.
As you apply the thinset, make sure to fill all gaps and spaces between the heating wires. Be careful not to damage or displace the mats while working. Maintain a consistent thickness of about 1/4 inch over the entire floor surface. This uniform layer will help distribute heat evenly and provide a stable base for your tiles.
Once you've covered the entire area, use a flat trowel to smooth out any ridges or uneven spots. Check for any air pockets or voids, and fill them as needed.
Allow the thinset to dry completely before proceeding with tile installation. This typically takes 24 to 48 hours, depending on room temperature and humidity. During this time, avoid walking on the floor or placing any objects on the surface to prevent damage to the heating system.
Lay Flooring Material
When laying flooring material over your electric radiant floor mats, you'll need to select an appropriate option that's compatible with radiant heating.
Before installation, verify your subfloor surface is clean, level, and properly prepared to support your chosen flooring.
Choose Appropriate Flooring Material
Selecting the right flooring material is vital for your electric radiant floor mat installation. You'll want to choose a material that conducts heat well and won't be damaged by temperature fluctuations.
Ceramic tile, porcelain, and natural stone are excellent options, as they're durable and transfer heat efficiently. These materials also provide a sleek, modern look that complements the high-tech nature of radiant heating.
If you prefer a warmer feel underfoot, engineered hardwood or luxury vinyl planks can work well with radiant heat systems. However, it's important to check the manufacturer's specifications to verify compatibility.
Avoid using solid hardwood, as it can warp or crack due to temperature changes.
When choosing your flooring, consider these factors:
- Heat conductivity of the material
- Durability and resistance to temperature changes
- Aesthetic appeal and compatibility with your home's design
Remember to factor in the thickness of your chosen flooring material when planning your installation. Thicker materials may reduce heat transfer efficiency, so you might need to adjust your system's settings accordingly.
Prepare Subfloor Surface
Before installing your electric radiant floor mats, it's crucial to prepare the subfloor surface properly. Start by thoroughly cleaning the subfloor, removing any debris, dust, or old adhesive. Vacuum and mop the area to guarantee a clean surface.
Next, inspect the subfloor for any damage, cracks, or unevenness. Fill in any gaps or cracks with a suitable floor leveling compound and sand down any high spots. Use a long level to check for any slopes or dips in the floor, addressing these issues before proceeding.
If you're working with a concrete subfloor, apply a moisture barrier to prevent moisture from seeping up through the concrete and damaging your radiant heating system.
For wood subfloors, ascertain proper ventilation underneath to prevent moisture buildup.
Install an insulation layer over the subfloor to improve the efficiency of your radiant heating system. This will help direct heat upward into your living space rather than losing it to the ground below.
Install Flooring Over Mats
Once you've installed the electric radiant floor mats, it's time to lay the flooring material over them. Choose a flooring type that's compatible with radiant heating, such as tile, stone, or engineered hardwood. Follow the manufacturer's instructions for your specific flooring material, as installation methods may vary.
Begin by applying a layer of thinset mortar or self-leveling compound over the mats to create a smooth surface. This layer protects the heating elements and guarantees even heat distribution. Allow the compound to dry completely before proceeding.
When installing tile, use a notched trowel to apply mortar and place tiles carefully, avoiding damage to the heating mats. For engineered hardwood, you'll need to float the floor or use an approved adhesive. Always consult the flooring manufacturer's guidelines for radiant heat installation.
Throughout the process, be mindful of these key points:
- Don't use nails or staples that could penetrate the heating mats
- Avoid dragging heavy tools or materials across the floor
- Keep the heating system off until the flooring and any adhesives have fully cured
After installation, wait the recommended time before turning on your new radiant floor heating system. Enjoy the comfort of your warm, cozy floors!
Final Inspection and Activation

The final inspection and activation mark the culmination of your electric radiant floor mat installation. Before you power up the system, carefully review all connections and wiring. Verify that the thermostat is properly connected and that all mats are securely in place beneath your flooring.
Use a multimeter to test the resistance of each mat, comparing the readings to the manufacturer's specifications. If any discrepancies arise, address them immediately. Check for any signs of damage or exposed wires that may have occurred during the installation process.
Once you're confident in the system's integrity, it's time to activate the floor heating. Turn on the power at the circuit breaker and program your thermostat according to the manufacturer's instructions. Start with a low temperature setting and gradually increase it over several days to allow the flooring to acclimate.
Monitor the system closely during its initial operation, watching for any unusual behavior or hot spots. If you notice any issues, turn off the power immediately and consult a professional.
With proper installation and activation, you'll soon be enjoying the comfort of your new radiant floor heating system.
Frequently Asked Questions
Can Electric Radiant Floor Mats Be Installed in Bathrooms or Wet Areas?
Yes, you can install electric radiant floor mats in bathrooms and wet areas. They're designed to be safe and effective in these spaces. Just make certain you're using mats specifically rated for wet environments and follow proper installation guidelines.
How Long Do Electric Radiant Floor Mats Typically Last Before Needing Replacement?
You can expect your electric radiant floor mats to last 20-35 years with proper care. They're durable and long-lasting, but factors like usage, maintenance, and quality can affect their lifespan. Regular checks will help you maximize their longevity.
Are Electric Radiant Floor Mats Compatible With All Types of Flooring Materials?
You'll find electric radiant floor mats compatible with most flooring types, including tile, stone, and laminate. However, they're not recommended for thick carpets or solid wood floors. Always check the manufacturer's guidelines for specific compatibility information.
What Is the Average Energy Consumption of Electric Radiant Floor Heating Systems?
You'll find that electric radiant floor heating typically consumes 10-15 watts per square foot. However, your actual energy usage will depend on factors like room size, insulation, and how often you're using the system.
Can Electric Radiant Floor Mats Be Installed Over Existing Tile or Hardwood Floors?
You can't install electric radiant floor mats directly over existing tile or hardwood. You'll need to remove the current flooring first. It's essential to start with a clean, level subfloor for proper installation and performance.
In Summary
You've successfully installed your electric radiant floor mats! You've transformed your space into a warm, cozy haven. Remember to test the system regularly and follow manufacturer guidelines for maintenance. Don't forget to enjoy the comfort of your heated floors, especially on chilly mornings. With proper care, your DIY radiant heating system will provide years of efficient, luxurious warmth. Congratulations on completing this rewarding home improvement project!


Leave a Reply