Regular inspections of your photovoltaic roof are essential for maintaining safety and optimizing system performance. You'll catch potential issues early, preventing costly repairs and ensuring maximum energy production. These checks help identify damage from weather, wear and tear, or faulty connections that could compromise efficiency or pose safety risks. By cleaning panels and removing debris, you'll maintain peak output. Routine inspections also extend your system's lifespan, protecting your investment. You should assess wiring, connections, and panel integrity, looking for hot spots or signs of degradation. Understanding the importance of regular maintenance is just the first step in maximizing your solar roof's benefits.
Safety First
Safety's paramount importance in photovoltaic roof inspections can't be overstated. When you're dealing with electrical systems and elevated work areas, you're facing potential hazards that require careful attention.
Always wear appropriate personal protective equipment (PPE), including non-slip shoes, safety harnesses, and gloves. Confirm you're trained in fall protection and electrical safety before attempting any inspection.
Before climbing onto the roof, assess its structural integrity and weather conditions. Don't inspect during rain, high winds, or extreme temperatures. Use a sturdy ladder, securing it properly and maintaining three points of contact while climbing.
Once on the roof, move cautiously to avoid tripping on solar panel wiring or damaging the panels themselves. Be aware of electrical risks. Never touch exposed wires or damaged components. If you suspect any electrical issues, call a professional immediately.
Keep metal tools away from live electrical parts to prevent short circuits. Always work with a partner who can assist in emergencies and call for help if needed.
Necessary Tools and Equipment
Before you begin your photovoltaic roof inspection, you'll need to gather the right tools and equipment.
Make certain you have essential safety gear, including a harness, non-slip shoes, and protective eyewear.
You'll also require inspection devices like a multimeter and infrared camera, as well as cleaning supplies to maintain the panels during your assessment.
Essential Safety Gear
Gear is the backbone of a safe photovoltaic roof inspection. You'll need to prioritize your safety when working at heights and around electrical equipment.
Start with a sturdy safety harness and fall protection system, ensuring they're properly fitted and attached to secure anchor points. Don't forget about non-slip footwear with excellent traction to prevent slips on sloped surfaces.
Protective eyewear is essential to shield your eyes from glare and potential debris. Opt for polarized safety glasses that reduce reflections from solar panels. You'll also need insulated gloves rated for electrical work to protect against potential shocks.
When inspecting photovoltaic roofs, remember these key safety considerations:
- Weather conditions: Avoid inspections during wet, windy, or extremely hot weather
- Electrical hazards: Always treat solar panels as live electrical equipment
- Structural integrity: Assess the roof's condition before walking on it
- Communication: Maintain contact with a ground team for emergency situations
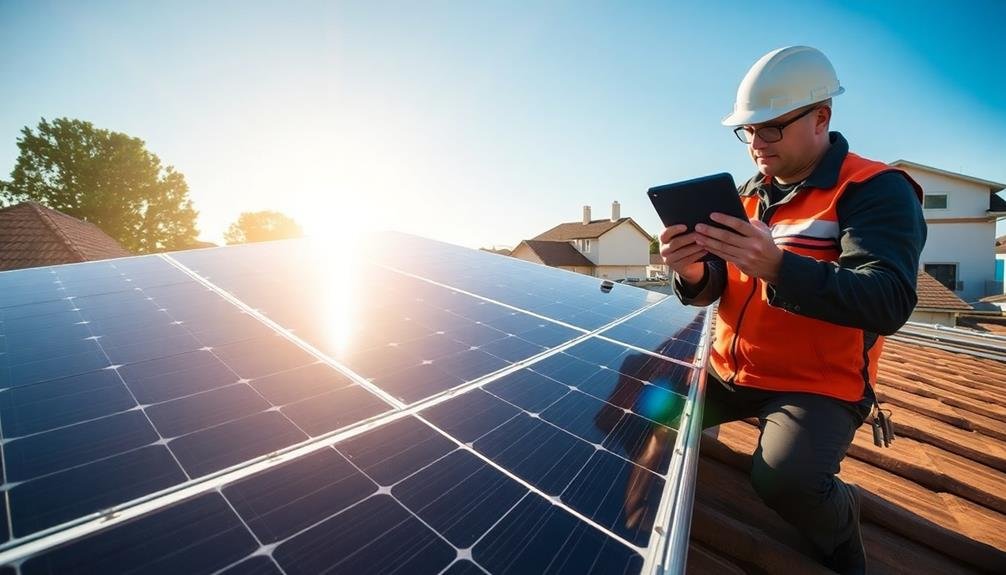
Inspection Devices
With your safety gear in place, it's time to focus on the tools you'll need for a thorough photovoltaic roof inspection. You'll want to equip yourself with a range of devices to guarantee you don't miss any potential issues.
Start with a high-quality digital camera or smartphone for documenting your findings. You'll need clear, detailed images to track changes over time or share with professionals if necessary. A thermal imaging camera is invaluable for detecting hot spots, which can indicate faulty cells or connections. Don't forget a multimeter to test voltage and current output of individual panels or strings.
Here's a quick reference guide for essential inspection devices:
| Device | Purpose | Importance |
|---|---|---|
| Digital Camera | Visual Documentation | High |
| Thermal Camera | Heat Detection | Critical |
| Multimeter | Electrical Testing | Essential |
| Infrared Thermometer | Spot Temperature Checks | Useful |
Additionally, consider bringing binoculars for distant observations and a tablet or laptop for on-site data recording and analysis. With these tools at your disposal, you'll be well-equipped to conduct a thorough inspection of your photovoltaic roof system, guaranteeing its ideal performance and longevity.
Cleaning Supplies
Proper cleaning supplies are essential for maintaining your photovoltaic roof system's efficiency. You'll need a combination of tools and cleaning agents to effectively remove dirt, debris, and other contaminants that can reduce your solar panels' performance.
Invest in a soft-bristled brush with an extendable handle, allowing you to reach all areas of your roof safely. Microfiber cloths are ideal for gentle cleaning and drying without leaving scratches or residue.
For cleaning solutions, use a specialized solar panel cleaner or a mild, non-abrasive soap mixed with distilled water. Avoid harsh chemicals or abrasive materials that could damage the panels' protective coating. You'll also need a squeegee with a rubber blade to remove excess water and prevent water spots.
When cleaning your photovoltaic roof, keep these key points in mind:
- Safety first: Use proper fall protection equipment and work with a partner
- Timing matters: Clean early morning or evening to avoid hot panels
- Be gentle: Apply minimal pressure to prevent damage to solar cells
- Rinse thoroughly: Remove all soap residue to maintain peak performance
Visual Inspection From Ground
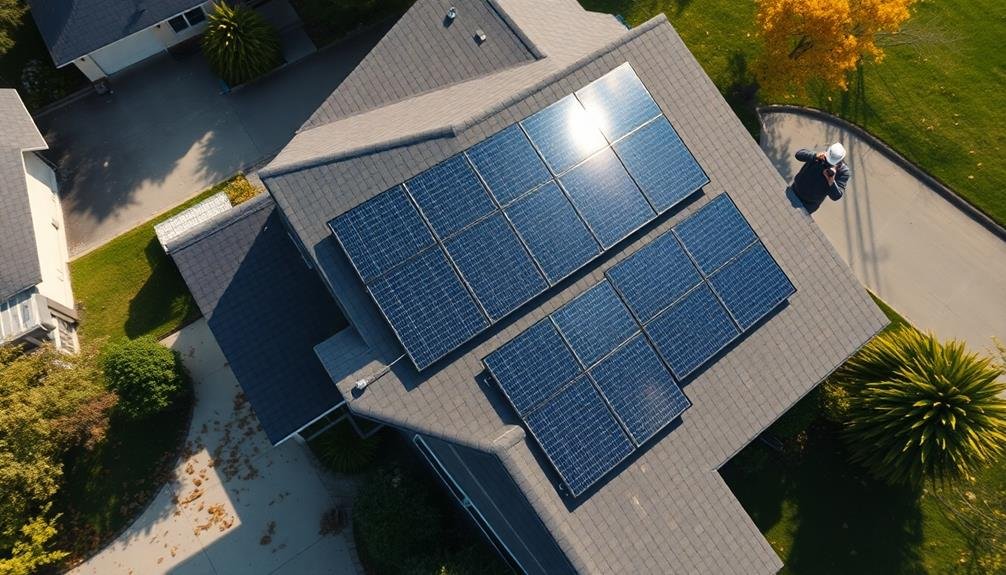
A thorough visual inspection from the ground serves as the initial step in evaluating a photovoltaic roof's condition.
You'll need to walk around your property, carefully examining the solar panels and their surrounding areas. Look for any obvious signs of damage, such as cracked or broken panels, loose connections, or debris accumulation.
Pay close attention to the edges and corners of the array, as these areas are more susceptible to wind damage.
Check for discoloration or dark spots on the panels, which may indicate internal issues or hot spots. Observe the panel alignment, ensuring they're all positioned correctly and haven't shifted.
Don't forget to examine the mounting hardware and brackets for any signs of corrosion or loosening.
If you've got trees near your roof, look for overhanging branches that could potentially damage the panels.
Also, keep an eye out for any unusual shadows cast on the array, as these can greatly reduce energy production.
During your inspection, note any concerns or potential issues you identify. This information will be valuable if you need to call in a professional for a more detailed assessment or repairs.
Roof Access Precautions
Before you ascend to inspect a photovoltaic roof, guarantee you're equipped with essential safety gear, including a hard hat, non-slip footwear, and a fall arrest system.
You'll need to master proper ladder placement techniques to create a stable and secure access point.
Safety Equipment Essentials
Safety equipment is paramount when inspecting photovoltaic roofs. You'll need to prioritize your well-being and guarantee you're properly equipped before stepping onto any roof surface.
Essential gear includes a sturdy safety harness, non-slip footwear, and protective gloves. Don't forget to wear a hard hat to shield yourself from potential falling debris or accidental bumps.
When preparing for your inspection, remember these pivotal safety equipment essentials:
- Fall protection system: Invest in a reliable fall arrest system, including a full-body harness, lanyard, and anchor points. This setup will prevent serious injuries in case of a slip or fall.
- Eye protection: Wear safety glasses or goggles to shield your eyes from dust, debris, and potential glare from the solar panels.
- Sun protection: Apply sunscreen and wear UV-protective clothing, as you'll be exposed to direct sunlight for extended periods.
- Communication device: Carry a fully charged mobile phone or two-way radio to maintain contact with ground personnel in case of emergencies.
Proper Ladder Placement Techniques
Ladders serve as the gateway to rooftop inspections, making their proper placement essential for your safety. When setting up your ladder, verify it's on a stable, level surface. Avoid placing it on wet or slippery ground, and never set it on top of objects to gain extra height. The ladder should extend at least 3 feet above the roof's edge, providing a secure handhold as you shift onto the roof.
Position the ladder at a 75-degree angle, following the 4:1 rule: for every 4 feet of height, the base should be 1 foot away from the wall. Secure the ladder's top to prevent sliding, and its base to stop it from slipping outward. Always maintain three points of contact while climbing, keeping your body centered between the rails.
Before ascending, check for overhead power lines and verify you're not placing the ladder near electrical hazards. If you're using an extension ladder, confirm that the locking mechanisms are fully engaged.
Don't overreach while on the ladder; instead, descend and reposition it as needed. By following these proper placement techniques, you'll greatly reduce the risk of accidents during your photovoltaic roof inspections.
Examining Panel Connections
When you're examining panel connections, it's vital to focus on the integrity of the wiring between solar panels. Look for any signs of wear, damage, or loose connections that could compromise your system's efficiency and safety.
Pay close attention to the junction boxes on the back of each panel, as these are common points of failure.
As you inspect, keep an eye out for:
- Corrosion on connectors or terminals
- Cracked or brittle insulation on cables
- Loose or disconnected wires
- Signs of water ingress or pest damage
Use a multimeter to test the voltage and current at each connection point. This will help you identify any underperforming panels or faulty connections.
Don't forget to check the grounding wires and verify they're properly secured.
If you notice any issues, it's imperative to address them promptly. Faulty connections can lead to reduced energy output, system failures, and even fire hazards.
For complex problems or if you're unsure about any aspect of the inspection, don't hesitate to call a professional. Regular examinations of panel connections will help maintain your photovoltaic system's performance and extend its lifespan.
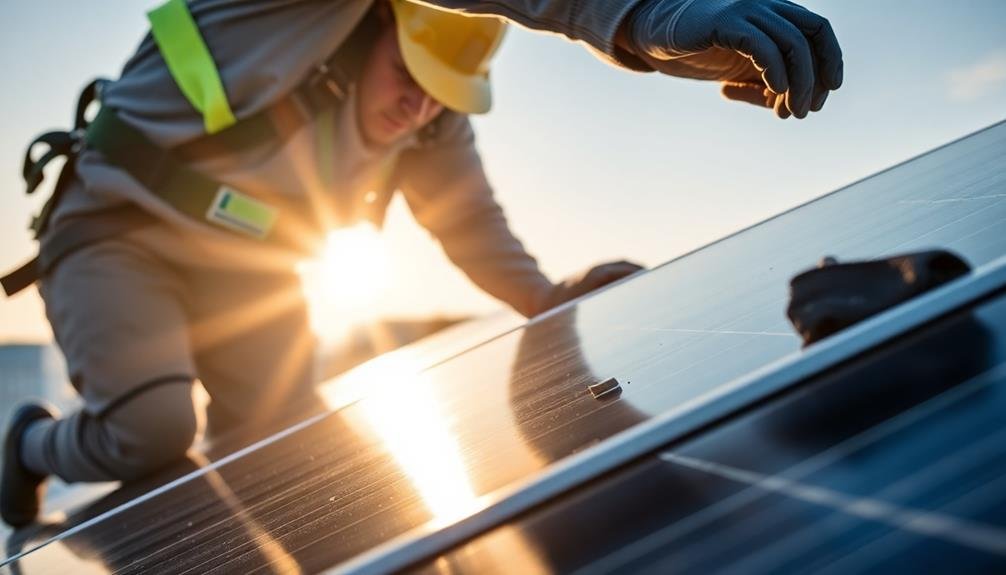
Checking for Physical Damage
As you proceed with your photovoltaic roof inspection, checking for physical damage is essential to confirm the system's longevity and efficiency. Look for cracks, chips, or scratches on the surface of the solar panels. These can occur due to hail, falling debris, or extreme weather conditions. Even small damages can lead to reduced performance or water infiltration.
Examine the panel frames for any signs of bending, warping, or corrosion. Verify that the mounting brackets are secure and haven't loosened over time. Check for any gaps between panels or misalignments that could indicate structural issues.
Don't forget to inspect the backsheet of the panels for bubbling, delamination, or discoloration. These problems can lead to moisture ingress and electrical failures. Look for any signs of animal activity, such as chewed wires or nests, which can cause significant damage.
Lastly, assess the condition of the roof itself. Look for any signs of wear and tear, such as loose shingles or tiles, that could compromise the integrity of your photovoltaic system. Address any issues promptly to prevent further damage and maintain peak performance.
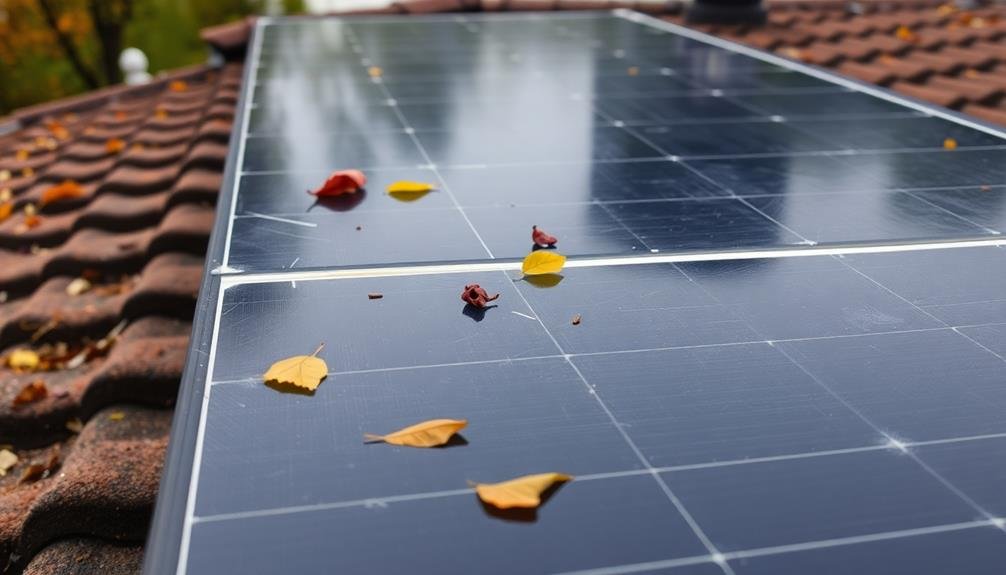
Cleaning Dust and Debris

After inspecting for physical damage, it's time to address the accumulation of dust and debris on your photovoltaic system.
Regular cleaning is vital for maintaining ideal performance and longevity of your solar panels. Dust, leaves, bird droppings, and other debris can greatly reduce the amount of sunlight reaching the photovoltaic cells, decreasing energy production.
To effectively clean your solar panels:
- Use a soft-bristled brush or a leaf blower to remove loose debris
- Spray panels with clean water to loosen stubborn dirt
- Gently scrub with a non-abrasive sponge and mild soap solution
- Rinse thoroughly with clean water to prevent soap residue
Be cautious when cleaning your panels, as excessive pressure or harsh chemicals can damage the surface.
If you're uncomfortable working on your roof, consider hiring a professional cleaning service. For ground-mounted systems, you may find it easier to clean the panels yourself.
Depending on your location and environmental factors, you should aim to clean your panels at least twice a year.
However, in dusty or polluted areas, more frequent cleaning may be necessary to maintain peak efficiency.
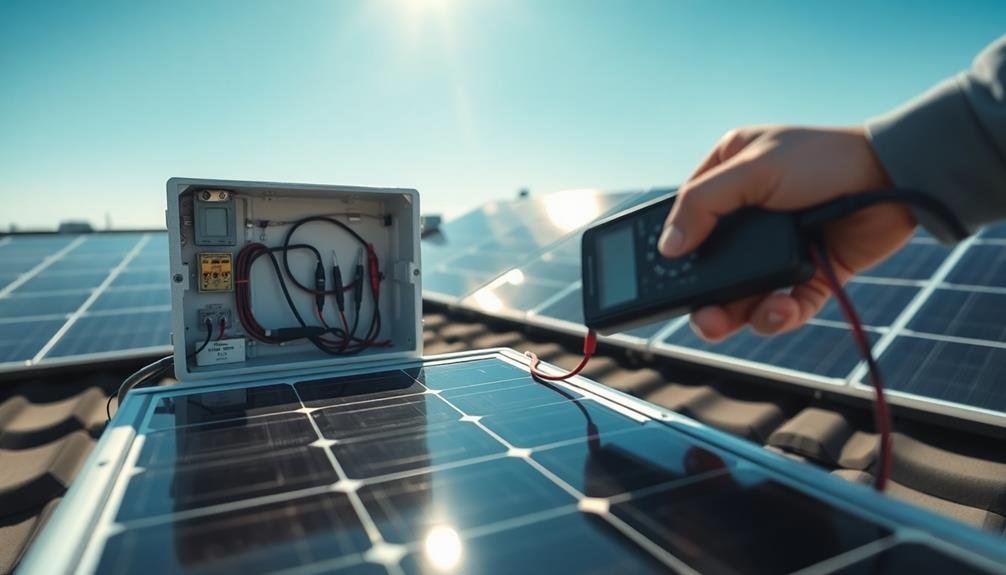
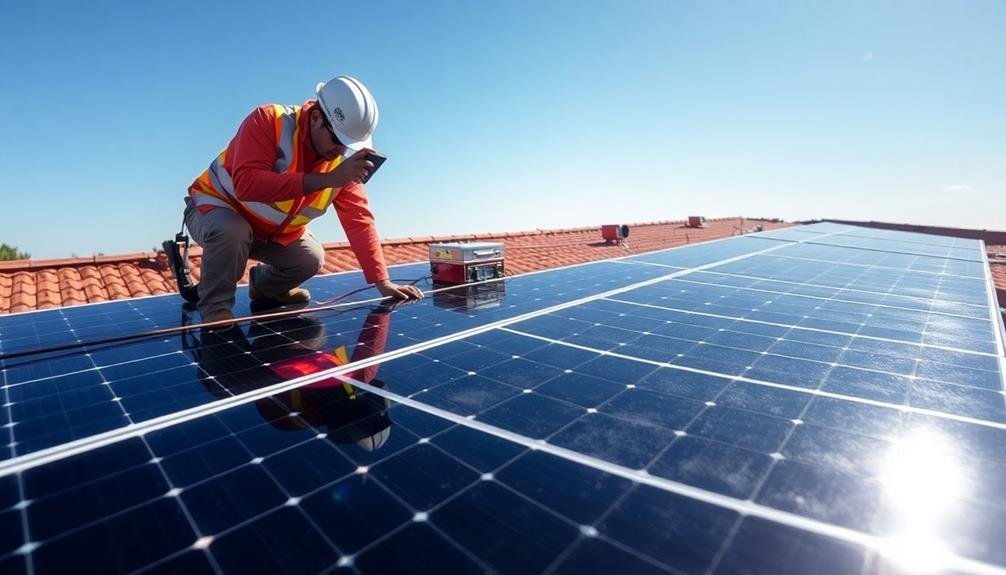
Inspecting Wiring and Cables
When inspecting your photovoltaic system's wiring and cables, you'll need to carefully examine them for signs of corrosion or physical damage.
Look for discoloration, fraying, or exposed wires that could indicate potential issues.
You should also check all connections to verify they're secure and properly seated, as loose connections can lead to inefficiency or system failures.
Detect Corrosion or Damage
The eagle-eyed inspector must carefully examine all wiring and cables for signs of corrosion or damage during a photovoltaic roof inspection.
You'll need to look for any discoloration, fraying, or exposed metal that could indicate potential issues. Corrosion can occur due to moisture exposure or chemical reactions, while physical damage may result from improper installation, wildlife interference, or extreme weather conditions.
To effectively detect corrosion or damage, you should:
- Visually inspect all visible wiring and connection points
- Use a thermal imaging camera to identify hot spots that may indicate electrical resistance
- Check for loose connections or signs of arcing at junction boxes and inverters
- Test the insulation resistance of cables to guarantee proper functionality
Don't forget to examine the conduit systems that protect the wiring, as they can also suffer from corrosion or physical damage.
Pay close attention to areas where cables enter or exit junction boxes, as these are common spots for wear and tear.
If you spot any signs of corrosion or damage, it's vital to address them promptly to prevent system failures, electrical hazards, or reduced energy production.
Ensure Proper Connections
Building on the inspection for corrosion and damage, guaranteeing proper connections is a key aspect of photovoltaic roof inspections. You'll need to examine all wiring and cables connecting your solar panels to the inverter and electrical system. Look for any loose, frayed, or disconnected wires that could compromise your system's efficiency or pose safety risks.
Check the junction boxes on each panel, confirming they're securely fastened and weatherproof. Inspect the MC4 connectors, which link panels together, for proper alignment and tight connections.
Don't forget to examine the conduit runs, verifying they're intact and free from cracks or gaps that could allow water infiltration. Pay close attention to grounding connections, as these are essential for safety and lightning protection. Verify all grounding wires are properly attached and free from corrosion.
You should also inspect the inverter connections, both on the DC input side from the panels and the AC output side to your home's electrical system. If you're not comfortable or qualified to perform these checks, it's best to hire a professional. They'll have the expertise to spot potential issues and can use specialized equipment like thermal imaging cameras to detect hidden connection problems.
Monitoring System Performance
Effective monitoring of system performance is essential for maintaining ideal photovoltaic roof efficiency.
You'll want to regularly check your system's output and compare it to expected levels based on current weather conditions and historical data. This allows you to quickly identify any issues that may be affecting your solar panels' performance.
To guarantee you're getting the most out of your photovoltaic roof, implement these monitoring practices:
- Install a monitoring system that tracks real-time energy production and consumption
- Set up alerts for sudden drops in performance or unusual patterns
- Regularly review performance reports to spot gradual declines in efficiency
- Compare your system's output to similar installations in your area
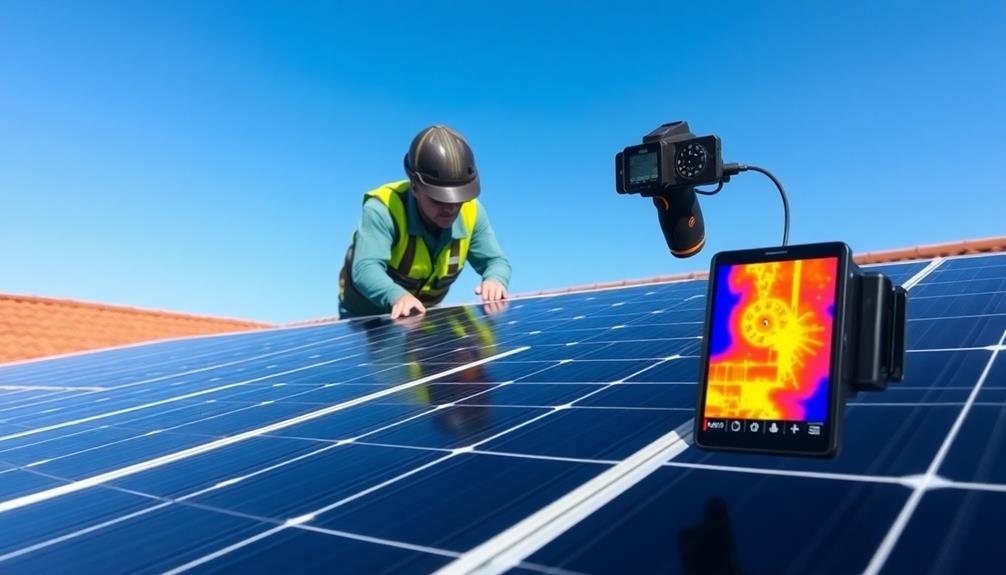
Identifying Hot Spots
While monitoring overall system performance is important, it's equally essential to identify specific problem areas on your photovoltaic roof. Hot spots are one of the most critical issues you should look out for during inspections. These localized areas of elevated temperature can indicate serious problems within your solar panels.
You'll need to use thermal imaging cameras to detect hot spots effectively. These devices reveal temperature variations across your panels, helping you pinpoint potential issues. Hot spots often appear as bright, warm areas contrasting with the cooler surrounding cells.
Several factors can cause hot spots, including cell damage, manufacturing defects, shading, or debris accumulation. If left unchecked, they can lead to decreased efficiency, accelerated panel degradation, and even fire hazards.
Regular inspections allow you to catch these problems early, preventing further damage and maintaining peak system performance.
When you identify a hot spot, don't ignore it. Investigate the cause promptly and take appropriate action, such as cleaning the panel, addressing shading issues, or replacing damaged components.
Assessing Weather-Related Wear
Mother Nature's impact on your photovoltaic roof can't be underestimated. Constant exposure to the elements can cause significant wear and tear, potentially reducing your system's efficiency and lifespan.
Regular inspections are essential to identify and address weather-related damage before it escalates into costly repairs or replacements.
When evaluating weather-related wear on your photovoltaic roof, pay close attention to these key areas:
- Panel surface: Look for scratches, cracks, or discoloration caused by hail, wind-blown debris, or prolonged sun exposure.
- Seals and gaskets: Check for deterioration or gaps that could allow moisture to penetrate, leading to electrical issues or corrosion.
- Mounting hardware: Inspect for loose or rusted bolts, brackets, or clamps that may compromise the system's structural integrity.
- Wiring and connections: Examine exposed cables and junction boxes for signs of UV degradation, animal damage, or water ingress.
Documenting Findings and Issues
Thorough documentation is the backbone of any successful photovoltaic roof inspection. As you assess your solar panels, it's essential to record every detail you observe. Start by creating a standardized checklist that covers all aspects of the inspection, including panel condition, wiring integrity, and mounting system stability.
Take clear, high-resolution photos of any issues you encounter, ensuring they're properly labeled and dated. Don't forget to capture images of the overall system layout as well.
Make detailed notes describing the location and nature of each problem, using specific terminology to avoid ambiguity. If you're using inspection software, input your findings directly into the system. This will help you track issues over time and generate thorough reports.
Be sure to document both visible defects and potential concerns that may require further monitoring. After the inspection, compile all your notes, photos, and data into a well-organized report.
Include recommendations for repairs or maintenance, along with their urgency levels. This documentation will be invaluable for future inspections, maintenance planning, and warranty claims if needed.
When to Call Professionals
A homeowner's ability to conduct photovoltaic roof inspections has its limits. While regular visual checks are essential, certain situations require professional expertise. You should call in the experts when you notice significant performance issues, visible damage, or if you're unsure about the system's overall health.
Professional inspectors have specialized tools and knowledge to diagnose complex problems. They can perform thorough analyses of your system's electrical components, structural integrity, and energy production efficiency.
Don't hesitate to contact professionals if you observe:
- Sharp drops in energy production without obvious causes
- Visible cracks, discoloration, or delamination of solar panels
- Loose or damaged wiring, connectors, or mounting hardware
- Unexplained system shutdowns or error messages
Additionally, it's wise to schedule professional inspections every few years, even if you haven't noticed any issues. These extensive check-ups can catch potential problems early, ensuring your system's longevity and peak performance.
Frequently Asked Questions
How Often Should I Schedule Professional Inspections for My Photovoltaic Roof?
You should schedule professional inspections for your photovoltaic roof annually. It's best to have experts check your system once a year to guarantee peak performance, identify potential issues, and maintain warranty compliance. Don't skip these important check-ups.
Can Extreme Temperatures Affect the Efficiency of My Solar Panels?
Yes, extreme temperatures can impact your solar panels' efficiency. You'll notice reduced performance in very hot weather, as excessive heat decreases voltage output. Cold temperatures generally don't harm efficiency, but snow accumulation can block sunlight and reduce production.
What's the Average Lifespan of a Photovoltaic Roof System?
You can expect your photovoltaic roof system to last 25-30 years on average. However, with proper maintenance and care, it's possible to extend its lifespan. Regular inspections and timely repairs can help maximize your system's longevity.
Are There Any Tax Incentives for Maintaining a Photovoltaic Roof?
You'll find that tax incentives for maintaining photovoltaic roofs are rare. However, you can benefit from federal and state tax credits for installing and upgrading your system. These incentives often cover a significant portion of your initial costs.
How Does Shading From Nearby Trees Impact Solar Panel Performance?
Shading from nearby trees can greatly reduce your solar panels' performance. Even partial shade on a single panel can affect the entire system's output. You'll want to trim overhanging branches regularly to maximize your solar energy production.
In Summary
You've learned why regular inspections of your photovoltaic roof are essential. By following these steps, you'll guarantee your system's safety, efficiency, and longevity. Don't neglect this important maintenance task. Remember, if you're ever unsure or uncomfortable, it's best to call in the professionals. Keep your solar investment working at its peak by staying vigilant and addressing issues promptly. Your roof will thank you, and you'll enjoy peak energy production for years to come.
Leave a Reply