To install your solar attic fan, start by choosing an ideal south-facing location on your roof. Gather necessary tools and materials, including safety gear. Mark and cut the roof opening carefully, then install flashing and sealant for waterproofing. Position and secure the fan unit, ensuring a proper fit. Connect the solar panel to the fan and test its operation. Adjust thermostat settings for peak performance. Inspect for leaks and clean up the work area. Establish a maintenance routine to keep your fan running efficiently. By following these steps, you'll be well on your way to a successful installation that'll keep your attic cool and energy bills low.
Choose the Right Location
When selecting the ideal spot for your solar attic fan, take into account the roof's orientation and exposure to sunlight. The fan should be placed on a south-facing slope to maximize solar panel efficiency. Verify there are no obstructions like trees or nearby buildings that could cast shadows on the panel throughout the day.
Assess your attic's layout and identify areas with poor air circulation. The fan should be positioned to effectively draw hot air from these problem spots. Typically, you'll want to install it near the roof's peak for best airflow.
Check the roof's structure to confirm it can support the fan's weight. Look for a location between rafters or trusses, avoiding electrical wiring, plumbing, or other obstacles. If you have multiple attic spaces, you may need more than one fan for complete coverage.
Don't forget to think about aesthetics. Choose a spot that's less visible from the street if possible.
Also, consider accessibility for future maintenance. You'll want to be able to reach the fan easily for cleaning or repairs.
Gather Necessary Tools and Materials
With your installation spot selected, it's time to assemble everything you'll need for the job. Gather your tools and materials to guarantee a smooth installation process.
You'll need basic hand tools like a drill, screwdriver, utility knife, and measuring tape. Don't forget safety equipment, including gloves, safety glasses, and a dust mask.
For materials, you'll need the solar attic fan kit, which typically includes the fan unit, solar panel, and mounting hardware. You may also need additional items like roofing nails, roof sealant, and wire connectors. If your attic doesn't have sufficient insulation around the installation area, pick up some insulation material as well.
Before you begin, double-check that you have everything on this essential list:
- Solar attic fan kit (fan, panel, and hardware)
- Roofing materials (nails, sealant, flashing)
- Electrical supplies (wire, connectors, electrical tape)
- Safety equipment (gloves, glasses, dust mask)
Mark and Cut Roof Opening

Start by locating the ideal spot on your roof for the solar attic fan installation, considering factors like sunlight exposure and roof structure.
Once you've determined the best location, carefully measure and outline the opening according to the manufacturer's specifications.
Using appropriate tools, cut through the roofing material along your marked outline, ensuring precision and safety throughout the process.
Locate Ideal Installation Spot
Choosing the perfect spot for your solar attic fan installation is vital for peak performance. You'll want to position it where it can receive maximum sunlight throughout the day while also effectively ventilating your attic space.
Consider the orientation of your roof and the path of the sun across your property. South-facing slopes are often ideal, as they receive the most direct sunlight.
Before finalizing the location, inspect your attic's interior to verify there are no obstructions like wiring, plumbing, or structural supports in the chosen area. You'll also need to avoid placing the fan near existing vents or chimneys, as this can disrupt proper airflow.
When selecting the perfect spot, keep these factors in mind:
- Maximum sun exposure
- Proper distance from roof edges and peaks
- Accessibility for future maintenance
- Clearance from interior attic obstacles
Once you've identified the best location, mark it clearly on both the exterior roof surface and the interior attic space. This will help guarantee accuracy when you begin cutting the opening.
Measure and Outline Opening
Precision is key when marking and cutting the opening for your solar attic fan. Begin by measuring the dimensions of your fan's base plate. Transfer these measurements to the roof, centering them over the spot you've chosen for installation. Use a carpenter's square to guarantee your lines are straight and perpendicular.
Mark the outline with a permanent marker or chalk, double-checking your measurements. Before cutting, drill a small pilot hole at each corner of your outline. This will help guide your saw and prevent over-cutting.
Use a reciprocating saw or jigsaw to carefully cut along the marked lines, starting from one of the pilot holes. As you cut, be mindful of any electrical wires or obstacles in the attic space below. Work slowly and steadily to maintain control of the saw.
Once you've completed the cut, remove the cut-out section of roofing material. Clean the edges of the opening, removing any debris or loose shingles. Inspect the opening to guarantee it's the correct size and shape for your fan. If necessary, make minor adjustments with your saw or a file to achieve a perfect fit.
Cut Through Roofing Material
With your opening marked and measured, it's time to cut through the roofing material. Use a utility knife to carefully cut through the shingles along your marked outline. Be sure to cut only through the shingles and not the roof decking beneath.
Once you've cut through the shingles, use a pry bar to gently lift and remove them from the marked area.
Next, use a reciprocating saw to cut through the roof decking. Follow your outline precisely, making sure to avoid any rafters or other structural elements. As you cut, be mindful of any electrical wires or plumbing that may be present in the attic space below.
When cutting through the roofing material, keep these safety precautions in mind:
- Wear protective gear, including safety glasses and gloves
- Verify your ladder is stable and secure
- Have a helper on the ground for added safety
- Work slowly and carefully to maintain control of your tools
After you've finished cutting, remove any debris from the opening and check that the edges are smooth and even. If necessary, use sandpaper to refine the edges. Your roof opening is now ready for the solar attic fan installation.
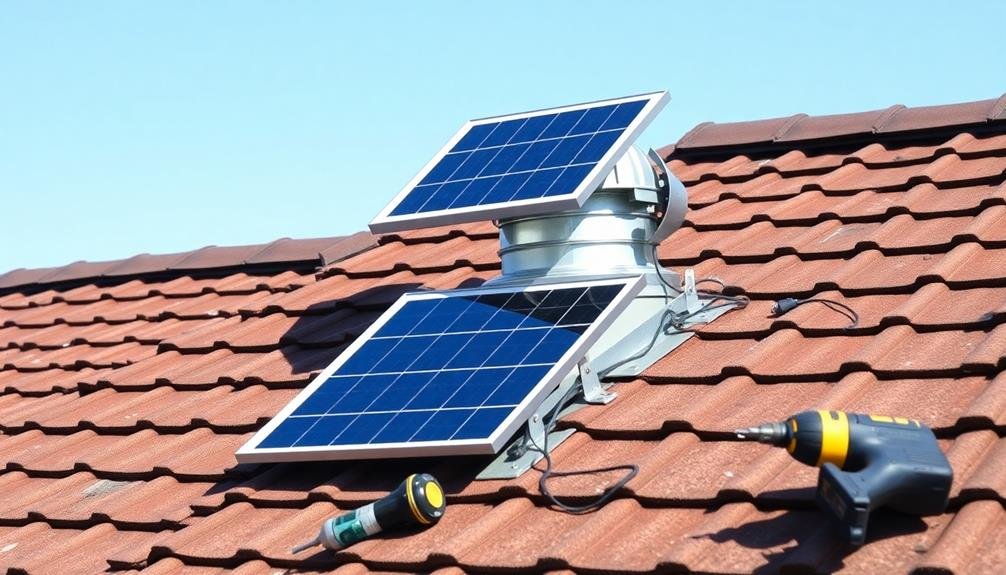
Install Flashing and Sealant
After cutting the hole, it's time to install the flashing and apply sealant.
Begin by sliding the flashing underneath the shingles above the hole, guaranteeing it's centered over the opening. Secure the flashing with roofing nails, placing them along the top edge and sides. Don't nail the bottom edge, as this allows water to flow down the roof.
Next, apply a generous amount of roofing sealant around the edges of the flashing. Use a caulking gun to create a continuous bead, paying special attention to the top and sides. This prevents water from seeping under the flashing and into your attic. For added protection, apply sealant to the nail heads as well.
Now, focus on the fan unit's base. Apply a thick bead of sealant around its perimeter before placing it over the flashing. Press firmly to guarantee a tight seal.
Secure the fan base to the roof deck using the provided screws or bolts, making sure not to overtighten them. Finally, apply another layer of sealant around the base's edges and over the screw heads for complete waterproofing.
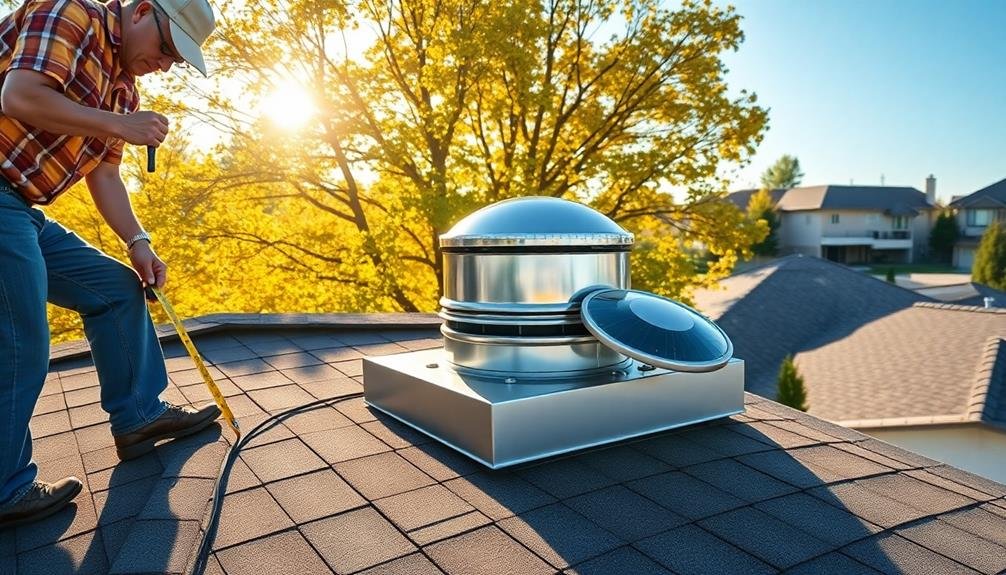
Position and Secure Fan Unit
Carefully lifting the solar attic fan unit, you'll need to position it over the prepared opening. Align the fan's base with the flashing to guarantee a proper fit. As you lower the unit, make sure the flashing's upper edge slides underneath the roofing material to maintain a watertight seal.
Once the fan is in place, it's time to secure it. Use the provided screws or nails to fasten the unit to your roof deck. Begin at the top of the flashing and work your way down, verifying each fastener is driven securely into the decking. Don't overtighten, as this could damage the flashing or create gaps.
To complete the installation, follow these vital steps:
- Apply a generous bead of roofing sealant around the entire perimeter of the flashing.
- Install any additional flashing or shingles to cover exposed edges.
- Check that the solar panel is unobstructed and facing the best direction for sunlight.
- Test the fan to confirm it's functioning correctly.
Remember to clean up any debris from your work area and dispose of it properly.
You've now successfully positioned and secured your solar attic fan, creating a more energy-efficient home ventilation system that will help regulate attic temperatures and potentially reduce your cooling costs.
Connect Solar Panel to Fan
During this important step, you'll need to connect the solar panel to your attic fan. Begin by carefully running the wire from the solar panel to the fan unit. Confirm you've left enough slack to allow for adjustments and avoid tension on the connections.
Strip the ends of the wires and connect them to the fan's terminals, matching positive to positive and negative to negative. Use wire nuts or crimp connectors to secure the connections, then wrap them with electrical tape for added protection against moisture and corrosion.
Here's a quick reference guide for common wire colors and their functions:
| Wire Color | Solar Panel | Fan Unit | Function |
|---|---|---|---|
| Red | Positive | Positive | Power |
| Black | Negative | Negative | Ground |
| Green | Ground | Ground | Safety |
| Blue | N/A | Speed | Control |
| Yellow | N/A | Sensor | Thermostat |
Double-check all connections to confirm they're secure and properly insulated. If your fan has a built-in thermostat or humidistat, connect these according to the manufacturer's instructions. Finally, test the connection by covering the solar panel and uncovering it to verify that the fan starts and stops as expected.
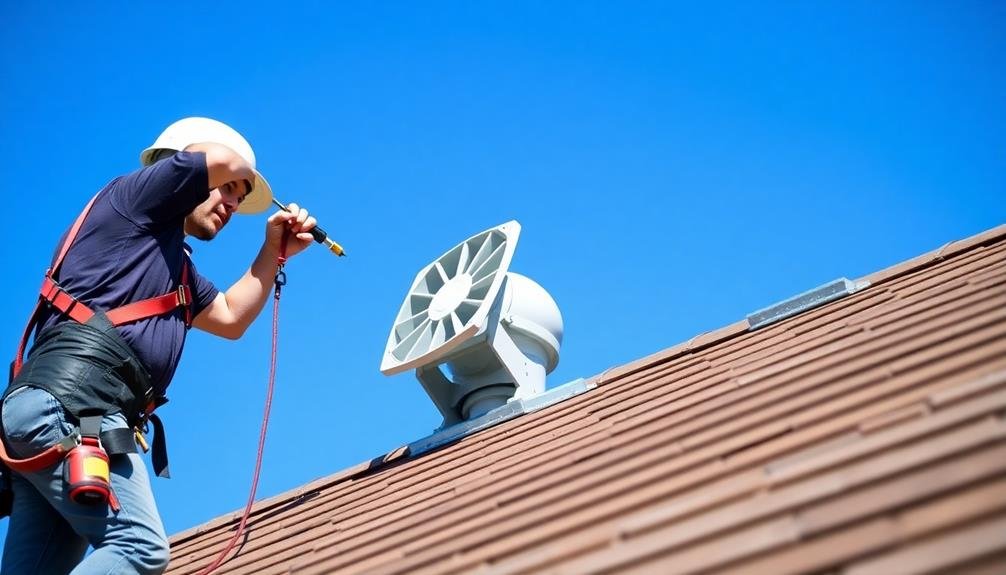
Test Fan Operation
Once you've connected everything up, it's time to test your solar attic fan's operation. Start by ensuring the solar panel is positioned to receive direct sunlight. On a sunny day, the fan should begin spinning immediately. If it doesn't, double-check all your connections and make sure there are no obstructions in the fan blades.
To thoroughly test your fan's operation, follow these steps:
- Monitor the fan's performance throughout the day
- Check for any unusual noises or vibrations
- Measure the attic temperature before and after installation
- Observe the fan's response to changing light conditions
Pay attention to how quickly the fan starts up when sunlight hits the panel and how it slows down as light diminishes.
You should notice a gradual decrease in attic temperature over time. If the fan isn't performing as expected, consider adjusting the panel's angle or location for ideal sun exposure.
Adjust Thermostat Settings
After testing your solar attic fan's operation, you'll need to adjust the thermostat settings for peak performance.
Set the temperature range to activate the fan when your attic reaches a specific heat threshold, typically between 90-110°F.
Don't forget to program seasonal adjustments and consider the fan's activation point to guarantee it runs efficiently throughout the year.
Set Optimal Temperature Range
Setting the ideal temperature range for your solar attic fan is crucial for its efficient operation. You'll want to strike a balance between energy savings and comfort. Most solar attic fans come with adjustable thermostats, allowing you to control when the fan activates.
To set the best temperature range:
- Locate the thermostat on your solar attic fan unit
- Determine your desired attic temperature (usually between 90-110°F)
- Adjust the thermostat to this temperature using the provided controls
- Test the fan to verify it activates at the set temperature
Remember, the goal is to keep your attic cooler than the outside air during hot days. This prevents heat from building up and seeping into your living spaces.
In most climates, setting the thermostat between 90-100°F works well. However, you might need to adjust based on your specific location and home design.
Don't set the temperature too low, as this can cause the fan to run unnecessarily, potentially wasting energy. Conversely, setting it too high may not provide adequate ventilation.
Monitor your attic temperature over time and make adjustments as needed to find the sweet spot for your home's efficiency and comfort.
Program Seasonal Adjustments
Seasonal changes greatly impact your attic's temperature, necessitating adjustments to your solar attic fan's thermostat settings. To guarantee peak performance year-round, program your fan to adapt to these variations.
In spring and fall, set the thermostat between 80-85°F (27-29°C) to maintain comfortable attic temperatures. During summer, increase the setting to 90-95°F (32-35°C) to combat intense heat buildup.
For winter, you'll want to adjust the fan's operation to prevent excessive heat loss. Set the thermostat to 60-65°F (16-18°C) to allow some air circulation without removing too much warm air. If you live in an area with heavy snowfall, consider disabling the fan entirely to prevent cold air intrusion.
Remember to check and reprogram your settings at the beginning of each season. You can also fine-tune the thermostat based on your specific climate and home insulation.
Keep a log of your adjustments and their effects on attic temperature and overall home comfort. This will help you refine settings over time.
Don't forget to clean the fan and solar panel during these seasonal checks to maintain efficiency. By programming these seasonal adjustments, you'll maximize your solar attic fan's effectiveness and energy savings throughout the year.
Consider Fan Activation Point
While seasonal adjustments are important, fine-tuning your solar attic fan's activation point is key to optimizing its performance. The activation point, controlled by the thermostat, determines when your fan turns on and off. To set this effectively, consider your local climate and attic conditions.
Start by setting the thermostat to around 90°F (32°C). This temperature is a good baseline for most homes, but you may need to adjust it based on your specific needs. If you're noticing excessive heat in your living spaces or moisture buildup in the attic, lower the activation point. Conversely, if the fan runs too frequently, increase it slightly.
When adjusting your fan's activation point, keep these factors in mind:
- Insulation quality
- Roof color and material
- Attic ventilation
- Local weather patterns
Monitor your attic's temperature and humidity levels over time to gauge the effectiveness of your settings. You can use a simple thermometer and hygrometer for this purpose.
Don't hesitate to make small adjustments as needed, especially as seasons change. Remember, the goal is to maintain a comfortable living environment while maximizing energy efficiency.
Inspect for Leaks

After installing your solar attic fan, it's crucial to inspect for leaks. Start by examining the area around the fan's base where it meets the roof. Look for any gaps or spaces that could allow water to seep in. You'll want to check both the interior and exterior of your attic space.
On the inside, look for any signs of moisture or water stains on the rafters or decking near the fan installation. These could indicate a leak that needs immediate attention.
Outside, inspect the flashing and sealant around the fan's base. Confirm they're properly applied and haven't been compromised during installation.
Test the fan's water resistance by simulating rainfall with a garden hose. Spray water around the fan's perimeter, gradually increasing the water pressure. While doing this, have someone inside the attic looking for any signs of water intrusion.
If you detect any leaks, address them promptly. This might involve reapplying sealant, adjusting the flashing, or in some cases, reinstalling the fan.
Don't hesitate to call a professional if you're unsure about fixing the leak yourself. Regular inspections will help maintain your solar attic fan's efficiency and protect your home from water damage.
Clean Up and Maintenance
The final step in your solar attic fan installation process is clean-up and maintenance. After securing the fan and confirming there are no leaks, it's time to tidy up your work area and establish a maintenance routine.
Remove any debris, packaging materials, or tools from the attic space. Dispose of waste properly and store your equipment safely.
To keep your solar attic fan functioning effectively, you'll need to perform regular maintenance. Here are four key maintenance tasks:
- Clean the solar panel regularly to guarantee maximum efficiency
- Check the fan blades for dust or debris accumulation
- Inspect wiring connections for any signs of wear or damage
- Test the fan's operation periodically, especially after severe weather events
Schedule these maintenance tasks at least twice a year, ideally in spring and fall. This will help you catch any potential issues before they become major problems.
Keep a log of your maintenance activities to track the fan's performance over time.
Frequently Asked Questions
How Long Does a Solar Attic Fan Typically Last?
You can expect your solar attic fan to last between 15 to 25 years with proper maintenance. It's durable and designed for long-term use. However, you'll want to check it periodically to guarantee it's functioning at its best.
Can I Install a Solar Attic Fan on a Flat Roof?
Yes, you can install a solar attic fan on a flat roof. You'll need to use a specially designed flat roof mount and guarantee proper sealing to prevent leaks. It's essential to maintain adequate ventilation for ideal performance.
What's the Average Cost Savings on Energy Bills With a Solar Fan?
You'll typically save 10-20% on cooling costs with a solar attic fan. Your exact savings depend on factors like your home's size, insulation, and climate. It's a cost-effective way to reduce energy bills and improve comfort.
Are There Any Tax Incentives for Installing a Solar Attic Fan?
Yes, you may qualify for tax incentives when installing a solar attic fan. Check with your local government and utility company for available rebates or credits. The federal solar tax credit could also apply to your installation.
Can a Solar Attic Fan Be Used in Conjunction With Existing Ventilation Systems?
Yes, you can use a solar attic fan alongside existing ventilation systems. It'll complement your current setup, enhancing overall airflow and cooling efficiency. You'll benefit from improved ventilation without compromising your existing systems. They work together seamlessly.
In Summary
You've successfully installed your solar attic fan! Remember, you'll need to keep it clean and check for any issues periodically. Don't forget to monitor your home's temperature and energy usage to see the benefits of your new fan. If you encounter any problems, don't hesitate to consult a professional. With proper maintenance, your solar attic fan will help keep your home cooler and more energy-efficient for years to come.


Leave a Reply