
To bake crusty bread outdoors using solar power, you'll need to build a sun-powered oven. Start by gathering materials like cardboard, aluminum foil, and clear plastic wrap. Design your oven with a sturdy frame, reflective surfaces, and an insulated baking chamber. Prepare a suitable bread dough recipe, adjusting for solar baking conditions. Position your oven in direct sunlight, tilting reflectors to maximize heat capture. Monitor the temperature closely and adjust as needed. Bake until the crust is golden brown and the internal temperature reaches 190-210°F. With practice, you'll master the art of creating perfectly crusty loaves using nothing but the sun's energy.
Gathering Materials for Solar Oven
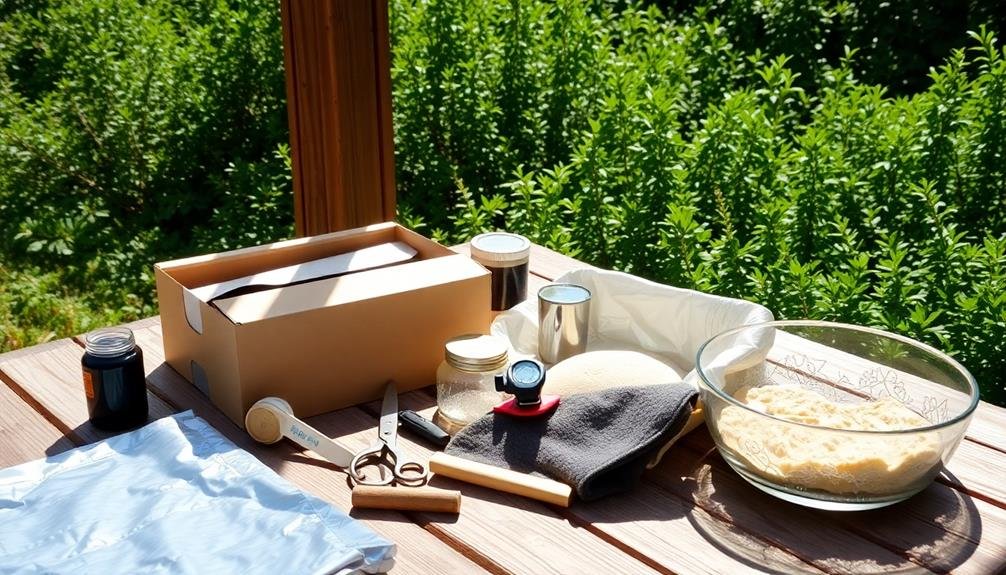
Enthusiasts of eco-friendly cooking, it's time to gather materials for your solar oven. You'll need a cardboard box, aluminum foil, black construction paper, clear plastic wrap, and a thermometer. Choose a sturdy box that's at least 3 inches deep and has a lid. The size will determine how much food you can cook, so select accordingly.
For insulation, collect newspaper or shredded paper. You'll also need scissors, a utility knife, and strong adhesive tape. Don't forget a dark-colored pot or pan for cooking; black absorbs heat best. A wooden spoon and oven mitts are essential for handling hot containers.
To boost efficiency, get a piece of reflective material like a car sun shade or additional aluminum foil. You might want to include a pizza stone or unglazed ceramic tile to help distribute heat evenly. For added stability, gather some small rocks or bricks to prop up your oven.
Lastly, you'll need sunshine! Choose a sunny spot in your yard or on a balcony where your solar oven can soak up rays unobstructed for several hours.
Designing Your Sun-Powered Bread Oven
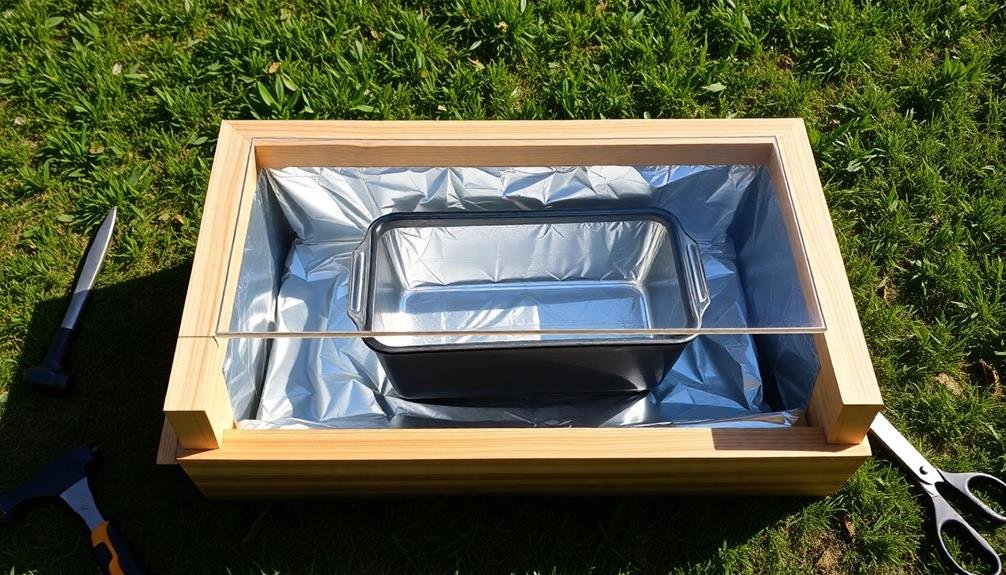
When it comes to designing your sun-powered bread oven, you'll need to focus on maximizing heat absorption and retention. Start by creating a sturdy base using a cardboard box or wooden frame. Line the interior with reflective materials like aluminum foil or mylar sheets to bounce sunlight towards the center.
Next, construct a transparent lid using clear plastic or glass. This allows sunlight to enter while trapping heat inside. Create an insulated chamber by adding layers of newspaper, foam board, or wool between the outer walls and inner lining.
Position a dark-colored baking tray or pot in the center of your oven to absorb heat efficiently. Consider adding a thermometer to monitor internal temperatures. To enhance heat collection, build adjustable reflector panels that can be angled towards the sun.
Don't forget ventilation – include small holes or an adjustable flap to release excess moisture and prevent condensation. For added stability, reinforce corners and edges with duct tape or wood glue.
Constructing the Solar Oven Frame
To construct your solar oven frame, you'll need to gather the necessary materials and tools first.
You'll want to have wood or metal for the frame, insulation, reflective materials, and basic carpentry tools on hand.
Once you've assembled everything, you can follow a step-by-step guide to put your oven frame together efficiently and correctly.
Materials and Tools Needed
Building a solar oven frame requires a specific set of materials and tools. You'll need lightweight, heat-resistant materials for the frame itself, along with reflective surfaces to direct sunlight into the cooking chamber. For the frame, consider using thin plywood or sturdy cardboard. The reflective surfaces can be created with aluminum foil or mylar sheets.
Essential tools for this project include:
- A sharp utility knife or box cutter
- A sturdy pair of scissors
- A ruler or measuring tape
- A strong adhesive, like wood glue or construction adhesive
You'll also need a clear, heat-resistant material for the oven's window, such as tempered glass or a thick, transparent plastic sheet.
Don't forget insulation materials like foam board or newspaper to help retain heat inside the oven.
For assembling the frame, gather wood screws, a screwdriver, and a small hammer. If you're using cardboard, you may opt for heavy-duty packing tape instead.
Remember to have safety equipment on hand, including work gloves and safety glasses, to protect yourself while constructing your solar oven frame.
Step-by-Step Assembly Instructions
Now that you've gathered all the necessary materials and tools, it's time to construct the frame of your solar oven.
Begin by cutting the plywood into four pieces: two 24×24 inch squares for the base and top, and two 24×18 inch rectangles for the sides. Sand the edges smooth to prevent splinters.
Next, assemble the frame by attaching the side panels to the base using wood screws. Make sure the corners are square and secure. Apply weatherproof sealant along the joints to make the oven water-resistant.
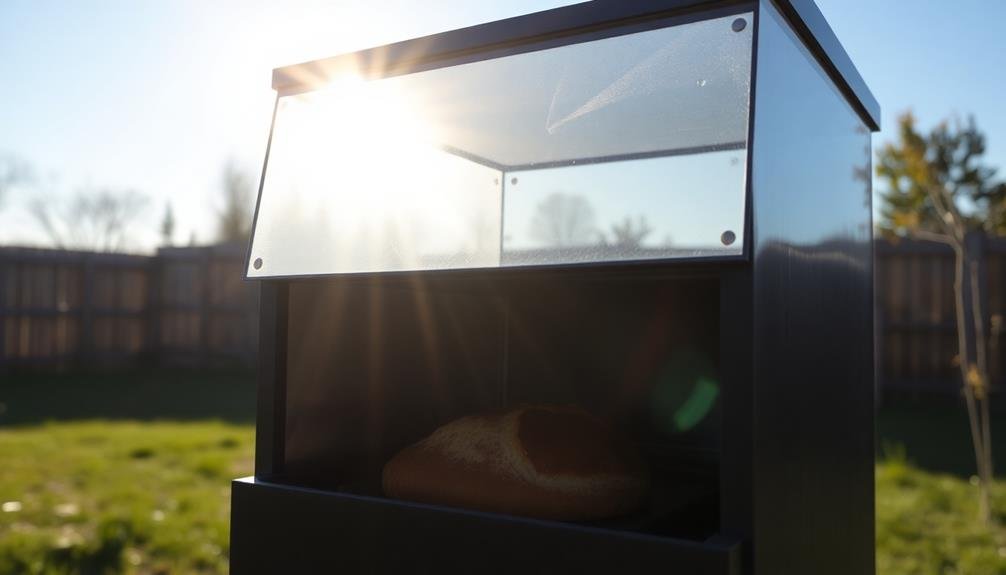
Cut a 20×20 inch opening in the top panel for the glass pane. Install the glass pane by applying silicone caulk around the edges and pressing it firmly into place. Secure it with glazing points for added stability.
Attach hinges to connect the top panel to the back of the frame, creating a lid that opens easily. Line the interior with reflective insulation, using spray adhesive to keep it in place.
Cut holes for the oven thermometer and any ventilation you want to include. Finally, paint the exterior with heat-resistant black paint to maximize heat absorption.
Your solar oven frame is now ready for the next steps.
Installing Reflective Surfaces
The most critical step in creating your sun-powered oven is installing reflective surfaces. These surfaces will concentrate the sun's rays, amplifying their power and directing heat into your cooking area. You'll want to use materials that are highly reflective and durable enough to withstand outdoor conditions.
To install the reflective surfaces effectively:
- Clean the interior thoroughly, removing any dust or debris that could interfere with adhesion.
- Measure and cut your reflective material to fit each interior surface precisely.
- Apply a heat-resistant adhesive to the oven's interior, working in small sections to guarantee even coverage.
- Carefully place the reflective material, smoothing out any air bubbles or wrinkles as you go.
Start with the bottom surface, then move to the sides, and finish with the lid or top surface. Be sure to leave openings for any vents or temperature gauges you've incorporated into your design.
For peak performance, consider using mirror-finish aluminum or Mylar sheets. These materials are lightweight, highly reflective, and resist degradation from heat and UV exposure.
Remember to wear gloves and eye protection when handling reflective materials to avoid cuts and glare.
Creating an Insulated Baking Chamber
With your reflective surfaces in place, it's time to focus on the heart of your sun-powered oven: the insulated baking chamber. This essential component traps heat and creates an ideal environment for baking your bread.
Start by selecting a dark-colored, heat-resistant container to serve as your baking chamber. A cast-iron Dutch oven or a dark metal pot with a tight-fitting lid works well. Line the bottom of the container with a thin layer of dark stones or ceramic tiles to absorb and retain heat.
Next, create an insulating box to house your baking chamber. Use rigid foam insulation boards, cutting them to size and assembling them into a box slightly larger than your container. Seal the joints with aluminum tape for added insulation.
Cut a hole in the top of the box to allow sunlight to reach your baking chamber. Cover this opening with a piece of tempered glass or clear, heat-resistant plastic to trap heat while letting light through.
Place your baking chamber inside the insulated box, ensuring there's a small air gap around it. This setup will maximize heat retention and create an efficient baking environment for your sun-powered oven.
Choosing the Perfect Bread Recipe
Success with your sun-powered oven depends greatly on selecting the right bread recipe. You'll want to choose a recipe that's well-suited for the unique conditions of solar baking. Look for bread types that don't require precise temperature control or rapid temperature changes, as solar ovens heat gradually and maintain steady temperatures.
Consider these factors when choosing your recipe:
- Moisture content: Opt for recipes with higher moisture content, as they're more forgiving in solar ovens.
- Rising time: Select recipes that allow for longer rising periods, which work well with the slower heating process.
- Crust development: Choose breads that benefit from a crisp crust, as solar ovens excel at creating golden-brown exteriors.
- Ingredient stability: Pick recipes with ingredients that won't spoil quickly in warm conditions.
Artisan loaves, focaccia, and sourdough breads are excellent choices for solar baking. They're often hearty, crusty, and adaptable to longer baking times.
Avoid delicate pastries or breads that require quick temperature adjustments. Remember, you're working with nature's oven, so embrace recipes that complement its gentle, consistent heat.
With the right recipe, you'll be amazed at the delicious results your sun-powered oven can produce.
Preparing Dough for Solar Baking

Preparing dough for solar baking requires a few adjustments to traditional methods. You'll need to create a slightly drier dough than usual, as solar ovens don't release moisture as effectively as conventional ovens. Reduce the liquid content in your recipe by about 10% to achieve the right consistency.
When kneading, aim for a smooth, elastic texture that's less sticky than normal. This will help prevent the dough from becoming too moist during the slower solar baking process. After kneading, let the dough rise in a warm, draft-free place until it has doubled in size.
Shape your loaf carefully, considering the dimensions of your solar oven. A flatter, wider shape will cook more evenly than a tall, round loaf. Place the shaped dough on a dark-colored baking sheet or in a dark pan to absorb more heat.
Before putting the dough in your solar oven, brush the top with oil or egg wash to promote browning. You may also want to score the top to control expansion.
Positioning Your Oven for Sunlight
Proper sun-tracking is essential for effective solar oven use. You'll want to position your oven in a spot that receives direct sunlight for several hours. Choose an area free from shadows cast by trees, buildings, or other obstacles.
Remember, the sun's position changes throughout the day, so you'll need to adjust your oven accordingly.
To maximize your solar oven's efficiency:
- Start by facing the oven towards the sun's current position
- Tilt the reflector panels to capture as much sunlight as possible
- Rotate the oven every 30 minutes to follow the sun's path
- Use a sun angle calculator to predict the best positioning
On cloudy days, you'll need to be more strategic. Place your oven in the sunniest spot available and be prepared for longer cooking times.
If you're in the Northern Hemisphere, a south-facing location is ideal. For those in the Southern Hemisphere, opt for a north-facing spot.
Monitoring Temperature and Baking Time

How do you guarantee your solar-baked bread turns out perfectly? It's all about monitoring temperature and baking time. Unlike conventional ovens, solar ovens don't maintain a constant temperature, so you'll need to keep a close eye on your bread.
Use an oven thermometer to track the internal temperature of your solar oven. Aim for 350°F to 375°F for most bread recipes. If the temperature drops, adjust your oven's position to catch more sunlight. Remember, baking times will vary depending on the sun's intensity and outdoor conditions.
Check your bread's progress regularly, but avoid opening the oven too often, as this releases heat. Look for these signs of doneness:
| Crust Color | Internal Temp | Sound | Texture |
|---|---|---|---|
| Golden brown | 190°F – 210°F | Hollow when tapped | Firm to touch |
| Dark brown | Above 210°F | Crisp sound | Very hard |
| Pale | Below 190°F | Dull thud | Soft or doughy |
| Uneven color | Varies | Inconsistent | Uneven |
If your bread isn't browning evenly, rotate it halfway through baking. Don't be discouraged if your first attempt isn't perfect – solar baking takes practice and patience.
Achieving the Perfect Crusty Loaf
For the perfect crusty loaf in your solar oven, you'll need to create the right environment. The key is to mimic the conditions of a traditional bread oven, which combines high heat and steam to produce that coveted crispy exterior.
To achieve this in your solar oven:
- Preheat your oven thoroughly, aiming for a temperature of around 400°F (204°C).
- Place a shallow pan of water at the bottom of the oven to create steam.
- Use a baking stone or cast iron skillet to provide even heat distribution.
- Score the top of your loaf just before baking to allow for controlled expansion.
As your bread bakes, you'll notice the crust beginning to form.
Don't be tempted to open the oven too often, as this will release heat and steam. Instead, rely on visual cues through the oven's window. The loaf is done when it's golden brown and sounds hollow when tapped on the bottom.
Once baked, remove the bread and let it cool on a wire rack. This allows air to circulate, preventing the bottom from becoming soggy and preserving that perfect crust you've worked so hard to achieve.
Frequently Asked Questions
Can I Use a Solar Oven for Baking on Cloudy Days?
You can use a solar oven on cloudy days, but it'll be less effective. You'll experience longer cooking times and lower temperatures. Consider using a backup heat source or choosing a sunnier day for ideal results.
How Long Does Solar-Baked Bread Stay Fresh Compared to Conventionally Baked Bread?
You'll find that solar-baked bread typically stays fresh for about the same time as conventionally baked bread. It's mainly the ingredients and storage methods that affect freshness, not the baking method. Proper storage is key for longevity.
Are There Any Safety Concerns When Using a Solar Oven?
When using a solar oven, you'll need to be cautious of hot surfaces and potential burns. Don't leave it unattended, and keep children and pets away. Always use oven mitts and follow proper food safety guidelines.
Can I Bake Other Types of Food in a Solar Bread Oven?
Yes, you can bake various foods in a solar bread oven. You're not limited to bread; you'll find it's great for cooking casseroles, roasting vegetables, and even baking desserts. It's versatile and eco-friendly for outdoor cooking.
What's the Maximum Temperature a Solar Oven Can Reach for Bread Baking?
You'll find solar ovens can reach impressive temperatures for bread baking. Typically, they max out around 300-350°F (150-175°C). However, some advanced models can hit up to 400°F (204°C), giving you plenty of heat for crusty loaves.
In Summary
You've now mastered the art of solar bread baking! With your homemade sun-powered oven, you'll enjoy fresh, crusty loaves while harnessing sustainable energy. Don't forget to experiment with different recipes and oven positions to perfect your technique. As you savor the aroma of warm bread baked by the sun's rays, you'll appreciate the satisfaction of eco-friendly cooking. Keep refining your skills, and you'll become a solar baking expert in no time!
Leave a Reply