To perfect your homemade sun cooker dimensions, start by sizing the reflector 1.5-2 times larger than your pot diameter. Aim for a cooking chamber volume of 1-2 cubic feet, with a depth of 6-8 inches and width 1.5-2 times the depth. Use 1-2 inches of insulation for ideal heat retention. Incorporate sun-tracking and angle adjustments for maximum efficiency. Balance portability with cooking capacity based on your needs. Account for seasonal sun angles and cooking vessel sizes when designing. Enhance heat retention with proper materials and a double-layered lid. Don't forget to include ventilation measures for steam release. These tips will set you on the path to solar cooking success.
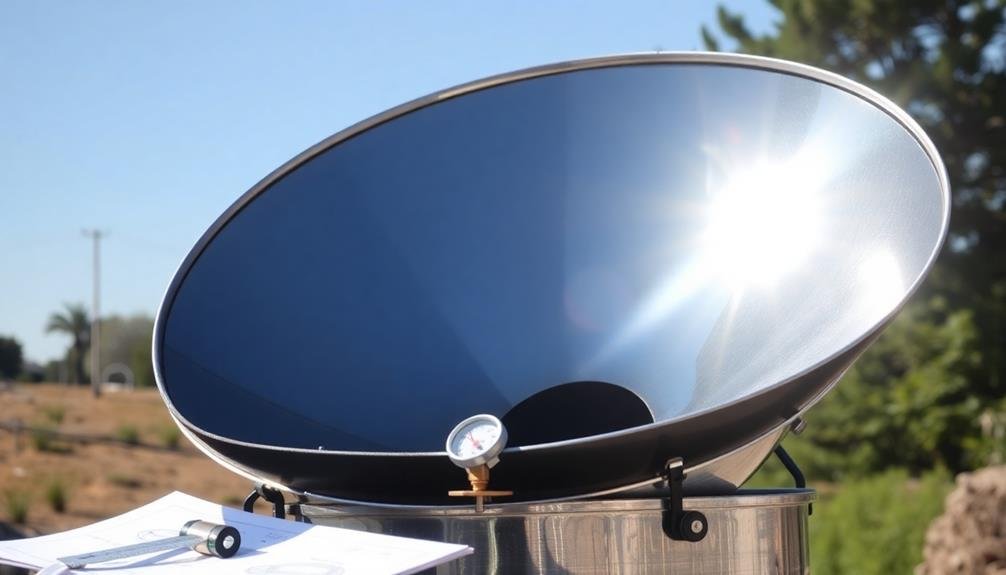
Determine Optimal Reflector Size
The ideal reflector size for your homemade sun cooker depends on several factors. Consider the cooking pot's size, desired cooking temperature, and your location's solar intensity. A general rule of thumb is to make your reflector about 1.5 to 2 times larger than the pot's diameter.
To determine the best size, start with a reflector that's twice the pot's diameter. Test its performance on a sunny day, monitoring cooking times and temperatures. If it's not reaching desired temperatures, gradually increase the reflector size. Conversely, if it's overheating, reduce the size slightly.
Remember that larger reflectors capture more sunlight, potentially cooking food faster. However, they're also bulkier and may be harder to position. For most home cooks, a reflector between 24 and 36 inches in diameter works well.
Consider your climate too. In areas with less intense sunlight, you might need a larger reflector to compensate. In tropical regions, a smaller reflector may suffice.
Experiment with different sizes to find the sweet spot for your specific needs and location.
Calculate Cooking Chamber Dimensions
When designing your sun cooker, you'll need to carefully consider the cooking chamber dimensions.
You should aim for a volume that allows ideal heating while considering how depth affects cooking time and width impacts heat distribution.
Volume for Optimal Heating
Calculating the ideal volume for your sun cooker's cooking chamber is essential for efficient heating. You'll want to strike a balance between having enough space for your food and maintaining peak heat concentration. Generally, aim for a volume between 1 to 2 cubic feet (28 to 56 liters) for a standard home-use sun cooker.
To determine the best volume, consider the types of meals you'll be preparing. For smaller dishes or individual portions, lean towards the lower end of the range. If you're planning to cook larger meals or use bigger pots, opt for a larger volume.
Remember that a smaller chamber heats up faster but limits your cooking capacity, while a larger one allows for more food but may take longer to reach desired temperatures.
You can fine-tune your cooker's volume by adjusting the height of the cooking chamber. A taller chamber increases volume without greatly affecting the base area exposed to sunlight.
If you find your current design isn't performing at its best, try experimenting with different heights to achieve the perfect balance between cooking capacity and heating efficiency.
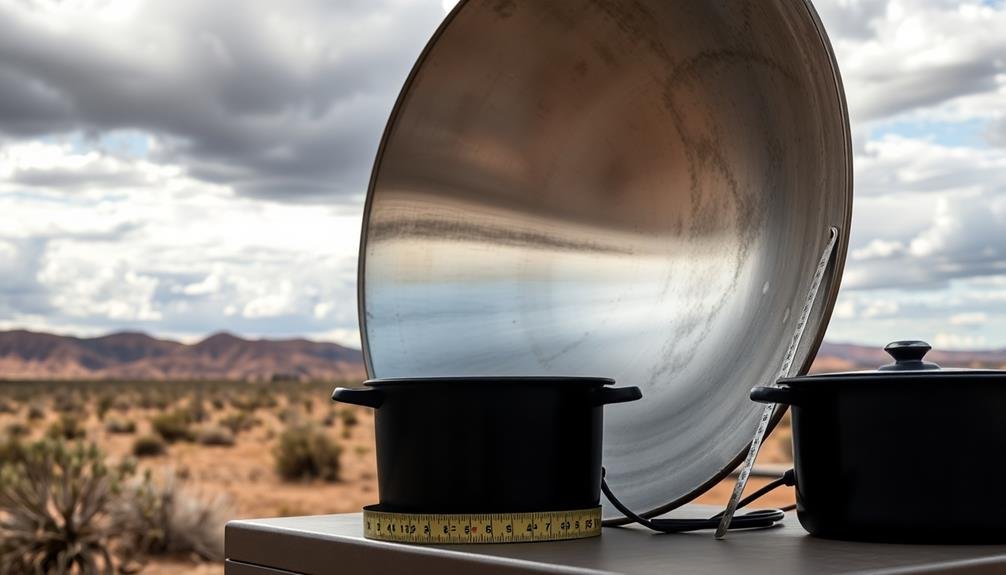
Depth Affects Cooking Time
Depth plays an essential role in determining your sun cooker's efficiency and cooking time. Shallower cooking chambers heat up faster but may not accommodate larger dishes. Deeper chambers allow for bigger pots but take longer to reach ideal temperatures.
To find the right balance, consider your typical meal sizes and cooking needs. A depth of 6-8 inches works well for most sun cookers, providing versatility for various dishes. Remember, deeper chambers require more insulation to maintain heat.
Here's a quick guide to help you choose the right depth:
| Depth (inches) | Cooking Time | Dish Size | Heat Retention | Insulation Needed |
|---|---|---|---|---|
| 4-5 | Fast | Small | Low | Minimal |
| 6-8 | Moderate | Medium | Good | Moderate |
| 9-10 | Slow | Large | Excellent | High |
| 11-12 | Very Slow | Extra Large | Superior | Maximum |
| 13+ | Longest | Oversized | Best | Extensive |
When deciding on depth, factor in your climate and available sunlight. In areas with less intense sunlight, opt for shallower depths to maximize heating efficiency. Experiment with different depths to find what works best for your specific needs and local conditions.
Width Impacts Heat Distribution
The width of your sun cooker's chamber plays an essential role in heat distribution and overall cooking efficiency. When designing your cooker, aim for a width that's about 1.5 to 2 times the depth. This ratio guarantees that sunlight reaches all areas of the cooking surface evenly, preventing hot spots or undercooking.
To calculate the ideal width, consider the size of your cooking pots and the types of food you'll be preparing. A wider chamber allows for larger pots or multiple dishes, but it may reduce the concentration of heat. If you're cooking smaller portions, a narrower chamber might be more efficient.
Keep in mind that the width also affects the cooker's portability and storage. You'll want to strike a balance between cooking capacity and practicality.
For most home sun cookers, a width of 18 to 24 inches (45 to 60 cm) works well. This range accommodates standard cookware while maintaining good heat distribution.
Consider Insulation Thickness
When building your sun cooker, insulation thickness plays a crucial role in its efficiency. You'll want to strike a balance between adequate insulation and overall size. Thicker insulation retains heat better, but it also increases the cooker's bulk and weight.
For most DIY sun cookers, aim for insulation between 1 to 2 inches thick. This range provides good heat retention without making your cooker too cumbersome. Consider using materials like fiberglass, rock wool, or even crumpled newspaper for insulation. These options are affordable and effective.
Remember that different parts of your cooker may require varying insulation thicknesses. The bottom and sides typically need more insulation than the top, as they're prone to heat loss. You might use 2 inches for the base and 1.5 inches for the sides.
Don't forget to factor in the insulation's R-value, which measures its thermal resistance. Higher R-values indicate better insulation properties. For sun cookers, aim for materials with R-values between 3 and 5 per inch. This guarantees peak heat retention without excessive bulk or cost.
Maximize Sun-Tracking Efficiency
To maximize your sun cooker's efficiency, start by positioning your reflector at the ideal angle to capture the most sunlight throughout the day.
You can further enhance performance by incorporating automated tracking systems that adjust the cooker's orientation as the sun moves across the sky.
For ultimate sun-tracking capability, consider implementing a multi-axis pivot design that allows your cooker to rotate both horizontally and vertically, ensuring maximum exposure to solar rays.
Optimal Reflector Angle Placement
Finding the ideal reflector angle is essential for maximizing your sun cooker's efficiency. The best angle depends on your location's latitude and the time of year. As a general rule, set your reflector at an angle equal to your latitude plus 10 degrees in winter, or minus 10 degrees in summer. This guarantees maximum sunlight capture throughout the day.
To fine-tune your reflector angle, observe the sun's path and adjust accordingly. You'll want to aim for a 90-degree angle between the reflector and the sun's rays at midday. This directs the most sunlight into your cooking chamber. Remember, the sun's position changes throughout the year, so you'll need to readjust periodically.
Consider these factors when positioning your reflector:
- Your specific latitude
- Season and time of year
- Local weather patterns
- Surrounding obstacles (trees, buildings)
For increased precision, use a sun angle calculator or smartphone app to determine the best angle for your location. Experiment with different angles and track your cooker's performance to find the sweet spot.
With practice, you'll develop an intuitive understanding of how to position your reflector for maximum efficiency in various conditions.
Automated Tracking Systems
While manual adjustments can yield good results, automated tracking systems take sun-tracking efficiency to the next level. These systems use sensors and motors to continuously adjust your sun cooker's position, guaranteeing peak sunlight exposure throughout the day.
To implement an automated tracking system, you'll need:
- Light sensors to detect the sun's position
- A microcontroller to process sensor data
- Servo motors to adjust the cooker's orientation
Here's a comparison of different tracking systems:
| System Type | Accuracy | Cost | Complexity |
|---|---|---|---|
| Single-axis | Moderate | Low | Simple |
| Dual-axis | High | High | Complex |
| Hybrid | Very High | Medium | Moderate |
Choose a system that fits your budget and technical skills. Single-axis trackers are great for beginners, while dual-axis systems offer the highest efficiency. Hybrid systems balance cost and performance.
When installing your automated tracker, verify it's properly calibrated and weatherproofed. Regular maintenance will keep it functioning effectively. With an automated system in place, you'll maximize your sun cooker's efficiency and enjoy consistent cooking results throughout the year.
Multi-Axis Pivot Design
Precision is key when it comes to multi-axis pivot designs for sun cookers. You'll want to create a system that allows your cooker to track the sun's movement across both horizontal and vertical planes. This dual-axis approach guarantees maximum exposure throughout the day, considerably boosting your cooker's efficiency.
When designing your multi-axis pivot, focus on creating smooth, adjustable movements. Use sturdy materials that can withstand outdoor conditions and support the weight of your cooker. Consider incorporating a counterbalance system to make manual adjustments easier.
To optimize your multi-axis pivot design:
- Use low-friction bearings or bushings at pivot points
- Implement a locking mechanism for each axis
- Guarantee proper weight distribution for stability
- Include calibration marks for precise adjustments
Balance Portability and Capacity

Striking the right balance between portability and capacity is vital when designing your homemade sun cooker.
You'll want a device that's easy to transport but still large enough to cook sufficient meals. Consider your typical usage scenarios: Will you be hiking with it or using it primarily in your backyard?
For backyard use, you can prioritize capacity. Aim for a cooking area of about 2-3 square feet, which can accommodate larger pots and multiple dishes.
If you're planning to take your cooker on trips, focus on a compact, lightweight design. A folding model with a cooking area of 1-1.5 square feet offers a good compromise.
Material choice plays a key role in balancing weight and durability. Aluminum is lightweight and reflects sunlight well, making it ideal for portable cookers.
For stationary models, you can use heavier materials like wood or sturdy plastics to increase stability and heat retention.
Don't forget about storage space for cooking utensils and containers. Incorporate small compartments or attachable pouches to keep everything organized without greatly increasing the cooker's overall size or weight.
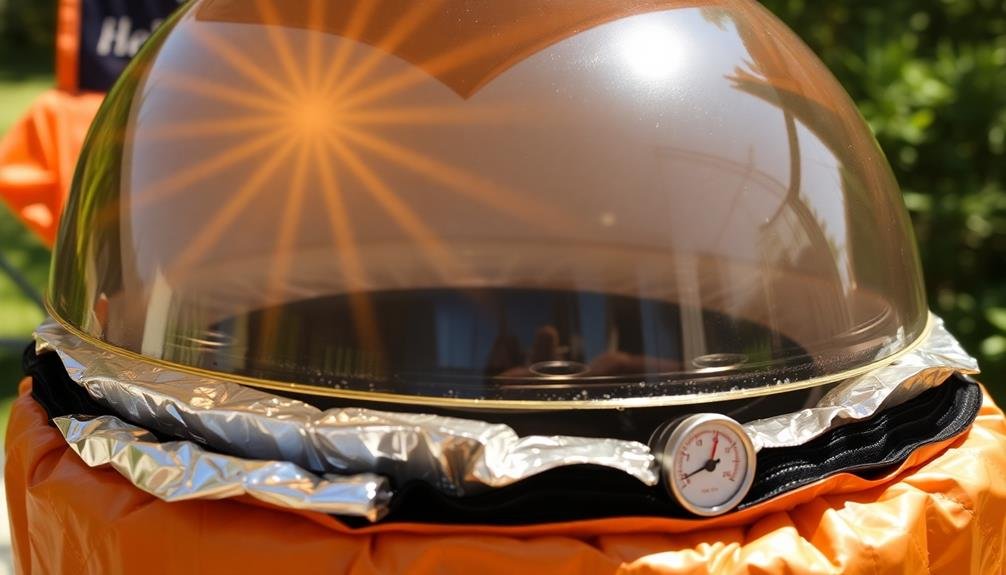
Optimize Glazing Surface Area
When designing your homemade sun cooker, you'll want to optimize the glazing surface area to maximize light capture.
Consider the trade-off between a larger glazing area, which can collect more sunlight, and the overall size of your cooker.
You can experiment with different shapes and angles to find the sweet spot that balances efficiency and practicality for your specific needs.
Maximize Light Capture
The light-capturing prowess of your homemade sun cooker hinges on its glazing surface area. To maximize light capture, you'll want to optimize this essential component. Start by ensuring your glazing material is clean and transparent, allowing maximum sunlight penetration.
Consider using double-glazing to reduce heat loss while maintaining optical clarity. Angle your glazing surface to face the sun directly during peak cooking hours. This often means tilting it slightly towards the equator, with the exact angle depending on your latitude.
You can also incorporate reflective surfaces around the glazing to redirect additional sunlight into your cooker. To further enhance light capture, focus on these key aspects:
- Use a large glazing area relative to your cooking chamber size
- Choose a shape that minimizes shading, like a shallow rectangle or trapezoid
- Avoid obstructions that could cast shadows on the glazing
- Implement a tracking system to follow the sun's movement throughout the day
Balance Size and Efficiency
Efficiency in sun cooker design often comes down to striking the right balance between size and performance.
You'll want to optimize your cooker's glazing surface area to capture maximum sunlight without making the device too unwieldy. Consider your cooking needs and available space when determining dimensions.
A larger glazing surface will collect more solar energy, potentially cooking food faster. However, it'll also make your cooker heavier and less portable. For most home users, a glazing area of 2-3 square feet offers a good compromise. This size can typically accommodate a 9×13 inch baking dish while remaining manageable.
To maximize efficiency, aim for a depth that's about one-third of your glazing width. This ratio helps focus sunlight effectively without creating excessive heat loss.
You can fine-tune your cooker's performance by adjusting the angle of the reflective panels. A 60-degree angle often works well, but you may need to experiment based on your latitude and the sun's position.
Adjust for Seasonal Sun Angles

Mastering seasonal sun angle adjustments is crucial for maximizing your homemade sun cooker's efficiency. The sun's position in the sky changes throughout the year, affecting how its rays hit your cooker. To adapt, you'll need to modify your cooker's angle and orientation regularly.
In summer, when the sun is higher, tilt your cooker at a steeper angle to capture more direct sunlight. During winter, when the sun is lower on the horizon, decrease the tilt for ideal exposure. Consider adding an adjustable stand or base to your cooker design, allowing for easy angle modifications.
To track the sun's seasonal changes and adjust accordingly:
- Use a sun angle calculator app or website
- Mark ideal cooker positions for each season
- Install a simple sundial near your cooking area
- Keep a log of ideal angles throughout the year
Don't forget to account for your specific latitude when making adjustments. Locations closer to the equator experience less dramatic seasonal changes, while those further north or south require more frequent modifications.
Account for Cooking Vessel Size
Selecting the right cooking vessel size is essential for your sun cooker's performance. You'll want to choose a pot or pan that fits comfortably within your cooker's dimensions while allowing for proper heat circulation. Aim for a vessel that's about 1-2 inches smaller than your cooker's interior on all sides.
Dark-colored, thin-walled pots work best as they absorb and transfer heat efficiently. Consider using cast iron, dark enamel, or anodized aluminum cookware. Avoid shiny or reflective surfaces that can bounce sunlight away from your food.
When designing your sun cooker, factor in the height of your tallest cooking vessel. Ascertain there's enough clearance between the pot and the reflector or glass cover. This space allows for proper heat buildup and circulation.
If you plan to use multiple cooking vessels simultaneously, design your cooker with compartments or shelves. This setup maximizes cooking capacity and allows for different dishes to be prepared at once.
Remember to adjust cooking times accordingly, as smaller portions will heat faster than larger ones.
Enhance Heat Retention Design
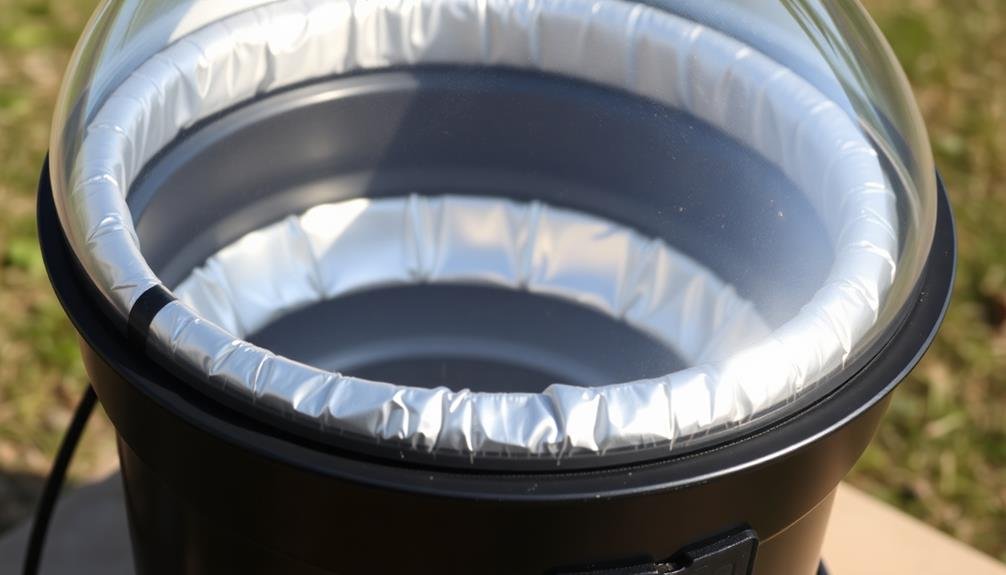
With your cooking vessels ideally sized, let's focus on maximizing your sun cooker's heat retention. The key is to create a well-insulated environment that traps and maintains heat efficiently.
Start by selecting materials with low thermal conductivity for the cooker's body. Reflective surfaces inside the cooker will help bounce heat back to the cooking area, increasing overall efficiency.
Consider adding a double-layered transparent lid to create an insulating air pocket. This design reduces heat loss through the top of the cooker. You'll also want to guarantee a tight seal between the lid and the cooker body to prevent heat from escaping.
To further enhance heat retention, incorporate these elements into your design:
- Use dark-colored, heat-absorbing materials for the cooking chamber's interior
- Add insulation around the sides and bottom of the cooker
- Install adjustable reflectors to direct more sunlight into the cooking area
- Include a heat-resistant gasket around the lid's edge for a better seal
Incorporate Proper Ventilation Measures
Safety is paramount when designing your homemade sun cooker, and proper ventilation plays an essential role. You'll need to guarantee that excess heat and steam can escape, preventing pressure buildup and potential accidents. Incorporate small vents or adjustable openings in your cooker's design to allow for controlled airflow.
When planning ventilation, consider these key factors:
| Vent Location | Size | Purpose |
|---|---|---|
| Top | 1-2 cm wide | Release steam and hot air |
| Sides | 0.5-1 cm wide | Promote air circulation |
| Bottom | 1 cm wide | Allow cool air intake |
Place vents strategically to maximize efficiency without compromising heat retention. Top vents should be positioned away from the food to prevent contamination. Side vents can be adjustable, allowing you to control airflow based on cooking needs. Bottom vents should be small enough to prevent excessive heat loss but large enough to maintain proper air circulation.
Frequently Asked Questions
What Materials Are Best for Constructing a Homemade Sun Cooker?
You'll want to use reflective materials like aluminum foil or mylar for the interior. For the frame, opt for lightweight, insulating materials such as cardboard, wood, or foam board. Don't forget a clear plastic or glass lid.
How Do I Prevent Food From Burning in a Sun Cooker?
You can prevent food from burning in a sun cooker by monitoring cooking times closely, using a thermometer, stirring frequently, and adjusting the cooker's angle. Don't leave food unattended, and consider using a lower heat setting if possible.
Can I Use a Sun Cooker in Cloudy or Partially Overcast Conditions?
You can use a sun cooker in cloudy or partially overcast conditions, but it'll be less effective. You'll need longer cooking times and may not reach high temperatures. It's best to wait for clearer skies for ideal results.
What Safety Precautions Should I Take When Using a Homemade Sun Cooker?
You'll need to take safety seriously when using a homemade sun cooker. Always wear protective eyewear and gloves, keep children away, and use oven mitts when handling hot cookware. Don't leave the cooker unattended while in use.
How Long Does It Typically Take to Cook Meals in a Sun Cooker?
You'll find that cooking times vary in a sun cooker. Generally, it takes 2-4 hours for most meals. Factors like sunlight intensity, food type, and cooker design affect duration. You'll need patience, but the results are worth it!
In Summary
You've now got the key dimensions for your homemade sun cooker. Remember, it's all about balance – size, efficiency, and practicality. Don't be afraid to experiment and adjust as you go. Your perfect sun cooker might take a few tries to get right, but with these tips, you're well on your way. Keep refining, and soon you'll be cooking up solar-powered feasts that'll impress everyone. Happy sun cooking!
Leave a Reply