To build your own solar panel frame, you’ll need basic tools like a saw, drill, and measuring tape, along with pressure-treated lumber and fasteners. Start by accurately measuring your panels and sketching a design. Cut the frame components, then assemble the structure using wood glue and screws. Reinforce corners with brackets and add support pieces for stability. Install weather sealing and mounting brackets before securing the panels. Don’t forget to properly ground the frame and test the system’s efficiency. With careful planning and execution, you can create a custom frame that perfectly fits your solar setup. The following guide will equip you with detailed steps for success.
Required Tools and Materials

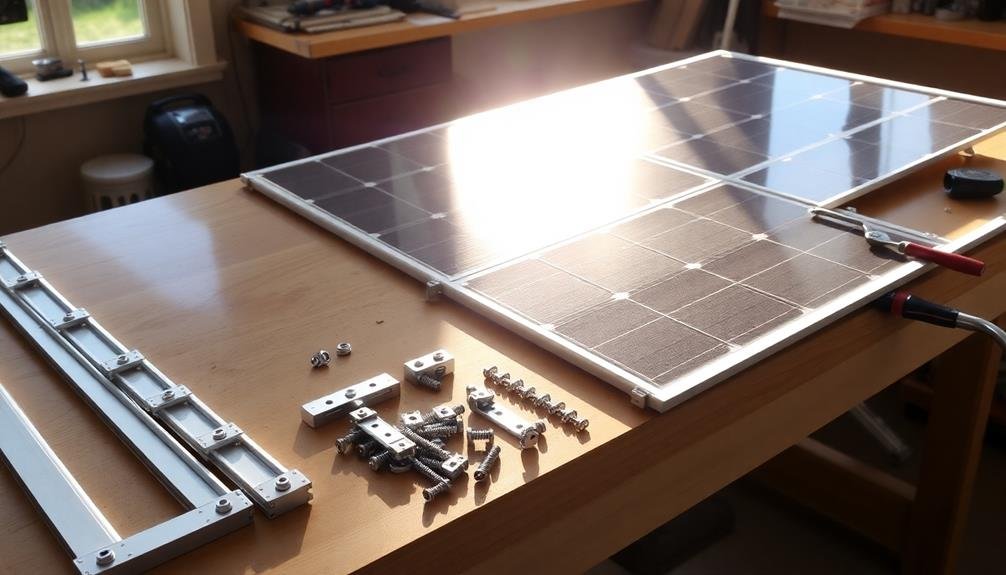
Before you begin building your solar panel frame, gather all the necessary tools and materials.
You’ll need a circular saw or miter saw, drill with various bits, screwdriver, measuring tape, pencil, and safety equipment like goggles and gloves.
For materials, procure pressure-treated lumber for the frame’s main structure. Choose 2x4s for the outer frame and cross supports, and 1x4s for the backing.
You’ll also need galvanized screws, wood glue, and weatherproof sealant.
Don’t forget to obtain corner brackets, L-brackets, and flat brackets for reinforcing the frame’s joints.
You’ll need mounting brackets specifically designed for solar panels, which will secure the panels to the frame.
Purchase UV-resistant zip ties to manage cables and wires.
For the frame’s finish, get exterior-grade paint or wood stain to protect it from the elements.
If you plan to mount the frame on a roof, acquire roof flashing and appropriate fasteners to guarantee a watertight seal.
Finally, invest in a level to verify your frame is perfectly aligned during construction and installation.
With these tools and materials at hand, you’re ready to start building your solar panel frame.
Measuring and Planning

Before you start building, you’ll need to accurately measure your solar panels to determine the frame dimensions.
Calculate the exact length, width, and depth required to securely house your panels.
Sketch a detailed design of your frame, including measurements and any additional features like mounting brackets or weatherproofing elements.
Calculating Panel Dimensions
When commencing your solar panel frame project, accurately calculating panel dimensions is vital for a successful build. Start by measuring the length and width of your solar panels, including any mounting hardware or connectors that protrude from the edges. Add a small buffer (typically 1/4 inch) to each dimension to guarantee a proper fit.
Next, determine the depth of your frame based on the thickness of your solar panels and any additional components you’ll be incorporating, such as backing boards or wiring channels. Consider the angle at which you’ll mount the panels and factor this into your depth calculations.
Calculate the total surface area of your solar array by multiplying the length and width of all panels combined. This information will help you determine the amount of framing material needed and assist in planning the overall layout of your installation.
Don’t forget to account for any gaps between panels or sections in your frame design. These spaces can be vital for airflow, wiring, and maintenance access.
Sketching Frame Design
With your panel dimensions in hand, it’s time to sketch out your frame design. Begin by drawing a simple rectangular outline on graph paper, using your calculated measurements. Add 1-2 inches to each side for the frame’s border. Next, sketch in the cross-supports and any additional reinforcement you’ll need based on your panel’s size and weight.
Consider the following factors when designing your frame:
| Material | Pros | Cons |
|---|---|---|
| Aluminum | Lightweight, rust-resistant | More expensive |
| Wood | Affordable, easy to work with | Requires weatherproofing |
| Steel | Durable, strong | Heavy, prone to rust |
| PVC | Lightweight, inexpensive | Less durable |
| Composite | Weather-resistant, strong | Expensive, harder to work with |
Once you’ve settled on a material, adjust your sketch to accommodate its specific properties. Don’t forget to include mounting points for attaching the frame to your roof or ground installation. Indicate where you’ll place weather stripping or sealant to protect your panels from the elements. Finally, make notes on your sketch about any special tools or hardware you’ll need for assembly. This detailed plan will serve as your blueprint when you begin constructing your frame.
Cutting the Frame Components

After gathering your materials, it’s time to cut the frame components. Begin by measuring and marking your lumber according to the dimensions in your frame design. Use a straight edge and pencil to guarantee accurate markings.
For precision cuts, a miter saw is ideal, but you can also use a circular saw or handsaw if that’s what you have available. When cutting, always wear safety glasses and work gloves. If you’re using power tools, confirm you’re in a well-ventilated area.
Make your cuts slowly and steadily to avoid splintering the wood. For angled cuts, adjust your saw to the correct degree as specified in your design. After cutting, sand the edges of each piece to remove any roughness or splinters. This will make assembly easier and prevent injury during handling.
Double-check all measurements to verify they match your design specifications. If any pieces are slightly off, make adjustments now before moving on to assembly. Organize your cut components by labeling them according to their position in the frame. This will streamline the assembly process and help you avoid confusion later on.
Assembling the Frame Structure

Now that you’ve cut your frame components, it’s time to assemble the structure.
You’ll need to carefully measure and cut any additional materials needed for joining the frame pieces together.
Next, you’ll join the frame components, ensuring they’re properly aligned and secured at the corners and edges.
Measure and Cut Materials
Precision is key when measuring and cutting materials for your solar panel frame. Begin by double-checking your frame dimensions and making any necessary adjustments. Use a tape measure to mark the exact lengths needed for each piece of aluminum or wood, depending on your chosen material. It’s essential to measure twice and cut once to avoid wasting materials.
For cutting, use the appropriate tools based on your frame material. If you’re working with aluminum, a hacksaw or circular saw with a metal-cutting blade will work best. For wood, a standard circular saw or miter saw is ideal. Always wear safety goggles and gloves when cutting.
When cutting, follow your marked lines carefully. If you’re using a power saw, clamp the material securely to prevent slipping. For precise cuts, consider using a guide or straight edge. After cutting, sand any rough edges to guarantee a smooth finish and prevent injury during assembly.
Remember to account for any joints or connections in your measurements. If you’re planning to use corner brackets or connectors, factor in their dimensions when cutting your frame pieces. This attention to detail will assure a perfect fit when you assemble your solar panel frame.
Join Frame Components
With all components cut to size, it’s time to assemble your solar panel frame. Begin by laying out the frame pieces on a flat surface, ensuring they’re arranged correctly. Apply wood glue to the joints where the pieces will connect, then use clamps to hold them in place while the glue sets.
Next, reinforce the joints with screws or nails for added stability. Pre-drill holes to prevent splitting, then drive the fasteners in securely. Don’t overtighten, as this can damage the wood.
Here’s a quick guide to joining different frame components:
| Component | Joining Method |
|---|---|
| Corner joints | Miter or butt joint |
| Side rails | Dado or rabbet joint |
| Cross braces | Mortise and tenon joint |
| Back support | Pocket hole screws |
Once the main frame is assembled, attach any additional support pieces or braces. These will help distribute the weight of the solar panel evenly across the frame.
Secure Corners and Edges
Properly securing the corners and edges of your solar panel frame is essential for its overall stability and longevity. After joining the frame components, you’ll need to reinforce these critical areas to guarantee your frame can withstand environmental stresses and support the weight of the solar panels.
Start by applying a strong adhesive to the inner corners of the frame, filling any gaps between the joined pieces. Once the adhesive has set, use metal corner brackets to further strengthen these joints. Attach the brackets using appropriate screws, making sure they’re tightened securely.
For the edges, you’ll want to add additional support to prevent bowing or warping. Here’s what you need to do:
- Cut aluminum strips to fit the length of each frame edge.
- Pre-drill holes in the strips for attaching to the frame.
- Apply a thin layer of silicone sealant along the edge before placing the strip.
- Secure the strips with small screws at regular intervals.
Attaching Support Brackets
Several support brackets are essential for ensuring your solar panel frame’s stability and longevity. You’ll need to attach these brackets strategically to distribute the weight and prevent warping or sagging over time.
Begin by measuring and marking the positions for your support brackets along the frame’s interior. Typically, you’ll want to place them every 2-3 feet, depending on the frame’s size.
Next, pre-drill holes for the bracket screws to avoid splitting the wood. Use corrosion-resistant screws that are appropriate for your frame material. When attaching the brackets, make sure they’re flush against both the frame and the back of the solar panel.
Tighten the screws securely, but be careful not to overtighten, as this can damage the frame or panel.
For added stability, consider using diagonal support brackets at the corners. These will help reinforce the frame’s structure and provide additional resistance against wind and other environmental factors.
Don’t forget to double-check that all brackets are level and properly aligned before moving on to the next step in your solar panel frame construction.
Installing Weather Sealing
Weather sealing is a crucial step in protecting your solar panel frame from the elements. It prevents moisture, dust, and debris from entering the frame and damaging the solar cells. To install weather sealing effectively, you’ll need to choose the right materials and apply them carefully around the edges of your frame.
Start by cleaning the frame thoroughly, making certain all surfaces are free from dirt and grease. Then, measure the perimeter of your frame and cut the weather stripping to size. Apply the sealing material evenly along the edges, pressing firmly to guarantee proper adhesion. Pay special attention to corners and joints, as these areas are particularly vulnerable to water infiltration.
Here’s a quick guide to installing weather sealing:
- Choose a high-quality, UV-resistant weatherstripping material
- Clean and dry the frame surfaces thoroughly
- Cut the weatherstripping to fit, allowing extra length for corners
- Apply the sealing material, working from one corner to the next
Remember to test the seal by gently pressing along the edges to check for any gaps or loose areas. If you find any, reapply the weatherstripping in those spots.
With proper weather sealing, your solar panel frame will be better equipped to withstand the elements and protect your investment for years to come.
Mounting Solar Panels

With your frame securely sealed, it’s time to attach your solar panels.
Begin by carefully placing each panel onto the frame, ensuring they’re centered and aligned properly. Use rubber washers or spacers between the panel and frame to prevent damage and allow for thermal expansion.
Next, secure the panels using stainless steel bolts, washers, and nuts. Tighten them enough to hold the panels firmly but avoid over-tightening, which could crack the glass.
If your frame has pre-drilled holes, use these for mounting. Otherwise, drill holes according to the panel manufacturer’s specifications.
Connect the panels electrically using MC4 connectors or junction boxes. Follow the wiring diagram provided with your panels, ensuring proper series or parallel connections.
Use UV-resistant solar cable to connect the panels to your charge controller or inverter.
Wiring and Connections
Once you’ve mounted your solar panels, it’s time to tackle the wiring and connections. This vital step guarantees your system functions efficiently and safely.
Start by planning your wiring layout, considering the shortest path between panels and your charge controller or inverter. Use UV-resistant, outdoor-rated solar cables to connect your panels in series or parallel, depending on your system’s voltage requirements.
When making connections, use MC4 connectors for a secure, weatherproof fit. Verify all connections are tight and properly sealed to prevent moisture ingress. Install a junction box to house your connections and provide protection from the elements.
Don’t forget to include a proper grounding system to safeguard against electrical faults and lightning strikes.
Here’s a quick checklist for wiring your solar panel frame:
- Plan your wiring layout
- Choose appropriate cables and connectors
- Connect panels in series or parallel
- Install a junction box and grounding system
Remember to follow local electrical codes and regulations when wiring your solar panel system. If you’re unsure about any aspect of the wiring process, consult a professional electrician to confirm your setup is safe and compliant.
Proper wiring and connections are essential for maximizing your solar panel frame’s performance and longevity.
Grounding the Frame
After securing your wiring and connections, grounding your solar panel frame is the next vital step. Proper grounding protects your system from electrical surges and guarantees safety. You’ll need a grounding rod, grounding wire, and clamps to complete this task.
Start by driving the grounding rod at least 8 feet into the ground near your solar panel frame. Connect the grounding wire to the rod using a grounding clamp. Run the wire to your solar panel frame, confirming it’s taut and secure. Attach the wire to the frame using another grounding clamp.
Here’s a quick reference guide for grounding materials based on system size:
| System Size | Grounding Rod | Wire Gauge | Clamp Type |
|---|---|---|---|
| < 1 kW | 6 ft copper | 10 AWG | Acorn |
| 1-5 kW | 8 ft copper | 8 AWG | Split-bolt |
| 5-10 kW | 10 ft copper | 6 AWG | C-clamp |
| 10-20 kW | 10 ft copper | 4 AWG | Lug |
| > 20 kW | 10 ft copper | 2 AWG | Exothermic |
Check local codes for specific requirements, as they may vary. Once you’ve completed the grounding, test it with a multimeter to verify proper connectivity. This step is essential for the safety and longevity of your solar panel system.
Finishing Touches

The final steps in building your solar panel frame involve adding those essential finishing touches. These final details will guarantee your frame isn’t only functional but also durable and aesthetically pleasing.
You’ll want to focus on weatherproofing, securing any loose components, and adding any necessary labels or identifiers.
Start by applying a weatherproof sealant to all joints and connections. This will protect your frame from moisture and extend its lifespan.
Next, double-check all bolts and screws, tightening them if needed. Don’t forget to add rubber washers to prevent water infiltration.
Here’s a quick checklist of finishing touches:
- Apply anti-corrosion paint to metal components
- Install rubber grommets where wires exit the frame
- Attach warning labels and system information stickers
- Add UV-resistant covers for any exposed wiring
Testing and Adjustments

After completing your solar panel frame, it’s essential to test its efficiency and make necessary adjustments.
You’ll want to check the power output of your panels using a multimeter to guarantee they’re performing at their best.
If needed, fine-tune the angle of your panels to maximize sunlight exposure throughout the day, considering your specific geographical location and seasonal variations.
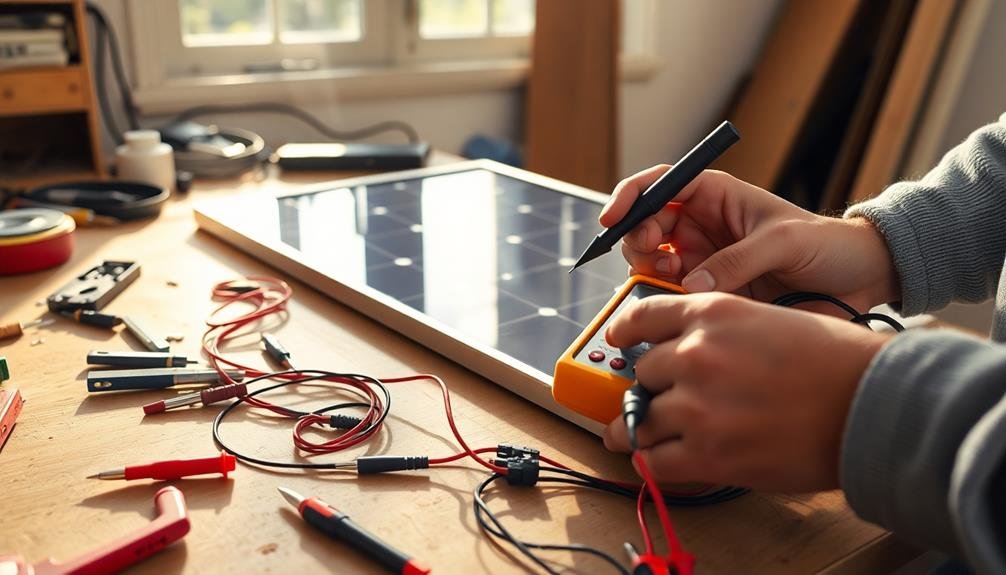
Checking for Efficiency
Once you’ve assembled your solar panel frame, it’s crucial to test its efficiency and make necessary adjustments. Start by measuring the voltage and current output of your panel using a multimeter. Compare these readings to the manufacturer’s specifications to verify your panel is performing as expected. If the output is lower than anticipated, check for any loose connections or shading issues that might be affecting performance.
Next, evaluate the angle and orientation of your solar panel frame. Use a solar angle finder or smartphone app to determine the ideal tilt for your location and season. Adjust the frame accordingly to maximize sun exposure throughout the day.
To further assess and improve your solar panel’s efficiency:
- Monitor energy production over time using a solar charge controller or inverter with data logging capabilities.
- Clean the panel surface regularly to remove dust, debris, and bird droppings that can reduce efficiency.
- Inspect the frame for any signs of corrosion or damage that might impact performance.
- Consider adding a solar tracker to your frame for increased energy production, especially in areas with limited sunlight.
Fine-tuning Panel Angle
Fine-tuning your solar panel’s angle is a key step in maximizing its energy production. To achieve ideal performance, you’ll need to adjust the tilt based on your location’s latitude and the current season.
Start by setting the panel at an angle equal to your latitude for a year-round average. For summer, decrease the angle by 15 degrees, and for winter, increase it by 15 degrees.
Use a digital angle finder or smartphone app to measure the panel’s tilt accurately. Make small adjustments and monitor the output over several days using a multimeter or solar charge controller.
Keep a log of the angle and corresponding energy production to identify the most effective position. Consider seasonal adjustments every three months to account for the sun’s changing path.
If you’re in the Northern Hemisphere, face the panels south; if you’re in the Southern Hemisphere, face them north. For areas with heavy snow, a steeper angle helps shed accumulation.
Don’t forget to clean the panels regularly and trim any nearby vegetation that might cast shadows. By fine-tuning the angle and maintaining your setup, you’ll guarantee your DIY solar panel frame performs at its best year-round.
Maintenance Tips

Your solar panel frame’s longevity depends on regular maintenance. By following a few simple steps, you’ll guarantee your DIY frame continues to support your solar panels effectively for years to come.
Regularly inspect your frame for signs of wear, rust, or damage, especially after severe weather events. Clean the frame periodically to remove dirt, debris, and any corrosive substances that might accumulate over time.
Pay special attention to the frame’s connection points and fasteners, tightening them as needed to maintain structural integrity. If you’ve used wood in your frame construction, apply a weather-resistant sealant annually to protect against moisture and UV damage.
For metal frames, touch up any scratches or chips in the paint to prevent rust formation.
To help you stay on top of your maintenance routine, follow these key steps:
- Conduct monthly visual inspections
- Clean the frame quarterly with mild soap and water
- Check and tighten fasteners every six months
- Apply protective coatings or sealants annually
Troubleshooting Common Issues
While building your own solar panel frame can be rewarding, you may encounter some challenges along the way. One common issue is misalignment of frame components. If you notice gaps or uneven edges, disassemble the frame and double-check your measurements before reassembling.
Another problem is inadequate weatherproofing. Confirm you’ve applied sealant to all joints and used weather-resistant materials to prevent water infiltration.
You might also face difficulties with mounting the solar panels securely. If the panels are loose, reinforce the mounting brackets or add additional support points. Warping can occur if you’ve used untreated wood; consider replacing affected parts with treated lumber or metal alternatives.
If you’re experiencing reduced energy output, check for shading issues caused by the frame design or nearby obstacles.
Stability problems may arise in areas with high winds. Strengthen the frame’s foundation and add bracing if necessary.
Frequently Asked Questions
Can I Use Recycled Materials to Build a Solar Panel Frame?
Yes, you can use recycled materials to build a solar panel frame. It’s an eco-friendly and cost-effective option. You’ll find many suitable materials like wood pallets, metal scraps, or old window frames. Just make certain they’re sturdy and weather-resistant.
How Do I Calculate the Optimal Tilt Angle for My Location?
You’ll need to determine your latitude first. Then, use this simple formula: ideal tilt angle = latitude × 0.76 + 3.1°. You can also find online calculators that’ll do the math for you based on your location.
Are There Specific Building Codes for Solar Panel Frame Installations?
You’ll need to check your local building codes for solar panel frame installations. They vary by location but often cover aspects like wind resistance, roof load capacity, and electrical connections. Don’t skip this step—it’s essential for safety and compliance.
What’s the Average Lifespan of a DIY Solar Panel Frame?
Your DIY solar panel frame’s lifespan can vary, but you’ll typically get 20-30 years if you’ve built it well. It’s essential that you’ve used durable materials and followed proper installation techniques to maximize its longevity.
Can I Add More Panels to My Existing Frame in the Future?
You can add more panels to your existing frame, but it’s not always straightforward. You’ll need to take into account your frame’s capacity, structural integrity, and available space. It’s often easier to build a new frame for additional panels.
In Summary
You’ve now completed your DIY solar panel frame! By following these steps, you’ve created a sturdy, custom-fit structure for your solar panels. Remember to regularly inspect and maintain your frame to guarantee its longevity. If you encounter any issues, refer to the troubleshooting section. With your new frame in place, you’re one step closer to harnessing clean, renewable energy. Enjoy the benefits of your hard work and eco-friendly investment!


Leave a Reply