
To install solar panels yourself, start by evaluating your energy needs and choosing the right system. Gather necessary tools and equipment, then prepare your roof for installation. Mount the solar panel racking system securely, ensuring proper alignment and leveling. Install the panels on the rails, connecting them carefully. Finally, set up the inverter and complete the electrical connections. Throughout the process, prioritize safety and comply with local regulations. While DIY installation can save money, it requires careful planning and execution. If you're ready to harness the sun's power, there's much more to explore about this rewarding project.
Assess Your Solar Energy Needs
Before diving into the installation process, it's crucial to accurately assess your solar energy needs. Start by reviewing your electricity bills from the past year to determine your average monthly consumption. This will help you calculate the size of the solar panel system required to meet your energy demands.
Next, evaluate your roof's suitability for solar panels. Consider factors like its orientation, angle, and available space. South-facing roofs typically receive the most sunlight in the Northern Hemisphere, while north-facing roofs are ideal in the Southern Hemisphere. Confirm your roof is in good condition and can support the additional weight of solar panels.
Assess your local climate and sunlight patterns. Areas with more sunny days will generate more solar energy, while cloudy or shaded locations may require larger systems to compensate.
Use online solar calculators or consult with local solar professionals to estimate your potential energy production.
Choose Appropriate Solar Panel System
Now that you've assessed your energy needs, it's time to select the right solar panel system for your home. You'll need to choose between grid-tied, off-grid, or hybrid systems based on your energy goals and local regulations. Consider factors like panel efficiency, power output, and durability when selecting your panels.
Next, determine the number of panels required to meet your energy needs. Factor in your roof's size, orientation, and shading to maximize energy production. Don't forget to account for future energy needs and potential expansions.
Here's a comparison of common solar panel types:
| Type | Efficiency | Cost | Lifespan |
|---|---|---|---|
| Monocrystalline | 15-22% | High | 25-30 years |
| Polycrystalline | 13-17% | Medium | 23-27 years |
| Thin-film | 10-13% | Low | 10-20 years |
| Bifacial | 17-22% | High | 30+ years |
| PERC | 17-20% | Medium-High | 25-30 years |
Choose an inverter that's compatible with your panel system and meets your energy needs. Options include string inverters, microinverters, and power optimizers. Don't forget to select appropriate mounting hardware and safety equipment for your DIY installation.
Gather Necessary Tools and Equipment
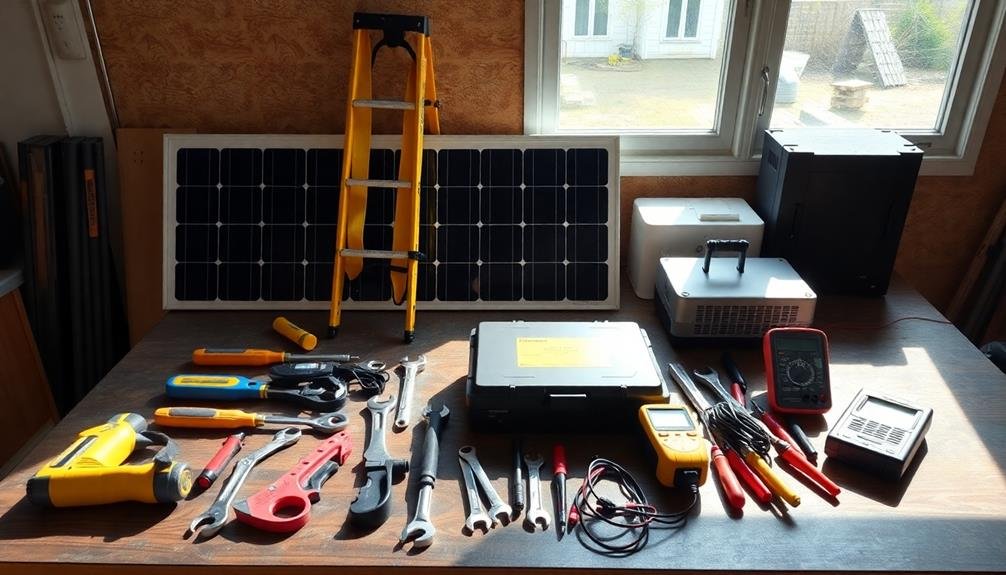
Once you've selected your solar panel system, it's vital to gather all the necessary tools and equipment for a successful DIY installation.
You'll need basic hand tools like screwdrivers, wrenches, pliers, and a drill with various bits. A multimeter is fundamental for testing electrical connections and voltage. Don't forget safety equipment, including gloves, safety glasses, and a hard hat.
For roof installations, you'll require a sturdy ladder, roof brackets, and fall protection gear. Specific solar panel mounting hardware, such as rails, clamps, and bolts, is required to secure the panels.
You'll also need electrical components like MC4 connectors, solar cables, and a junction box. If you're installing a grid-tied system, you'll need an inverter to convert DC power to AC. For off-grid systems, include batteries and a charge controller.
Depending on your location, you may need grounding equipment and conduit for cable protection. Lastly, verify you have sealants, such as silicone caulk, to weatherproof any roof penetrations.
Having all these tools and equipment ready before starting will streamline your installation process and help avoid unnecessary delays.
Prepare Roof for Installation
With safety gear in place, preparing your roof for solar panel installation is an essential step.
Begin by thoroughly inspecting your roof's condition. Look for any damaged or worn shingles, loose nails, or areas that need repair. Address these issues before proceeding to guarantee a stable foundation for your solar panels.
Next, clean the roof surface where you'll install the panels. Remove debris, leaves, and dirt using a broom or leaf blower. This will provide a clean workspace and help identify any potential obstacles.
Locate and mark the roof rafters using a stud finder. You'll need to attach mounting brackets to these sturdy points for secure panel installation. Measure and mark the exact locations where you'll place the panels, guaranteeing they're aligned properly and have sufficient space between them.
If your roof has a steep pitch, consider installing temporary safety anchors or scaffolding for added security during the installation process.
Finally, apply a weather-resistant sealant around any existing roof penetrations, such as vents or chimneys, to prevent water infiltration once the panels are in place.
With these preparations complete, you're ready to begin installing the mounting hardware for your solar panels.
Mount Solar Panel Racking System

To mount your solar panel racking system, you'll first need to choose the ideal location on your roof.
Once you've determined the best spot, securely fasten the racking to your roof using appropriate hardware and sealants to prevent leaks.
Choose Mounting Location
When selecting a mounting location for your solar panel racking system, you'll need to analyze several essential factors. Start by evaluating your roof's condition, age, and structural integrity. Verify it can support the additional weight of the solar panels and racking system.
Consider the roof's orientation and angle, as south-facing roofs with a 30-45 degree tilt typically receive the most sunlight in the Northern Hemisphere.
Examine your property for potential shading issues from trees, buildings, or other obstructions. Maximize sun exposure by choosing a location with minimal shading throughout the day. If your roof isn't suitable, consider ground-mounted systems or alternative structures like carports or pergolas.
When finalizing your mounting location, keep these key points in mind:
- Accessibility for installation and maintenance
- Proximity to your main electrical panel
- Local building codes and zoning regulations
- Aesthetic impact on your property
Once you've chosen the ideal mounting location, measure the available space and plan the layout of your solar panels. This will help you determine the number of panels you can install and optimize their placement for maximum energy production.
Remember to leave enough space for walkways and safety equipment as required by local regulations.
Secure Racking to Roof
Once you've chosen the ideal mounting location, it's time to secure the solar panel racking system to your roof.
Begin by marking the exact spots where you'll attach the mounting brackets. Use a stud finder to locate roof rafters, verifying you're anchoring into solid structural support.
Next, drill pilot holes through your roof's shingles and into the rafters. Apply a weatherproof sealant around each hole to prevent water infiltration. Secure the mounting brackets using lag bolts, making sure they're tight but not over-tightened to avoid damaging the roof.
Install flashing around each mount to further protect against leaks. Then, attach the racking rails to the mounting brackets. Verify the rails are level and properly aligned using a spirit level. Tighten all connections securely.
For flat roofs, you'll use a different system with weighted ballasts or adhesive mounts. Follow manufacturer guidelines for your specific roof type and racking system.
Throughout this process, prioritize safety. Use proper fall protection equipment and work with a partner if possible. Double-check all connections and verify the racking system is firmly attached before proceeding to install the solar panels.
Align and Level Rails
In line with the previous steps, aligning and leveling the rails is essential for ideal solar panel performance. You'll need to guarantee the rails are perfectly straight and level to maximize sunlight absorption and prevent water pooling.
Start by measuring the distance between each rail, adjusting them to match your panel specifications. Use a chalk line to mark straight lines across your roof, guiding your rail placement.
Next, use a level to check each rail's horizontal alignment. Adjust the mounting brackets as needed to achieve a perfectly level surface. Don't rush this process; even slight misalignments can affect your system's efficiency.
Once you're satisfied with the alignment, tighten all bolts and fasteners securely.
Before moving on, double-check your work. Ensure:
- All rails are parallel to each other
- The distance between rails matches your panel specifications
- Each rail is level across its entire length
- All mounting hardware is tight and secure
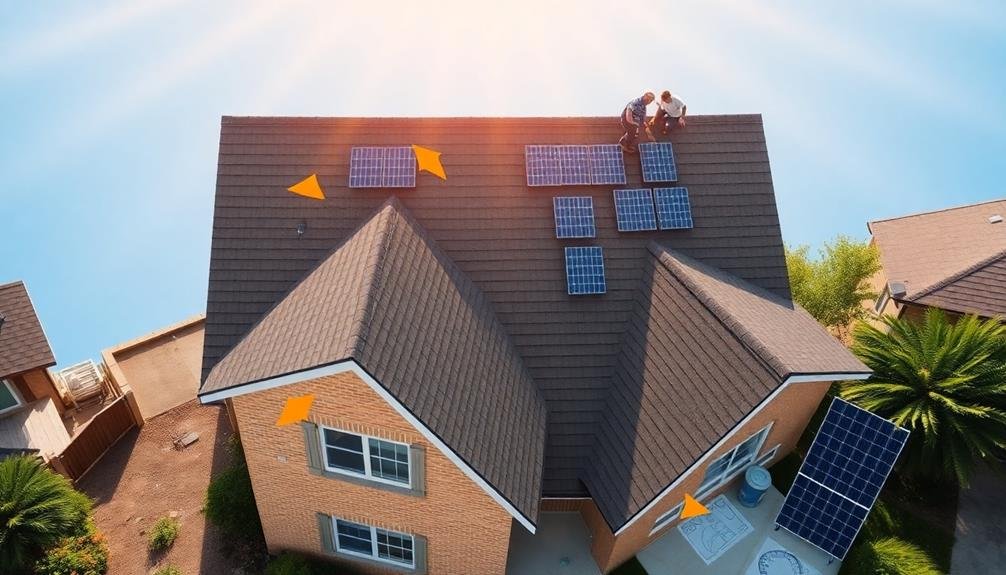
Install and Connect Solar Panels
The moment you've been waiting for has arrived – it's time to install and connect your solar panels.
Begin by carefully lifting each panel onto the rails, starting from one end. Secure them using the manufacturer-provided clamps, confirming they're tight but not over-tightened. Leave a small gap between panels for thermal expansion.
Next, connect the panels electrically. Each panel has a junction box with positive and negative leads. Connect these in series or parallel, depending on your system design. Use MC4 connectors to join the cables, making sure they click securely. Always connect positive to negative between panels.
Once all panels are connected, run the main cables from the array to your inverter location. Use UV-resistant, outdoor-rated wiring, and secure it properly to prevent damage.
Install a disconnect switch between the panels and inverter for safety.
Before connecting to the inverter, test the voltage output of your array using a multimeter. Verify it matches your calculations and inverter specifications.
If everything checks out, you're ready to connect to the inverter and complete your solar installation.
Set Up Inverter and Electrical

With your solar panels in place, it's time to focus on setting up the inverter and electrical components. The inverter is essential as it converts the DC power generated by your panels into usable AC power for your home. Choose a cool, dry location for your inverter, preferably near your main electrical panel.
Mount the inverter securely to the wall, guaranteeing proper ventilation. Next, connect the DC cables from your solar panels to the inverter's input terminals. Then, run AC cables from the inverter's output to your main electrical panel. Install a dedicated circuit breaker for your solar system in the panel.
Before connecting to the grid, you'll need to:
- Install a production meter to track your system's output
- Set up a disconnect switch for safety
- Implement grounding measures to protect against electrical surges
- Obtain necessary permits and inspections from local authorities
Once everything's connected, don't power on the system yet. Have a licensed electrician perform a final check to verify all connections are correct and safe.
They'll also help you with the final grid connection and system activation. Remember, working with high-voltage electricity can be dangerous, so prioritize safety throughout this process.
Frequently Asked Questions
How Long Does a DIY Solar Panel Installation Typically Take?
You'll typically spend 2-5 days installing DIY solar panels, depending on your experience and system size. It's not a quick weekend project. You'll need to plan carefully, gather materials, and allow time for inspections and paperwork.
Can I Install Solar Panels on a Flat Roof?
Yes, you can install solar panels on a flat roof. You'll need to use special mounting systems and guarantee proper drainage. It's essential to take into account the roof's load-bearing capacity and local building codes before proceeding with the installation.
What Permits Are Required for a DIY Solar Panel Installation?
You'll typically need electrical and building permits for a DIY solar installation. Check with your local government for specific requirements. Don't forget to contact your utility company, as they may require additional paperwork or inspections.
How Do I Maintain and Clean My Solar Panels After Installation?
To maintain your solar panels, you'll need to clean them regularly. Use water and a soft brush to remove dirt and debris. Check for damage, trim nearby trees, and monitor your system's performance. Don't forget to schedule professional inspections annually.
Are There Any Tax Incentives for Installing Solar Panels Myself?
You'll likely qualify for federal tax credits when installing solar panels yourself. State and local incentives may also apply. Check with your tax professional and local authorities to ascertain you're claiming all available benefits for your DIY installation.
In Summary
You've now completed the major steps to install your own solar panels. Remember, while DIY installation can save money, it's not without risks. Always prioritize safety and follow local regulations. If you're unsure about any part of the process, don't hesitate to consult a professional. With your new solar system in place, you're ready to start harnessing clean energy and reducing your carbon footprint. Enjoy your sustainable power solution!


Leave a Reply