You can craft your own evacuated tube solar collector to harness sustainable energy and reduce your reliance on traditional power sources. Start by understanding the components and gathering necessary materials like evacuated tubes, a manifold, and frame construction materials. Prioritize safety with protective gear when handling glass components. Design your collector layout for best sun exposure, then prepare the mounting frame and install the manifold. Attach the evacuated tubes carefully, connect the plumbing system, and set up the storage tank and pump. After testing and troubleshooting, maintain your collector regularly for peak efficiency. This guide will equip you with the knowledge to begin your solar energy journey.
Understanding Evacuated Tube Solar Collectors

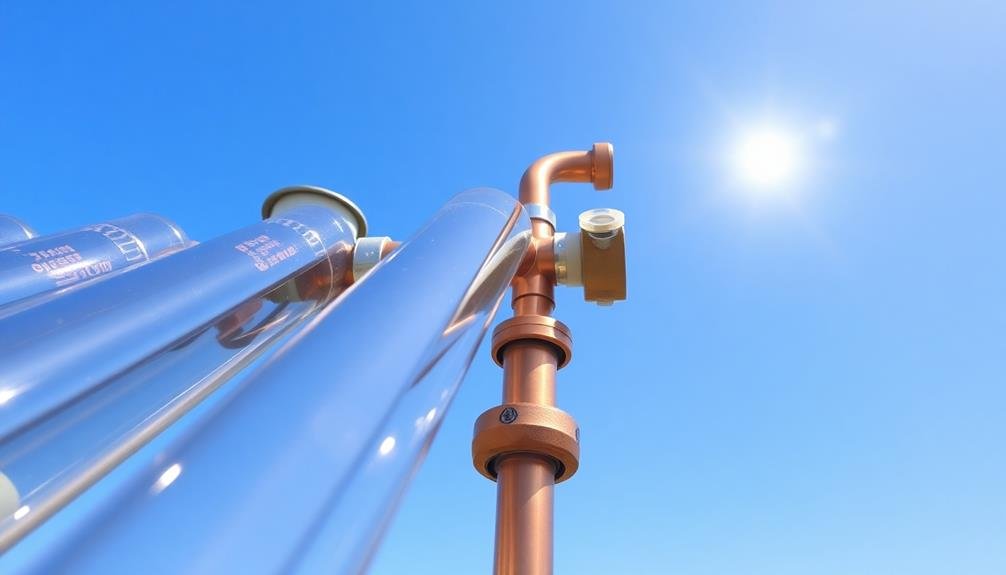
Over the past decade, evacuated tube solar collectors have gained popularity as an efficient way to harness solar energy. They consist of a series of glass tubes, each containing a smaller tube filled with a heat-absorbing fluid. The space between these tubes is evacuated, creating a vacuum that minimizes heat loss and maximizes energy collection.
You'll find that evacuated tube collectors are more efficient than flat-plate collectors, especially in colder climates or during winter months. They can absorb heat from various angles, making them effective even when the sun isn't directly overhead.
These collectors typically operate at higher temperatures, making them ideal for both water heating and space heating applications.
When you're evaluating an evacuated tube solar collector, you'll need to understand its key components: the outer glass tube, inner absorber tube, heat pipe, and manifold. The heat pipe transfers the collected energy to the manifold, where it's then distributed to your heating system.
You'll also want to take into account factors like the number of tubes, collector size, and mounting options to guarantee peak performance for your specific needs.
Required Materials and Tools
Now that you understand the basics of evacuated tube solar collectors, let's focus on what you'll need to build your own solar collector.
You'll require evacuated tubes, which you can purchase online or from specialized solar equipment suppliers. You'll also need a manifold or heat exchanger to collect the heated fluid from the tubes.
For the frame, gather aluminum or stainless steel rails and brackets.
Essential tools include a drill with various bits, a saw for cutting the frame materials, and wrenches for tightening bolts. You'll need silicone sealant to guarantee watertight connections and insulation materials to minimize heat loss.
Don't forget safety gear like gloves and safety glasses.
For the plumbing system, acquire copper pipes, fittings, and a circulation pump. You'll also need a storage tank to hold the heated water or fluid.
Temperature sensors and a controller will help you monitor and manage the system's performance.
Finally, gather mounting hardware suitable for your roof or installation location.
With these materials and tools, you'll be well-equipped to start constructing your own evacuated tube solar collector.
Safety Precautions

Before you begin constructing your solar collector, prioritize safety by gathering essential protective gear.
You'll need safety glasses, work gloves, and a dust mask to shield yourself from potential hazards.
When handling glass components, exercise extreme caution to prevent cuts and guarantee you're working in a well-ventilated area.
Protective Gear Essentials
While building a solar collector can be an exciting project, safety should always be your top priority. To protect yourself during construction, you'll need several essential pieces of protective gear.
Start with safety goggles to shield your eyes from flying debris and harmful UV rays. A pair of sturdy work gloves will safeguard your hands from cuts, scrapes, and burns when handling materials and tools.
Don't forget to wear a dust mask or respirator to prevent inhalation of harmful particles, especially when cutting or sanding components. Long-sleeved shirts and pants made of durable materials will protect your skin from scratches and potential heat exposure. Steel-toed boots are vital to prevent foot injuries from falling objects.
When working with glass tubes or mirrors, consider wearing a face shield for additional protection against potential shattering. If you're using power tools, ear protection is essential to prevent hearing damage.
Handling Glass Carefully
Handling glass safely is vital when crafting your solar collector. You'll be working with fragile evacuated tubes and other glass components, so it's important to follow proper handling techniques. Always wear your protective gear, including gloves and safety glasses, when working with glass.
When lifting glass tubes, use both hands and distribute the weight evenly. Avoid twisting or applying pressure to the middle of the tubes. Instead, support them at the ends. If you're cutting glass, use a proper glass cutter and score the surface only once. Clean up any glass shards immediately using a broom and dustpan, never your hands.
Here's a quick reference guide for handling different glass components:
| Component | Handling Technique | Storage | Cleaning |
|---|---|---|---|
| Evacuated Tubes | Hold at ends, avoid twisting | Padded rack | Soft, damp cloth |
| Glass Cover | Support from underneath | Vertical in foam | Mild soap solution |
| Mirrors | Use suction cups | Flat, protected surface | Microfiber cloth |
Remember to work in a well-lit area and keep your workspace clean and organized. If you drop or break any glass, don't panic. Carefully clean up the area and dispose of broken glass in a puncture-resistant container. By following these precautions, you'll minimize the risk of injury and guarantee a smooth solar collector construction process.
Designing Your Collector Layout
The layout of your solar collector is crucial for maximizing its efficiency. You'll need to take into account factors like available space, sun exposure, and your specific energy needs.
Start by determining the ideal angle for your collector, which typically matches your latitude. This angle guarantees maximum sun exposure throughout the year.
Next, decide on the number of evacuated tubes you'll use. More tubes mean more heat collection, but also increase cost and weight. Calculate your energy requirements to strike the right balance.
Arrange the tubes in parallel rows, leaving enough space between them to prevent shading. The standard gap is about 1-2 inches.
Evaluate the mounting location carefully. A south-facing roof or wall is ideal in the Northern Hemisphere. If you're using a ground mount, make sure it's free from obstructions that could cast shadows.
Don't forget to plan for easy access for maintenance and cleaning.
Incorporate a manifold into your design to collect the heated fluid from all tubes. Position it at the top of the collector for the best thermosiphon effect.
Preparing the Mounting Frame

Sturdy construction forms the backbone of your solar collector system. Begin by selecting a durable material for your mounting frame, such as galvanized steel or aluminum. These metals resist corrosion and can withstand outdoor conditions.
Cut the frame pieces to size according to your design specifications, ensuring precise measurements for a snug fit. Next, drill holes in the frame for attaching the evacuated tubes and manifold. Use a drill press for accuracy and consistency.
Don't forget to add mounting holes for securing the frame to your roof or ground-based structure. Sand any rough edges to prevent injury during assembly and maintenance.
Apply a weather-resistant coating to the frame if it's not pre-treated. This extra layer of protection will extend the life of your collector.
Assemble the frame using corrosion-resistant fasteners, such as stainless steel bolts and nuts. Double-check that all connections are tight and secure.
Installing the Manifold
Now that you've set up the frame, it's time to tackle the manifold installation. The manifold is an essential component of your solar collector, as it collects and distributes the heated fluid from the evacuated tubes.
Begin by positioning the manifold at the top of the frame, ensuring it's level and aligned with the pre-drilled holes. Secure the manifold to the frame using stainless steel bolts and washers. Tighten them evenly to prevent warping or stress on the manifold.
Next, connect the inlet and outlet ports of the manifold to your plumbing system. Use high-temperature silicone gaskets to create a watertight seal at each connection point.
Install the temperature sensors into the designated ports on the manifold. These will help you monitor the system's performance.
Don't forget to insulate the manifold and exposed piping to minimize heat loss. Wrap the insulation tightly around the manifold, securing it with heat-resistant tape.
Attaching Evacuated Tubes
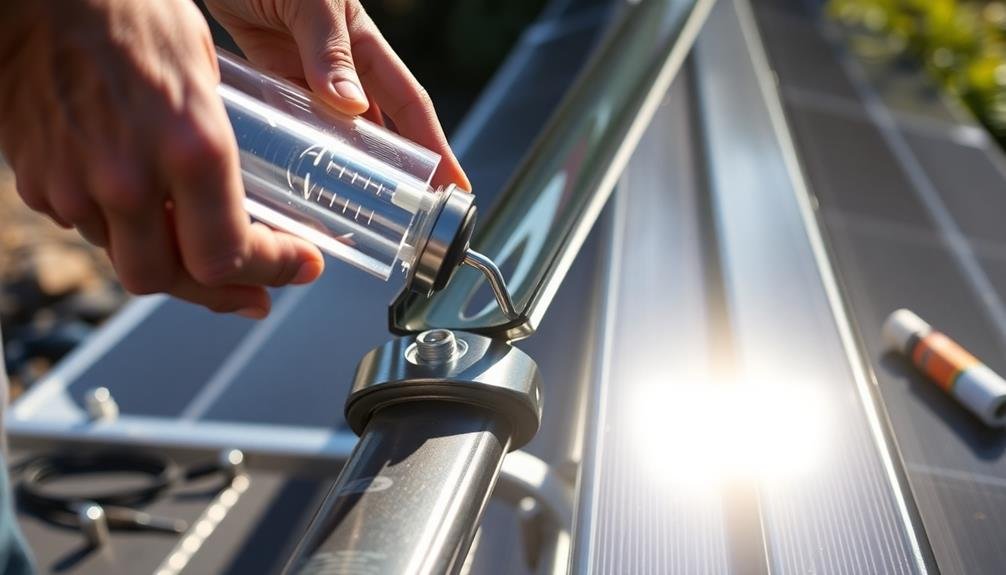
After preparing the manifold, you'll move on to attaching the evacuated tubes.
First, verify your mounting brackets are correctly positioned and secured to support the tubes.
You'll then carefully insert each tube into the manifold, using proper techniques to prevent damage and guarantee a tight fit.
Mounting Bracket Preparation
The backbone of your solar collector lies in its mounting bracket, which securely holds the evacuated tubes in place. To prepare your mounting bracket, you'll need to choose a sturdy material like aluminum or stainless steel. These materials resist corrosion and can withstand outdoor conditions.
Start by measuring the diameter of your evacuated tubes and the total width of your planned array. Cut your chosen material to size, ensuring it's long enough to accommodate all tubes with proper spacing.
Drill holes along the bracket at regular intervals, matching the number of tubes you'll be installing. These holes should be slightly larger than the tube diameter to allow for easy insertion and removal.
Next, create a lip or groove along the bracket's edge to prevent the tubes from sliding out. You can do this by bending the material or attaching a separate strip.
Add reinforcement bars perpendicular to the main bracket for additional support, especially if you're mounting multiple rows of tubes.
Tube Insertion Techniques
Precision is key when attaching evacuated tubes to your solar collector.
Begin by inspecting each tube for any cracks or damage. Clean the tubes thoroughly with a soft, lint-free cloth to remove any dust or fingerprints. Next, apply a thin layer of heat transfer paste to the copper heat pipe at the top of each tube. This paste guarantees ideal thermal conductivity between the tube and the header.
Carefully align the tube with the mounting bracket, guaranteeing it's perpendicular to the manifold. Gently slide the tube into place, making sure the heat pipe enters the header smoothly. Don't force it if you encounter resistance; instead, check for proper alignment.
Once the tube is fully inserted, secure it using the provided clips or rubber grommets.
Repeat this process for each tube, working methodically from one end of the collector to the other. As you progress, periodically check that all tubes are level and properly seated.
After inserting all tubes, perform a final inspection to confirm they're securely fastened and correctly aligned. This careful attention to detail will maximize your solar collector's efficiency and longevity.
Sealing and Testing
Once you've attached all evacuated tubes, it's crucial to seal and test your solar collector. Start by applying a high-temperature silicone sealant around the base of each tube where it meets the manifold. This creates a watertight seal and prevents heat loss. Allow the sealant to cure for 24 hours before proceeding.
Next, conduct a pressure test to verify there are no leaks in your system. Connect a pressure gauge to the inlet valve and slowly fill the collector with water. Pressurize the system to 50 PSI and monitor it for at least an hour. If the pressure remains stable, your collector is properly sealed.
After the pressure test, drain the system and refill it with a heat transfer fluid, such as a propylene glycol mixture. This fluid helps prevent freezing and improves heat transfer efficiency.
Purge any air from the system by running the circulation pump and opening the air release valve.
Connecting the Plumbing System
After assembling the main components of your solar collector, it's time to connect the plumbing system. Start by attaching the inlet and outlet pipes to the manifold. Use high-temperature silicone sealant to guarantee a watertight connection.
Connect these pipes to your home's hot water system, making sure to install shut-off valves for maintenance purposes.
Next, install a circulation pump to move the heat transfer fluid through the system. Place it on the cold water return line to the collector. Add an expansion tank to accommodate fluid expansion as it heats up.
Don't forget to include a pressure relief valve for safety.
Install temperature sensors at the inlet and outlet of the collector to monitor its performance. Connect these to a controller that will regulate the pump's operation based on temperature differentials.
Insulating the Piping

You'll need to select appropriate materials for insulating your solar collector's pipes to minimize heat loss.
Wrap the pipes carefully, ensuring complete coverage and secure fastening of the insulation.
Once installed, test the effectiveness of your insulation by measuring temperature differences along the piping system.
Materials for Pipe Insulation
In order to maximize the efficiency of your solar collector, proper pipe insulation is essential. You'll want to choose materials that can withstand high temperatures and provide excellent thermal resistance. Consider these popular options for pipe insulation:
| Material | R-value per inch | Max Temperature |
|---|---|---|
| Fiberglass | 2.2 – 2.7 | 1000°F (538°C) |
| Mineral Wool | 3.1 – 4.0 | 1200°F (649°C) |
| Polyethylene | 3.8 – 4.3 | 200°F (93°C) |
| Aerogel | 10.0 – 14.0 | 1200°F (649°C) |
Fiberglass and mineral wool are cost-effective choices that can handle high temperatures. They're widely available and easy to install. Polyethylene foam is lightweight and flexible, making it ideal for tight spaces, but it's not suitable for very high temperatures. For exceptional performance, consider aerogel insulation. It's pricier but offers superior insulation in a thinner layer.
When selecting your insulation, factor in your local climate, the collector's operating temperature, and your budget. Don't forget to use heat-resistant adhesive tape or wire to secure the insulation around pipe joints and fittings. Proper installation is vital for maintaining the insulation's effectiveness and preventing heat loss in your solar collector system.
Proper Insulation Techniques
Once you've chosen the appropriate insulation material, it's crucial to apply it correctly to maximize your solar collector's efficiency. Start by ensuring the pipes are clean and dry before insulation. Cut the insulation to fit snugly around the pipes, leaving no gaps or air pockets. For foam insulation, use a sharp utility knife to make precise cuts.
Wrap the insulation around the pipes, making sure to overlap the seams. Secure it with heat-resistant tape or zip ties every 12-18 inches. Pay special attention to joints, valves, and fittings, as these areas are prone to heat loss. Use pre-formed insulation fittings or carefully cut and shape the insulation to fit these irregularities.
For outdoor installations, protect the insulation from UV rays and weather damage by wrapping it with aluminum foil tape or a PVC jacket. Don't compress the insulation, as this reduces its effectiveness. If using fiberglass, wear protective gear and follow safety guidelines.
Remember to insulate all hot water pipes, including those leading to and from the solar collector. This thorough approach will minimize heat loss throughout the system, improving overall efficiency and performance.
Testing Insulation Effectiveness
After properly insulating your solar collector's piping, it's important to confirm the effectiveness of your work.
Begin by conducting a visual inspection, checking for any gaps or inconsistencies in the insulation. Run your hands along the insulated pipes to feel for cold spots, which may indicate areas of poor coverage.
Next, use an infrared thermometer to measure surface temperatures along the insulated pipes. Compare these readings to uninsulated sections to gauge the insulation's performance.
For a more precise assessment, attach temperature sensors at various points along the piping and monitor the temperature drop over a set distance.
You can also perform a heat loss test by running hot water through the system and measuring the temperature difference between the inlet and outlet. Calculate the heat loss rate and compare it to manufacturer specifications or industry standards.
To test for moisture resistance, spray water on the insulation and check for absorption. Verify that the insulation maintains its integrity when exposed to typical environmental conditions.
Installing the Storage Tank
With the collector assembly complete, it's time to focus on installing the storage tank. Choose a location that's close to your collector and easily accessible for maintenance. Confirm the area can support the weight of a full tank.
Before installation, inspect the tank for any damage. Clean it thoroughly and apply an anti-corrosion coating if necessary. Next, connect the inlet and outlet pipes from the collector to the tank. Use high-temperature resistant fittings and apply thread sealant to prevent leaks.
Install a pressure relief valve and an expansion tank to manage pressure changes in the system. Don't forget to insulate all pipes to minimize heat loss.
Here's a quick guide to common storage tank types:
| Tank Type | Capacity (Gallons) | Material | Lifespan (Years) | Cost ($) |
|---|---|---|---|---|
| Glass-lined | 40-120 | Steel with glass lining | 8-12 | 500-1000 |
| Stainless Steel | 50-150 | Stainless Steel | 15-20 | 1000-2000 |
| Plastic | 30-100 | High-density polyethylene | 10-15 | 300-700 |
| Concrete | 500-1000 | Reinforced concrete | 20-30 | 2000-5000 |
| Fiberglass | 100-500 | Fiberglass-reinforced plastic | 15-25 | 1500-3000 |
Choose a tank that best fits your needs and budget. Once installed, fill the tank with water and check for leaks before proceeding to the next step.
Setting Up the Pump

The pump is an essential component of your solar collector system, ensuring proper circulation of the heat transfer fluid. You'll need to select a pump that's compatible with your system's size and flow requirements. Opt for a high-efficiency, low-power consumption model to maximize your energy savings.
Begin by mounting the pump near your storage tank, ensuring it's easily accessible for maintenance. Connect the pump's inlet to the bottom of the storage tank and the outlet to the solar collector's inlet pipe. Use appropriate fittings and heat-resistant tubing to make these connections.
Install a check valve on the pump's outlet side to prevent backflow when the pump isn't running. You'll also want to add shut-off valves on both sides of the pump for easier servicing.
Wire the pump to your system's controller, which will activate it based on temperature differentials between the collector and storage tank. Don't forget to properly ground the pump and protect the wiring from the elements.
Testing and Troubleshooting
Your solar collector system's testing phase is essential to confirm peak performance and identify any potential issues.
Begin by checking all connections for leaks, verifying the pump is functioning correctly, and validating that the temperature sensors are accurately reading. Run the system for several hours, monitoring the inlet and outlet temperatures to confirm proper heat transfer.
If you notice inadequate temperature rise, inspect the evacuated tubes for damage or vacuum loss. A simple test involves touching the glass surface; if it's warm, the vacuum seal may be compromised.
Check the flow rate through the system; it should be slow enough to allow sufficient heat absorption but fast enough to prevent stagnation.
Troubleshoot any circulation problems by bleeding air from the system and verifying pump operation. If you're experiencing inconsistent performance, examine the controller settings and confirm it's responding appropriately to temperature differentials.
For unexpectedly low efficiency, check the collector's orientation and tilt angle, and remove any shading obstructions.
Don't forget to inspect the heat exchanger for scale buildup, which can reduce heat transfer efficiency. Regular maintenance, including cleaning the glass tubes and checking the glycol mixture, will help prevent future issues and maintain ideal performance.
Maintenance and Efficiency Tips

Regular maintenance is key to keeping your solar collector system running efficiently for years to come. Start by inspecting your system monthly for any visible damage or leaks. Clean the glass tubes with a soft cloth and mild detergent to remove dirt and debris that can reduce efficiency. Check the insulation around pipes and tanks, replacing any damaged sections promptly.
Monitor your system's performance regularly. If you notice a drop in efficiency, it could indicate a problem that needs addressing. Keep an eye on the glycol levels in your heat transfer fluid, topping it up as needed. Flush the system annually to remove any sediment buildup.
To maximize efficiency, verify your collector is positioned effectively to capture sunlight throughout the day. Trim any overhanging branches that might shade the tubes. Consider installing a solar tracker to automatically adjust the collector's angle for ideal sun exposure.
Use a high-quality heat transfer fluid and insulate all pipes thoroughly to minimize heat loss. Finally, integrate your solar collector with your home's energy management system to enhance usage and track performance over time. By following these tips, you'll maintain peak efficiency and extend your solar collector's lifespan.
Frequently Asked Questions
How Long Does It Take to See a Return on Investment?
You'll typically see a return on investment in 3-7 years, depending on factors like energy costs, system efficiency, and installation expenses. It's worth noting that you'll continue saving on energy bills long after the payback period.
Can Evacuated Tube Collectors Be Used in Extremely Cold Climates?
Yes, you can use evacuated tube collectors in extremely cold climates. They're highly efficient in freezing temperatures due to their vacuum insulation. You'll find they perform well even when it's snowing or below zero outside.
What Permits Are Required for Installing a DIY Solar Collector?
You'll likely need building permits for your DIY solar collector. Check with your local building department about specific requirements. They may ask for system details, structural plans, and electrical diagrams. Don't forget to inquire about zoning restrictions too.
How Do Evacuated Tube Collectors Compare to Flat-Plate Collectors in Efficiency?
You'll find evacuated tube collectors are generally more efficient than flat-plate collectors. They lose less heat, perform better in cold climates, and can reach higher temperatures. However, they're often more expensive and fragile.
Can These Collectors Be Integrated With Existing Heating Systems?
Yes, you can integrate these collectors with your existing heating systems. They'll work well with radiant floor heating, forced air systems, and hot water tanks. You'll need a heat exchanger and controller to manage the integration effectively.
In Summary
You've now learned how to craft your own evacuated tube solar collector. By following these steps, you've created an efficient, eco-friendly heating system for your home. Remember to regularly maintain your collector and monitor its performance. Don't hesitate to troubleshoot if issues arise. With proper care, your DIY solar collector will provide sustainable energy for years to come. You're now part of the renewable energy solution, contributing to a greener future.


Leave a Reply