To access the full potential of your geothermal heat exchanger, focus on these three pro secrets: First, conduct a thorough site assessment, evaluating soil composition, land area, and underground utilities. Second, optimize your loop field design by accurately calculating heating and cooling loads, factoring in soil thermal conductivity, and selecting the right loop configuration. Third, employ precise installation techniques, including proper borehole spacing, grouting methods, and fusion welding for leak-free joints. By mastering these key aspects, you'll guarantee maximum efficiency and longevity for your geothermal system. Dive deeper to discover how these secrets can transform your installation process.
Proper Site Assessment
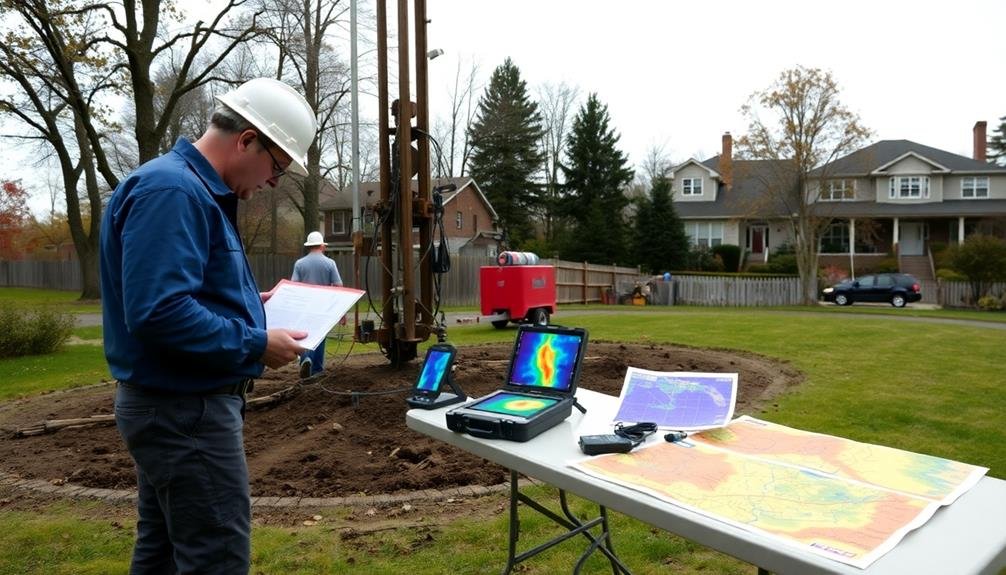
A thorough site evaluation is the cornerstone of any successful geothermal heat exchanger installation. You'll need to assess several vital factors to guarantee ideal system performance.
First, examine the soil composition and thermal conductivity. Different soil types have varying heat transfer rates, which directly impact the exchanger's efficiency. You'll want to conduct thermal response tests to determine the ground's thermal properties accurately.
Next, evaluate the available land area. The size of your property will dictate the type of ground loop system you can install, whether it's horizontal, vertical, or a pond/lake loop.
Don't forget to take into account any underground utilities or structures that might interfere with the installation.
Water table depth and quality are also essential. If you're planning an open-loop system, you'll need to test the water for minerals and pH levels that could affect the equipment.
For closed-loop systems, high water tables may influence your design choices.
Lastly, assess the local climate and your heating and cooling load requirements. These factors will help determine the system size and loop field design needed to meet your energy demands efficiently.
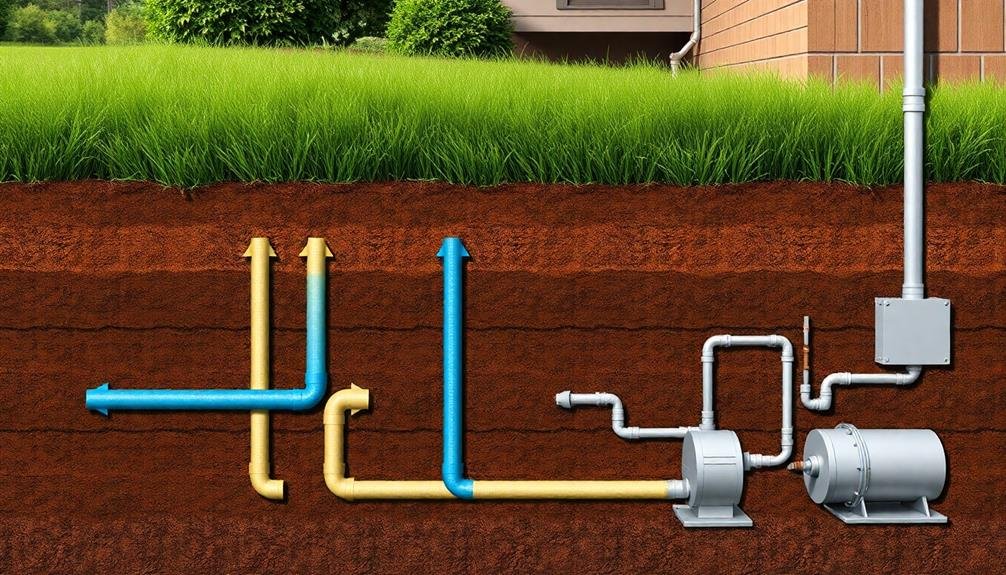
Optimizing Loop Field Design
How can you confirm your geothermal heat exchanger operates at peak efficiency? The key lies in enhancing your loop field design.
Start by accurately calculating your heating and cooling loads, as this determines the size and layout of your ground loops. Don't skimp on this step; oversizing wastes money, while undersizing leads to poor performance.
Consider your site's soil composition and thermal conductivity. Dense, moist soils conduct heat better than dry, sandy ones, affecting loop length and spacing. Use thermal conductivity tests to fine-tune your design.
Pay attention to groundwater movement, as it can enhance heat transfer.
Choose the right loop configuration. Horizontal loops work well for large, open areas, while vertical loops are ideal for limited spaces. Slinky loops offer a compromise between the two.
Confirm proper pipe sizing and flow rates to maximize heat exchange efficiency.
Don't forget about antifreeze selection. Pick a solution that balances freeze protection with superior heat transfer properties.
Precise Installation Techniques

Precision is paramount when installing a geothermal heat exchanger. You'll need to guarantee proper depth, spacing, and orientation of the ground loops to maximize system efficiency.
Start by using advanced drilling techniques to create boreholes that meet exact specifications. For vertical systems, maintain consistent spacing between boreholes, typically 15-20 feet apart, to prevent thermal interference.
When inserting the loops, use a tremie pipe to properly grout the boreholes, guaranteeing full contact between the pipe and surrounding soil. This step is essential for ideal heat transfer.
For horizontal systems, maintain a consistent depth of 4-6 feet and use wide trenches to allow proper pipe separation.
Pay close attention to pipe connections, using fusion welding for HDPE pipes to create leak-free joints. Install air release valves at high points to prevent air locks.
When backfilling, use thermal enhancement materials around the pipes to improve heat conductivity.
Frequently Asked Questions
How Long Does a Geothermal Heat Exchanger System Typically Last?
You'll be pleased to know that a geothermal heat exchanger system typically lasts 25 to 50 years. The underground loops can even last up to 100 years, while the heat pump unit might need replacement after 20-25 years.
Can Geothermal Systems Be Used for Both Heating and Cooling?
Yes, you can use geothermal systems for both heating and cooling. They'll efficiently warm your home in winter and cool it in summer by transferring heat to and from the ground. It's a versatile, year-round climate control solution.
What Maintenance Is Required for a Geothermal Heat Exchanger?
You'll need to regularly check antifreeze levels, clean filters, and inspect pumps. You should flush the system every few years and have a professional inspect it annually. Don't forget to monitor for leaks and unusual noises.
How Noisy Are Geothermal Heat Pump Systems Compared to Traditional HVAC Units?
You'll find geothermal heat pump systems are much quieter than traditional HVAC units. They don't have outdoor compressors or fans, so you won't hear the typical noise associated with air conditioners or heat pumps outside your home.
Are There Government Incentives or Tax Credits for Installing Geothermal Systems?
Yes, you'll often find government incentives and tax credits for geothermal systems. You can get federal tax credits, state rebates, and local incentives. Check with your energy department and tax professional to see what's available in your area.
In Summary
You've now learned three key secrets to geothermal heat exchanger success. By conducting a thorough site assessment, optimizing your loop field design, and employing precise installation techniques, you'll maximize your system's efficiency and longevity. Remember, attention to detail in these areas can make all the difference. As you move forward with your geothermal project, keep these pro tips in mind. They'll help guarantee you get the most out of your investment in clean, sustainable energy.


Leave a Reply