
To build your off-grid home energy system with a Vertical Axis Wind Turbine (VAWT), you'll need to start with a thorough site assessment. Evaluate your wind resources, check local zoning laws, and choose an ideal location for installation. Select a VAWT model that matches your power needs and space constraints. Gather the necessary tools and materials, then construct a sturdy foundation and tower. Assemble and mount the turbine components carefully. Set up your electrical system, including a battery bank, inverter, and charge controller. Don't forget essential safety measures throughout the process. With proper planning and execution, you'll be harnessing clean, renewable energy in no time.
Understanding VAWTs

For off-grid energy solutions, Vertical Axis Wind Turbines (VAWTs) offer a unique alternative to traditional horizontal turbines. Unlike their horizontal counterparts, VAWTs rotate around a vertical axis, allowing them to capture wind from any direction without the need for complex yaw mechanisms. This design makes them particularly suitable for areas with turbulent or inconsistent wind patterns.
VAWTs come in two main types: Darrieus and Savonius. The Darrieus type resembles an eggbeater and uses lift forces to rotate, while the Savonius type looks like a split cylinder and relies on drag forces. Each has its advantages: Darrieus turbines are more efficient at higher wind speeds, while Savonius designs perform better in low wind conditions.
One of the key benefits of VAWTs is their compact size, making them ideal for residential installations where space is limited. They're also quieter and less visually intrusive than traditional wind turbines.
However, VAWTs generally have lower efficiency rates compared to horizontal axis turbines and may require more maintenance due to their design. When considering a VAWT for your off-grid system, you'll need to weigh these factors against your specific energy needs and location.
Site Assessment and Planning
Before installing a wind turbine, you'll need to conduct a thorough site assessment.
Start by evaluating your property's wind resource, checking local zoning laws, and obtaining necessary permits.
Wind Resource Evaluation
Successful wind power generation hinges on a thorough wind resource evaluation. To assess your site's wind potential, you'll need to gather data on wind speed, direction, and frequency. Start by consulting wind resource maps for your region, which provide a general overview of average wind speeds. However, these maps don't account for local terrain variations, so you'll need to conduct on-site measurements.
Install an anemometer at the proposed turbine height for at least a year to collect accurate wind data. Record wind speeds at regular intervals and analyze the results to determine your site's wind power potential. Pay attention to seasonal variations and prevailing wind directions.
Use this table to interpret your wind speed data:
| Wind Speed (mph) | Power Potential | Turbine Suitability |
|---|---|---|
| 0-6 | Poor | Not suitable |
| 7-9 | Marginal | Small VAWTs only |
| 10-13 | Moderate | Most VAWTs |
| 14-17 | Good | All VAWTs |
| 18+ | Excellent | All wind turbines |
Consider factors like turbulence from nearby obstacles, wind shear, and wind rose patterns. These elements will help you determine the best location and height for your VAWT installation, ensuring maximum energy production and efficiency.
Zoning and Permitting
Once you've determined your site's wind power potential, you'll need to navigate the regulatory landscape. Start by researching local zoning laws and ordinances specific to wind turbines. Many municipalities have height restrictions, setback requirements, and noise regulations that can impact your VAWT installation.
Contact your local planning department to inquire about necessary permits. You'll likely need a building permit and possibly an electrical permit. Some areas may require additional environmental impact assessments or heritage site considerations.
Be prepared to submit detailed plans, including turbine specifications, tower design, and electrical schematics.
Check if your area has any homeowners' association rules that might restrict VAWT installations. Even if you're in a rural location, consider potential impacts on neighbors, such as visual obstruction or noise concerns. Address these proactively to avoid future conflicts.
Familiarize yourself with grid interconnection requirements if you plan to connect your VAWT to the utility grid. You may need approval from your local utility company and additional safety equipment.
Ultimately, research any available incentives or tax credits for renewable energy installations, as these can offset your costs and influence your permitting strategy.
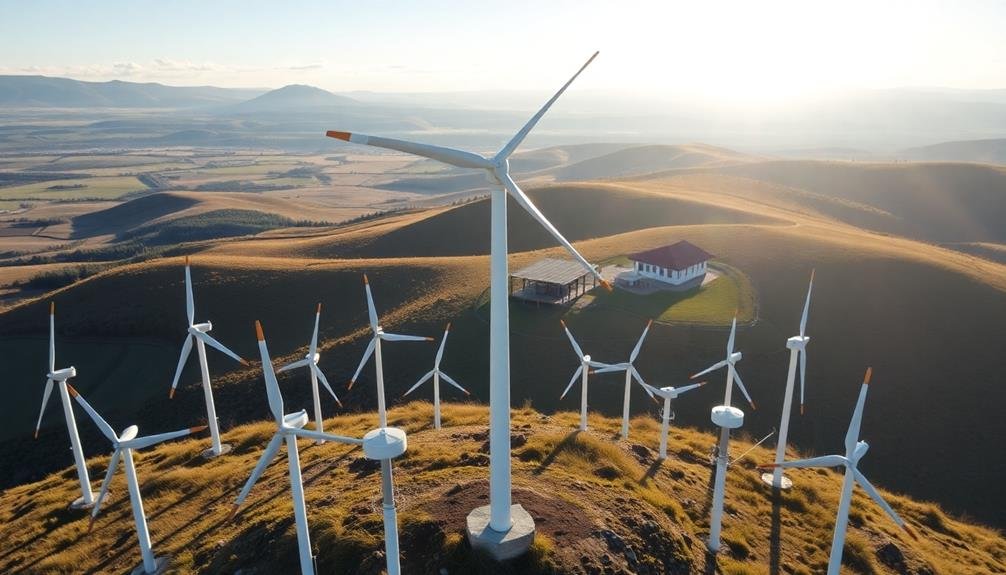
Optimal Turbine Placement
Proper placement of your vertical axis wind turbine (VAWT) is crucial for maximizing energy production. Begin by conducting a thorough site assessment to identify the best location on your property. Look for areas with consistent, unobstructed wind flow, typically on hilltops or open fields away from buildings and trees.
Measure wind speed and direction at potential sites using an anemometer for at least six months to a year. This data will help you determine the ideal placement and expected energy output. Consider local topography, as it can affect wind patterns. Avoid turbulence-prone areas near structures or landscape features.
Install your VAWT at least 30 feet above nearby obstructions to capture cleaner, stronger winds. Make sure the turbine is easily accessible for maintenance but far enough from living spaces to minimize noise. Check local regulations for height restrictions and setback requirements.
Evaluate soil stability and foundation needs at your chosen site. A professional engineer can help determine the appropriate foundation type based on soil conditions and turbine specifications.
Choosing the Right VAWT Model
When selecting a Vertical Axis Wind Turbine (VAWT) for your off-grid home, you'll need to carefully consider power output requirements.
You'll want to match the turbine's capacity to your energy needs, accounting for factors like wind speeds in your area.
Additionally, you must evaluate the size and space available for installation, ensuring the chosen VAWT fits comfortably within your property's constraints.
Power Output Considerations
Selecting the right Vertical Axis Wind Turbine (VAWT) model is crucial for meeting your off-grid home's energy needs. When evaluating power output, you'll need to assess your energy consumption and local wind conditions. VAWTs come in various sizes and capacities, typically ranging from 100W to 10kW for residential use.
To determine the ideal power output for your VAWT, contemplate these factors:
- Average wind speed in your area
- Your home's daily energy consumption
- Available space for installation
- Budget constraints
- Local zoning regulations and permits
Remember that a VAWT's actual power output may differ from its rated capacity due to varying wind conditions. It's wise to choose a model that can generate slightly more power than you need to account for fluctuations.
You'll also want to take into account the turbine's cut-in speed, which is the minimum wind speed required for power generation. Lower cut-in speeds are generally more beneficial for consistent energy production.
Don't forget to factor in energy storage solutions, such as batteries, to guarantee a steady power supply during periods of low wind. By carefully evaluating these power output considerations, you'll be better equipped to select the most suitable VAWT for your off-grid home.
Size and Space Requirements
After considering power output, you'll need to evaluate the size and space requirements for your Vertical Axis Wind Turbine (VAWT).
VAWTs come in various dimensions, typically ranging from 2 to 10 meters in height and 1 to 5 meters in diameter. You'll want to choose a model that fits comfortably within your available space while still meeting your energy needs.
First, assess your property's layout and identify potential installation sites. Consider factors like wind exposure, proximity to buildings, and local zoning regulations. Most VAWTs require a minimum of 10-15 feet of clearance from obstacles to operate efficiently.
You'll also need to account for the turbine's foundation, which may add an extra 1-2 meters to its overall height.
Next, think about the visual impact of the turbine on your property and neighbors. Smaller models are often more discreet and may be preferable in residential areas. However, they generally produce less power than larger units.
If you have ample space and fewer aesthetic concerns, a larger VAWT might be more suitable for maximizing energy production. Remember to factor in maintenance access when planning your installation site.
Required Tools and Materials
To successfully set up your off-grid home energy system, you'll need a range of specific tools and materials. These items will guarantee you can properly install and maintain your Vertical Axis Wind Turbine (VAWT) and associated components.
Make sure you have all the necessary equipment before starting your project to avoid delays and potential safety issues.
Essential tools for VAWT installation include:
- Power drill with various drill bits
- Wrench set and socket set
- Level and measuring tape
- Wire cutters and strippers
- Safety equipment (gloves, goggles, hard hat)
In addition to tools, you'll need materials specific to your VAWT system. These typically include the turbine itself, mounting hardware, wiring, and electrical components such as an inverter and charge controller.
Don't forget to acquire a deep-cycle battery bank for energy storage.
Before purchasing materials, carefully review your VAWT manufacturer's specifications and recommendations. This will help you choose the right components and guarantee compatibility with your system.
Remember to factor in additional materials for weatherproofing and protection against the elements, such as sealants and protective coatings.
Foundation and Tower Construction
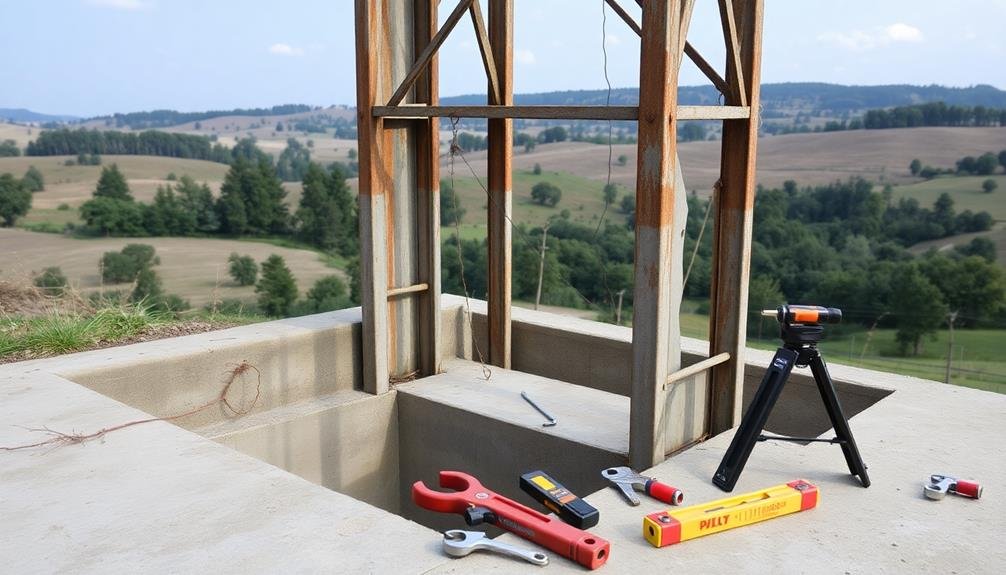
With your tools and materials ready, it's time to focus on the foundation and tower construction for your Vertical Axis Wind Turbine.
Begin by selecting a suitable location for your VAWT, guaranteeing it's away from obstacles that could disrupt wind flow. Mark the area for your foundation, typically a 4×4 foot square.
Dig the foundation hole to a depth of at least 3 feet, or below the frost line in your area. Mix and pour concrete into the hole, inserting J-bolts for attaching the tower base. Allow the concrete to cure for 48 hours.
Next, assemble your tower sections on the ground. If using a lattice tower, bolt the sections together securely. For a monopole design, guarantee all segments are properly aligned and joined. Install any necessary guy wire attachment points.
Once the foundation has cured, attach the tower base to the J-bolts. Carefully raise the tower, using a gin pole or crane if needed. Secure guy wires if your design requires them.
Check the tower's vertical alignment using a level, making adjustments as necessary.
Assembling the VAWT Components
The tower is up, so let's focus on assembling your VAWT components. Start by laying out all the parts and double-checking that you have everything listed in the manual.
You'll need to assemble the rotor, which consists of the blades, hub, and shaft. Carefully attach the blades to the hub, ensuring they're evenly spaced and securely fastened. Next, connect the shaft to the hub assembly.
Now, it's time to install the generator and gearbox. Mount these components onto the tower's top plate, aligning them precisely with the rotor shaft. You'll need to connect the electrical wiring from the generator to your power system, following the manufacturer's instructions carefully.
Here are key points to remember during assembly:
- Wear protective gear, including gloves and safety glasses
- Use the correct tools for each step to avoid damaging components
- Apply thread-locking compound to bolts to prevent loosening from vibrations
- Check for proper alignment and balance of all rotating parts
- Follow torque specifications for all fasteners
Once you've assembled and installed all components, perform a final inspection. Check that everything is securely fastened and properly aligned.
With the VAWT components assembled, you're ready to move on to the next phase of your off-grid energy project.
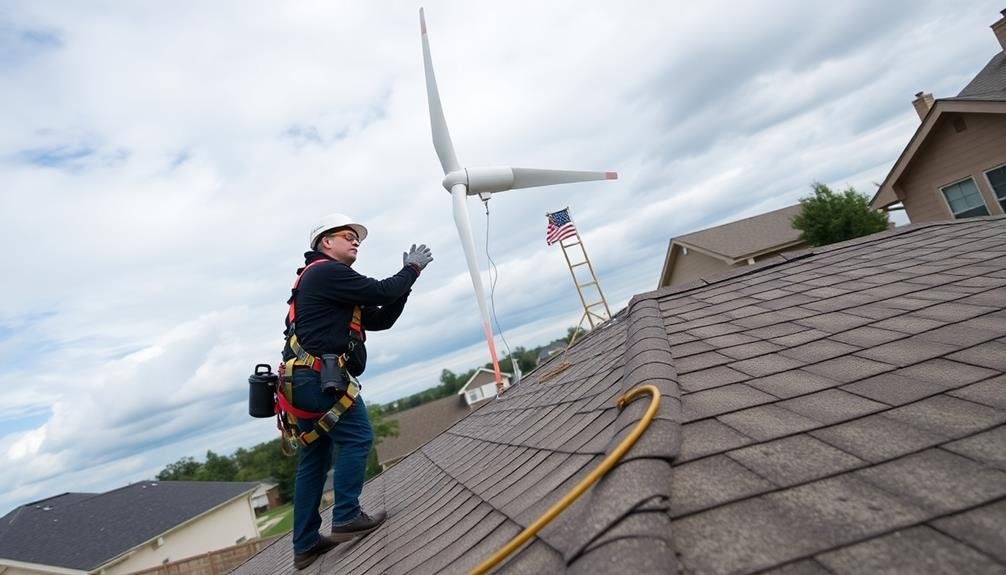
Mounting the Turbine
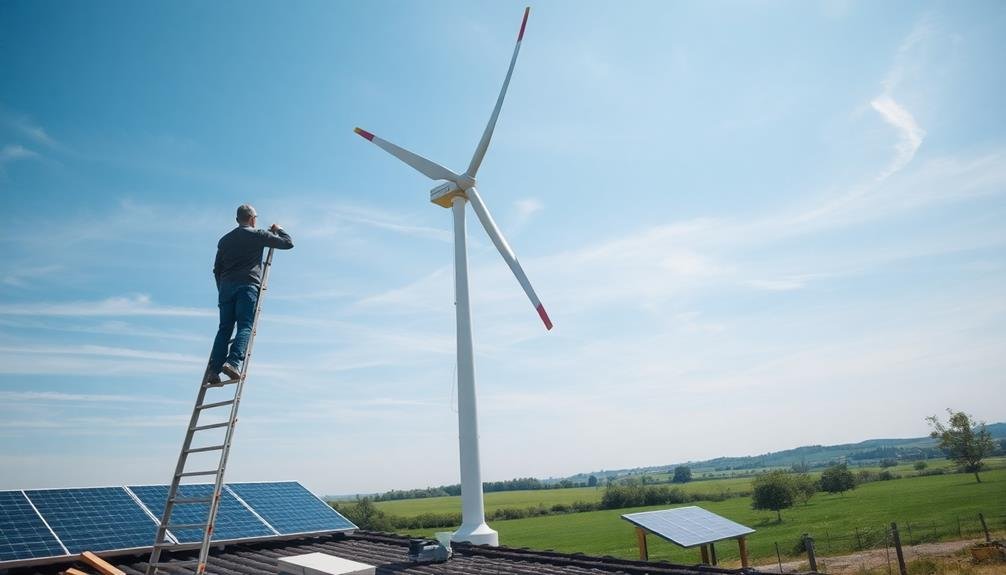
Having assembled the components, you're now ready to mount the turbine. Choose a location that's at least 30 feet away from buildings and trees to minimize turbulence. Verify the area has consistent wind flow and is easily accessible for maintenance.
Start by securing the base plate to a concrete foundation or sturdy platform. Use heavy-duty bolts and anchors appropriate for your surface type. Level the base plate carefully to verify proper turbine operation.
Next, attach the main shaft to the base plate using the provided mounting brackets. Double-check that it's perfectly vertical using a level.
Install the generator at the top of the shaft, making sure all electrical connections are secure and weatherproofed.
Now, carefully lift the rotor assembly and slide it onto the main shaft. Secure it tightly with the locking mechanism provided.
Attach the blades to the rotor hub, ensuring they're evenly spaced and properly aligned.
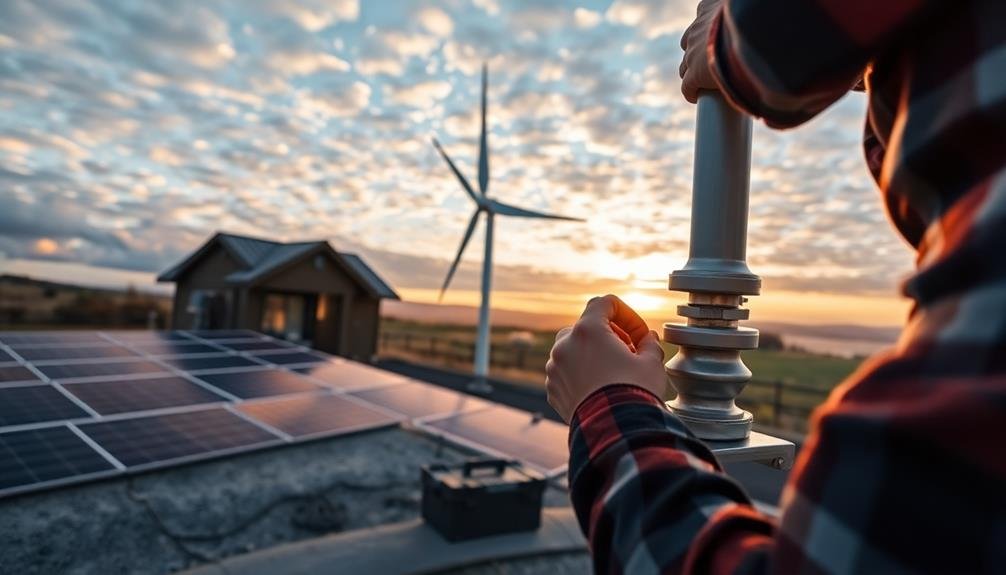
Electrical System Setup
Proper electrical system setup is essential for your wind turbine's efficiency and safety. Begin by connecting the turbine's output to a charge controller, which regulates the voltage and current flowing to your battery bank. Choose a controller that's compatible with your turbine's output and your system's voltage.
Next, wire the charge controller to your battery bank. Verify you're using appropriate gauge wires to handle the expected current. From the battery bank, connect an inverter to convert the DC power to AC for household use. Select an inverter that can handle your peak power needs.
Install a main disconnect switch between the turbine and charge controller for safety during maintenance. Don't forget to properly ground all components to protect against lightning strikes and static buildup.
Here are key considerations for your electrical setup:
- Use weather-resistant connectors and conduit for outdoor wiring
- Install surge protection devices at critical points
- Label all wires and components clearly
- Use a battery monitor to track your system's performance
- Implement a backup power source, such as a generator, for periods of low wind
Remember to follow local electrical codes and consider hiring a professional electrician if you're unsure about any aspect of the installation.
Battery Bank Installation
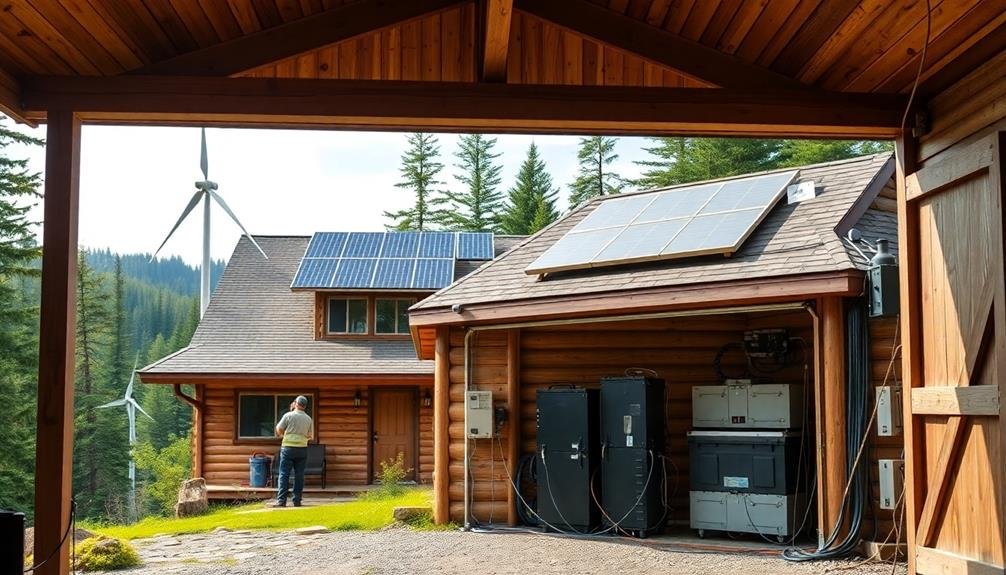
With your electrical system set up, it's time to focus on the heart of your off-grid power storage: the battery bank. Choose a dedicated space for your batteries, guaranteeing proper ventilation and temperature control. Select deep-cycle batteries designed for renewable energy systems, considering factors like capacity, voltage, and cycle life.
Before installation, prepare the area by cleaning and leveling the surface. Install battery racks or platforms to keep the batteries organized and elevated. Connect the batteries in series or parallel, depending on your system's voltage requirements. Use properly sized cables and terminals, guaranteeing tight connections to minimize resistance.
Here's a quick reference guide for battery bank installation:
| Step | Action | Tools Needed |
|---|---|---|
| 1 | Prepare space | Cleaning supplies, level |
| 2 | Install racks | Drill, screws, wrench |
| 3 | Place batteries | Heavy-duty gloves, lifting straps |
| 4 | Connect batteries | Cable crimper, torque wrench |
| 5 | Install BMS | Multimeter, wire stripper |
After connecting the batteries, install a battery management system (BMS) to monitor and protect your investment. Finally, label all connections clearly and create a maintenance schedule to guarantee peak performance and longevity of your battery bank.
Inverter and Charge Controller Integration
When integrating your inverter and charge controller, you'll need to carefully select components that work together seamlessly.
Proper wiring is essential for peak performance, ensuring efficient power transfer between your solar panels, batteries, and household appliances.
Setting up a robust monitoring system will allow you to track your energy production and consumption, helping you make informed decisions about your off-grid power usage.
Choosing Compatible Components
Selecting compatible components is vital for an efficient off-grid energy system. When choosing your inverter and charge controller, confirm they're designed to work together seamlessly. Check the voltage and amperage ratings of both devices to verify they match your battery bank and power generation sources.
It's imperative to select an inverter that can handle your peak power demands and a charge controller capable of managing your system's maximum current.
Consider these factors when selecting compatible components:
- Voltage compatibility between batteries, inverter, and charge controller
- Power output capacity of the inverter
- Maximum input current of the charge controller
- Communication protocols for system monitoring
- Expandability for future system growth
Don't forget to account for efficiency ratings when making your choices. Higher-quality components often have better conversion rates, reducing energy loss.
It's also wise to choose products from reputable manufacturers with good customer support and warranty options. Remember, your system is only as strong as its weakest link, so invest in reliable, well-matched components.
Wiring for Optimal Performance
Proper wiring is the backbone of an efficient off-grid energy system. You'll need to connect your VAWT to the charge controller and inverter, guaranteeing peak power flow and system protection.
Start by selecting the right gauge wire based on your system's voltage and amperage. Thicker wires reduce resistance and power loss over long distances.
Connect your VAWT's output to the charge controller's input terminals, maintaining proper polarity. The charge controller then connects to your battery bank. From there, wire the battery bank to the inverter's input.
Verify all connections are tight and corrosion-free to prevent voltage drops and potential fire hazards. Install circuit breakers or fuses between components for added safety. Place them on the positive wire close to the power source.
Don't forget to ground your system properly, connecting all metal components to a common ground point. Use weatherproof junction boxes and conduits to protect outdoor wiring from the elements.
Label all wires and connections clearly for easy maintenance and troubleshooting. Finally, double-check your wiring diagram and connections before powering up your system to avoid costly mistakes or damage to components.
System Monitoring Setup
With your wiring complete, it's time to set up system monitoring for your off-grid energy setup. Integrating your inverter and charge controller is essential for efficient power management and system oversight.
Start by connecting your inverter to the battery bank and main AC distribution panel. Then, link your charge controller to the battery bank and your renewable energy sources, such as solar panels or wind turbines.
Install a system monitoring device that communicates with both the inverter and charge controller. This will allow you to track:
- Real-time energy production and consumption
- Battery state of charge and health
- System efficiency and performance metrics
- Fault detection and alerts
- Historical data for long-term analysis
Configure your monitoring system to provide remote access via a smartphone app or web portal. This enables you to check on your system's status from anywhere and make adjustments as needed.
Set up alerts for important events like low battery charge or system malfunctions.
Regularly review your system's performance data to optimize energy usage and identify potential issues before they become problems.
Safety Measures and Precautions
Safety should be your top priority when setting up and maintaining an off-grid energy system. Always wear appropriate personal protective equipment (PPE), including safety glasses, gloves, and non-slip footwear. When working with electrical components, use insulated tools and verify the system is properly grounded.
Install surge protectors and circuit breakers to safeguard your equipment from power spikes and overloads. Regularly inspect all wiring connections for signs of wear, corrosion, or damage. Keep your battery bank in a well-ventilated area to prevent the buildup of potentially explosive gases.
When working with solar panels, be cautious of their slippery surfaces and sharp edges. For wind turbines, implement a braking system to prevent over-spinning during high winds. Establish a clear safety zone around your turbine to protect against falling ice or debris.
Develop an emergency shutdown procedure and confirm all household members know how to implement it. Keep a fire extinguisher rated for electrical fires nearby and learn how to use it properly. Regularly test your smoke and carbon monoxide detectors.
Testing and Commissioning
Once you've installed your off-grid energy system, it's crucial to test and commission it before relying on it full-time. This process guarantees your system functions correctly and safely. Start by conducting a visual inspection of all components, checking for proper connections and any signs of damage.
Next, test each component individually, including your VAWT, battery bank, and inverter.
To thoroughly test your off-grid energy system, follow these steps:
- Measure voltage output from your VAWT in various wind conditions
- Check battery charging and discharging rates
- Test inverter performance under different loads
- Verify proper functioning of all safety devices and shut-off mechanisms
- Monitor system performance over an extended period (at least 24 hours)
During commissioning, gradually increase the load on your system to confirm it can handle your energy needs.
Keep a close eye on battery levels, inverter output, and overall system performance. Document all test results and system parameters for future reference.
If you encounter any issues or unexpected behavior, consult your installation manual or seek professional help.
Once you're confident in your system's performance, you can begin relying on it for your daily energy needs.
Maintenance and Troubleshooting
Regular maintenance is essential for keeping your off-grid energy system running smoothly and efficiently. Perform monthly visual inspections of your VAWT, checking for loose bolts, signs of wear, or damage. Clean the blades and remove any debris that might affect performance. Lubricate moving parts according to the manufacturer's recommendations, typically every six months.
Monitor your battery bank's voltage levels and electrolyte levels in flooded lead-acid batteries. Top up with distilled water when necessary. Equalize your batteries periodically to prevent sulfation and extend their lifespan. Inspect all electrical connections for corrosion or looseness, tightening as needed.
If you notice a decrease in power output, first check for obstructions around the turbine. Verify that your charge controller is functioning correctly and that all fuses are intact. Listen for unusual noises coming from the VAWT, which may indicate bearing issues or loose components. If problems persist, consult your turbine's manual for troubleshooting steps or contact a professional technician.
Keep detailed records of maintenance activities and system performance. This data will help you identify trends and potential issues before they become serious problems, ensuring your off-grid energy system remains reliable for years to come.
Frequently Asked Questions
How Long Does a Typical VAWT Installation Take From Start to Finish?
You'll typically spend 2-5 days installing a VAWT from start to finish. It depends on your experience, site conditions, and turbine size. You're looking at about 1-2 days for prep work and 1-3 days for assembly and mounting.
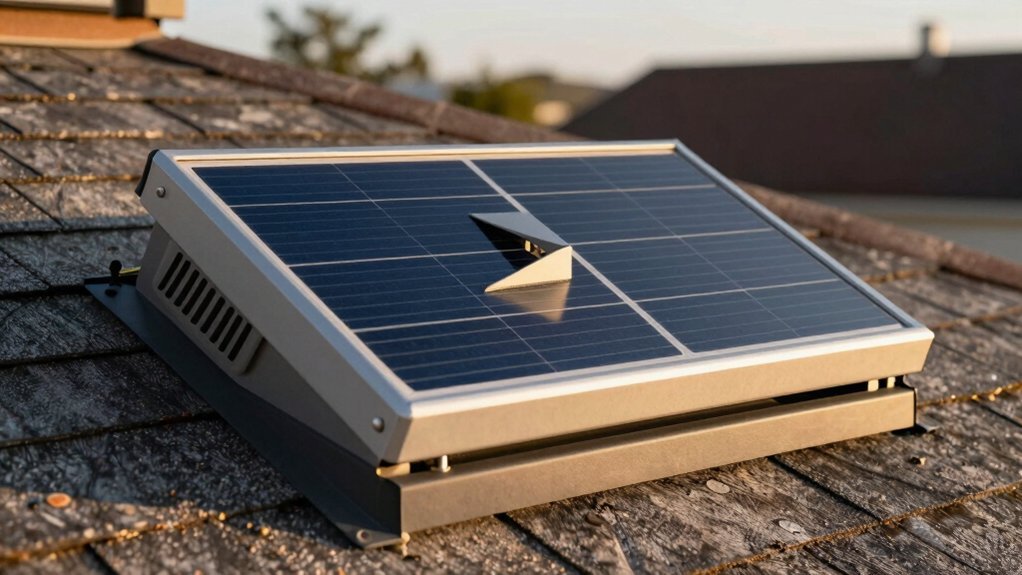
Can VAWTS Be Installed on Existing Structures Like Rooftops or Barns?
Yes, you can install VAWTs on existing structures like rooftops or barns. They're adaptable to various settings, but you'll need to guarantee the structure can support the turbine's weight and vibrations. Always consult a professional for proper installation.
What Are the Noise Levels Produced by VAWTS Compared to Traditional Windmills?
You'll find VAWTs generally produce less noise than traditional windmills. They're quieter due to their slower rotation speeds and lower blade tip velocity. However, noise levels can vary depending on the specific VAWT design and wind conditions.
Are There Any Government Incentives or Tax Credits for Installing VAWTS?
You'll find various government incentives and tax credits for installing VAWTs. Check with your local and federal energy departments for specific programs. They often offer rebates, grants, or tax deductions to encourage renewable energy adoption in homes.
How Do VAWTS Perform in Extreme Weather Conditions Like Hurricanes or Blizzards?
VAWTs can handle extreme weather better than traditional turbines. They'll continue working in high winds and heavy snow. However, you should secure them properly for hurricanes. In severe conditions, it's best to lower or stow your VAWT.
In Summary
You've now got the knowledge to harness wind power with your own VAWT system. Remember, proper planning, safety, and maintenance are key to success. Don't hesitate to consult professionals if you're unsure. With your VAWT up and running, you'll be generating clean energy and reducing your carbon footprint. Enjoy your newfound energy independence and the satisfaction of contributing to a greener future. Keep learning and optimizing your system for the best results.
Leave a Reply