Retrofitting radiant heating can transform your existing floors into an efficient, luxurious heating system. You'll enjoy consistent warmth from the ground up, eliminating cold spots and drafts. This upgrade can lower your energy bills by up to 30% while improving indoor air quality. It's compatible with various flooring types and doesn't require extensive renovation. You'll need to assess your current floors, choose between electric and hydronic systems, and consider flooring compatibility. Proper installation techniques and electrical considerations are essential for ideal performance. By understanding the process and benefits, you'll be well-equipped to make the best decision for your home's comfort and efficiency.
Understanding Radiant Floor Heating

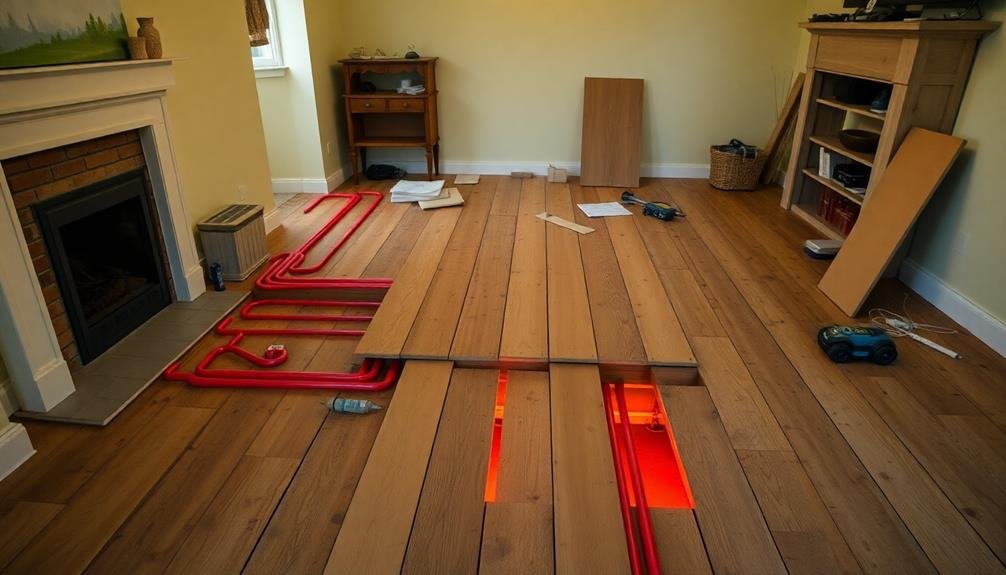
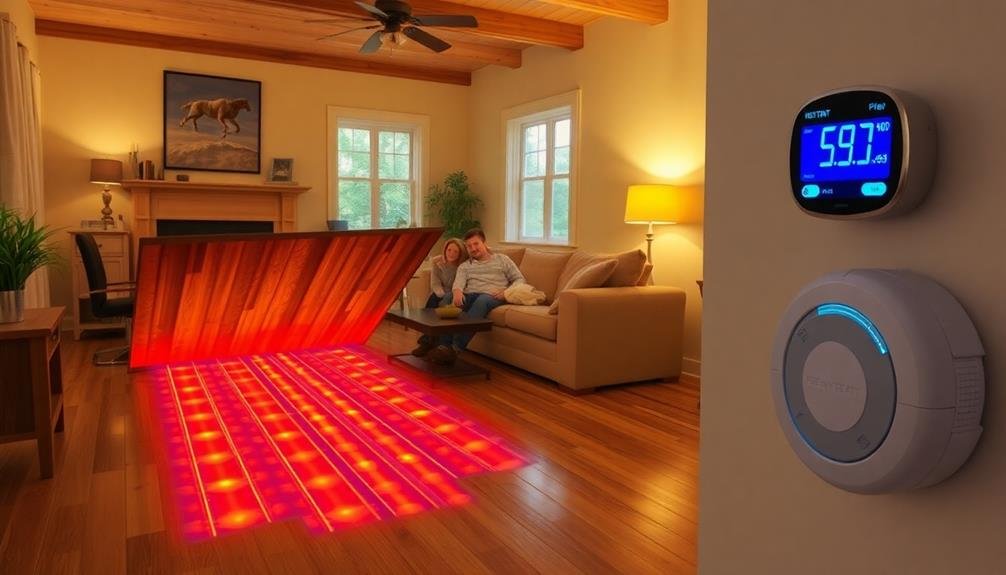
When it comes to home heating, radiant floor heating offers a luxurious and efficient alternative to traditional forced-air systems. Unlike conventional methods that blow heated air through vents, radiant heating warms your home from the ground up. It works by installing heating elements beneath your floor, which radiate warmth upward, creating a consistent and comfortable temperature throughout the room.
You'll find two main types of radiant floor heating: electric and hydronic. Electric systems use electrical resistance cables or mats, while hydronic systems circulate heated water through a network of pipes. Both options can be installed under various flooring materials, including tile, hardwood, and even carpeting.
One of the key benefits you'll experience with radiant floor heating is improved energy efficiency. Since heat rises naturally, you'll feel warm at lower thermostat settings, potentially reducing your energy costs.
Additionally, you'll enjoy silent operation and improved indoor air quality, as there's no noisy blower or ductwork to circulate dust and allergens. Radiant heating also eliminates cold spots and drafts, ensuring even warmth across your living space.
Benefits of Retrofitting
Why consider retrofitting your existing home with radiant heating? This upgrade offers numerous advantages that can greatly improve your living space and energy efficiency.
You'll enjoy consistent, comfortable warmth throughout your home, as radiant heating eliminates cold spots and drafts common with forced-air systems. It's also more energy-efficient, potentially lowering your heating bills by up to 30%.
Retrofitting allows you to modernize your home without the hassle of a full renovation. You can install radiant heating under various flooring types, including hardwood, tile, and even carpet. This flexibility means you won't have to compromise on your existing décor.
The system is also maintenance-free, with no filters to replace or ductwork to clean.
Radiant heating improves indoor air quality by reducing dust circulation and allergens. It's silent, creating a peaceful environment free from the noise of traditional heating systems.
Additionally, you'll reclaim valuable wall space previously occupied by radiators or vents. Retrofitting with radiant heating not only enhances your comfort but also increases your home's value, making it an attractive investment for long-term homeowners and those considering future resale.
Assessing Your Existing Floors
Before starting on a radiant heating retrofit, you'll need to carefully evaluate your existing floors. Consider the type of flooring, its age, condition, and compatibility with radiant heating systems. Check for any moisture issues, unevenness, or structural concerns that might affect the installation process.
Measure your floor's thermal resistance (R-value) to determine how well it'll conduct heat. Lower R-values are generally better for radiant heating efficiency. You'll also need to assess the subfloor and joist system to guarantee they can support the additional weight of the radiant heating components.
Here's a quick reference guide for common flooring types and their compatibility with radiant heating:
| Flooring Type | Compatibility | Heat Conductivity | Installation Ease | Longevity |
|---|---|---|---|---|
| Tile/Stone | Excellent | High | Moderate | High |
| Engineered Wood | Good | Moderate | Easy | Moderate |
| Vinyl | Good | Moderate | Easy | Moderate |
| Carpet | Fair | Low | Easy | Low |
| Hardwood | Variable | Moderate | Challenging | High |
Consider consulting a professional to help assess your floors and determine the best approach for your radiant heating retrofit. They can provide valuable insights into potential challenges and recommend the most suitable system for your specific situation.
Choosing the Right System
When choosing a radiant heating system for your retrofit, you'll need to evaluate electric and hydronic options.
Your existing flooring material will play an essential role in determining system compatibility.
You'll also want to weigh the energy efficiency of each system type to guarantee long-term cost-effectiveness and comfort.
Electric vs. Hydronic Systems
Choosing between electric and hydronic radiant heating systems is a crucial decision when retrofitting your home. Electric systems use resistance cables or mats installed beneath your flooring, while hydronic systems circulate heated water through a network of pipes. Each has its own advantages and considerations.
Electric systems are typically easier to install, especially in smaller spaces or single rooms. They're ideal for retrofitting because they don't require extensive plumbing work. However, they can be more expensive to operate long-term due to higher electricity costs.
Hydronic systems, while more complex to install, are generally more energy-efficient and cost-effective for larger areas or whole-house heating. They offer more consistent heat distribution but require a boiler or water heater.
Here's a comparison of the two systems:
| Feature | Electric | Hydronic |
|---|---|---|
| Installation | Simpler | More complex |
| Operating cost | Higher | Lower |
| Energy efficiency | Lower | Higher |
| Heat consistency | Good | Excellent |
Consider your home's layout, existing infrastructure, and energy costs when deciding between electric and hydronic systems. Consult with a heating professional to determine the best option for your specific retrofit project.
Flooring Material Compatibility
For a successful radiant heating retrofit, it's important to take into account your flooring material's compatibility with the chosen system. Different flooring types conduct heat differently, affecting the efficiency and performance of your radiant heating.
When selecting a system, consider these factors:
- Thermal conductivity: Materials like ceramic tile and natural stone have high thermal conductivity, making them ideal for radiant heating. They efficiently transfer heat from the system to the room.
- Insulation properties: Carpet and thick wooden floors can act as insulators, reducing heat transfer. If you have these materials, you may need to adjust your system's output or consider alternative options.
- Moisture sensitivity: Some materials, such as hardwood, can be sensitive to moisture and temperature changes. Confirm your radiant heating system is designed to maintain consistent temperatures and humidity levels.
When retrofitting, you'll need to remove existing flooring to install the radiant heating system. This presents an opportunity to choose new flooring that's optimized for heat transfer.
If you're set on keeping your current flooring, consult with a professional to determine the best radiant heating solution for your specific situation.
Energy Efficiency Considerations
Beyond flooring compatibility, energy efficiency is a key factor in selecting the right radiant heating system for your retrofit. When choosing a system, consider both its initial energy consumption and long-term efficiency.
Electric radiant heating systems are often more efficient than traditional forced-air systems, as they don't lose heat through ductwork. However, their operating costs can be higher in areas with expensive electricity.
Hydronic systems, which use hot water circulated through pipes, are typically more energy-efficient for larger spaces. They can be connected to various heat sources, including high-efficiency boilers, heat pumps, or solar water heaters. This flexibility allows you to choose the most cost-effective and environmentally friendly option for your home.
Look for systems with programmable thermostats and zoning capabilities. These features let you heat specific areas only when needed, further reducing energy consumption.
Insulation plays a vital role in maximizing efficiency. Confirm your floor is properly insulated to prevent heat loss to the subfloor. Additionally, consider the system's response time. Some radiant heating systems heat up and cool down faster than others, allowing for more precise temperature control and potentially lower energy use.
Preparing for Installation
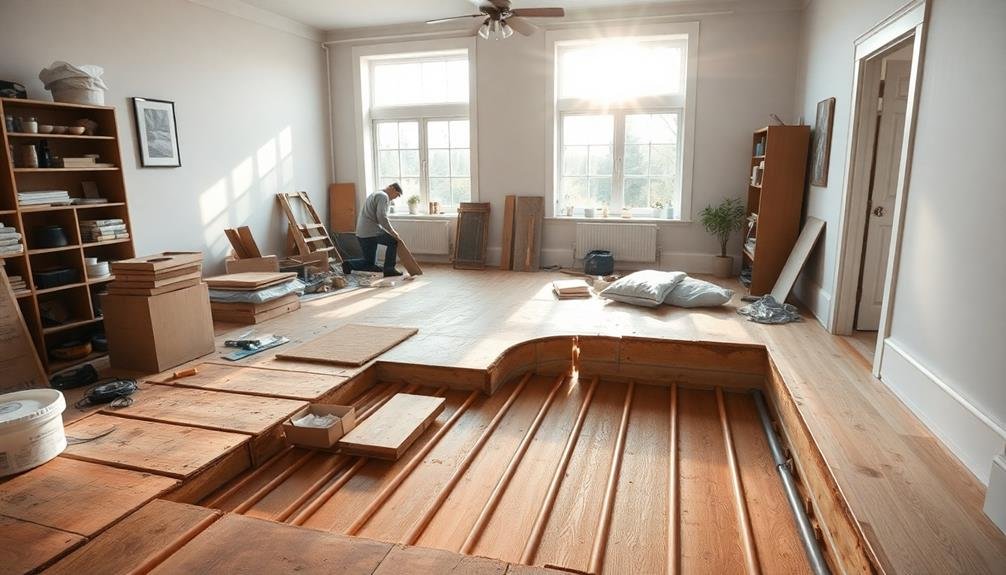
Before diving into the installation process, you'll need to properly prepare your space. Start by thoroughly cleaning the existing floor surface, removing any debris or old adhesives.
Next, inspect the subfloor for damage or unevenness, and repair or level it as necessary. Make certain your floor can support the additional weight of the radiant heating system and new flooring material.
Consider the following key steps to prepare for installation:
- Measure your room accurately and create a detailed layout plan for the heating system, including the location of the thermostat and power source.
- Remove baseboards, trim, and doors to allow for the new flooring height and easy access during installation.
- Acclimate your new flooring materials to the room's temperature and humidity for at least 48 hours before installation.
Don't forget to check local building codes and obtain any necessary permits. If you're not comfortable with electrical work, hire a licensed electrician to handle the wiring.
Step-by-Step Retrofitting Process
When retrofitting radiant heating, you'll begin with thorough preparation and planning, guaranteeing all necessary materials and tools are on hand.
You'll then move on to the installation techniques, which may involve removing existing flooring, laying pipes or electric mats, and connecting to your home's heating system.
Preparation and Planning
To successfully retrofit radiant heating, proper preparation and planning are vital. Before you begin, assess your home's current heating system, insulation, and flooring to determine the best radiant heating solution. Consider factors like room size, ceiling height, and existing heat sources to choose the most efficient system for your needs.
Next, create a detailed plan for the installation process. This should include:
- A timeline for each stage of the project
- A list of required materials and tools
- A budget breakdown, including labor costs if hiring professionals
You'll need to decide whether to install the radiant heating system yourself or hire a contractor. If you're experienced with home improvement projects, a DIY approach can save money. However, professional installation guarantees proper setup and may be necessary for complex systems or if you're uncomfortable with electrical work.
Don't forget to check local building codes and obtain any necessary permits before starting the project. This step is vital to guarantee your retrofit meets safety standards and avoids potential legal issues down the line.
With careful planning, you'll be well-prepared to transform your existing floors into a cozy, efficient radiant heating system.
Installation Techniques
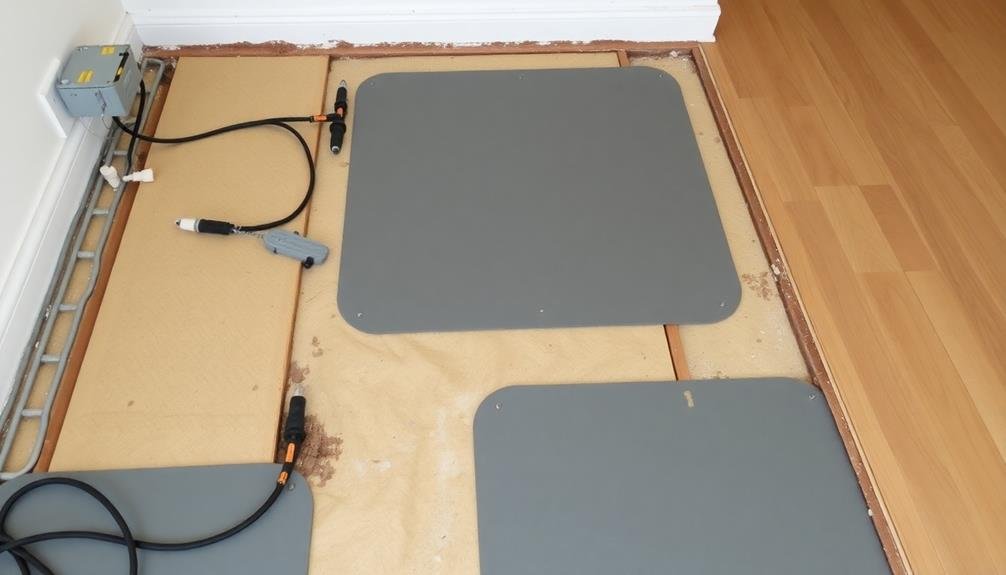
After thorough planning, you're ready to plunge into the step-by-step process of retrofitting radiant heating. Begin by removing existing flooring and cleaning the subfloor thoroughly. Next, install a vapor barrier to prevent moisture damage. Lay out the heating elements according to your plan, guaranteeing even coverage and proper spacing.
Connect the heating elements to the power source and thermostat, following manufacturer guidelines and local electrical codes. Test the system before proceeding to verify it's functioning correctly. Apply a layer of self-leveling compound over the heating elements to create a smooth surface for your new flooring.
| Step | Action | Tools Needed |
|---|---|---|
| 1 | Remove flooring | Pry bar, hammer |
| 2 | Clean subfloor | Vacuum, mop |
| 3 | Install vapor barrier | Utility knife, tape |
| 4 | Lay heating elements | Measuring tape, stapler |
| 5 | Connect to power | Wire strippers, screwdriver |
Once the compound has dried, install your chosen flooring material. Be careful not to damage the heating elements during this process. Finally, program your thermostat and enjoy your newly retrofitted radiant heating system. Remember to keep detailed records of the installation for future reference and maintenance.
Testing and Finishing
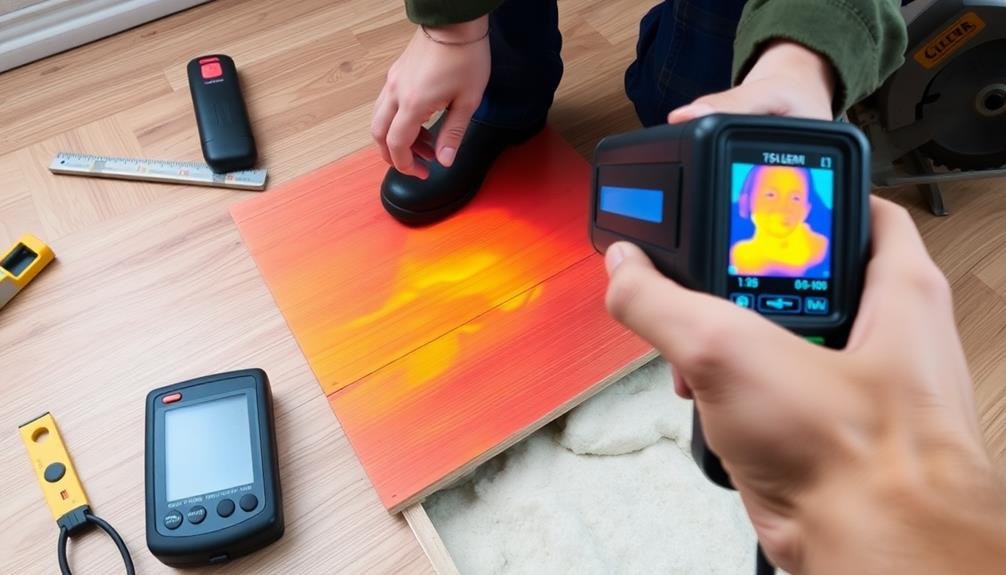
The final stages of retrofitting radiant heating involve meticulous testing and finishing. Once you've installed the heating elements, it's essential to verify their functionality and guarantee proper coverage.
Begin by conducting a resistance test with a multimeter to check for any shorts or breaks in the system. If everything checks out, proceed with a thermal imaging test to identify any cold spots or uneven heating areas.
Next, you'll need to complete the flooring installation. This process varies depending on your chosen floor covering:
- For tile or stone: Apply a layer of thinset mortar over the heating elements, then lay your tiles as usual.
- For hardwood or laminate: Install a layer of underlayment to protect the heating system, followed by your chosen flooring material.
- For carpet: Add a layer of heat-resistant underlayment before installing the carpet pad and carpeting.
Electrical Considerations
When retrofitting radiant heating, you'll need to carefully consider the electrical requirements. Most radiant heating systems require a dedicated circuit, so you'll likely need to upgrade your electrical panel. Consult a licensed electrician to assess your current setup and determine if you need additional capacity.
Your system's voltage and amperage will depend on the size of the area you're heating and the wattage of the heating elements. Typically, you'll encounter 120V or 240V systems. Here's a quick reference guide:
| System Size | Voltage | Amperage | Circuit Breaker | Wire Gauge |
|---|---|---|---|---|
| Small | 120V | 15A | 20A | 12 AWG |
| Medium | 120V | 20A | 25A | 10 AWG |
| Large | 240V | 30A | 40A | 8 AWG |
| Extra Large | 240V | 40A | 50A | 6 AWG |
| Custom | 240V | 50A+ | 60A+ | 4 AWG or larger |
Remember to factor in the cost of electrical work when budgeting for your radiant heating project. You'll also need to install a ground fault circuit interrupter (GFCI) for safety. Finally, verify your thermostat is compatible with your chosen system and can handle the electrical load.
Flooring Options and Compatibility
Choosing the right flooring is essential for maximizing the efficiency of your radiant heating system. When retrofitting radiant heating, you'll need to take into account which flooring materials are compatible and conducive to heat transfer.
Tile and stone are excellent options, as they conduct heat well and distribute it evenly throughout your space. Engineered hardwood is another viable choice, offering better stability than solid wood when exposed to temperature changes.
For those who prefer a softer surface, you'll be pleased to know that certain types of carpet can work with radiant heating. However, opt for low-pile carpets with a low tog rating to guarantee efficient heat transfer.
Vinyl and laminate flooring can also be used, but be sure to check the manufacturer's specifications for temperature limitations.
When selecting your flooring, keep these key factors in mind:
- Heat conductivity: Choose materials that allow heat to pass through easily
- Durability: Confirm the flooring can withstand temperature fluctuations
- Installation method: Some flooring types may require specific installation techniques to work with radiant heating
Energy Efficiency and Cost Savings
Radiant heating systems can markedly reduce your energy consumption compared to traditional forced-air systems.
You'll benefit from more efficient heat distribution, as radiant systems warm objects and surfaces directly rather than heating the air.
Over time, these efficiency gains translate into substantial utility savings, making radiant heating a cost-effective choice for your home.
Reduced Energy Consumption
One of the most compelling reasons to retrofit radiant heating is its potential for reduced energy consumption. When you upgrade your existing floors with this efficient heating system, you'll notice a significant decrease in your energy bills.
Radiant heating operates at lower temperatures than traditional forced-air systems, yet it provides consistent warmth throughout your space.
You'll experience energy savings through:
- Even heat distribution: Radiant systems heat objects and surfaces directly, eliminating cold spots and reducing the need to overheat certain areas.
- Reduced heat loss: Unlike forced-air systems, radiant heating doesn't lose heat through ductwork, resulting in more efficient energy use.
- Lower thermostat settings: The consistent warmth allows you to maintain comfort at lower overall temperatures, further reducing energy consumption.
Long-Term Utility Savings
Over time, the energy efficiency of radiant heating translates into substantial utility savings. You'll notice a significant decrease in your monthly energy bills as radiant systems operate at lower temperatures than traditional forced-air heating. This efficiency stems from the even distribution of heat across your floor surface, eliminating cold spots and reducing the need for constant temperature adjustments.
You'll also benefit from the system's longevity. Radiant heating typically lasts 20-30 years with minimal maintenance, far outlasting conventional HVAC systems. This durability means you won't face frequent replacement costs, further enhancing your long-term savings.
Moreover, radiant heating allows for zoned temperature control, enabling you to heat only occupied rooms. This targeted approach can lead to additional energy savings of up to 30% compared to whole-house heating. As energy prices continue to rise, your investment in radiant heating becomes increasingly valuable.
Consider the cumulative effect of these savings over decades. While the initial installation cost may be higher, you'll recoup this investment through years of reduced utility bills and minimal maintenance expenses, making radiant heating a financially sound choice for the long term.
Maintenance and Troubleshooting
How can you guarantee your retrofitted radiant heating system continues to perform at its best? Regular maintenance and prompt troubleshooting are key to guaranteeing your system's longevity and efficiency.
While radiant heating systems are generally low-maintenance, periodic checks can prevent minor issues from escalating into major problems.
To maintain your radiant heating system effectively:
- Inspect the system annually: Check for leaks, unusual noises, or inconsistent heating. Pay attention to any cold spots in your floors, as they may indicate a problem.
- Monitor system pressure: Guarantee the pressure remains within the manufacturer's recommended range. Low pressure can lead to inefficient heating and potential system damage.
- Clean and bleed radiators: Remove air bubbles from the system by bleeding radiators annually. This improves heat distribution and system efficiency.
If you encounter issues, don't hesitate to consult a professional. Common problems include thermostat malfunctions, air locks, or pump failures.
Regular maintenance can often prevent these issues, but if they do occur, addressing them promptly will minimize disruption to your home's comfort and prevent costly repairs down the line.
Frequently Asked Questions
Can Radiant Floor Heating Be Installed in a Multi-Story Home?
Yes, you can install radiant floor heating in a multi-story home. It's possible for each floor, including upper levels. You'll need to take into account the ceiling height, floor structure, and heating system capacity for each story during installation.
How Long Does the Retrofitting Process Typically Take to Complete?
You'll find that retrofitting radiant floor heating typically takes 2-5 days per room. The timeline depends on your home's size, flooring type, and system complexity. You'll need to plan for some disruption during installation.
Is Radiant Floor Heating Safe for Homes With Pets?
Yes, radiant floor heating is safe for homes with pets. You'll find it's a comfortable option for your furry friends. It doesn't dry out their skin or create hot spots. They'll love lounging on the warm floors.
Can I Install Radiant Heating Myself, or Is Professional Installation Required?
While you can install some electric radiant heating systems yourself, it's often best to hire a professional. They'll guarantee proper installation, safety, and efficiency. For hydronic systems, professional installation is typically required due to their complexity.
Will Radiant Floor Heating Affect the Resale Value of My Home?
Yes, radiant floor heating can positively impact your home's resale value. It's an attractive feature that offers comfort and energy efficiency. You'll likely see a return on investment, as many buyers appreciate this luxurious heating option.
In Summary
You've now got the knowledge to transform your existing floors with radiant heating. By retrofitting, you'll enjoy cozy warmth and energy savings without major renovations. Remember to assess your floors, choose the right system, and consider electrical needs. With proper installation and compatible flooring, you'll create a comfortable, efficient home. Don't forget to maintain your system for long-lasting performance. Embrace the comfort of radiant heat beneath your feet!


Leave a Reply