
Your DIY solar oven needs these 7 essential utensils for ideal cooking: a thermometer to monitor temperatures, dark-colored cooking pots for efficient heat absorption, oven mitts for safety, aluminum foil to enhance reflectivity, silicone baking mats for even heat distribution, long-handled wooden spoons for stirring without burns, and glass jars for versatile food preparation. Each item plays a vital role in maximizing your solar oven's performance and ensuring safe, effective cooking. With these tools at your disposal, you'll be well-equipped to harness the sun's power and create delicious, eco-friendly meals. Discover how each utensil can elevate your solar cooking experience.
Thermometer
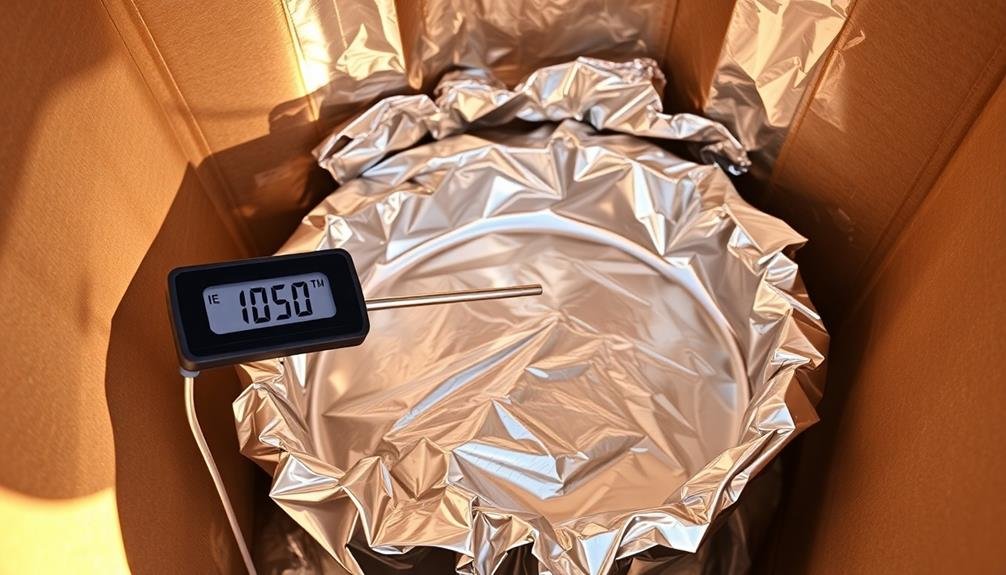
Choosing the right thermometer is essential for monitoring your solar oven's temperature. You'll want a thermometer that can withstand high temperatures, typically up to 500°F (260°C) or more.
Opt for a digital thermometer with a probe for accurate readings, as it'll allow you to check the temperature without opening the oven and losing heat.
Look for a thermometer with a long probe, at least 6 inches, to reach the center of your cooking vessel. Verify it has a clear, easy-to-read display and quick response time. Some models come with preset temperature alerts, which can be helpful for specific recipes.
Consider a dual-probe thermometer if you want to monitor both the oven's ambient temperature and the internal temperature of your food simultaneously. This feature is particularly useful for meats and dishes that require precise cooking temperatures.
Don't forget to calibrate your thermometer before use to verify accuracy. You can do this by testing it in boiling water (212°F/100°C at sea level) and making adjustments if necessary.
Regularly check and replace batteries to maintain reliable performance during your solar cooking adventures.
Dark-Colored Cooking Pots
When it comes to solar cooking, dark-colored pots are essential for maximizing heat absorption. You'll want to choose pots with matte black or dark surfaces, as they absorb and retain heat more efficiently than light-colored or shiny alternatives. Cast iron, anodized aluminum, or enamel-coated cookware are excellent options for your solar oven.
Opt for pots with tight-fitting lids to trap moisture and heat inside, guaranteeing your food cooks evenly and thoroughly. Thin-walled pots heat up faster but may not retain heat as well as thicker ones.
Consider your cooking needs when selecting pot sizes; smaller pots are ideal for quick-cooking items, while larger ones work better for stews and roasts.
You can enhance heat absorption by painting the exterior of your pots with high-temperature black paint designed for grills or stoves. Remember to season cast iron pots properly to prevent rusting and maintain their non-stick properties.
When using your solar oven, place darker pots towards the back where it's hottest, and lighter ones in front. This arrangement helps optimize cooking efficiency and guarantees all your dishes are cooked to perfection.
Oven Mitts
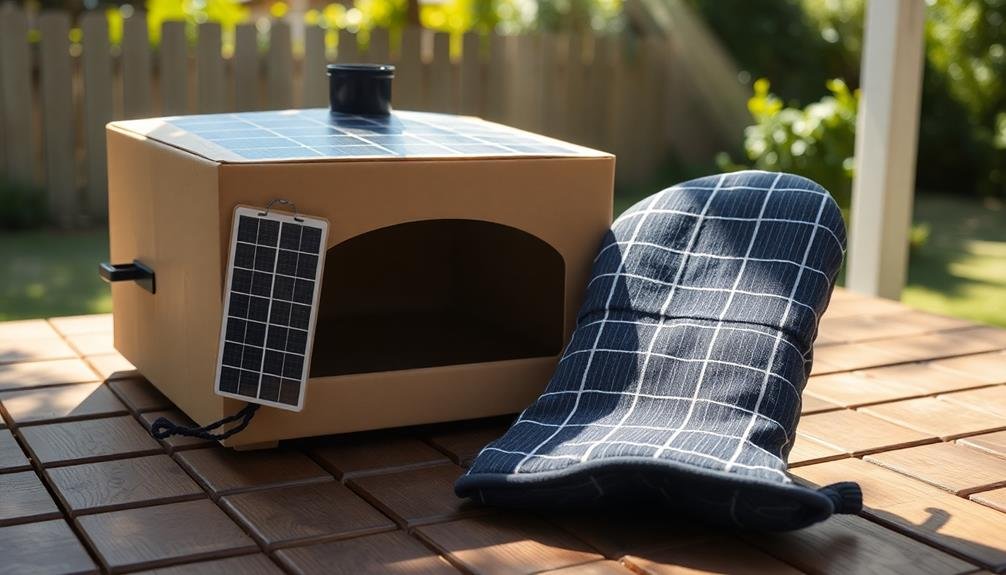
You'll need to gear up with proper oven mitts when handling hot dishes from your solar oven. Although solar cooking temperatures are generally lower than conventional ovens, they can still reach up to 300°F (150°C). This means your cookware and food will be hot enough to cause serious burns if handled incorrectly.
When choosing oven mitts for your solar oven, look for:
- Heat resistance: Select mitts rated for at least 400°F (204°C) to guarantee safety.
- Length: Opt for longer mitts that cover your forearms, protecting you from accidental contact with hot surfaces.
- Grip: Choose mitts with textured surfaces or silicone patterns for a secure hold on slippery cookware.
Consider investing in silicone oven mitts, which offer excellent heat resistance and are easy to clean. They're also waterproof, preventing steam burns that can occur with fabric mitts.
Alternatively, heavy-duty cloth mitts with insulation can work well, but make sure they're thick enough to provide adequate protection.
Remember to always use your oven mitts when adjusting the position of your solar oven or removing dishes. Keep them clean and dry to maintain their heat-resistant properties, and replace them if they show signs of wear or damage.
Aluminum Foil
Aluminum foil is an essential component in your DIY solar oven toolkit due to its reflective heat properties.
You'll find it invaluable for directing and concentrating sunlight onto your cooking vessel, enhancing the oven's efficiency.
As a versatile wrapping material, you can also use it to cover food, create makeshift cooking containers, or line your solar oven for improved heat retention.
Reflective Heat Properties
The heat-reflecting power of aluminum foil plays a crucial role in DIY solar oven utensils. When you're crafting your solar cooker, understanding how aluminum foil interacts with heat can greatly boost its efficiency. This reflective material redirects sunlight and thermal energy towards your food, intensifying the cooking process.
To maximize the reflective properties of aluminum foil in your solar oven, consider these key points:
- Smooth surface: Confirm the foil is tightly stretched and free of wrinkles to create an even reflective surface.
- Shiny side out: While both sides reflect heat, the shiny side is slightly more effective, so face it outward.
- Multiple layers: Use double or triple layers of foil to increase insulation and reflection.
You'll want to line the interior of your oven with foil, focusing on the walls and bottom.
For even better results, create a removable reflector panel using cardboard covered in foil. This panel can be positioned to direct additional sunlight into the oven, increasing its temperature and cooking power.
Versatile Wrapping Material
Beyond its reflective properties, aluminum foil serves as a versatile wrapping material in DIY solar oven utensils. You'll find it indispensable for wrapping food items, creating makeshift containers, and protecting your dishes from direct sunlight. Its flexibility allows you to mold it around various shapes and sizes, ensuring a snug fit for your solar cooking needs.
When using aluminum foil in your solar oven, you can create packets to steam vegetables or fish, trapping moisture and flavors inside. It's also excellent for lining baking dishes, making cleanup a breeze. You'll appreciate how it helps maintain consistent temperatures by sealing in heat and preventing moisture loss.
Don't forget to use heavy-duty foil for more durability, especially when cooking foods that might puncture thinner varieties. You can even fashion small reflectors or heat shields with foil to direct sunlight more efficiently onto your cooking vessel.
Remember to handle the foil carefully after cooking, as it retains heat well. By keeping a roll of aluminum foil in your solar cooking kit, you're equipping yourself with a multi-purpose tool that enhances your outdoor cooking experience.
Silicone Baking Mats
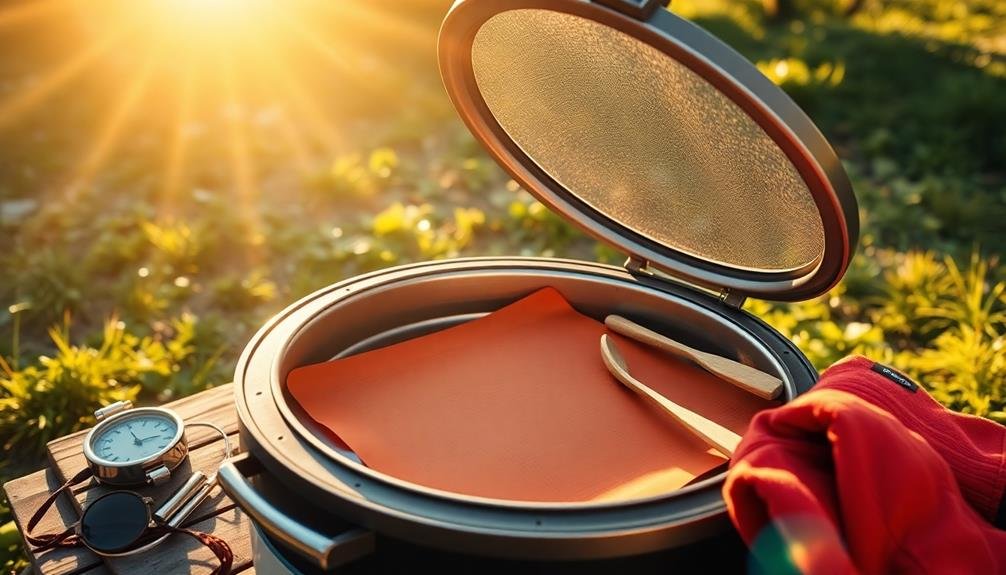
Silicone baking mats offer a versatile and eco-friendly alternative to disposable parchment paper or aluminum foil in your solar oven. These non-stick surfaces are perfect for baking, roasting, and even dehydrating foods in your DIY solar cooker.
They're heat-resistant, easy to clean, and can be reused countless times, making them an excellent investment for your solar cooking adventures.
When choosing silicone baking mats for your solar oven, look for:
- Size compatibility with your solar oven's cooking tray
- High temperature resistance (at least 400°F/204°C)
- Food-grade silicone material with no harmful additives
You'll find that silicone mats distribute heat evenly, resulting in more consistent cooking results.
They're also great for containing any spills or drips, keeping your solar oven clean. To use them effectively, place the mat directly on your oven's cooking tray, arrange your food on top, and cook as usual.
After cooking, simply wipe the mat clean or rinse it with warm, soapy water. Store it flat or rolled up for your next solar cooking session.
Long-Handled Wooden Spoons
Long-handled wooden spoons are essential tools for your DIY solar oven kit. These utensils offer several advantages when cooking with solar power. The extended handles keep your hands safely away from the hot oven chamber, reducing the risk of burns.
Wood is an excellent insulator, so it won't conduct heat like metal utensils, making it comfortable to hold even during extended cooking sessions.
You'll find wooden spoons particularly useful for stirring soups, stews, and sauces in your solar oven. Their gentle edges won't scratch your cookware, preserving the longevity of your pots and pans.
Opt for spoons made from hardwoods like beech, maple, or olive wood for durability and resistance to splitting.
When selecting long-handled wooden spoons, look for ones with a length of at least 12 inches. This extra reach will give you ample clearance when accessing deep pots or reaching into the back of your solar oven.
Choose spoons with comfortable, ergonomic handles to reduce hand fatigue during use. Remember to hand wash your wooden utensils and occasionally treat them with food-grade mineral oil to maintain their quality and extend their lifespan.
Glass Jars

Glass jars are versatile and indispensable components of your DIY solar oven kit. They serve multiple purposes, from cooking and baking to storing and preserving food. When selecting glass jars for your solar oven, opt for wide-mouth varieties with tight-fitting lids. These provide easier access and better sealing, ensuring your food stays fresh and contaminant-free.
Mason jars are particularly well-suited for solar cooking due to their heat resistance and durability. You can use them to prepare a wide range of dishes, including:
- Soups and stews
- Rice and grains
- Baked goods like muffins or bread
To maximize efficiency, paint the exterior of your glass jars black, leaving a small strip clear for monitoring your food's progress. This dark coating helps absorb more solar energy, speeding up the cooking process.
When handling hot jars, always use thick oven mitts or tongs to prevent burns.
Remember to clean your glass jars thoroughly after each use and inspect them for cracks or chips. Damaged jars can shatter under high temperatures, potentially ruining your meal and creating a safety hazard.
With proper care, your glass jars will be reliable companions in your solar cooking adventures.
Frequently Asked Questions
How Long Does It Take to Cook Food in a Solar Oven?
Cooking time in a solar oven varies depending on your dish and sunlight conditions. You'll typically need 1-3 hours for most meals. It's slower than conventional ovens, but you'll save energy and enjoy sun-cooked flavors.
Can I Use a Solar Oven on Cloudy Days?
You can use a solar oven on cloudy days, but it'll be less effective. Your cooking times will increase, and you might not reach high temperatures. It's best to plan for longer cooking periods or consider alternative methods when it's overcast.
What's the Maximum Temperature a DIY Solar Oven Can Reach?
Your DIY solar oven can typically reach temperatures between 200°F and 300°F. However, with ideal design and conditions, you might achieve up to 400°F. Remember, factors like materials, insulation, and sunlight intensity will affect your oven's maximum temperature.
Are There Any Foods That Shouldn't Be Cooked in a Solar Oven?
You shouldn't cook foods that require high temperatures or quick cooking in a solar oven. Avoid raw meats, eggs, and dishes needing precise temperature control. Stick to slow-cooking foods like stews, casseroles, and baked goods for best results.
How Do I Properly Clean and Maintain My DIY Solar Oven?
You'll want to clean your DIY solar oven regularly. Wipe down the interior with a damp cloth, avoiding harsh chemicals. Check for any cracks or damage, and repair as needed. Store it in a dry place when not in use.
In Summary
You're now equipped with the essential utensils for your DIY solar oven. With these tools, you'll be able to monitor temperature, cook efficiently, handle hot items safely, and maximize heat retention. Don't forget to experiment with different recipes and cooking times. As you become more comfortable with your solar oven, you'll discover new ways to harness the sun's power for sustainable cooking. Enjoy your eco-friendly culinary adventures and the delicious meals you'll create!
Leave a Reply