Looking to build your own solar dehydrator? You've got three efficient options to choose from. The cardboard box dehydrator is perfect for beginners, using simple materials and black lining for heat absorption. For a more advanced project, try the wooden frame parabolic dehydrator, which concentrates sunlight for increased efficiency. If you're eco-conscious, the upcycled window solar dryer repurposes old windows into an effective drying system. Each design offers unique features like adjustable angles, reflective surfaces, and ventilation for ideal drying. These DIY plans provide a sustainable way to preserve food using the sun's energy. Explore these options to find the perfect fit for your needs and skill level.
Cardboard Box Solar Dehydrator

For a simple and cost-effective solar dehydrator, you can't beat a cardboard box design. This DIY project requires minimal materials and tools, making it perfect for beginners or those on a tight budget.
Start with a large cardboard box and cut openings for ventilation and sunlight exposure. Line the inside with black construction paper or paint it black to absorb heat effectively.
Create removable trays using smaller cardboard boxes or wooden frames covered with food-grade mesh. These trays will hold your fruits, vegetables, or herbs for drying.
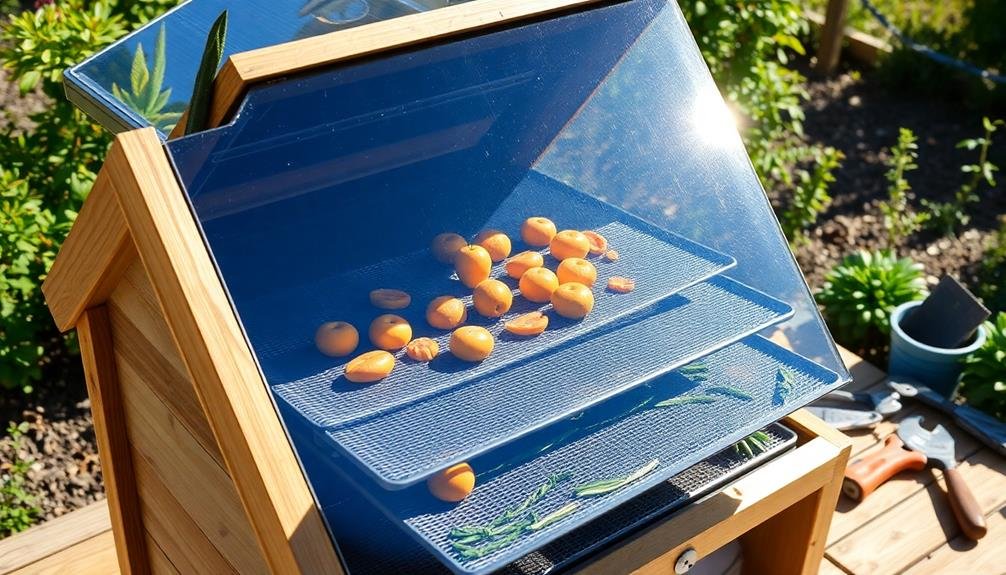
Position the box at an angle facing the sun, with the front slightly lower than the back to encourage air circulation. Cover the top opening with clear plastic wrap or a sheet of glass to trap heat and protect your food from insects and debris.
To enhance efficiency, add reflective surfaces around the box using aluminum foil or mylar sheets. This will direct more sunlight into the dehydrator.
Monitor the internal temperature using a thermometer, aiming for 95-145°F (35-63°C) depending on the food you're drying. Rotate the box as needed to follow the sun's path throughout the day.
Wooden Frame Parabolic Dehydrator
A wooden frame parabolic dehydrator takes solar drying to the next level with its efficiency and larger capacity. This design uses a curved reflective surface to concentrate sunlight onto your food, accelerating the drying process.
To build one, you'll need wooden boards, reflective material, and basic carpentry tools. Start by constructing a sturdy rectangular frame, then add curved supports to create the parabolic shape. Cover the interior with a highly reflective material like Mylar or polished aluminum sheets.
Install adjustable legs to optimize the angle for maximum sun exposure throughout the day. Place a series of drying racks within the focal point of the parabola, ensuring proper airflow between them. Use food-grade mesh or perforated trays for the racks to allow air circulation.
Add a transparent cover, such as clear acrylic or glass, to trap heat and protect your food from insects and debris. Include vents at the top and bottom to manage airflow and prevent condensation.
This design's increased efficiency means you can dry larger quantities of food faster than with a basic solar dehydrator. It's ideal for preserving fruits, vegetables, herbs, and even making jerky.
Upcycled Window Solar Dryer

Sustainability meets innovation in the upcycled window solar dryer. This eco-friendly design repurposes old windows to create an efficient solar dehydrator, perfect for preserving fruits, vegetables, and herbs.
To build your upcycled window solar dryer, you'll need two old windows of similar size, some scrap wood, and basic hardware. Start by creating a box frame using the wood, ensuring it's slightly larger than your windows. Attach one window to the top of the frame as a transparent lid.
Install the second window at an angle inside the box, creating a sloped surface to maximize sun exposure. Paint the interior black to absorb heat, and add ventilation holes at the top and bottom for air circulation. Place mesh screens or drying racks on the sloped window surface to hold your food items.
For better efficiency, consider adding reflective material around the edges to direct more sunlight onto your produce. This design isn't only cost-effective but also highly portable. You can easily move it to follow the sun throughout the day, ensuring ideal drying conditions for your food.
With proper positioning and maintenance, your upcycled window solar dryer will provide years of sustainable food preservation.
Frequently Asked Questions
How Does Altitude Affect Solar Dehydrator Efficiency?
At higher altitudes, you'll find your solar dehydrator works more efficiently. You've got lower air pressure, which speeds up moisture evaporation. However, you'll also face cooler temperatures, so you'll need to adjust your drying times accordingly.
Can Solar Dehydrators Be Used in Humid Climates?
Yes, you can use solar dehydrators in humid climates, but they'll be less efficient. You'll need to guarantee proper air circulation and may require longer drying times. Consider adding a small fan or desiccant to improve performance.
What's the Average Lifespan of a DIY Solar Dehydrator?
Your DIY solar dehydrator's lifespan depends on materials and maintenance. With proper care, it can last 5-10 years. You'll need to replace parts occasionally, but if you've built it well, it'll serve you for a long time.
Are There Food Safety Concerns When Using Solar Dehydrators?
Yes, you should be aware of food safety concerns when using solar dehydrators. You'll need to guarantee proper temperature control, prevent contamination, and monitor moisture levels. It's essential you follow safe food handling practices throughout the drying process.
How Do You Prevent Pests From Accessing Food in Solar Dehydrators?
To prevent pests in solar dehydrators, you'll want to use fine mesh screens over all openings. Keep your dehydrator clean and inspect it regularly. You can also add natural repellents like bay leaves or use food-safe silica gel packets.
In Summary
You've now explored three DIY solar dehydrator options that'll help you preserve food using the sun's power. Whether you choose the simple cardboard box design, the efficient parabolic model, or the upcycled window dryer, you're taking a step towards sustainable food preservation. Remember to adjust drying times based on your climate and the food you're dehydrating. With practice, you'll soon be creating delicious, long-lasting dried fruits, vegetables, and herbs using free solar energy.
Leave a Reply