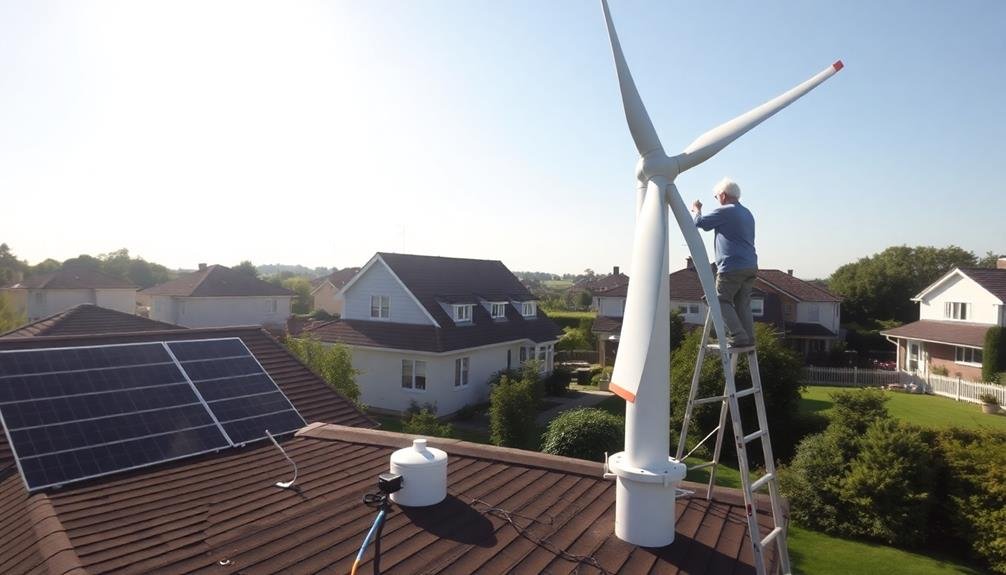
Boosting your home's energy with a DIY wind turbine can be a rewarding project. Start by evaluating your property's wind potential and choosing the right turbine size for your needs. Gather necessary tools and materials, secure permits, and prepare the installation site. You'll need to erect the tower, mount the turbine, and handle wiring and electrical connections. Don't forget to connect to the power grid and implement a maintenance routine. With proper planning and execution, you can maximize your turbine's energy output and reduce your reliance on traditional power sources. Dive deeper to uncover the full potential of this renewable energy solution.
Assessing Your Property's Wind Potential

Before diving into turbine installation, you'll need to evaluate your property's wind potential. Start by researching local wind data from weather stations or online resources. Look for average wind speeds in your area, paying attention to seasonal variations. Ideally, you want consistent wind speeds of at least 10-12 mph for a small wind turbine to be effective.
Next, assess your property's specific characteristics. Consider the topography, nearby structures, and vegetation. Hills, trees, and buildings can greatly impact wind flow. You'll want an open area with minimal obstructions for the best turbine performance. Use an anemometer to measure wind speeds at various locations on your property over several months.
Don't forget to check local zoning laws and regulations. Some areas have height restrictions or noise ordinances that may affect turbine installation. Also, consider your neighbors' views and potential concerns.
Lastly, estimate your energy needs and compare them to potential wind power generation. This will help you determine if a wind turbine is a cost-effective solution for your home. If your property isn't suitable for a wind turbine, consider alternative renewable energy options like solar panels.
Choosing the Right Turbine Size

Selecting the appropriate turbine size is crucial for maximizing energy production and efficiency. You'll need to evaluate several factors when choosing the right turbine for your property.
First, assess your energy consumption needs by reviewing your electricity bills and calculating your average monthly usage. This will help you determine the capacity required to offset your energy costs.
Next, factor in your property's wind resources, as identified in the previous step. A turbine that's too small won't generate enough power, while one that's too large may be unnecessary and cost-prohibitive.
Reflect on the available space for installation and any local zoning restrictions that might limit turbine size or height.
When evaluating turbine options, pay attention to:
- Rated power output (in kilowatts)
- Cut-in wind speed (the minimum speed required to generate electricity)
- Rotor diameter and swept area
Don't forget to account for future energy needs if you're planning to expand your home or add electric vehicles. It's often more cost-effective to install a slightly larger turbine initially than to upgrade later.
Gathering Necessary Tools and Materials

Before you begin installing your turbine, you'll need to gather all the essential tools and materials.
Start by creating a thorough checklist of tools, including wrenches, pliers, and safety equipment.
Next, compile an inventory of required materials, such as mounting hardware, wiring, and any additional components specific to your turbine model.
Essential Tools Checklist
A DIY turbine installer's success hinges on having the right tools and materials at hand. Before you begin your project, make sure you've got all the essentials.
You'll need basic hand tools like screwdrivers, pliers, and wrenches, as well as specialized equipment for working with electrical components. Don't forget safety gear, including gloves, goggles, and a hard hat.
For precise measurements and alignments, you'll want a level, tape measure, and compass. A power drill with various bits will be vital for mounting the turbine and creating holes for wiring.
You'll also need wire strippers, crimping tools, and electrical tape for handling the wiring aspects of the installation.
Here's a quick checklist of often-overlooked items you shouldn't forget:
- Weatherproof sealant for protecting connections
- Cable ties for organizing and securing wires
- Multimeter for testing electrical connections
Required Materials Inventory
Every successful DIY turbine installation starts with a thorough materials inventory. You'll need to gather all the necessary components before beginning your project. Start with the turbine itself, making sure you've selected the right size and type for your energy needs and location.
Don't forget the mounting bracket or pole, which should be sturdy enough to support your turbine in various weather conditions.
You'll also need electrical components, including wires, a charge controller, and batteries for energy storage. Confirm you have the correct gauge wire and sufficient length to connect your turbine to your home's electrical system.
Include safety equipment such as rubber gloves and safety glasses in your inventory.
For the installation process, you'll require concrete mix, rebar, and forms if you're creating a foundation. Gather weatherproofing materials like silicone sealant and waterproof tape to protect electrical connections.
Include bolts, nuts, and washers of appropriate sizes for securing the turbine and its components. Finally, don't overlook small but essential items like wire connectors, cable ties, and electrical tape.
Double-check your inventory against the manufacturer's specifications to make sure you haven't missed any vital materials.
Securing Permits and Approvals

Before installing your turbine, you'll need to navigate local zoning regulations and obtain necessary permits.
You should also contact your utility company to understand their specific requirements for grid connection.
Additionally, you may be required to conduct an environmental impact assessment to guarantee your project complies with ecological standards.
Local Zoning Regulations
When installing a DIY turbine, you'll need to navigate local zoning regulations and secure the necessary permits and approvals. Start by researching your area's specific zoning laws, as they can vary greatly between municipalities.
You'll likely need to check height restrictions, setback requirements, and noise regulations that may impact your turbine's placement and operation.
Contact your local planning or zoning office to discuss your project and obtain the required application forms. Be prepared to submit detailed plans, including the turbine's specifications, proposed location, and any supporting structures.
You may also need to provide environmental impact assessments or noise studies, depending on your area's requirements.
Consider these key aspects of zoning regulations:
- Height limitations: Many areas restrict the maximum height of structures, which can affect your turbine's efficiency.
- Setback requirements: You'll need to make certain your turbine is placed far enough from property lines and neighboring structures.
- Aesthetic considerations: Some communities have design guidelines to maintain visual harmony.
Be patient and persistent throughout the approval process, as it can take several weeks or even months.
Don't hesitate to seek professional help if you encounter complex zoning issues or face opposition from neighbors or local authorities.
Utility Company Requirements
After maneuvering through local zoning regulations, you'll need to address utility company requirements for your DIY turbine installation.
Contact your electric utility provider early in the planning process to understand their specific policies and procedures for connecting small-scale wind systems to the grid.
You'll likely need to complete an interconnection agreement, which outlines the technical and safety standards your turbine must meet. This typically includes installing a bi-directional meter to measure both the electricity you consume and the excess power you generate.
You may also need to add safety equipment like automatic shut-off switches and protective relays.
Many utilities require a professional inspection of your installation before granting final approval. They'll verify that your system complies with the National Electrical Code and local regulations.
Be prepared to provide detailed documentation, including electrical schematics and equipment specifications.
Some utility companies offer net metering programs, allowing you to receive credit for excess electricity you feed back into the grid.
Inquire about these options and any associated paperwork or special metering requirements.
Don't forget to ask about potential fees for connection services or system studies they might conduct.
Environmental Impact Assessments
Environmental impact assessments are an essential step in securing permits and approvals for your DIY turbine installation.
You'll need to evaluate how your turbine might affect local wildlife, noise levels, and visual aesthetics. Many jurisdictions require a detailed report on these potential impacts before granting permits.
Start by researching your area's specific requirements. You may need to hire a professional environmental consultant to conduct the assessment.
They'll examine factors like:
- Bird and bat migration patterns
- Potential shadow flicker effects on neighboring properties
- Noise levels at different wind speeds
Once you've completed the assessment, you'll need to submit it to your local planning department.
Be prepared to address any concerns they raise. You might need to make adjustments to your turbine's location or design to minimize environmental impacts.
Preparing the Installation Site

Preparation is key to a successful turbine installation. Before you begin, you'll need to clear the area where you plan to install your turbine. Remove any obstacles, vegetation, or debris that could interfere with the installation process or the turbine's operation.
Next, assess the ground conditions. Confirm the soil is stable enough to support the turbine's foundation. If necessary, consult a geotechnical engineer to determine if additional ground reinforcement is required.
Here's a quick checklist to help you prepare your installation site:
| Task | Tools Needed |
|---|---|
| Clear vegetation | Pruning shears, chainsaw |
| Level the ground | Shovel, rake, level |
| Mark foundation area | Measuring tape, stakes |
| Prepare access for equipment | Temporary road materials |
Once you've completed these tasks, it's time to plan for the foundation. Depending on your turbine's size and local regulations, you may need to pour a concrete base. Confirm you have the necessary permits and follow local building codes.
Assembling the Turbine Components

You'll begin assembling your turbine by gathering all necessary parts, including the blades, generator, and mounting hardware.
Next, you'll prepare the mounting structure, making certain it's stable and properly aligned to support the turbine's weight and movement.
Gather Necessary Parts
Gathering the necessary parts is a vital first step in assembling your DIY turbine. Before you begin, make certain you have all the components required for a successful installation.
You'll need the main turbine body, blades, generator, tail vane, and mounting hardware. Don't forget essential tools like wrenches, screwdrivers, and a drill.
When sourcing parts, consider quality and compatibility. Opt for materials that can withstand outdoor conditions and are designed for wind energy applications.
It's essential to choose components that work together seamlessly to maximize efficiency and longevity.
Here's a quick checklist of key items you'll need:
- Turbine rotor and hub assembly
- Generator with appropriate voltage output
- Tail boom and vane for directional control
- Tower or mounting pole with guy wires
- Charge controller and deep-cycle batteries
As you gather these parts, double-check measurements and specifications to make certain everything fits correctly.
It's also wise to have extra nuts, bolts, and washers on hand. Remember, proper preparation at this stage will save you time and frustration during the assembly process.
If you're unsure about any component, consult the manufacturer's guidelines or seek advice from experienced DIY turbine builders.
Prepare Mounting Structure
Once you've gathered all the necessary parts, the next essential step is preparing the mounting structure for your DIY turbine. Start by selecting a suitable location for your turbine, considering factors like wind exposure and local zoning regulations. Ascertain the chosen spot is free from obstacles that could interfere with the turbine's operation.
Begin assembling the mounting pole or tower according to the manufacturer's instructions. If you're using a pre-fabricated tower, follow the provided guidelines carefully. For a custom-built structure, ascertain it's sturdy enough to withstand strong winds and vibrations.
Next, prepare the foundation for your mounting structure. This may involve digging a hole and pouring concrete, or securing anchor bolts to an existing surface. Allow sufficient time for the foundation to cure before proceeding.
Attach any necessary guy wires or support cables to reinforce the structure. Double-check all connections and tighten bolts to the recommended torque specifications.
Install the turbine mounting plate or bracket at the top of the structure, ascertaining it's level and securely fastened.
Connect Blades and Generator
The heart of your DIY turbine lies in connecting the blades to the generator. This vital step requires careful attention to detail and precision. Begin by aligning the blade hub with the generator shaft, guaranteeing it's centered and level. Secure the hub using the provided bolts, tightening them evenly to maintain balance.
Next, attach each blade to the hub, following the manufacturer's instructions for proper angle and spacing.
As you connect the blades, keep these key points in mind:
- Balance is critical: Uneven blade weight distribution can cause vibrations and reduce efficiency.
- Torque specifications matter: Over-tightening can damage components, while under-tightening may lead to loosening during operation.
- Weather protection is essential: Apply a weatherproof sealant to all connection points to prevent moisture ingress.
Once the blades are securely fastened, connect the generator to your mounting structure. Verify all wiring is properly insulated and protected from the elements.
Double-check all connections and give the turbine a gentle spin by hand to verify smooth rotation. With the blades and generator now connected, you're one step closer to harnessing wind power for your home.
Erecting the Tower

Your wind turbine's tower forms the backbone of the entire system. It's essential to erect it correctly to guarantee peak performance and safety.
Begin by laying out the tower sections on the ground, aligning them in the order they'll be assembled. Carefully inspect each section for any damage or defects before proceeding.
Next, attach guy wires to the appropriate points on the tower. These will provide stability once the tower is upright. Use a gin pole to lift each section into place, starting with the bottom section. As you raise each piece, bolt it securely to the one below. Verify all connections are tight and properly aligned.
Once the tower is fully assembled, it's time to raise it. Use a winch or come-along to slowly lift the tower, keeping tension on the guy wires to maintain balance.
As the tower nears vertical, secure the guy wires to their anchors. Double-check all connections and confirm the tower is perfectly straight using a level.
Mounting the Turbine

With the tower securely in place, it's time to focus on mounting the turbine itself. This critical step requires careful attention to detail and precision. Begin by reviewing your turbine's manufacturer instructions, as specific mounting procedures may vary between models.
Before lifting the turbine, verify you have all necessary tools and hardware readily available. You'll need to work efficiently once the turbine is hoisted to minimize fatigue and potential safety risks.
Use a pulley system or crane to carefully raise the turbine to the top of the tower. As you guide it into position, align the mounting brackets on the turbine with the corresponding attachment points on the tower.
Secure the turbine to the tower using high-quality, corrosion-resistant bolts and nuts. Tighten them to the manufacturer's recommended torque specifications to guarantee a stable connection. Once mounted, double-check all fasteners and connections.
Key considerations for turbine mounting:
- Weather conditions: Choose a calm day with clear visibility
- Safety equipment: Wear proper PPE, including a safety harness
- Electrical connections: Prepare wiring for connecting the turbine to your system
After mounting, conduct a visual inspection of the turbine and tower assembly. Look for any signs of misalignment or stress on components.
Wiring and Electrical Connections

Now that you've successfully mounted the turbine, how do you bring its power to life? It's time to tackle the wiring and electrical connections. You'll need to connect the turbine to your home's electrical system, but safety is paramount. Always consult a licensed electrician if you're unsure about any step.
Start by running a cable from the turbine to your home's main electrical panel. Use weather-resistant cables designed for outdoor use. Install a disconnect switch near the turbine for maintenance and emergencies. Next, connect the turbine to a charge controller, which regulates the power output and protects your batteries from overcharging.
Here's a quick guide to the main components you'll be working with:
| Component | Function | Installation Location |
|---|---|---|
| Turbine | Generates power | Outdoors on mount |
| Disconnect switch | Safety cutoff | Near turbine |
| Charge controller | Regulates power | Indoor utility area |
| Inverter | Converts DC to AC | Near batteries |
After the charge controller, connect your battery bank. These store excess power for use when the wind isn't blowing. Finally, install an inverter to convert the DC power from the batteries into AC power for your home's appliances. Remember to ground all components properly to prevent electrical hazards.
Connecting to the Power Grid

Connecting your turbine to the power grid is the next step in maximizing your wind energy system's potential. This process, known as grid-tie, allows you to feed excess electricity back into the utility network, potentially earning credits on your energy bill. Before proceeding, contact your local utility company to discuss their specific requirements and obtain necessary permits.
You'll need to install a grid-tie inverter, which converts the DC power from your turbine into AC power compatible with the grid. Make sure that your inverter meets all safety and regulatory standards.
Next, you'll connect the inverter to your home's main electrical panel and install a bi-directional meter to track energy flow in both directions.
Safety is paramount when connecting to the grid. Consider these vital points:
- Always work with a licensed electrician for final connections
- Install proper disconnects and surge protection devices
- Verify your system includes anti-islanding protection to prevent backfeeding during power outages
Once connected, test your system thoroughly to verify proper operation. Monitor your energy production and consumption to optimize your wind turbine's performance and maximize your savings.
Regular maintenance and inspections will help guarantee your grid-tied system continues to operate efficiently and safely for years to come.
Maintenance and Troubleshooting Tips

Ensuring your wind turbine operates at peak efficiency requires regular maintenance and the ability to troubleshoot common issues.
You'll need to perform monthly visual inspections, checking for loose bolts, cracks, or signs of wear on the blades and tower. Lubricate moving parts according to the manufacturer's instructions, typically every six months.
Listen for unusual noises during operation, as they often indicate problems. If you hear grinding or squealing, it may be a sign of bearing failure.
Check the turbine's output regularly; a sudden drop in power generation could mean blade damage or a faulty generator.
Keep the blades clean to maintain maximum performance. Use a mild soap solution and a soft cloth to remove dirt and debris.
Inspect the guy wires (if applicable) for tension and corrosion, adjusting or replacing them as needed.
In case of severe weather, shut down your turbine to prevent damage. If it stops spinning in windy conditions, check for loose connections or a tripped circuit breaker.
For electrical issues, consult a professional if you're not comfortable working with high-voltage systems.
Maximizing Energy Output

With your turbine properly maintained, it's time to focus on getting the most out of your investment. To maximize energy output, you'll need to optimize your turbine's performance and placement. Start by regularly monitoring your turbine's energy production and comparing it to local wind data. This will help you identify any discrepancies and potential areas for improvement.
Consider upgrading your turbine's components if they're outdated or underperforming. Modern blades, generators, and control systems can greatly boost efficiency. You should also verify your turbine is positioned in the best possible location on your property. Conduct a thorough wind assessment to identify areas with consistent, strong winds and minimal obstructions.
To further enhance your turbine's output:
- Install a wind vane to keep the turbine facing into the wind
- Use a taller tower to access stronger, more consistent winds
- Implement an energy storage system to capture excess power
Don't forget to regularly clean your turbine's blades and remove any debris that may accumulate. Even small obstructions can greatly reduce efficiency.
Frequently Asked Questions
How Noisy Are Residential Wind Turbines?
You'll find residential wind turbines aren't too noisy. They typically produce 45-50 decibels at 100 feet, similar to a refrigerator's hum. However, noise levels can vary based on wind speed and turbine design. You'll barely notice them.
Can Wind Turbines Withstand Extreme Weather Conditions Like Hurricanes or Tornadoes?
Most wind turbines can withstand moderate storms, but they're not designed for extreme weather like hurricanes or tornadoes. You'll need to lower or secure your turbine during severe conditions to prevent damage. Always prioritize safety over power generation.
Do Wind Turbines Pose a Threat to Local Wildlife?
Wind turbines can pose some risks to wildlife, particularly birds and bats. You'll find they may cause collisions or habitat disruption. However, modern designs and proper siting have considerably reduced these impacts in recent years.
How Long Does It Take to Recoup the Initial Investment?
You'll typically recoup your initial investment in 5-10 years, depending on factors like wind conditions, turbine size, and electricity rates. Don't forget to take into account maintenance costs when calculating your payback period.
Are There Any Tax Incentives or Rebates for Installing a Wind Turbine?
Yes, you'll often find tax incentives and rebates for wind turbine installations. Check with your local government, state agencies, and utility companies. They may offer federal tax credits, property tax exemptions, or cash rebates to offset your costs.
In Summary
You've now got the knowledge to harness wind power at home. Remember, proper assessment, planning, and installation are essential for success. Don't forget to maintain your turbine regularly and optimize its performance. While it's a significant undertaking, your DIY wind turbine can lead to substantial energy savings and a reduced carbon footprint. Embrace this sustainable energy solution and enjoy the benefits of clean, renewable power right in your backyard.

Leave a Reply