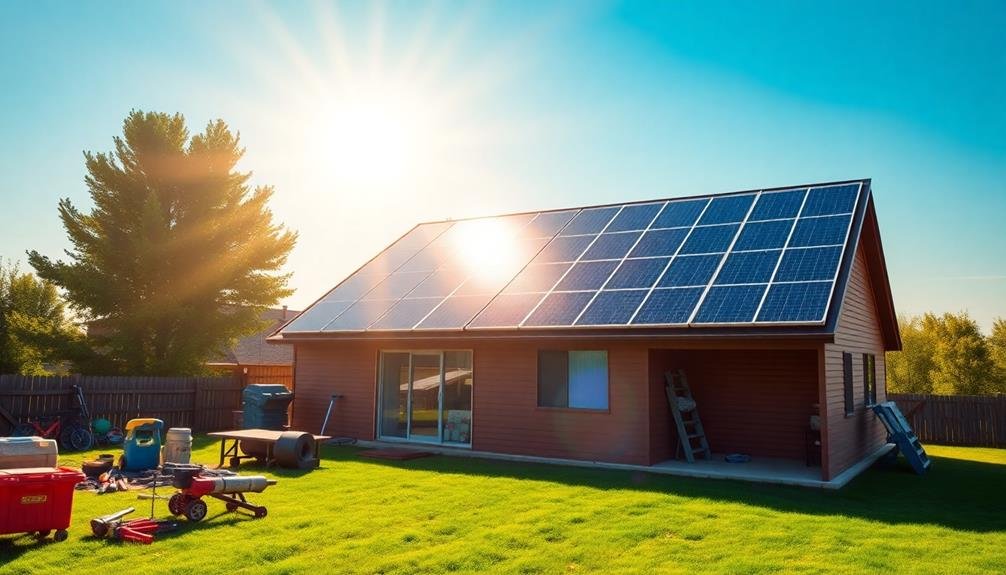
You can revolutionize your home's energy system by crafting your own solar collector. Start by choosing between thermal and photovoltaic collectors based on your needs. Gather essential tools like drills, saws, and safety gear, along with materials such as wood, copper piping, and insulation. Design your collector considering size, orientation, and tilt angle for peak efficiency. Build the frame, install the absorber plate, and connect the plumbing components. Regular maintenance and monitoring will maximize performance and savings. With proper care, your DIY solar collector can slash utility bills and reduce your carbon footprint for decades. Dive deeper to access the full potential of solar energy at home.
Understanding Solar Collector Basics
As you commence your journey to harness solar energy, understanding the basics of solar collectors is essential.
Solar collectors are devices that capture and convert sunlight into usable heat or electricity. They're the heart of any solar energy system, whether for heating water, warming your home, or generating power.
There are two main types of solar collectors: thermal and photovoltaic (PV). Thermal collectors absorb sunlight to heat a fluid, typically water or air, which is then used for various applications.
PV collectors, on the other hand, convert sunlight directly into electricity using semiconductor materials.
The efficiency of a solar collector depends on several factors, including its orientation, tilt angle, and the materials used in its construction. For peak performance, you'll want to position your collector facing south (in the Northern Hemisphere) and at an angle roughly equal to your latitude.
Key components of a solar collector include the absorber plate, which captures solar radiation; the glazing, which protects the absorber and reduces heat loss; and the insulation, which minimizes heat transfer to the surroundings.
Understanding these elements will help you make informed decisions when crafting your own solar collector.
Necessary Tools and Materials
Now that you've grasped the fundamentals of solar collectors, let's focus on what you'll need to build one yourself.
You'll require a mix of common household items and specialized components. Start with a wooden frame, plywood sheets, and insulation material for the collector's base. You'll also need copper piping, pipe fittings, and a pump to circulate the heat-transfer fluid.
For the absorber plate, select a thin sheet of copper or aluminum painted black. Cover it with a glass or polycarbonate sheet to create a greenhouse effect.
Don't forget sealants and weatherstripping to guarantee your collector is watertight.
Essential tools include a drill, saw, screwdriver, soldering iron, and various wrenches. You'll also need safety equipment like gloves and goggles.
For precise measurements, have a thermometer, flow meter, and multimeter on hand.
Consider purchasing a pre-made solar collector kit if you're not confident in your DIY skills. These kits often include most necessary components and detailed instructions, simplifying the construction process while still allowing you to customize your solar energy system.
Designing Your Solar Collector
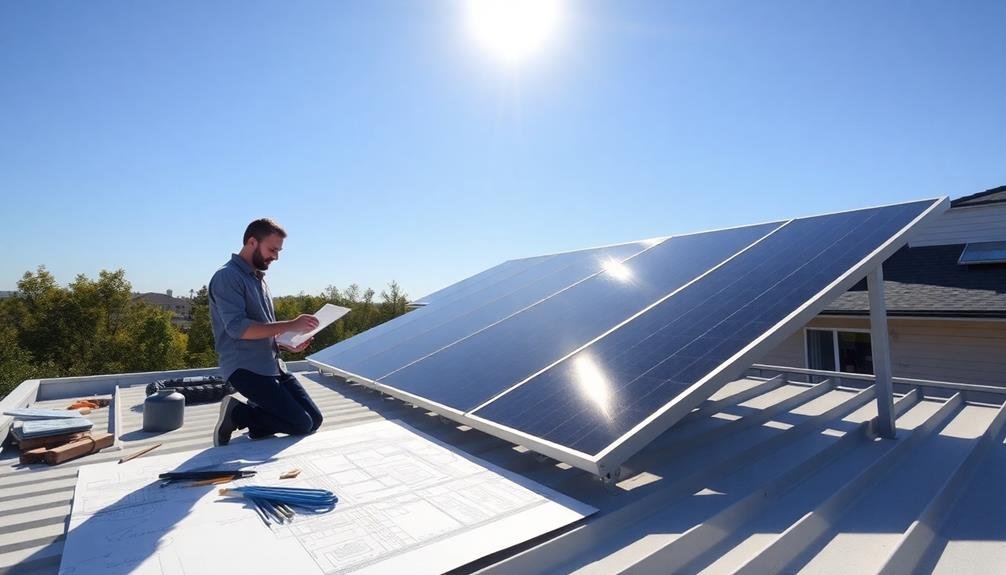
The blueprint of your solar collector is essential for its efficiency and effectiveness. Start by determining the size of your collector based on your energy needs and available space. A typical residential collector ranges from 20 to 40 square feet.
Consider the angle of installation, aiming for ideal sun exposure throughout the year. In most cases, this means tilting the collector at an angle equal to your latitude plus 15 degrees.
Choose between flat-plate and evacuated tube collectors. Flat-plate collectors are simpler and cheaper but less efficient, while evacuated tube collectors offer higher efficiency but cost more.
Design the absorber plate using a dark, heat-conductive material like copper or aluminum, coated with a selective surface to maximize heat absorption. Plan the insulation layer to minimize heat loss, using materials like fiberglass or foam board.
Incorporate a glazing cover, typically made of tempered glass or polycarbonate, to trap heat while allowing sunlight through.
Design the piping system for fluid circulation, ensuring even distribution across the absorber plate.
Building the Collector Frame
While your design is complete, constructing the frame marks the first tangible step in building your solar collector. Begin by gathering your materials: wood for the frame, screws, a drill, and a saw. Choose weather-resistant wood like cedar or treated lumber to guarantee longevity.
Cut the wood to your specified dimensions, guaranteeing precision for a snug fit. Assemble the frame using wood screws, pre-drilling holes to prevent splitting. Don't forget to add support braces for stability.
Next, create a backing for your collector. Plywood or oriented strand board (OSB) works well. Cut it to size and secure it to the frame, creating a solid foundation for your absorber plate.
Here's a quick guide to frame assembly:
| Step | Action | Time |
|---|---|---|
| 1 | Cut wood | 30 min |
| 2 | Assemble frame | 45 min |
| 3 | Add braces | 20 min |
| 4 | Attach backing | 15 min |
With your frame complete, you're ready to move on to installing the absorber plate and glazing. Remember, a well-built frame guarantees your collector's efficiency and longevity, so take your time and focus on quality craftsmanship.
Installing the Absorber Plate
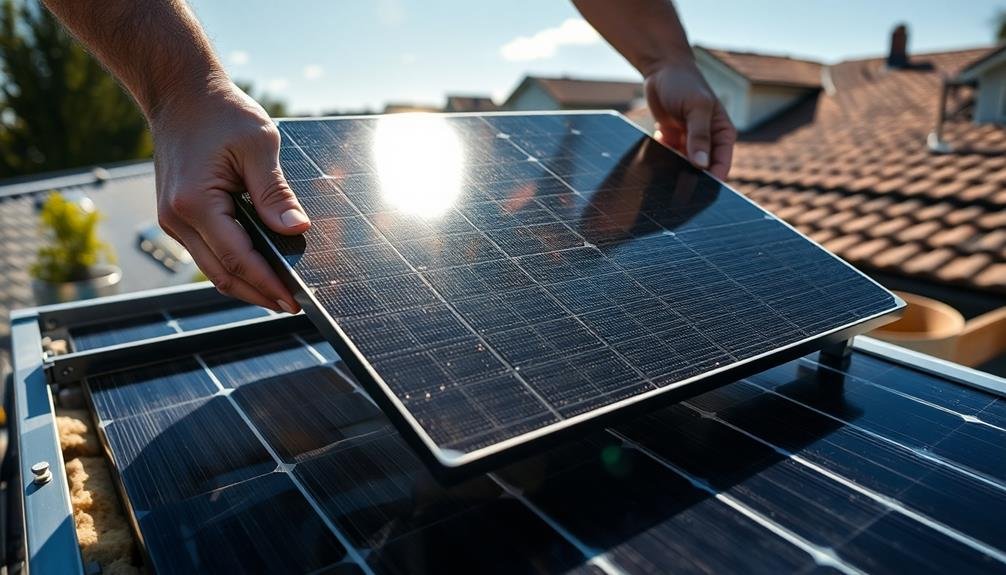
When installing the absorber plate, you'll need to focus on two key aspects: positioning and securing.
You'll want to position the plate for maximum efficiency, ensuring it's angled to capture the most sunlight throughout the day.
Once you've determined the ideal position, you'll need to securely fasten the plate to prevent any movement or damage from environmental factors.
Positioning for Maximum Efficiency
Proper positioning of your solar collector's absorber plate is essential for maximizing energy efficiency. You'll want to angle it towards the sun's path to capture the most sunlight throughout the day. In the Northern Hemisphere, face your collector south, while in the Southern Hemisphere, face it north.
The ideal tilt angle depends on your latitude and the season. As a general rule, set the tilt angle equal to your latitude for year-round use. Adjust it by adding 15 degrees in winter or subtracting 15 degrees in summer for seasonal enhancement.
Consider these factors when positioning your absorber plate:
- Local climate and weather patterns
- Potential shading from nearby structures or trees
- Roof pitch and structural limitations
- Ease of access for maintenance
- Aesthetic impact on your home's appearance
Use a compass and inclinometer to guarantee precise alignment. If possible, install your collector on an adjustable mount to fine-tune its position throughout the year.
Securing the Absorber Plate
With your solar collector's position optimized, it's time to fasten the absorber plate. This vital component absorbs solar radiation and transfers heat to the fluid circulating through the system.
Begin by cleaning the interior of the collector frame, making sure it's free from debris and dust. Apply a thin layer of high-temperature silicone sealant along the frame's edges where the absorber plate will sit.
Carefully lower the absorber plate into position, aligning it with the pre-drilled holes in the frame. Use stainless steel screws to fasten the plate securely, starting from the center and working your way outward. This method helps prevent warping and guarantees even pressure distribution.
Tighten the screws gradually, alternating between opposite sides to maintain balance. Once the plate is firmly attached, inspect the edges for any gaps.
Apply additional silicone sealant if necessary to create a watertight seal. This step is vital for preventing moisture infiltration and maintaining the collector's efficiency.
Allow the sealant to cure completely before proceeding with the next steps of your solar collector assembly. Proper installation of the absorber plate is essential for maximizing your system's heat collection and overall performance.
Applying Insulation and Glazing
Once you've assembled the basic structure of your solar collector, it's time to focus on insulation and glazing. These components are essential for maximizing efficiency and heat retention.
Start by applying insulation to the back and sides of the collector. Use high-temperature insulation materials like fiberglass or mineral wool, ensuring a snug fit around the absorber plate.
Next, install the glazing, which acts as a transparent cover for your collector. Choose between tempered glass or polycarbonate sheets, both offering excellent durability and light transmission. Secure the glazing with weatherproof sealant and fasteners, creating an airtight seal to prevent heat loss.
When applying insulation and glazing, keep these key points in mind:
- Use gloves and protective gear when handling insulation materials
- Cut insulation to fit precisely, leaving no gaps
- Apply a reflective foil barrier between the insulation and absorber plate
- Clean the glazing thoroughly before installation
- Allow proper expansion space for the glazing material
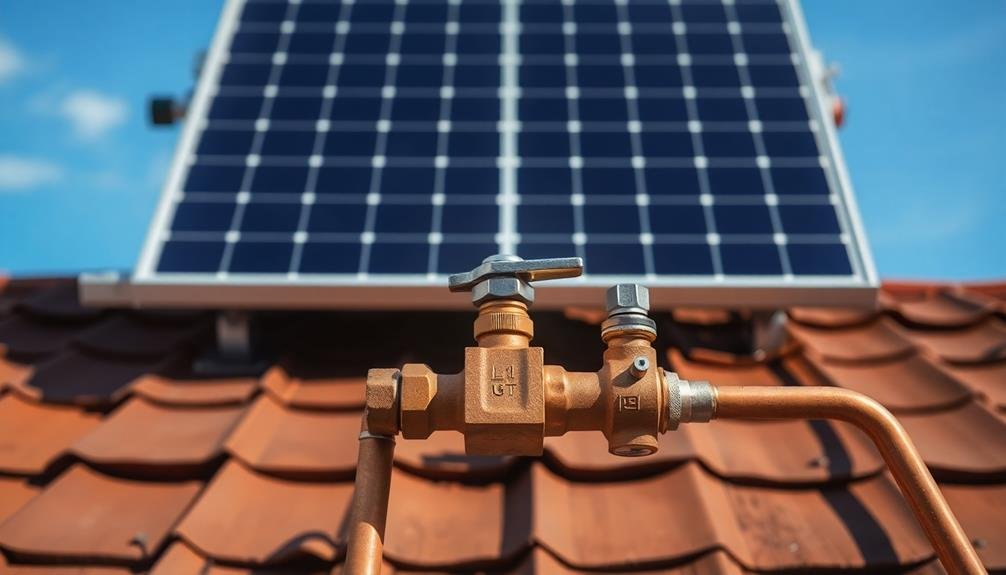
Connecting Plumbing Components
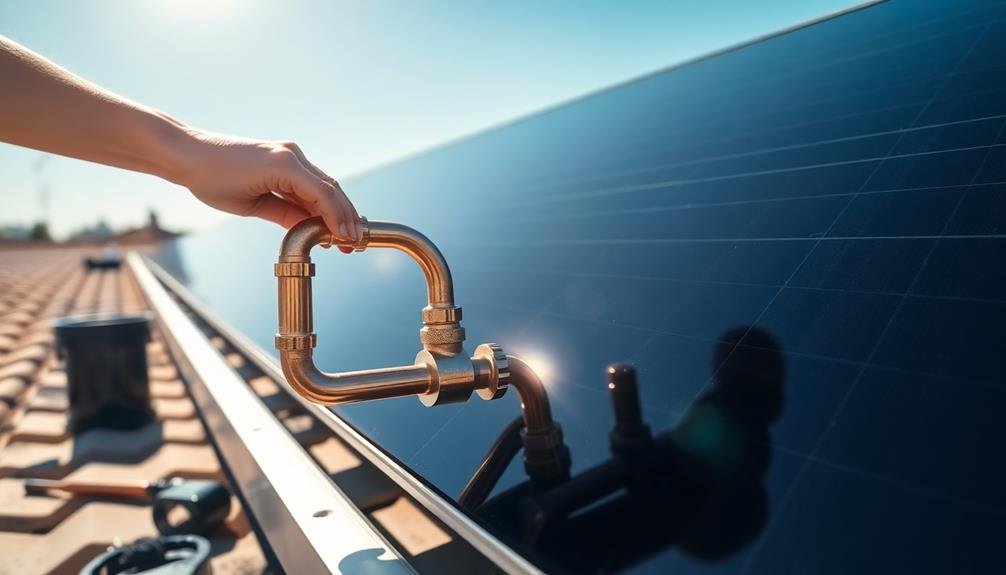
Now that you've sealed your collector, it's time to focus on the plumbing components. You'll need to connect the inlet and outlet pipes to your collector box. Start by drilling holes for the pipes, making sure they're slightly larger than the pipe diameter. Insert rubber grommets into these holes to prevent leaks and protect the pipes.
Next, attach the copper pipes to your absorber plate using soldering techniques or compression fittings. Make certain a tight seal to maximize heat transfer efficiency. Connect the external plumbing to these pipes, using appropriate fittings and valves to control water flow.
| Component | Purpose | Installation Tip |
|---|---|---|
| Inlet Pipe | Brings cold water in | Install at bottom of collector |
| Outlet Pipe | Carries heated water out | Install at top of collector |
| Valves | Control water flow | Use ball valves for easy operation |
Don't forget to insulate all exposed pipes to minimize heat loss. Use high-temperature pipe insulation, securing it with UV-resistant tape. Finally, install a pump to circulate water through your system, and connect it to your home's existing water heating setup. Test your connections for leaks before finalizing the installation, making sure your solar collector is ready to harness the sun's energy efficiently.
Mounting the Solar Collector
When mounting your solar collector, you'll need to evaluate the ideal location for maximum sunlight exposure.
You should assess factors like roof angle, shade patterns, and local climate conditions to determine the best placement.
Once you've chosen the perfect spot, it's essential to use secure attachment techniques that can withstand wind and weather, ensuring your collector remains stable and efficient for years to come.
Choosing Optimal Mounting Location
The success of your solar collector hinges on its placement. To maximize energy collection, you'll need to carefully consider the ideal mounting location. Start by evaluating your property for areas with unobstructed southern exposure, as this orientation receives the most sunlight throughout the day in the Northern Hemisphere.
Analyze potential mounting spots, keeping in mind factors such as roof angle, structural integrity, and ease of access for maintenance. You'll want to avoid areas prone to shading from nearby trees, buildings, or other obstacles.
Consider seasonal changes in sun angle and how they might affect your collector's performance.
When selecting the perfect location, keep these key factors in mind:
- Angle of incidence: Aim for a tilt that matches your latitude for year-round efficiency
- Structural support: Verify the mounting surface can handle the collector's weight
- Weather resistance: Choose a spot protected from strong winds and heavy snow loads
- Proximity to storage: Minimize distance to your heat storage system to reduce heat loss
- Aesthetics: Balance energy efficiency with visual appeal for your property
Secure Attachment Techniques
Securing your solar collector properly is essential for its longevity and performance. You'll need to take into account both the mounting surface and the attachment method. For roof installations, use stainless steel lag bolts that penetrate the rafters, guaranteeing a solid anchor. Apply a weatherproof sealant around each bolt to prevent leaks.
If you're mounting on a wall, use heavy-duty brackets designed for solar panels, and anchor them securely into the studs.
For ground-mounted systems, concrete footings provide a stable base. Embed mounting posts into the concrete and allow it to cure fully before attaching your collector. Use galvanized or stainless steel hardware to resist corrosion. Confirm all connections are tight, but don't overtighten, as this can damage the panels or mounting hardware.
Take into account wind loads in your area and choose attachment methods that can withstand local conditions. Use locking washers or thread-locking compounds to prevent loosening over time.
If you're unsure about the structural integrity of your mounting surface, consult a professional to assess and reinforce it if necessary. Regular inspections of your mounting system will help maintain its security and effectiveness.
Integrating With Existing Water System
Integrating a solar collector with your existing water system involves three key steps. First, you'll need to connect the collector to your cold water supply. This usually means tapping into the main cold water line before it enters your water heater.
Next, you'll install a pump to circulate water through the collector. Finally, you'll connect the heated water output from the collector to your existing water heater.
Before you begin, verify you have all necessary components:
- Solar collector panels
- Circulation pump
- Expansion tank
- Temperature sensors
- Control unit
You'll need to install the pump near your water heater, typically on the cold water supply line. The expansion tank accommodates the increased water volume as it heats and expands.
Temperature sensors monitor the collector and storage tank temperatures, while the control unit manages the system's operation.
When integrating, you must also consider your climate. In freezing conditions, you'll need to use a glycol-based heat transfer fluid instead of water and install a heat exchanger. This prevents damage from frozen pipes.
Always consult local building codes and consider professional installation if you're unsure about any aspect of the integration process.
Testing and Troubleshooting
When testing your solar collector, you'll need to measure its efficiency using techniques like flow rate analysis and temperature differential calculations.
You're likely to encounter common issues such as air locks, leaks, or incorrect positioning that can affect performance.
Efficiency Measurement Techniques
To accurately assess the performance of your solar collector, you'll need to employ various efficiency measurement techniques. Start by measuring the inlet and outlet temperatures of your collector fluid using thermometers or temperature sensors. Record these values at regular intervals throughout the day to calculate the temperature difference.
Next, measure the flow rate of your collector fluid using a flow meter. This data, combined with the temperature difference, allows you to calculate the heat energy output of your system. To determine overall efficiency, you'll need to compare this output to the solar radiation input, which you can measure using a pyranometer.
Key efficiency metrics to take into account include:
- Thermal efficiency
- Heat loss coefficient
- Collector heat removal factor
- Stagnation temperature
- Time constant
Monitor these metrics over time to identify trends and potential issues.
Keep in mind that factors like weather conditions, collector orientation, and shading can impact efficiency. By regularly measuring and analyzing your solar collector's performance, you'll be able to optimize its operation and guarantee you're maximizing your energy savings.
Common Issues Solved
Troubleshooting solar collectors can be a challenging task, but it's essential for maintaining peak performance. You'll often encounter common issues that can be easily resolved with the right approach.
First, check for leaks in the system by inspecting connections and seals. If you notice any fluid loss, tighten fittings or replace damaged components.
Next, address overheating problems by ensuring proper insulation and venting. You may need to adjust the collector angle or add shading devices to prevent excessive heat buildup.
If you're experiencing low heat output, verify that the collector is clean and free from debris. Regularly wash the surface to maintain peak efficiency.
For circulation issues, inspect the pump and valves for proper operation. You might need to bleed air from the system or replace faulty components. Monitor system pressure and top up the heat transfer fluid as needed.
If you notice significant temperature fluctuations, check the thermostat and control systems for accuracy.
Lastly, don't forget to examine the storage tank for corrosion or sediment buildup. Flush the tank periodically to maintain water quality and heat transfer efficiency.
Maintenance and Cleaning Tips

Three key maintenance tasks will keep your solar collector operating at peak efficiency. First, regularly inspect for damage or debris. Check for cracks, loose connections, or anything obstructing the collector's surface.
Second, clean the collector periodically. Dust, pollen, and bird droppings can reduce efficiency.
Third, monitor system performance to catch issues early.
To clean your solar collector effectively:
- Use soft brushes or sponges to avoid scratching
- Employ mild, non-abrasive cleaners
- Rinse thoroughly with clean water
- Clean during cooler hours to prevent rapid drying
- Follow manufacturer's guidelines for specific products
Schedule cleaning sessions based on your local environment. Dusty or pollen-heavy areas may require more frequent cleaning. In most cases, cleaning every 3-6 months suffices.
Don't forget to clean the surrounding area, trimming overhanging branches or removing nearby dust sources.
Lastly, consider professional maintenance annually. They'll check electrical connections, fluid levels in thermal systems, and overall performance.
Maximizing Efficiency and Performance
Efficiency champions know that maximizing solar collector performance involves more than just installation and maintenance. To get the most out of your solar collector, you'll need to focus on several key factors.
First, guarantee ideal positioning by angling your collector towards the sun's path. In the Northern Hemisphere, face it south at an angle equal to your latitude plus 15 degrees.
Next, consider adding a tracking system to follow the sun's movement, increasing energy capture by up to 30%. Insulate your collector and storage tank to minimize heat loss, using materials like fiberglass or foam.
Install a heat exchanger to effectively transfer energy from the collector to your home's heating system.
Monitor your system's performance regularly using smart meters or energy management software. This data will help you identify inefficiencies and make necessary adjustments.
Upgrade to high-efficiency pumps and controllers to reduce energy consumption. Finally, consider integrating your solar collector with other renewable energy sources, like wind or geothermal, for a more robust and effective home energy system.
Cost Savings and Environmental Impact

Sustainability and savings go hand in hand when it comes to solar collectors for home energy. By harnessing the sun's power, you're not only reducing your carbon footprint but also slashing your energy bills. The initial investment in a solar collector system can pay off considerably over time, with many homeowners recouping their costs within 5-10 years.
You'll enjoy numerous benefits from your solar collector:
- Lower monthly utility bills
- Increased home value
- Protection against rising energy costs
- Potential tax incentives and rebates
- Reduced dependence on the grid
The environmental impact of solar collectors is substantial. By switching to this clean energy source, you're actively reducing greenhouse gas emissions and decreasing your reliance on fossil fuels. A typical residential solar system can offset about 100,000 pounds of carbon dioxide over its lifetime – equivalent to planting over 2,000 trees.
Moreover, solar collectors require minimal maintenance, ensuring long-term cost savings. With a lifespan of 25-30 years, your investment continues to pay dividends long after the initial break-even point.
You're not just saving money; you're investing in a sustainable future for generations to come.
Frequently Asked Questions
Can a Solar Collector Work Effectively in Cold or Cloudy Climates?
Yes, solar collectors can work in cold or cloudy climates. You'll still generate energy, but at reduced efficiency. To maximize output, you should consider using higher-efficiency panels and adjusting their angle for peak sun exposure.
How Long Does It Typically Take to See a Return on Investment?
You'll typically see a return on investment in 5-10 years, depending on your location, energy usage, and system size. Factors like electricity rates and available incentives can greatly impact your payback period. It's worth calculating your specific situation.
Are There Any Local Regulations or Permits Required for Installation?
You'll likely need permits for solar installation. Check with your local building department for specific requirements. They may include electrical, structural, and zoning permits. Don't skip this step, as it's essential for legal compliance.
Can Solar Collectors Be Used for Space Heating in Addition to Water Heating?
Yes, you can use solar collectors for space heating. They're versatile and can warm your home through radiant floor systems or forced air. You'll need a larger system, but it's an efficient way to heat your living spaces.
What Are the Potential Risks or Drawbacks of DIY Solar Collector Installation?
You'll face risks like roof damage, leaks, and electrical hazards when installing DIY solar collectors. You're also likely to encounter performance issues, voided warranties, and potential code violations. It's best to consult professionals for safe, efficient installation.
In Summary
You've now got the knowledge to build your own solar collector, joining the home energy revolution. By following these steps, you'll harness the sun's power, reducing your carbon footprint and energy bills. Remember to maintain your collector regularly for peak performance. As you enjoy the benefits of your DIY project, you're not just saving money; you're contributing to a cleaner, more sustainable future. Keep innovating and exploring renewable energy solutions!


Leave a Reply