Crafting your own plant illumination system can transform your indoor space into a thriving garden oasis. You'll need to understand LED grow light basics, select the right bulbs, and design a system tailored to your plants' needs. Assemble a frame, wire it safely, and consider integrating smart bulbs for added control. Position lights ideally, typically 6-12 inches above plants, and maintain your setup regularly. You can expand your garden with vertical solutions and explore hydroponic systems. By mastering these elements, you'll create an efficient, aesthetically pleasing indoor garden that flourishes year-round. Dive deeper to reveal the full potential of your green sanctuary.
Understanding LED Grow Light Basics

LED grow lights have taken off in recent years as an efficient way to nurture plants indoors. They're a popular choice for home gardeners due to their energy efficiency, long lifespan, and ability to provide specific light spectrums that plants need for growth.
When choosing LED grow lights, you'll need to take into account several factors. First, understand the light spectrum. Plants primarily use red and blue light for photosynthesis, but full-spectrum lights can promote overall health.
Next, evaluate the intensity of light, measured in lumens or PAR (Photosynthetically Active Radiation). The required intensity depends on your plants' needs and the distance between the light and the plants.
You'll also want to look at the coverage area of the light and verify it matches your grow space. Wattage is important too, but don't rely solely on this metric as LED efficiency varies. Instead, focus on the actual light output.
Selecting the Right LED Bulbs
Once you've grasped the basics of LED grow lights, it's time to focus on selecting the right bulbs for your indoor garden. Start by considering the light spectrum your plants need. Most plants thrive with a combination of red and blue light, but some benefit from additional colors like green or white.
Look for full-spectrum LED bulbs that mimic natural sunlight for versatile growing.
Next, evaluate the bulb's intensity, measured in lumens or PAR (Photosynthetically Active Radiation). Different plants require varying light levels, so research your specific species' needs. For low-light plants, 300-800 lumens per square foot is often sufficient, while high-light plants may need 2000+ lumens.
Consider the bulb's beam angle, which affects light distribution. Wider angles (120°) are suitable for larger areas, while narrower angles (90°) concentrate light for taller plants.
Don't forget about energy efficiency and longevity. Look for bulbs with high lumens per watt ratios and long lifespans to save on electricity and replacement costs.
Designing Your DIY Lighting System
With the right LED bulbs in hand, it's time to map out your DIY lighting system. Start by evaluating your plants' light requirements and the available space.
Consider creating a modular design that allows for easy adjustments as your garden grows. Sketch a layout of your setup, indicating where each plant will be placed and how the lights will be positioned. Aim for even coverage, ensuring that taller plants don't cast shadows on shorter ones.
You'll want to mount your lights at an appropriate height, typically 6-12 inches above the canopy, depending on the light intensity and plant needs.
Next, plan your wiring. Determine how you'll connect your lights to a power source, considering factors like outlet locations and cord management. If you're using multiple lights, you might opt for a central power strip or daisy-chain configuration.
Don't forget to incorporate a timer into your design. This will automate your lighting schedule, ensuring consistent light cycles for your plants.
Consider using adjustable hanging systems or articulating arms for flexibility in light positioning. Finally, factor in heat dissipation and ventilation to maintain an ideal growing environment.
Assembling the Grow Light Frame
To assemble your grow light frame, you'll first need to select appropriate materials like PVC pipes, wood, or metal rods.
Once you've chosen your frame material, carefully measure and cut the components to fit your desired dimensions.
Selecting Appropriate Frame Materials
When assembling the grow light frame, choosing the right materials is essential for durability and functionality. You'll want to take into account factors like weight, corrosion resistance, and ease of assembly. For most DIY grow light frames, aluminum, PVC, or wood are popular choices.
Aluminum is lightweight, rust-resistant, and easy to work with. It's ideal for larger setups or if you plan to move your frame frequently. PVC is budget-friendly and simple to assemble, making it perfect for beginners or temporary setups. Wood offers a natural look and is readily available, but it's heavier and may require more maintenance.
Here's a comparison of these materials:
| Material | Pros | Cons |
|---|---|---|
| Aluminum | Lightweight, durable | More expensive |
| PVC | Affordable, easy to assemble | Less sturdy |
| Wood | Natural look, readily available | Heavier, requires maintenance |
When selecting your frame material, take into account your budget, the size of your setup, and your long-term plans. If you're building a large, permanent structure, aluminum might be worth the investment. For smaller or temporary setups, PVC could be the best choice. Wood can work well for medium-sized frames if you don't mind the extra weight and maintenance.
Measuring and Cutting Components
Accurate measurements and precise cuts are essential for assembling a sturdy grow light frame. Begin by measuring the space where you'll place your grow light system. Use these dimensions to determine the size of your frame components. Always measure twice before cutting to avoid wasting materials.
For wooden frames, use a miter saw or hand saw to cut your pieces to length. If you're working with PVC, a hacksaw or PVC cutter will suffice. Metal frames may require a metal cutting saw or angle grinder. Make certain all cuts are straight and clean for proper fitting.
Mark your cutting lines clearly with a pencil and straightedge. If you're creating joints, such as for wooden frames, measure and mark these carefully. For PVC, measure and mark spots for connectors.
Don't forget to account for any additional features, like hooks for hanging lights or shelves for plants. Measure and cut these components as well.
Once you've cut all pieces, dry fit them together to guarantee everything aligns correctly before proceeding with assembly. This step allows you to make any necessary adjustments before final construction.
Securing Frame Connections
With your components measured and cut, it's time to assemble your grow light frame. Begin by laying out your PVC pipes and connectors on a flat surface, matching them to your design plan.
Start with the base of the frame, connecting the pipes to form a sturdy rectangle or square. Use PVC cement to secure each joint, applying it evenly to both the pipe and connector surfaces. Hold each connection firmly for about 30 seconds to guarantee a strong bond.
Next, attach the vertical supports to the base. These will form the height of your frame. Make sure they're perpendicular to the base for stability. Once the verticals are in place, connect the top horizontal pieces to complete the frame structure.
Double-check all connections to verify they're secure and aligned correctly. For added stability, consider adding diagonal braces at the corners. These will help prevent wobbling and provide extra support for your lighting fixtures.
If you're using a different material, like wood or metal, adjust your connection methods accordingly. Use screws, bolts, or appropriate fasteners to secure joints tightly. Remember to sand any rough edges for safety.
Wiring and Electrical Considerations

When wiring your homemade grow light, you'll need to prioritize safety by using proper connection techniques and insulation.
Choose bulbs with appropriate wattage for your plants' needs and the capacity of your electrical system.
Don't forget to waterproof all electrical components to protect against moisture damage and potential shorts.
Safe Connection Practices
Safety should be your top priority when wiring and connecting electrical components for your homemade plant illumination system. Always verify you're working with unplugged devices and use insulated tools to prevent accidental shocks.
When connecting wires, use appropriate wire nuts or connectors, and wrap exposed connections with electrical tape for added protection. Double-check your wire connections for security and proper insulation before powering up the system.
Avoid overloading circuits by calculating the total wattage of your grow lights and confirming it doesn't exceed your power source's capacity. If you're unsure about any electrical work, consult a professional electrician.
Keep all connections away from water sources and use GFCI outlets to prevent electrical hazards in damp environments. Regularly inspect your wiring for signs of wear, fraying, or damage, and replace any compromised components immediately.
When routing wires, avoid creating tripping hazards and use cable clips or conduits to keep them organized and protected.
Lastly, install a proper grounding system to safeguard against electrical faults and consider using surge protectors to shield your equipment from power fluctuations.
Choosing Appropriate Wattage
Selecting the appropriate wattage for your homemade plant illumination system is essential for both plant health and electrical safety. You'll need to evaluate the specific light requirements of your plants and the capacity of your electrical system.
Start by calculating the total wattage needed for your indoor garden. Most plants require 20-40 watts per square foot of growing space. Multiply your garden's square footage by this range to determine the ideal wattage. For example, a 4-square-foot garden might need 80-160 watts of lighting.
Next, check your electrical circuit's capacity. Standard household circuits are typically 15 or 20 amps. To find the maximum wattage your circuit can handle, multiply the amperage by 120 volts (standard household voltage). For a 15-amp circuit, that's 1,800 watts.
Ensure your chosen wattage doesn't exceed 80% of your circuit's capacity to prevent overloading. If you need more power, think about distributing your lights across multiple circuits or installing a dedicated circuit for your plant illumination system.
Remember to factor in other devices on the same circuit when calculating available wattage. By choosing the right wattage, you'll create a safe and effective lighting setup for your indoor garden.
Waterproofing Electrical Components
Because water and electricity don't mix, waterproofing your electrical components is crucial for a safe and durable plant illumination system.
Start by selecting waterproof or water-resistant light fixtures designed for outdoor or humid environments. These often come with IP ratings indicating their level of protection against water and dust.
For connections and exposed wiring, use waterproof wire nuts and electrical tape to seal joints. Apply silicone sealant around the base of light fixtures and any points where wires enter or exit enclosures.
Consider using heat shrink tubing for an extra layer of protection on wire connections.
Elevate power strips and outlets above the ground and away from potential water sources. Use GFCI (Ground Fault Circuit Interrupter) outlets to prevent electrical shocks.
For added protection, place electrical components in waterproof enclosures or boxes.
When working with DIY setups, verify all connections are tight and secure. Regularly inspect your system for signs of wear, corrosion, or water damage.
If you're unsure about your ability to properly waterproof electrical components, consult a professional electrician to verify your indoor garden lighting is safe and up to code.
Smart Bulb Integration for Plants
Smart bulbs' integration into plant lighting systems has revolutionized home gardening. You can now control your plants' light exposure with unprecedented precision, tailoring it to their specific needs.
These Wi-Fi-enabled bulbs allow you to adjust color temperature, intensity, and duration of light remotely through smartphone apps or voice assistants.
When choosing smart bulbs for your plants, look for ones with full-spectrum LED lights that mimic natural sunlight. Many options offer customizable schedules, allowing you to create the perfect lighting conditions for different growth stages.
You'll find bulbs with specific plant-growing modes, which optimize light wavelengths for photosynthesis and healthy development.
To integrate smart bulbs into your setup, verify your Wi-Fi network reaches your growing area. Install the bulbs in weather-resistant fixtures if you're using them in humid environments.
Connect them to your home automation system for seamless control alongside other smart devices. You can even set up alerts to remind you of watering schedules or notify you of changes in light conditions.
With smart bulbs, you'll have a dynamic, responsive lighting system that adapts to your plants' needs throughout their growth cycle.
Positioning Lights for Optimal Growth
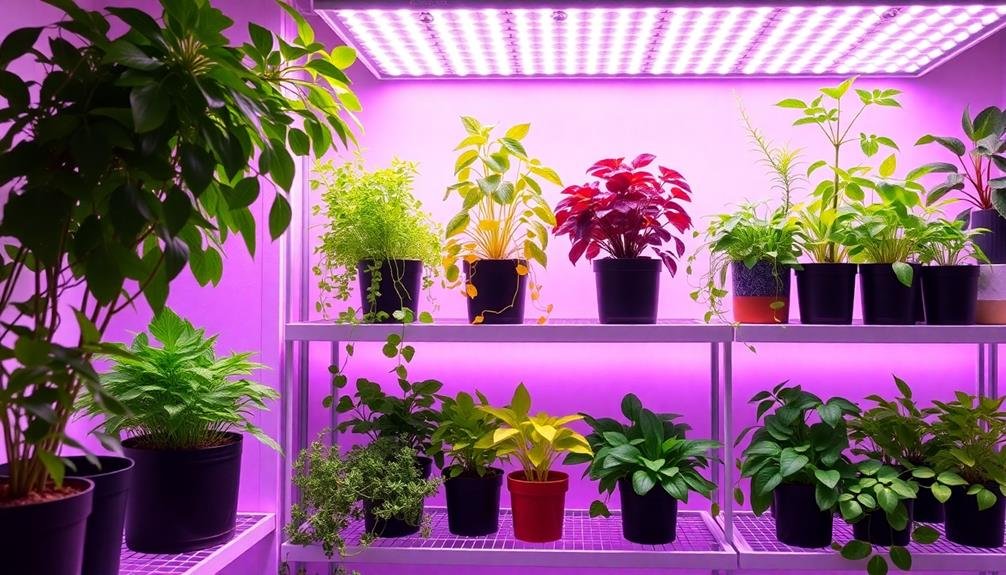
To achieve ideal growth, proper positioning of your plant lights is essential. Start by placing your lights 6-12 inches above your plants, adjusting the height as they grow. For seedlings and young plants, keep lights closer, around 6 inches, to prevent stretching. As plants mature, gradually raise the lights to maintain optimal intensity.
Consider the light requirements of different plant species. Leafy greens and herbs typically need 12-16 hours of light daily, while flowering plants may require 14-18 hours. Use a timer to maintain consistent light cycles.
Arrange your plants so that taller ones don't shade shorter ones. If you're using a single light source, rotate your plants regularly to guarantee even exposure. For larger indoor gardens, create a grid-like pattern with multiple lights to provide uniform coverage.
Don't forget about natural light sources. Position your artificial lights to complement sunlight from windows, if available. This combination can create a more balanced light spectrum for your plants.
Lastly, monitor your plants' response to the lighting setup. If you notice leggy growth or pale leaves, adjust the light positioning accordingly. With careful observation and positioning, you'll create an ideal environment for your indoor garden to thrive.
Maintenance and Troubleshooting Tips
Maintaining your homemade plant illumination system is key to guaranteeing its longevity and effectiveness. Regularly check for loose connections, frayed wires, or any signs of wear and tear. Clean your lights monthly to remove dust and debris that can reduce their efficiency. If you notice your plants aren't thriving as they should, it might be time to adjust your lighting schedule or intensity.
When troubleshooting, start by checking the basics. Verify your timer is functioning correctly and that all bulbs are working. If you're using LED lights, look for any flickering, which could indicate a failing driver. For fluorescent systems, replace bulbs that show dark ends or a pinkish glow.
Here are some common issues you might encounter:
- Leggy plants: Your lights may be too far away or not strong enough
- Leaf burn: The lights might be too close or too intense
- Uneven growth: Consider rotating your plants regularly
If you're still having trouble, don't hesitate to consult online forums or local gardening experts.
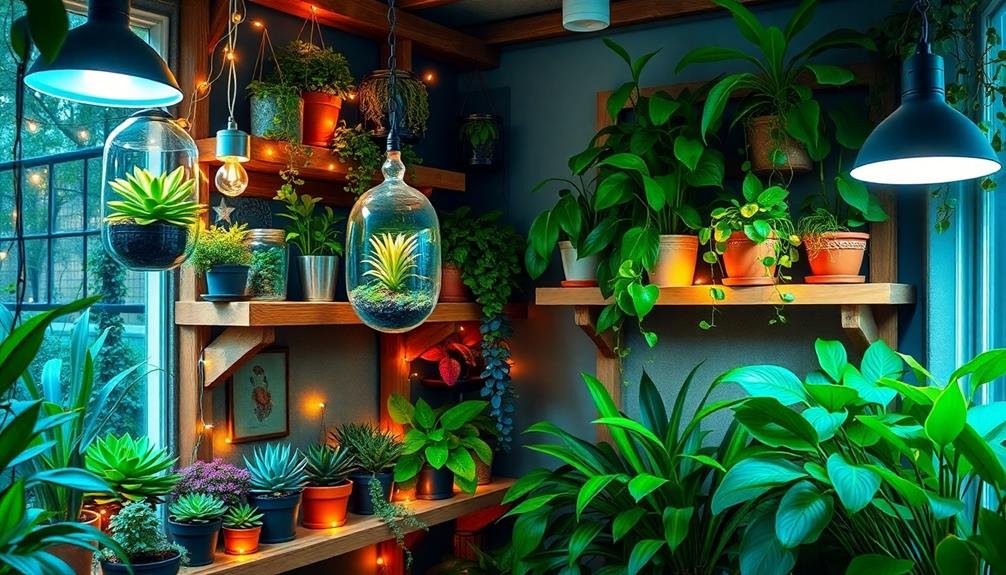
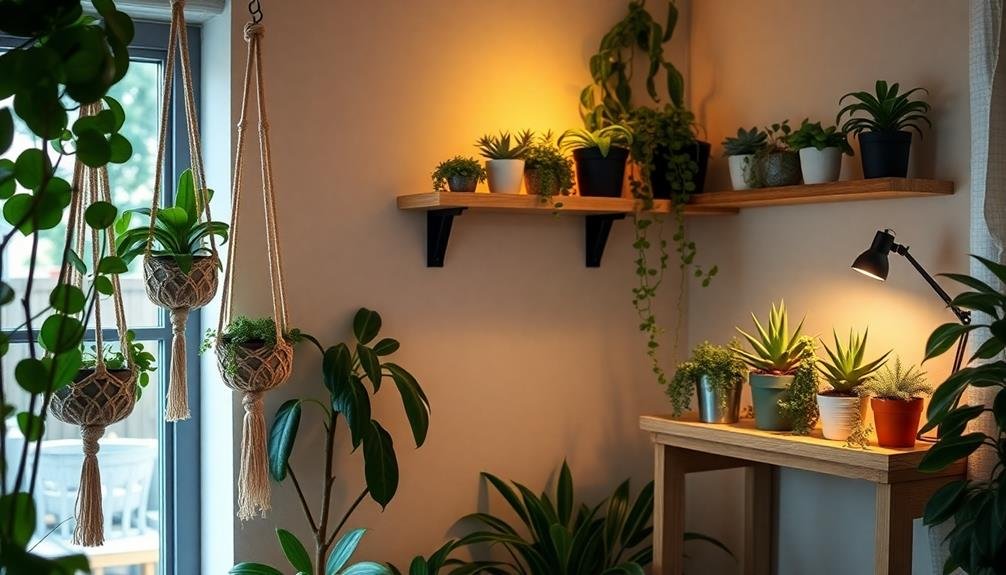
Expanding Your Indoor Garden Setup
Once you've mastered basic plant illumination, expanding your indoor garden setup can be an exciting next step.
Consider incorporating vertical gardening systems to maximize space and create a lush, green environment. Wall-mounted planters or tiered shelving units allow you to grow more plants without sacrificing floor space.
Experiment with different plant varieties that thrive under artificial light, such as herbs, microgreens, and compact vegetable cultivars. These can provide fresh ingredients for your kitchen year-round.
Don't forget to adjust your lighting setup accordingly, as different plants have varying light requirements.
Automated systems can streamline your expanded garden's maintenance. Install a drip irrigation system or self-watering planters to guarantee consistent moisture levels.
Smart plugs and timers can control your lighting schedule, mimicking natural day-night cycles for peak plant growth.
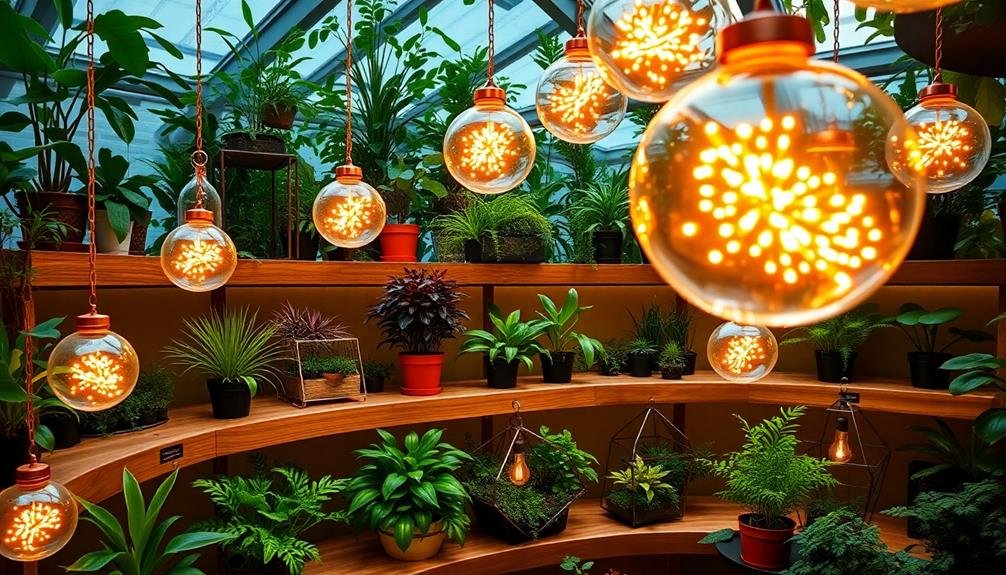
To enhance aesthetics and functionality, integrate your plant illumination with your home decor. Use decorative grow lights that double as ambient lighting, or create living walls with built-in LED strips.
This approach not only nurtures your plants but also transforms your indoor space into a vibrant, green sanctuary.
Frequently Asked Questions
Can Homemade Grow Lights Be Used for Hydroponics?
Yes, you can use homemade grow lights for hydroponics. They're cost-effective and customizable for your specific needs. However, make certain they provide the right spectrum and intensity for ideal plant growth. Monitor your plants closely for best results.
How Do DIY Grow Lights Compare to Commercial Grow Tents?
You'll find DIY grow lights can be effective but often less powerful than commercial grow tents. They're cheaper and customizable, but commercial options offer better light distribution, environmental control, and durability. Your choice depends on your budget and needs.
Are There Any Plants That Don't Respond Well to LED Grow Lights?
You'll find most plants thrive under LED grow lights. However, some shade-loving plants like ferns and orchids may struggle with intense LED light. It's best to research your specific plant's needs and adjust lighting accordingly.
What's the Average Lifespan of a Homemade LED Grow Light System?
Your homemade LED grow light system can last 5-10 years with proper care. You'll need to replace individual bulbs every 2-3 years. Regular maintenance and avoiding overheating will extend its lifespan. Don't forget to clean it periodically.
Can Homemade Grow Lights Affect My Home's Humidity Levels?
Yes, your homemade grow lights can affect humidity levels. They'll generate heat, potentially increasing moisture in the air. You'll need to monitor and adjust humidity with proper ventilation or a dehumidifier to maintain ideal growing conditions.
In Summary
You've now got the knowledge to create your own LED grow light system for your indoor garden. With the right bulbs, smart design, and proper positioning, you'll provide your plants with the light they need to thrive. Remember to maintain your setup and troubleshoot any issues that arise. As you gain confidence, don't hesitate to expand your indoor oasis. You're well on your way to becoming a master of homemade plant illumination!


Leave a Reply