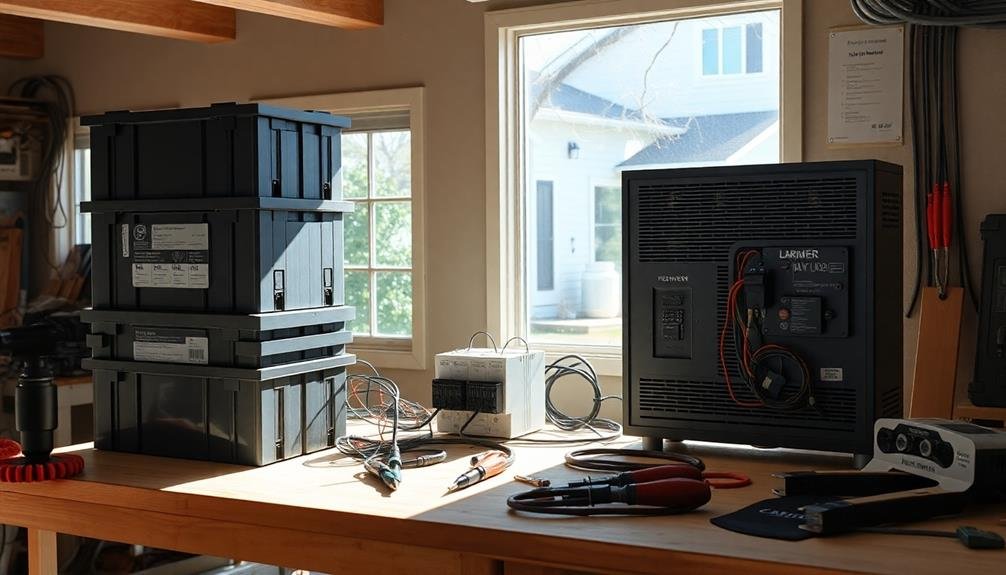
To build a DIY Powerwall, you'll need several key components. Start with high-quality lithium-ion battery cells, typically 18650 or 21700 format. You'll also require a battery management system (BMS) to monitor and control the pack. For structure, use weather-resistant materials like powder-coated steel for the enclosure. Don't forget proper wiring, connectors, and cable management solutions. An inverter and charge controller are essential for power conversion and charging. Finally, prioritize safety with disconnects, breakers, and personal protective equipment. With these materials in hand, you'll be well-equipped to tackle your Powerwall project. The details that follow will help guarantee your success.
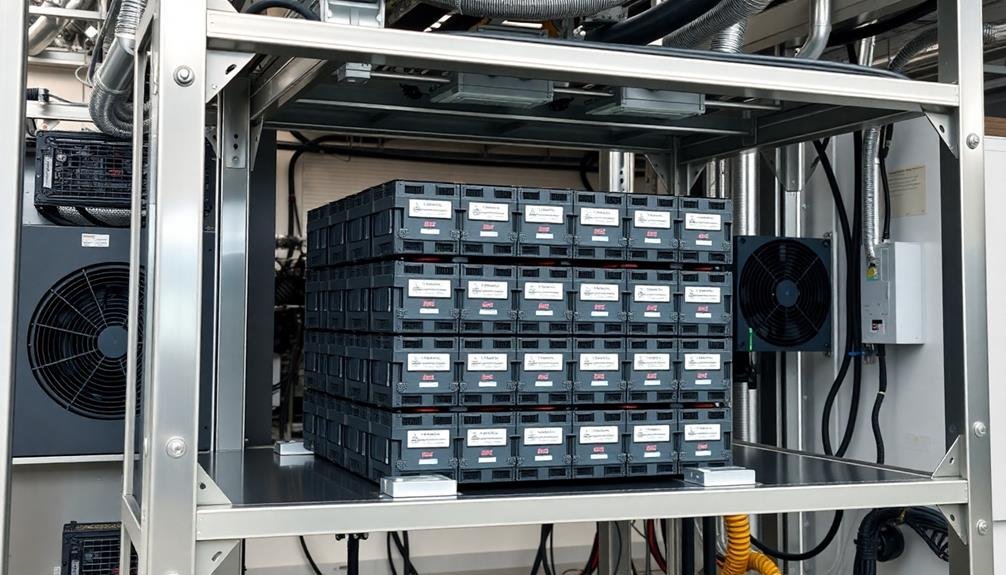
Battery Cells

Battery cells are the fundamental building blocks of a Powerwall. You'll need to choose cells that offer high energy density, long cycle life, and safety. Lithium-ion cells are the most common choice due to their excellent performance characteristics. Consider 18650 or 21700 format cells, which are widely available and offer a good balance of capacity and size.
When selecting cells, pay attention to their voltage, capacity, and discharge rate. You'll want cells with a nominal voltage of 3.6V to 3.7V and a capacity of 2000mAh to 5000mAh. The discharge rate should be at least 2C for peak performance. Look for cells from reputable manufacturers like Samsung, LG, or Panasonic to guarantee quality and reliability.
You'll need to calculate the total number of cells required based on your desired Powerwall capacity. For example, a 10kWh Powerwall might require around 1000 18650 cells. Remember to factor in the battery management system's overhead when determining cell count.
Always handle cells with care and follow proper safety protocols during assembly and operation.
Battery Management System
The brains of your Powerwall, a Battery Management System (BMS), is essential for safe and efficient operation. It monitors and controls various aspects of your battery pack, guaranteeing peak performance and longevity. You'll need a BMS that's compatible with your chosen battery cells and can handle the total voltage and capacity of your system.
Key components of a BMS include a microcontroller, voltage sensors, current sensors, and temperature sensors. The microcontroller processes data from these sensors and manages the battery pack accordingly.
You'll also need balance circuits to maintain equal charge levels across all cells. When selecting a BMS, consider features like cell balancing, overcharge protection, over-discharge protection, and thermal management. Look for a system that can communicate with your inverter and other components of your Powerwall setup.
You can choose between a centralized BMS, which is simpler to install but less flexible, or a distributed BMS, which offers more precise control but is more complex.
Verify the BMS you select can handle the number of cells in your battery pack and provides adequate safety features for your specific setup.
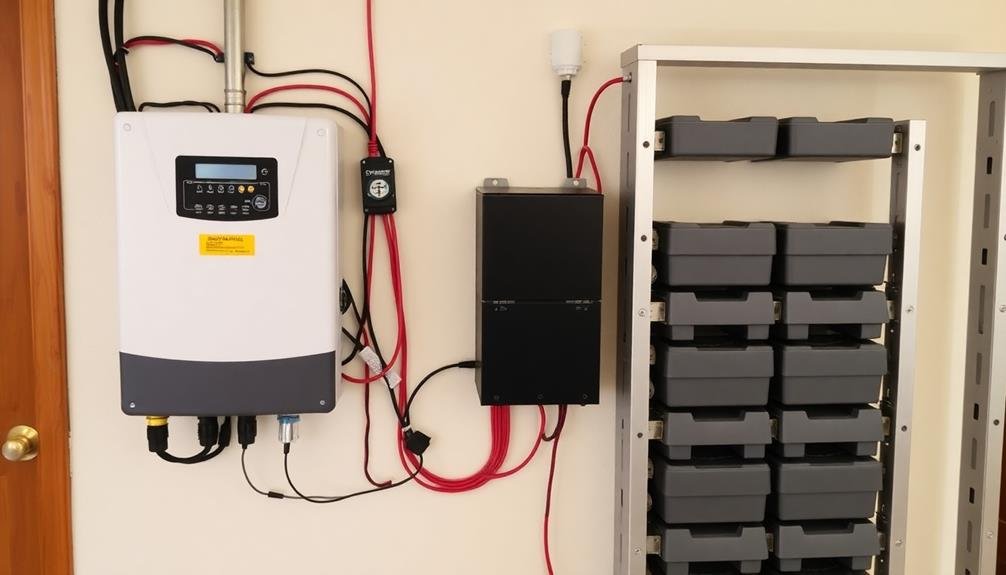
Enclosure and Structural Support
Your Powerwall's protective shell and framework are essential for safeguarding the components and guaranteeing proper installation. For the enclosure, consider using a sturdy, weather-resistant material like powder-coated steel or high-density polyethylene (HDPE). These materials offer excellent protection against moisture, dust, and temperature fluctuations.
Ascertain the enclosure has proper ventilation to prevent overheating and allow for efficient heat dissipation.
The structural support should be designed to bear the weight of the entire system, including batteries, inverters, and other components. Use galvanized steel or aluminum framing to create a robust framework that can be securely mounted to a wall or floor.
Include adjustable brackets and mounting plates to accommodate various battery sizes and configurations.
Don't forget to incorporate cable management solutions within the enclosure to keep wiring organized and prevent potential short circuits. Install rubber grommets or cable glands where wires enter or exit the enclosure to maintain a weatherproof seal.
Wiring and Connectors
You'll need to select the appropriate electrical cables to safely connect your Powerwall components.
Choosing the right connectors and terminals is essential for ensuring secure and efficient electrical connections throughout the system.
Don't forget to incorporate safety disconnects and breakers to protect your Powerwall from potential electrical issues and overloads.
Types of Electrical Cables
Selecting the right electrical cables can make or break your Powerwall project. You'll need to take into account several types of cables for different purposes. For the main power connections, use thick, high-amperage cables such as 2/0 AWG or 4/0 AWG, depending on your system's requirements. These cables can handle the high current flow between batteries, inverters, and charge controllers.
For lower-power connections and control circuits, you can opt for smaller gauge wires like 10 AWG or 12 AWG. Make certain you're using copper wire with proper insulation rated for your system's voltage. Don't forget to choose cables with appropriate temperature ratings for your installation environment.
You'll also need to take into account specialized cables for specific components. For solar panel connections, use UV-resistant PV wire designed for outdoor use. If you're connecting multiple battery cells, invest in tinned copper battery interconnect cables to prevent corrosion.
Remember to factor in the length of cables you'll need, as voltage drop can occur over long distances. Always choose cables that exceed your system's maximum current capacity to guarantee safety and efficiency.
Connectors and Terminals
The backbone of any Powerwall system relies on proper connections. You'll need a variety of connectors and terminals to guarantee safe and efficient power transfer between components. These connectors come in different sizes and types, each suited for specific applications within your Powerwall setup.
When selecting connectors and terminals, consider the following factors:
- Current capacity: Choose connectors rated for the maximum current your system will handle.
- Voltage rating: Verify the connectors can withstand the voltage levels in your Powerwall.
- Environmental resistance: Opt for weatherproof options if your system is exposed to the elements.
- Ease of installation: Look for connectors that are simple to attach and secure.
Common types of connectors you'll encounter include Anderson Powerpole connectors, MC4 solar connectors, and ring terminals. For battery connections, you'll likely need large gauge lugs or bus bars.
Don't forget to invest in a quality crimping tool to guarantee proper installation of these connectors.
Remember to use heat shrink tubing or electrical tape to insulate exposed connections, reducing the risk of short circuits. Always double-check your connections before powering up your Powerwall to verify safety and peak performance.
Safety Disconnects and Breakers
While assembling your Powerwall, it's vital to incorporate safety disconnects and breakers into your wiring system. These components protect your battery pack and connected devices from electrical faults, overloads, and short circuits. You'll need to choose the right types and ratings based on your system's voltage and current requirements.
For a typical DIY Powerwall, consider including:
| Component | Purpose | Rating |
|---|---|---|
| DC Circuit Breaker | Protects battery | 100-250A |
| AC Circuit Breaker | Protects inverter | 30-60A |
| Emergency Disconnect | Rapid system shutdown | System voltage |
Install a main DC circuit breaker between the battery pack and inverter to safeguard against overcurrent. An AC breaker on the output side of the inverter will protect your home's electrical system. Don't forget to add an emergency disconnect switch for quick power cutoff in case of emergencies.
When selecting these components, verify they're rated for your system's maximum voltage and current. It's important to use high-quality, UL-listed devices to maintain safety standards. Remember, proper installation of these safety components is just as important as their selection. If you're unsure about any aspect of the installation, consult a licensed electrician.
Inverter and Charge Controller
When selecting an inverter and charge controller for your Powerwall, you'll need to take into account their compatibility with your battery system and solar panels.
You should carefully assess the sizing requirements, ensuring these components can handle your power needs and match your system's voltage.
It's essential to factor in efficiency ratings, as higher-quality inverters and charge controllers can greatly influence your Powerwall's overall performance and longevity.
Selection and Compatibility Considerations
Selecting the right inverter and charge controller for your DIY Powerwall is essential to its overall performance and longevity. When choosing these components, you'll need to take into account their compatibility with your battery system and intended power output.
Verify that the inverter's capacity matches your Powerwall's maximum power output and can handle surge loads from appliances like refrigerators or air conditioners.
For the charge controller, opt for a model that supports the battery chemistry you're using (e.g., lithium-ion, lead-acid) and can handle the maximum charging current from your solar panels or other power sources. MPPT (Maximum Power Point Tracking) charge controllers are often preferred for their higher efficiency.
Reflect on these factors when selecting your inverter and charge controller:
- Power rating: Must match or exceed your Powerwall's capacity
- Voltage compatibility: Confirm it matches your battery bank's voltage
- Efficiency: Look for high conversion efficiency to minimize power loss
- Features: Think about additional functions like remote monitoring or programmable settings
Don't forget to check for certifications and safety standards when purchasing these components. Investing in quality equipment will help guarantee the reliability and safety of your DIY Powerwall system.
Sizing and Efficiency Factors
The heart of your DIY Powerwall's performance lies in correctly sizing your inverter and charge controller. These components are essential for efficient power conversion and battery management.
For your inverter, consider your peak power requirements. Calculate the total wattage of devices you'll run simultaneously and add a 20% safety margin. Choose an inverter with a continuous power rating that meets or exceeds this figure. Remember, the inverter must handle surge loads from motors starting up.
The charge controller's size depends on your battery bank's voltage and the solar array's current output. Select a controller that can handle your system's maximum potential current. MPPT controllers are more efficient than PWM types, especially for higher voltage systems.
Efficiency is key. Look for inverters with high efficiency ratings, typically 90% or above. For charge controllers, MPPT types can increase charging efficiency by up to 30% compared to PWM controllers.
Don't skimp on quality. Higher-end components often have better efficiency, reliability, and features like remote monitoring. They'll pay for themselves through improved system performance and longevity.
Safety Equipment
Safety equipment is essential when working on a DIY Powerwall project. You'll need to protect yourself from potential electrical hazards and chemical exposure.
Always wear insulated gloves rated for the voltage you're working with, and use safety glasses to shield your eyes from sparks or debris. A fire extinguisher should be within reach in case of emergencies.
When handling batteries, especially lithium-ion cells, you'll need additional precautions. Wear a respirator mask to avoid inhaling harmful fumes, and use chemical-resistant gloves to protect your skin from corrosive materials.
Don't forget to work in a well-ventilated area to prevent the buildup of dangerous gases.
Here's a list of essential safety equipment for your Powerwall project:
- Insulated gloves (voltage-rated)
- Safety glasses or face shield
- Fire extinguisher (Class C for electrical fires)
- Respirator mask (with appropriate filters)
Remember to keep a first aid kit nearby and familiarize yourself with proper emergency procedures.
If you're unsure about any aspect of the project, consult an expert or consider professional installation. Your safety should always be the top priority when working with high-voltage electrical systems and potentially hazardous materials.
Frequently Asked Questions
How Long Does It Take to Build a DIY Powerwall?
You can build a DIY powerwall in a few days to several weeks, depending on your skill level and time commitment. It's not a quick project, so be prepared to invest significant time in planning, gathering materials, and assembly.
Can I Use Different Types of Batteries in My Powerwall?
You shouldn't mix different battery types in your DIY powerwall. It's best to use the same type, capacity, and age for all cells. Mixing batteries can lead to uneven charging, reduced efficiency, and potential safety hazards.
What Permits or Regulations Apply to Installing a Home Powerwall?
You'll likely need electrical and building permits from your local government. Check zoning laws and HOA restrictions. Consult an electrician for specific requirements. Don't forget to notify your utility company about the installation. Safety regulations must be followed.
How Much Money Can I Save With a Powerwall Over Time?
You can save considerably with a Powerwall over time. It'll reduce your electricity bills by storing excess solar energy and using it during peak hours. Your savings depend on your energy usage and local utility rates.
Are There Any Environmental Concerns With Disposing of Old Powerwall Batteries?
You should be concerned about disposing of old Powerwall batteries. They contain hazardous materials that can harm the environment if not handled properly. Always recycle them through authorized facilities to guarantee safe disposal and minimize environmental impact.
In Summary
You've got the essential components for your DIY powerwall project. Remember, safety is paramount when working with high-voltage systems. Don't skimp on quality materials or protective gear. If you're not confident in your electrical skills, consider seeking professional help. While building a powerwall can be rewarding, it's vital to follow local regulations and consult experts when needed. With careful planning and execution, you'll soon have your own energy storage solution.


Leave a Reply