
To fix common radiant floor heating problems quickly, start by checking for uneven heat distribution and cold spots. Verify your thermostat is functioning correctly and properly programmed. Bleed the system to remove air locks, which can cause inefficient heating. Inspect for leaks in the tubing and address any pump failures promptly. If your system heats slowly, examine insulation and pressure balance. Don't forget to check the fluid mixture and look for corrosion in manifold components. By addressing these issues, you'll improve your system's performance and comfort. Dive deeper to master the art of maintaining your radiant floor heating system efficiently.
Uneven Heat Distribution

Why does your radiant floor heating feel like a patchwork of hot and cold spots? This common issue often stems from improper installation or design flaws.
Uneven heat distribution can result from poorly spaced heating pipes, inadequate insulation, or inconsistent flooring materials.
To address this problem, start by checking your system's layout. Confirm that the heating pipes are evenly spaced and follow the manufacturer's recommendations.
If you've recently renovated, verify that new flooring materials aren't interfering with heat transfer. Thick carpets or certain types of wood can act as insulators, preventing efficient heat distribution.
Next, examine your thermostat settings and zone controls. Incorrectly configured zones or malfunctioning thermostats can lead to temperature imbalances.
Consider upgrading to a smart thermostat for more precise control.
If these steps don't resolve the issue, you may need to consult a professional. They can perform a thorough inspection, identifying any blockages, air pockets, or leaks in the system.
In some cases, adding a circulation pump or balancing valves can improve heat distribution.
Thermostat Malfunctions
Your radiant floor heating system's thermostat can be a source of frustrating issues.
You might encounter incorrect temperature readings, leading to discomfort and inefficient heating.
Programming glitches can disrupt your desired heating schedule, while wiring and connectivity problems may cause your thermostat to malfunction or lose communication with the heating system entirely.
Incorrect Temperature Readings
In spite of the generally reliable nature of radiant floor heating systems, incorrect temperature readings due to thermostat malfunctions can pose a significant problem.
When your thermostat fails to accurately measure the room temperature, it can lead to discomfort and energy inefficiency. You might notice that your floors aren't as warm as they should be, or conversely, they're overheating.
To address this issue, first check if the thermostat's location is appropriate. It shouldn't be near heat sources, in direct sunlight, or in drafty areas.
Next, verify the thermostat is level and properly mounted on the wall. Dust and debris can also interfere with readings, so clean the device gently with a soft brush.
If these steps don't resolve the problem, you may need to calibrate your thermostat. Consult your user manual for specific instructions, as the process varies between models.
Sometimes, the issue lies with faulty wiring or a defective temperature sensor. In these cases, it's best to call a professional to diagnose and repair the problem.
Don't hesitate to replace an old or malfunctioning thermostat, as newer models often offer improved accuracy and energy-saving features.
Programming Issues
Many radiant floor heating systems encounter programming issues related to thermostat malfunctions. These problems can lead to inconsistent heating, energy waste, and discomfort. To address these issues, you'll need to troubleshoot your thermostat and its programming.
First, check if your thermostat is properly connected to the heating system and receiving power. If it's not, consult an electrician to guarantee proper wiring.
Next, verify that the thermostat's settings match your heating preferences and daily schedule. Incorrect programming can cause your system to heat at undesired times or fail to maintain comfortable temperatures.
Common programming issues include:
- Incorrectly set time and date
- Improper temperature setpoints for different times of day
- Confusion between heating and cooling modes
- Failure to account for weekday and weekend schedules
If you're unsure how to program your thermostat, consult the user manual or manufacturer's website for guidance.
Many modern thermostats offer smartphone apps or web interfaces for easier programming. Consider upgrading to a smart thermostat if your current model is outdated or difficult to use.
These devices can learn your preferences, adjust to your schedule automatically, and provide more precise temperature control, potentially resolving many programming-related issues.
Wiring and Connectivity Problems
Wiring and connectivity problems often lurk behind thermostat malfunctions, causing headaches for radiant floor heating system owners. If you're experiencing inconsistent temperatures or your system won't turn on, start by checking the wiring connections. Loose or damaged wires can disrupt communication between your thermostat and heating elements.
First, turn off the power to your system at the circuit breaker. Remove the thermostat from the wall plate and inspect the wires. Look for any signs of fraying, corrosion, or loose connections. Tighten any loose screws and replace any damaged wires. If you're comfortable, use a multimeter to test for continuity and verify proper voltage.
Don't forget to check the sensor wire, which monitors floor temperature. A faulty sensor can lead to inaccurate readings and system malfunctions. If you suspect a sensor issue, consider replacing it.
Sometimes, interference from other electrical devices can disrupt thermostat signals. Try relocating any nearby electronics or Wi-Fi routers. If you have a smart thermostat, confirm it's connected to a stable Wi-Fi network and that its software is up to date.
If these steps don't resolve the issue, consult a professional electrician or HVAC specialist. They can perform more advanced diagnostics and repairs to get your radiant floor heating system back on track.
Air Locks in Pipes

If you're experiencing uneven heating or cold spots in your radiant floor system, you might be dealing with air locks in the pipes.
You'll need to identify the signs of air locks, which can include gurgling sounds, reduced heat output, or certain areas of the floor remaining cold.
To resolve this issue, you'll have to bleed the system, removing trapped air and allowing water to flow freely through the pipes.
Identifying Air Lock Signs
When your radiant floor heating system isn't performing as it should, air locks in the pipes might be the culprit.
These pesky air pockets can greatly reduce your system's efficiency and comfort. To identify if you're dealing with air locks, look out for these telltale signs:
- Uneven heating: You'll notice some areas of your floor are warmer than others, creating cold spots throughout the room.
- Gurgling or bubbling sounds: As water tries to push past the air pockets, you might hear unusual noises coming from your pipes.
- Reduced heat output: Your system may struggle to reach the desired temperature, even when set higher than usual.
- Increased energy bills: Air locks force your system to work harder, leading to higher energy consumption.
If you've noticed any of these symptoms, it's time to take action.
Don't ignore these signs, as they can lead to more severe issues if left untreated.
Remember, early detection and prompt resolution of air locks can save you money and guarantee your radiant floor heating system operates at peak performance.
In the next section, we'll explore effective methods to remove air locks and restore your system's efficiency.
Bleeding the System
Bleeding your radiant floor heating system is the most effective way to remove air locks from the pipes. To begin, locate the manifold where your system's pipes converge.
You'll need to identify the bleed valves on each circuit. Start with the circuit closest to the boiler and work your way outward.
Open the bleed valve slightly using a flathead screwdriver. You'll hear a hissing sound as air escapes. Keep a small container nearby to catch any water that may come out.
Once you see a steady stream of water without air bubbles, close the valve. Repeat this process for each circuit.
After bleeding all circuits, check the system's pressure gauge. If it's below the recommended level, you'll need to add water to the system. Open the fill valve slowly until the pressure reaches the correct level, typically around 12-15 PSI for residential systems.
Once you've completed the bleeding process, turn on your heating system and monitor it closely. Check for any cold spots or uneven heating, which may indicate that air is still trapped in the system.
If problems persist, you may need to repeat the bleeding process or consult a professional.
Leaks in Radiant Tubing
A homeowner's nightmare, leaks in radiant tubing can cause significant damage and disrupt your heating system's efficiency. These leaks often occur due to improper installation, corrosion, or physical damage to the pipes. If you suspect a leak, it's essential to act quickly to prevent further damage and costly repairs.
To identify and address leaks in your radiant floor heating system:
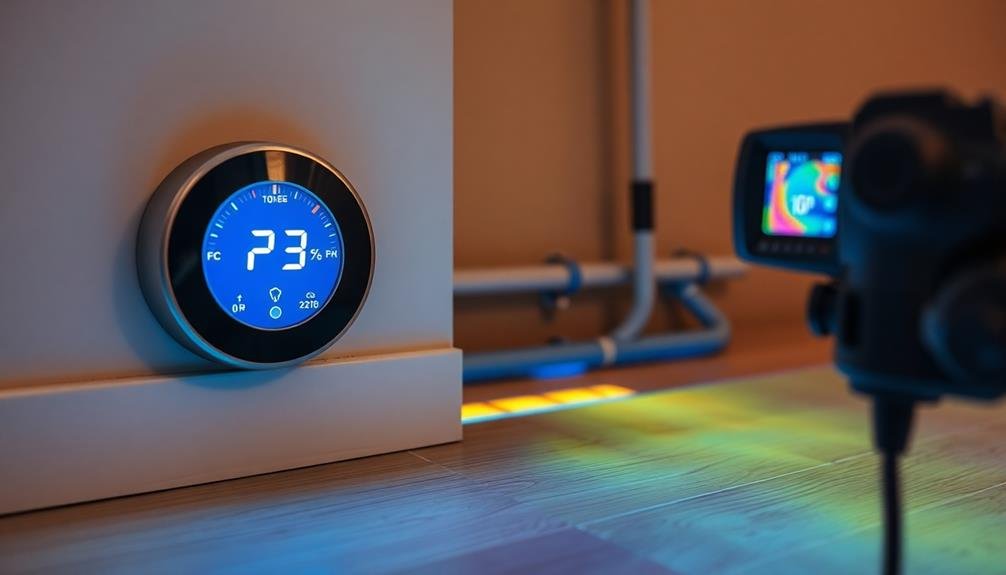
- Look for signs of moisture, such as damp spots on your floor, walls, or ceiling.
- Listen for unusual sounds like hissing or gurgling, which may indicate escaping water.
- Monitor your water bill for unexplained increases, as this could signal a hidden leak.
- Use a thermal imaging camera to detect temperature variations that might reveal leak locations.
Once you've identified a leak, shut off the system immediately and drain the affected area. For minor leaks, you might be able to use a pipe repair kit or epoxy.
However, for more severe damage or if you're unsure about the repair process, it's best to call a professional. They can accurately locate the leak, assess the damage, and perform the necessary repairs to restore your radiant floor heating system to ideal function.
Pump Failures
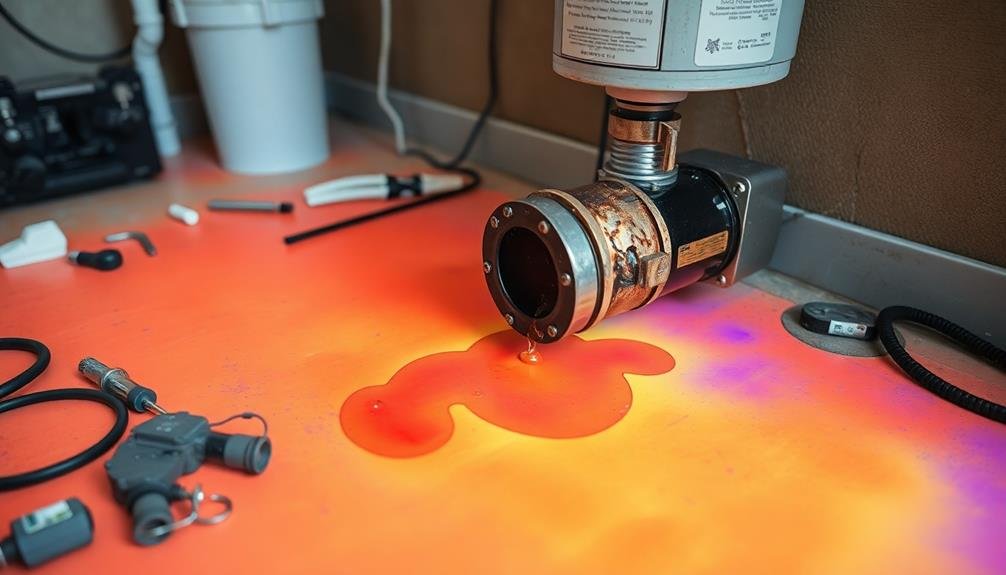
The heart of your radiant floor heating system, the pump, can sometimes fail, leading to significant problems. When your pump malfunctions, you'll notice uneven heating, cold spots, or a complete lack of warmth in your floors. Don't ignore these signs, as they can indicate a serious issue that needs immediate attention.
Common causes of pump failures include electrical issues, bearing wear, and impeller damage. To troubleshoot, first check if the pump is receiving power. If it's running but not circulating properly, you may need to bleed air from the system or clean out debris. In some cases, you'll need to replace the entire pump.
Here's a quick guide to pump failure symptoms and solutions:
| Symptom | Possible Cause | Solution |
|---|---|---|
| No power | Electrical failure | Check wiring, fuses |
| Noisy operation | Worn bearings | Replace bearings or pump |
| Weak circulation | Clogged impeller | Clean or replace impeller |
| Intermittent operation | Faulty controls | Replace thermostat or controller |
Regular maintenance can help prevent pump failures. Inspect your system annually, checking for leaks, unusual noises, or changes in performance. If you're not comfortable diagnosing or repairing pump issues yourself, don't hesitate to call a professional. Prompt attention to pump problems can save you money and guarantee your radiant floor heating system continues to provide efficient, comfortable warmth.
Inadequate Insulation
Inadequate insulation can considerably reduce the efficiency of your radiant floor heating system.
You'll notice signs of poor insulation if your floors take longer to warm up or if you're experiencing higher energy bills.
To improve insulation efficiency, consider adding underlayment materials, sealing air leaks, and ensuring proper insulation in walls and crawl spaces.
Signs of Poor Insulation
Spotting signs of poor insulation can help you pinpoint why your radiant floor heating system isn't performing at its best.
Pay attention to these telltale indicators that your floor's insulation might be inadequate:
- Cold spots: If you notice certain areas of your floor feel colder than others, it's likely due to uneven heat distribution caused by poor insulation.
- High energy bills: When your heating system has to work overtime to maintain the desired temperature, you'll see a significant increase in your energy costs.
- Slow heating: If it takes an unusually long time for your floors to warm up after turning on the system, inadequate insulation could be the culprit.
- Temperature fluctuations: Poorly insulated floors may struggle to maintain a consistent temperature, leading to noticeable temperature swings throughout the day.
To confirm your suspicions, you can perform a simple test.
Place a thermometer on the floor's surface and another in the room. If there's a significant difference between the two readings, it's a clear indication that heat is escaping through the floor.
Don't ignore these signs – addressing insulation issues promptly can improve your system's efficiency and comfort levels while reducing energy costs.
Improving Insulation Efficiency
Recognizing the signs of inadequate insulation is just the first step; improving your radiant floor heating system's efficiency requires targeted action. To enhance insulation, start by evaluating your current setup and identifying weak points. Focus on areas where heat loss is most considerable, such as the subfloor, walls, and ceiling.
Upgrade your insulation materials to those with higher R-values, which measure thermal resistance. Consider using foam board insulation or spray foam for better coverage and sealing. Don't forget to insulate pipes and ductwork to minimize heat loss during distribution.
Here's a quick guide to common insulation materials and their effectiveness:
| Material | R-value per inch | Cost | Installation Difficulty |
|---|---|---|---|
| Fiberglass | 2.2-2.7 | Low | Easy |
| Cellulose | 3.1-3.8 | Medium | Moderate |
| Spray Foam | 3.6-6.5 | High | Professional |
| Foam Board | 3.6-6.5 | Medium | Moderate |
When improving insulation, pay attention to air sealing as well. Address gaps, cracks, and penetrations in your home's envelope to prevent drafts and heat escape. By combining proper insulation with effective air sealing, you'll considerably boost your radiant floor heating system's efficiency and reduce energy costs.
Noisy System Operation

Numerous homeowners with radiant floor heating systems may encounter noisy operation, which can be both annoying and concerning.
If you're experiencing unusual sounds from your radiant floor heating, it's crucial to identify the source and address it promptly. Common causes of noisy operation include air trapped in the system, loose components, or issues with the circulation pump.
To troubleshoot and resolve noisy system operation, follow these steps:
- Bleed the air from your system: Turn off the heating and allow it to cool. Locate the air bleed valves and open them carefully to release trapped air.
- Check for loose components: Inspect all visible pipes, fittings, and connections. Tighten any loose parts you find, being careful not to overtighten.
- Examine the circulation pump: Listen for unusual noises coming from the pump. If it's making grinding or rattling sounds, it may need repair or replacement.
- Consult a professional: If you can't identify or fix the issue yourself, don't hesitate to call a qualified HVAC technician. They can diagnose and repair complex problems that may be causing the noise.
Cold Spots on Floor
While noisy operation can be disruptive, cold spots on your heated floor can greatly impact comfort and efficiency. These uneven temperature areas often result from issues within your radiant heating system. Common causes include air pockets in the pipes, inadequate insulation, or problems with the heating elements.
To address cold spots, first identify their exact locations. Walk barefoot across the floor to pinpoint the cooler areas. Check for any visible damage to the flooring that might indicate underlying issues.
Next, inspect your system's manifold for proper flow and pressure. Bleed the system to remove trapped air, which can obstruct heat distribution.
If the problem persists, consider using thermal imaging to detect potential blockages or malfunctioning heating elements. In some cases, you may need to adjust the system's water temperature or flow rate to improve heat distribution. For electric radiant systems, check for faulty heating mats or loose connections.
Don't ignore cold spots, as they can signal more serious problems. If you're unable to resolve the issue, consult a professional who specializes in radiant floor heating. They can diagnose and fix complex problems, ensuring your system operates efficiently and provides consistent warmth throughout your space.
Slow Heating Response
Slow heating response can throw a wrench in your comfort plans when using radiant floor heating. This issue often stems from improper system design, inadequate insulation, or incorrect thermostat settings. You'll notice your floors take longer than expected to warm up, leaving you chilly and frustrated.
To tackle this problem, consider these steps:
- Check your thermostat settings: Confirm it's programmed correctly for your daily routine and desired temperatures.
- Improve insulation: Add insulation beneath the floor and around the heating pipes to minimize heat loss.
- Inspect your boiler: Make sure it's sized correctly for your home and operating efficiently.
- Evaluate your flooring material: Some materials, like thick carpets, can slow heat transfer.
If these DIY solutions don't resolve the issue, consult a professional. They can assess your system's design, check for air pockets in the pipes, and confirm proper water flow.
Pressure Imbalances
Within radiant floor heating systems, pressure imbalances can lead to uneven heat distribution and reduced efficiency.
You'll notice this problem when certain areas of your floor feel cooler than others, despite the system running at full capacity. These imbalances often stem from improper system design, incorrect pump sizing, or air trapped in the pipes.
To address this issue, start by checking your system's pressure gauge. If it's below the recommended level, you may need to add water to the system.
Next, inspect the circulation pump to verify it's working correctly and sized appropriately for your setup. If you're comfortable, bleed the air from the system using the air vents located on the manifold or at high points in the piping.
If these steps don't resolve the problem, you might've blockages in the pipes or issues with the zone valves.
In this case, it's best to call a professional who can perform a thorough system evaluation. They'll use specialized equipment to detect blockages and assess the overall system performance.
Corroded Manifold Components
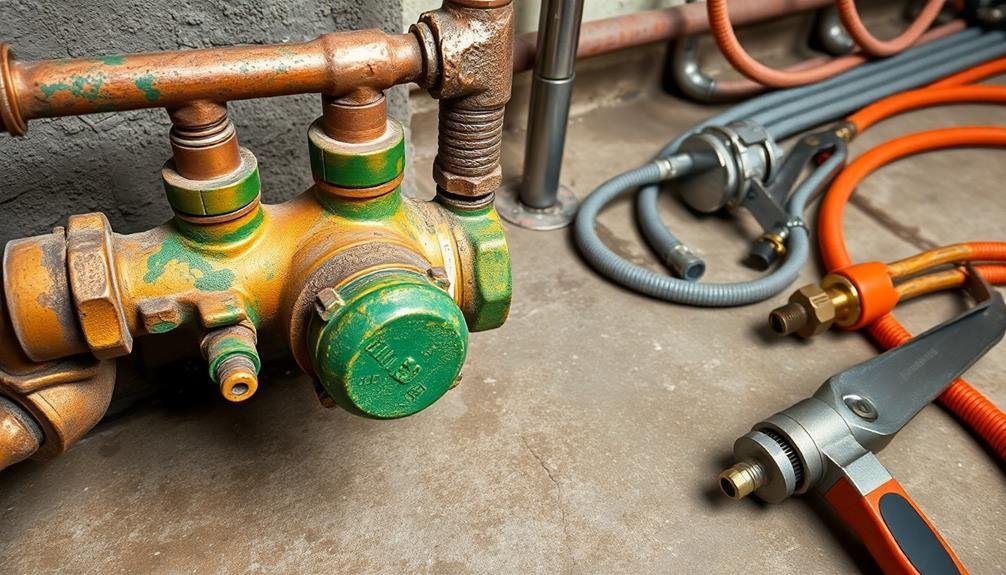
Numerous radiant floor heating systems suffer from corroded manifold components, which can severely impact system performance and longevity.
Corrosion can occur due to various factors, including water quality, improper maintenance, and chemical reactions within the system. If you suspect corroded manifold components, it's essential to address the issue promptly to prevent further damage and guarantee peak heating efficiency.
To identify and address corroded manifold components, follow these steps:
- Inspect the manifold visually for signs of rust, discoloration, or mineral buildup.
- Check for leaks or drips around the manifold connections and valves.
- Test the water quality in your system, paying attention to pH levels and mineral content.
- Consult a professional if you notice any signs of corrosion or suspect issues with your manifold.
If corrosion is present, you'll need to replace the affected components.
Consider upgrading to corrosion-resistant materials like stainless steel or brass. Additionally, implement preventive measures such as regular water treatment, installing a water softener, and scheduling annual maintenance checks.
Incorrect Fluid Mixture
Another common issue plaguing radiant floor heating systems is an incorrect fluid mixture. If you're using a water-based system, the proper balance of water and antifreeze is essential. Too little antifreeze can lead to freezing, while too much can reduce heat transfer efficiency.
To guarantee peak performance, you'll need to maintain the correct mixture ratio. Here's a quick guide to antifreeze percentages based on your climate:
| Climate | Minimum % | Recommended % | Maximum % |
|---|---|---|---|
| Mild | 20% | 30% | 40% |
| Moderate | 30% | 40% | 50% |
| Severe | 40% | 50% | 60% |
Remember, using the wrong type of antifreeze can damage your system. Stick to propylene glycol, as it's less toxic and more eco-friendly than ethylene glycol. Don't use automotive antifreeze, as it contains additives that can harm your heating system.
If you suspect an incorrect fluid mixture, test the solution using a refractometer or hydrometer. Adjust the mixture as needed, and flush the system if you've been using the wrong type of antifreeze. Regular maintenance checks will help prevent issues related to fluid mixture in your radiant floor heating system.
Frequently Asked Questions
How Long Does Radiant Floor Heating Typically Last Before Needing Replacement?
You can expect your radiant floor heating system to last 20 to 35 years with proper maintenance. However, individual components may need replacement sooner. Regular check-ups and addressing issues promptly will help extend its lifespan.
Can Radiant Floor Heating Be Installed in Existing Homes Without Major Renovations?
Yes, you can install radiant floor heating in existing homes without major renovations. You'll find options like electric mats that fit under various flooring types or hydronic systems that can be retrofitted. It's best to consult a professional for your specific situation.
What's the Average Cost to Install Radiant Floor Heating per Square Foot?
You'll typically spend $6-$15 per square foot for radiant floor heating installation. Costs vary based on your home's size, existing flooring, and system type. Electric systems are often cheaper upfront, but hydronic systems can be more cost-effective long-term.
Is Radiant Floor Heating Compatible With All Types of Flooring Materials?
You'll find radiant floor heating works with most flooring types. It's compatible with tile, stone, and concrete. You can use it with hardwood, but you'll need to be cautious. Carpet and vinyl may reduce efficiency, so consider alternatives.
How Does Radiant Floor Heating Impact Home Resale Value?
You'll likely see a boost in your home's resale value with radiant floor heating. It's an energy-efficient, luxurious feature that attracts buyers. You're offering comfort and lower utility bills, which can justify a higher asking price.
In Summary
You've now got the know-how to tackle common radiant floor heating issues. Don't let these problems leave you in the cold. Remember to check for uneven heat, thermostat glitches, air locks, leaks, and pump failures. Keep an eye on slow heating responses and pressure imbalances. Don't forget about corrosion and fluid mixtures. With these tips, you'll keep your radiant heating system running smoothly, ensuring cozy, efficient warmth throughout your home.


Leave a Reply