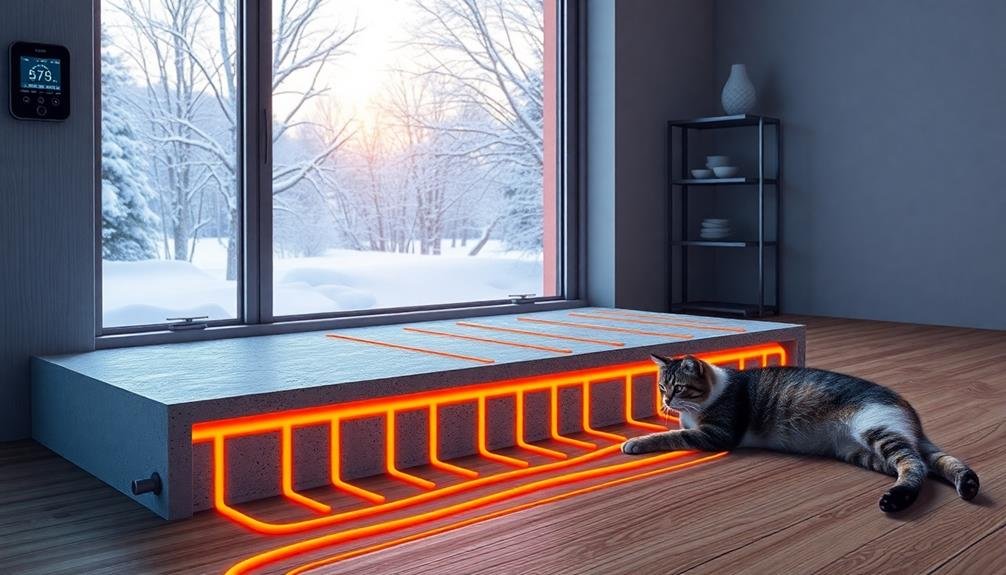
For successful concrete slab radiant floor heating, focus on proper insulation, efficient tubing layout, and the right concrete mix. Guarantee ideal slab thickness and design effective zone control. Don't forget to incorporate expansion joints and install a reliable moisture barrier. Choose a smart temperature control system for precise heating management. Regular maintenance is essential for longevity and efficiency. You'll also need to select appropriate heat sources, considering options like geothermal or solar thermal energy. By following these tips, you'll create a comfortable, energy-efficient heating system that'll serve you well for years. There's much more to explore about maximizing your radiant floor's performance.
Proper Insulation Installation
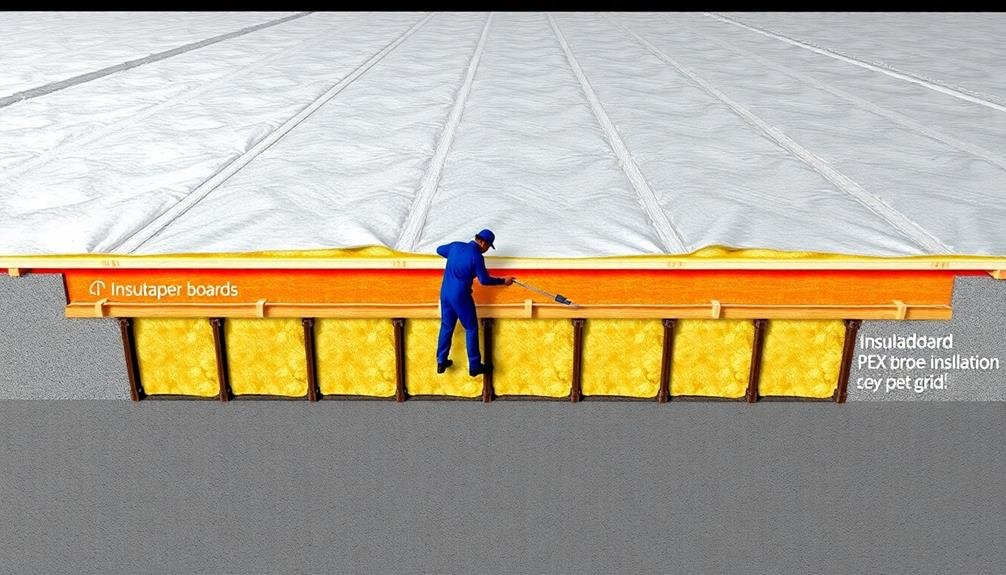
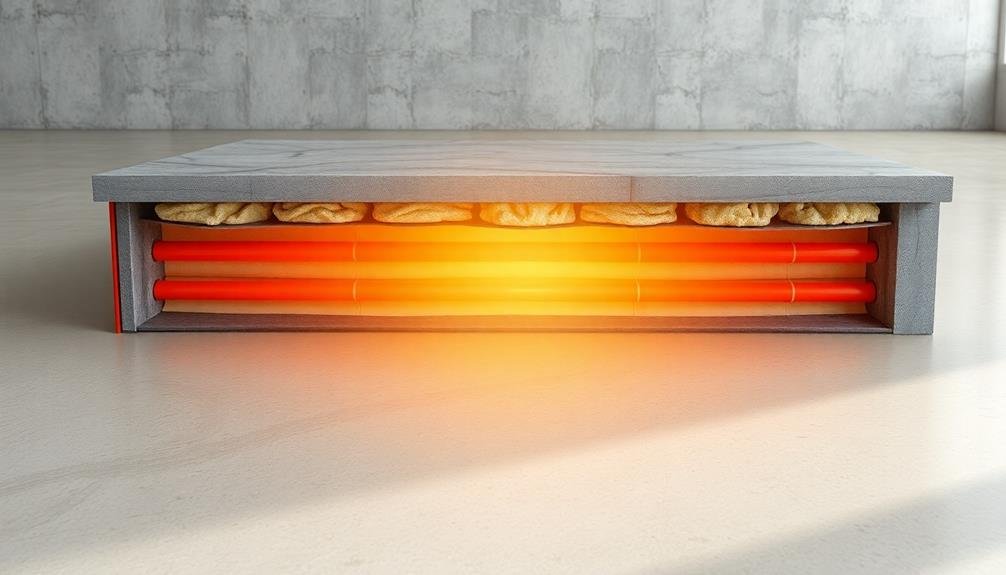
When installing radiant floor heating in a concrete slab, proper insulation is crucial for maximizing efficiency and comfort. You'll need to focus on two key areas: the slab's perimeter and underneath the slab itself.
For the perimeter, use rigid foam insulation boards with a minimum R-value of 10. Install these vertically along the edges of the slab, extending from the top of the slab to at least 24 inches below grade. This prevents heat loss through the slab's edges and helps maintain consistent temperatures throughout the floor.
Underneath the slab, lay a continuous layer of extruded polystyrene (XPS) insulation. Choose a thickness that provides an R-value of at least 10, typically about 2 inches. Guarantee the insulation covers the entire area beneath the slab, with no gaps or seams.
Place a vapor barrier over the insulation to prevent moisture intrusion.
Don't forget to insulate any pipes that run through the slab. Use foam pipe insulation sleeves to wrap around the pipes, preventing heat loss and protecting them from potential damage during the concrete pour.
Tubing Layout and Spacing
Your radiant floor heating system's performance hinges on proper tubing layout and spacing. Begin by creating a detailed plan of your room, marking all fixed objects and areas that don't require heating. Divide the space into zones based on heat requirements and room usage.
For most residential applications, you'll want to space your tubing 6 to 12 inches apart. High heat-loss areas like large windows or exterior walls may need closer spacing, while interior spaces can have wider gaps. Use a serpentine pattern for consistent heat distribution, guaranteeing the tubing runs perpendicular to the direction of foot traffic whenever possible.
Start laying the tubing from the room's perimeter, working your way inward. Maintain a minimum distance of 6 inches from walls and fixed objects. Use plastic zip ties or wire mesh to secure the tubing in place. Avoid sharp bends that could kink the tubing; instead, use gradual curves with a minimum radius of 6 inches.
For larger areas, consider using multiple loops to guarantee even heat distribution and easier maintenance. Remember to leave enough tubing at the manifold for connections.
Double-check your layout before pouring concrete to avoid costly mistakes.
Selecting the Right Concrete Mix
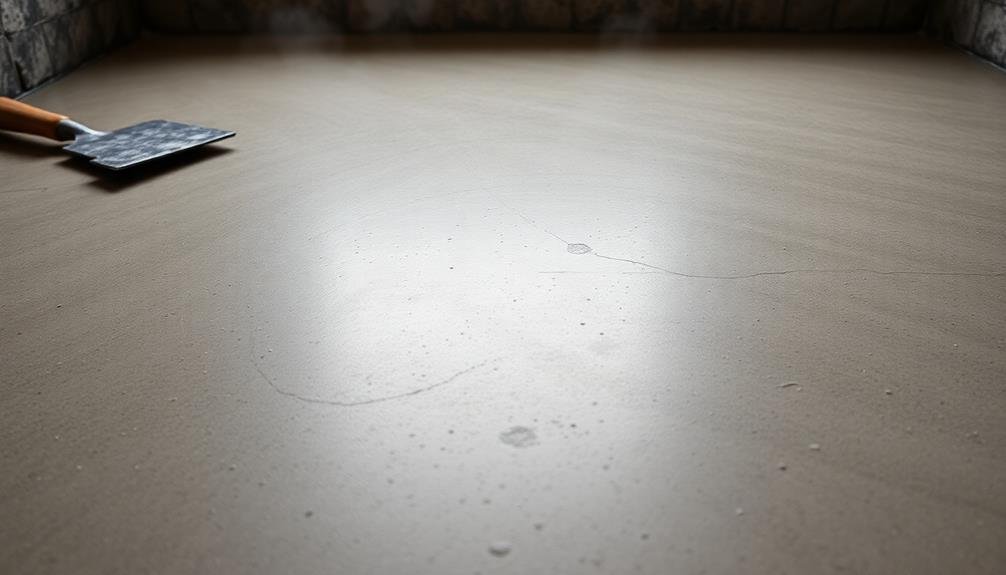
With your tubing layout planned, the next key consideration is the concrete mix you'll use. The right concrete mix is essential for ideal heat transfer and durability in your radiant floor heating system. Aim for a mix with high thermal conductivity and low air content.
Choose a mix with a compressive strength of at least 3,000 psi. A higher strength mix, around 4,000 to 5,000 psi, can provide better durability and heat distribution. Opt for a mix with smaller aggregate sizes, typically 3/8 inch or less, to improve heat transfer and reduce the risk of damaging the tubing during pouring.
Consider adding plasticizers to increase workability without compromising strength. This can help you achieve a smoother finish and better encapsulation of the heating tubes. Fiber reinforcement can also be beneficial, reducing the risk of cracking and improving overall durability.
Don't forget to discuss your specific needs with your concrete supplier. They can help you formulate a mix that balances thermal performance, strength, and workability for your radiant floor heating project.
Remember to factor in any local building codes or climate-specific requirements when selecting your concrete mix.
Optimal Slab Thickness
Precision in slab thickness is essential for an effective concrete radiant floor heating system. You'll want to aim for a thickness between 4 and 6 inches for most residential applications. This range provides ideal heat distribution and structural integrity while minimizing material costs and curing time.
For a 4-inch slab, you'll need to verify your subgrade is properly compacted and level. This thickness works well for lighter loads and can be more energy-efficient due to its lower thermal mass.
If you're dealing with heavier loads or want increased thermal storage, consider a 6-inch slab. Remember that thicker slabs require more concrete and take longer to cure, but they can provide better heat retention and distribution.
You'll need to adjust your radiant tubing layout accordingly, typically spacing the tubes closer together in thinner slabs.
Don't forget to account for any reinforcement, such as rebar or wire mesh, when determining your final slab thickness. Always consult with a structural engineer to verify your slab meets local building codes and load requirements for your specific project.
Designing Effective Zone Control
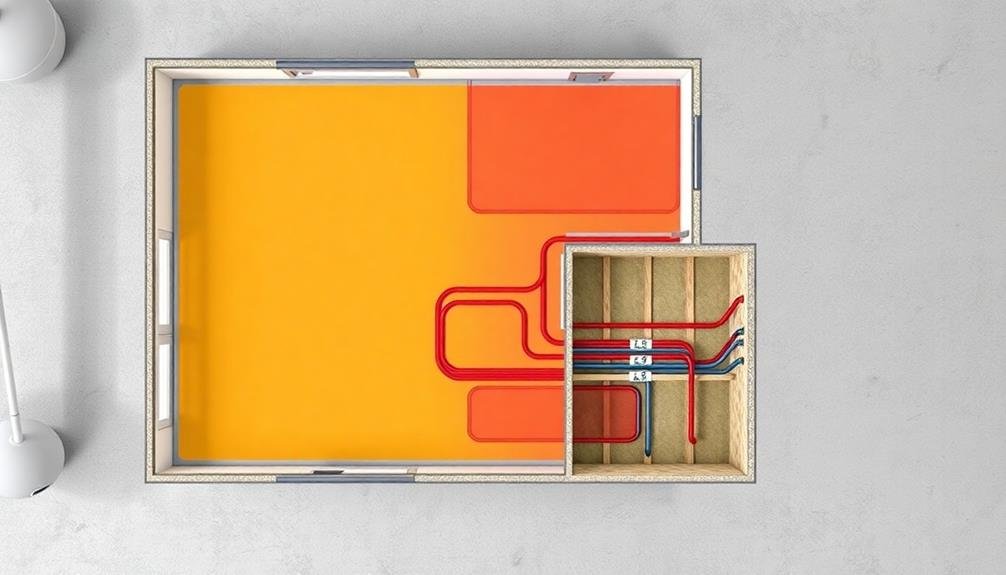
Once you've determined the ideal slab thickness, it's time to focus on zone control for your radiant floor heating system. Effective zone control allows you to manage temperatures in different areas of your home independently, improving comfort and energy efficiency.
To design an efficient zone control system, consider the layout of your home, daily usage patterns, and thermal characteristics of each space.
When planning your zones, keep these key factors in mind:
- Room function and occupancy
- Solar exposure and heat gain
- Insulation levels in different areas
- Size and shape of spaces
- Thermostat placement for accurate temperature readings
Don't create too many zones, as this can complicate the system and increase costs. Instead, group similar areas together, such as bedrooms or living spaces.
Guarantee each zone has its own thermostat and control valve for precise temperature regulation. You'll also need to size your manifold correctly to accommodate the number of zones you've designed.
Remember to factor in future expansion or changes in room usage when planning your system. By carefully designing your zone control, you'll create a more comfortable and energy-efficient radiant heating system that meets your specific needs.
Choosing Appropriate Heat Sources
When selecting a heat source for your concrete slab radiant floor heating system, you'll need to weigh the pros and cons of boilers versus heat pumps.
You might also want to explore geothermal energy options, which can provide efficient heating in certain climates.
Additionally, consider integrating solar thermal technology to potentially reduce your energy costs and environmental impact.
Boilers vs. Heat Pumps
Choosing the right heat source for your concrete slab radiant floor heating system is essential for efficiency and comfort.
When deciding between boilers and heat pumps, take into account your specific needs and local climate.
Boilers are a traditional choice, offering reliable performance and high-temperature water. They're ideal for colder regions and can use various fuel types.
Heat pumps, on the other hand, are more energy-efficient and can provide both heating and cooling. They work best in moderate climates and can greatly reduce your energy bills.
Here are key factors to take into account when choosing between boilers and heat pumps:
- Climate: Boilers perform better in extreme cold, while heat pumps excel in milder temperatures
- Energy efficiency: Heat pumps typically have higher efficiency ratings
- Installation costs: Boilers often have lower upfront costs
- Maintenance requirements: Heat pumps generally need less maintenance
- Fuel availability: Take into account local fuel prices and availability
Ultimately, your choice will depend on your home's specific requirements, budget, and long-term energy goals.
Consult with a professional to determine which option best suits your concrete slab radiant floor heating system.
Geothermal Energy Options
Geothermal energy offers three main options for powering your concrete slab radiant floor heating system: ground source heat pumps, direct use systems, and enhanced geothermal systems.
Ground source heat pumps are the most common choice for residential applications. They use the earth's constant temperature to heat and cool your home efficiently. You'll need to install a loop system in your yard, either horizontally or vertically, depending on your available space.
Direct use systems are ideal if you're lucky enough to have access to naturally occurring hot water or steam near your property. These systems tap directly into geothermal reservoirs, eliminating the need for a heat pump.
Enhanced geothermal systems are more complex and typically used for larger-scale projects. They involve creating artificial geothermal reservoirs by injecting water into hot, dry rock formations deep underground.
When choosing a geothermal option, consider your location, budget, and available space. Ground source heat pumps are versatile and can work almost anywhere, while direct use systems are limited to specific geographic areas.
Enhanced systems require significant investment and expertise but can provide substantial energy output for larger applications.
Solar Thermal Considerations
In light of environmental concerns and rising energy costs, solar thermal systems present a compelling alternative for powering your concrete slab radiant floor heating. These systems harness the sun's energy to heat a fluid, which is then circulated through your radiant floor system.
When considering solar thermal for your radiant heating, you'll need to assess your home's solar potential and climate conditions.
To maximize the efficiency of your solar thermal system, consider the following factors:
- Roof orientation and tilt angle for ideal sun exposure
- Available roof space for solar collectors
- Local climate and average sunlight hours
- Storage capacity for excess heat
- Integration with existing heating systems
You'll also need to decide between flat plate and evacuated tube collectors. Flat plate collectors are generally more cost-effective but less efficient, while evacuated tube collectors perform better in colder climates.
Don't forget to factor in the initial installation costs and long-term savings when evaluating solar thermal options. It's wise to consult with a solar thermal expert to determine the best system size and configuration for your specific needs, ensuring you get the most out of your investment in clean, renewable energy for your radiant floor heating.
Incorporating Expansion Joints
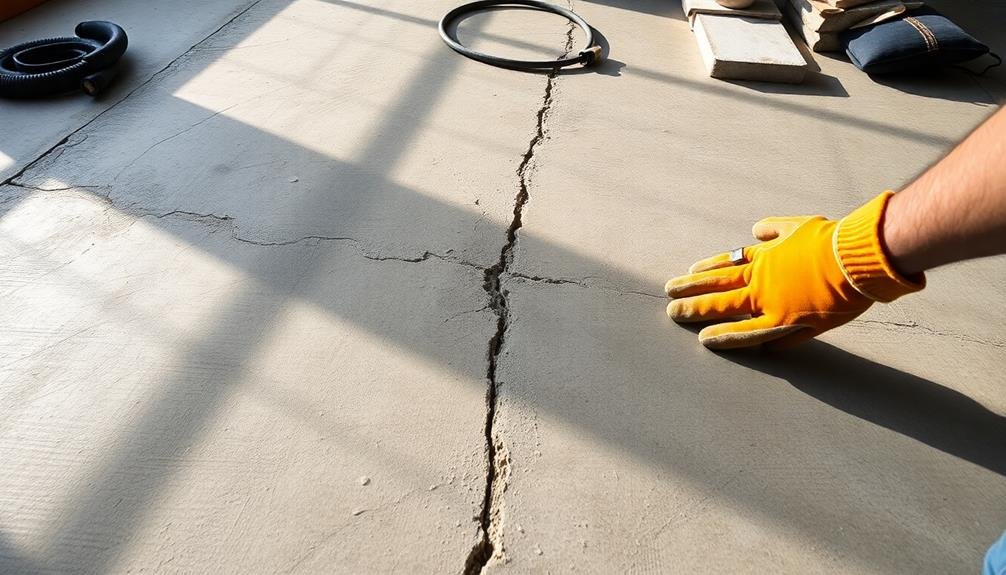
When installing radiant floor heating in a concrete slab, you'll need to incorporate expansion joints to prevent cracking as the concrete expands and contracts.
These joints allow for controlled movement, reducing stress on the slab and preserving the integrity of your heating system.
You should strategically place expansion joints at regular intervals and around the perimeter of the slab, ensuring they align with any existing structural joints in the building.
Purpose of Expansion Joints
Expansion joints play a crucial role in concrete slab radiant floor heating systems. They're designed to accommodate the natural movement of concrete as it expands and contracts due to temperature changes.
By incorporating these joints, you'll prevent cracks and other damage that could compromise your radiant heating system's efficiency and longevity.
The primary purposes of expansion joints in concrete slab radiant floor heating include:
- Relieving stress caused by thermal expansion and contraction
- Preventing random cracking throughout the slab
- Allowing for controlled movement of separate concrete sections
- Reducing the risk of damage to embedded radiant heating pipes
- Maintaining the structural integrity of the entire floor system
When you install expansion joints, you're fundamentally creating predetermined breaking points where the concrete can safely move without causing widespread damage.
This is particularly important in radiant floor heating systems, as the constant temperature fluctuations can lead to more pronounced expansion and contraction cycles.
Proper Joint Placement Techniques
To guarantee the effectiveness of expansion joints in your concrete slab radiant floor heating system, you'll need to master proper joint placement techniques. Start by dividing your floor area into smaller sections, typically no larger than 400 square feet each. Place expansion joints along these section boundaries, making sure they're at least 1/4 inch wide and extend through the full depth of the slab.
When planning joint placement, consider your room's layout and potential stress points. Install joints where the floor meets walls, columns, or other fixed structures. For long, narrow areas like hallways, place joints across the width at regular intervals. In larger rooms, create a grid pattern with joints spaced 10 to 15 feet apart.
Don't forget to accommodate doorways and changes between different flooring materials. Place joints at these locations to prevent cracking. If you're using decorative concrete, align joints with planned patterns or designs for a more aesthetically pleasing look.
Remember to protect your radiant heating pipes during joint installation. Use pipe sleeves or flexible tubing where pipes cross expansion joints to allow for movement without damage.
Moisture Barrier Considerations
One essential aspect of installing radiant floor heating in a concrete slab is the moisture barrier. You'll need to choose the right type and install it correctly to prevent moisture-related issues. A proper moisture barrier protects your heating system and the structural integrity of your home.
When selecting and installing a moisture barrier, consider these key points:
- Choose a high-quality, vapor-impermeable material like polyethylene sheeting
- Guarantee the barrier covers the entire slab area, extending up the walls
- Overlap seams by at least 6 inches and seal them with tape
- Repair any tears or punctures immediately
- Use caution when working around the barrier to avoid damage
You'll want to install the moisture barrier before laying the radiant heating pipes. This protects the pipes from moisture and guarantees even heat distribution.
Remember, the barrier also prevents moisture from seeping up through the concrete, which can lead to mold growth and structural damage.
Don't skimp on this essential step. A well-installed moisture barrier will extend the life of your radiant heating system and protect your investment.
Take the time to research and choose the best materials for your specific project needs.
Temperature Control Systems
When it comes to radiant floor heating, an efficient temperature control system is essential for ideal performance and comfort. You'll want to invest in a programmable thermostat designed specifically for radiant systems. These thermostats often include floor sensors to monitor slab temperature, ensuring accurate control and preventing overheating.
Consider zoning your system to allow independent temperature control in different areas of your home. This can improve energy efficiency and personalize comfort levels throughout the house. Smart thermostats are an excellent option, offering remote access and learning capabilities to optimize your heating schedule.
Don't forget about outdoor temperature sensors. These help your system anticipate heating needs based on weather conditions, improving overall efficiency.
You should also look for a control system with modulating capabilities, which can adjust water temperature in the radiant loops for precise heat output.
Lastly, make sure your temperature control system includes safety features like high-limit switches to prevent damage to your flooring materials.
With the right control system in place, you'll enjoy consistent, comfortable heat while maximizing energy efficiency in your concrete slab radiant floor heating setup.
Regular Maintenance and Inspection
While a well-designed temperature control system is key to your radiant floor heating's performance, regular maintenance and inspection are equally important for long-term efficiency.
You'll want to schedule annual check-ups with a professional to confirm your system is functioning effectively. During these inspections, they'll check for leaks, pressure levels, and proper fluid circulation.
Between professional visits, you can perform some maintenance tasks yourself. Keep an eye out for any signs of trouble, such as cold spots on the floor or unusually high energy bills.
Here's a quick checklist of regular maintenance tasks:
- Bleed air from the system annually
- Check and clean air vents and filters
- Monitor system pressure and top up fluid if needed
- Inspect visible pipes and connections for signs of wear or damage
- Test thermostats and zone controls for accuracy
Frequently Asked Questions
How Long Does It Take for a Concrete Slab Radiant Floor to Heat Up?
You'll typically wait 24-48 hours for your concrete slab radiant floor to fully heat up. It's a gradual process, so you won't feel immediate warmth. Factors like slab thickness and initial temperature can affect heating time.
Can Radiant Floor Heating Be Installed in Existing Concrete Slabs?
Yes, you can install radiant floor heating in existing concrete slabs. You'll need to cut grooves in the slab, lay the heating tubes, and cover them with a new layer of concrete or self-leveling compound. It's a complex process.
What Is the Average Lifespan of a Concrete Slab Radiant Heating System?
You can expect your concrete slab radiant heating system to last 30-50 years. With proper maintenance, it'll often outlive other home systems. It's durable, but factors like water quality and usage can affect its lifespan.
Are There Any Health Concerns Associated With Concrete Slab Radiant Floor Heating?
You'll find that concrete slab radiant floor heating generally doesn't pose significant health risks. It's a clean, allergen-free heating method. However, you should guarantee proper installation to prevent any potential issues with moisture or mold growth.
How Does Radiant Floor Heating Affect Flooring Options and Installation Methods?
You'll find radiant floor heating affects your flooring choices and installation. It's compatible with most options, but you'll need to contemplate heat conductivity. Some materials, like hardwood, require special installation methods to prevent warping or damage.
In Summary
You've now got the essential tips for a successful concrete slab radiant floor heating system. Remember, it's all about proper planning and execution. From insulation to tubing layout, concrete mix to slab thickness, you'll need to take into account every detail. Don't forget about zone control, expansion joints, and moisture barriers. With the right temperature control system and regular maintenance, you'll enjoy efficient, comfortable heating for years to come. Keep these tips in mind, and you're well on your way to radiant floor heating success.


Leave a Reply