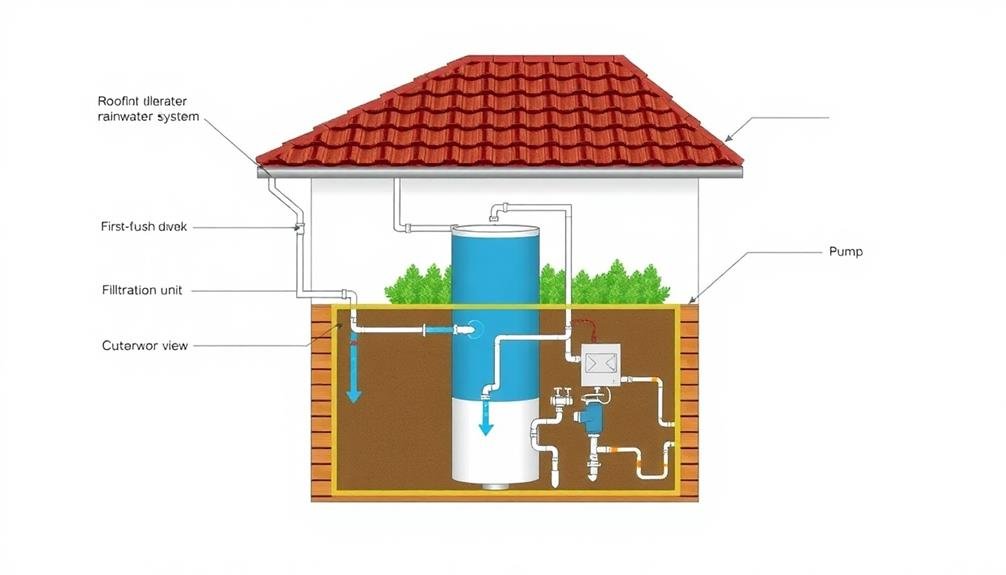
To construct your rainwater collection system, start by evaluating your property's suitability, including roof area and local regulations. Choose an ideal collection surface, like metal roofing, and size your storage tank based on water needs and rainfall patterns. Select appropriate gutters and downspouts, then design a multi-stage filtration system for clean water. Install first-flush diverters and overflow protection to maintain quality. Implement a pump system and distribution network tailored to your needs. Don't forget water treatment methods like UV disinfection for safety. By following this thorough guide, you'll create an efficient and sustainable water source for your home.
Assessing Your Property's Potential

Before diving into rainwater collection, it's crucial to evaluate your property's suitability. Start by examining your roof's surface area, as this determines the potential volume of water you can collect. Measure the square footage and consider the roof's material, as some are better suited for collection than others. Metal and tile roofs are ideal, while asphalt shingles may require additional filtration.
Next, examine your property's layout and identify the best location for your storage tank. Look for a spot that's close to your intended water use areas and allows for gravity-fed distribution if possible. Consider the soil type and stability to ascertain proper support for your tank.
Analyze your local climate and rainfall patterns. Use historical data to estimate the average annual rainfall in your area. This information will help you determine the appropriate tank size and whether rainwater collection can meet your needs year-round.
Lastly, check local regulations and zoning laws regarding rainwater harvesting. Some areas may have restrictions or require permits. Understanding these requirements will guarantee your system complies with local guidelines and avoids potential legal issues.
Choosing the Right Collection Surface
When selecting your rainwater collection surface, the roof of your home or outbuildings is typically the best choice. It's already designed to capture and channel water, making it an ideal starting point.
However, not all roofing materials are created equal when it comes to rainwater harvesting. Metal roofs are excellent for rainwater collection, as they're durable, smooth, and don't release harmful chemicals. Concrete or clay tiles also work well, though they may require more frequent cleaning.
Asphalt shingles are less desirable, as they can leach chemicals and granules into your collected water. If you're using asphalt shingles, consider installing a first-flush diverter to remove initial runoff.
Ensure your collection surface is free from overhanging trees, as leaves and debris can contaminate your water and clog your system. You'll also want to avoid collecting from areas where birds frequently roost.
If you're building a new structure specifically for rainwater collection, consider a sloped metal roof for peak results. Remember, the cleaner your collection surface, the higher the quality of water you'll harvest.
Sizing Your Storage Tank
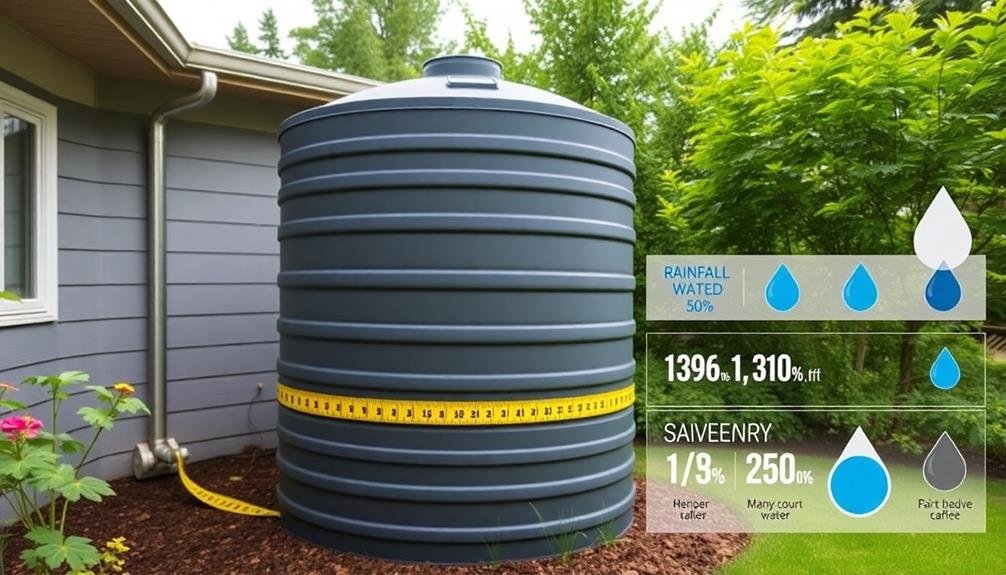
After selecting your collection surface, it's crucial to determine the right size for your storage tank. To calculate the appropriate tank size, you'll need to take into account several factors.
First, assess your water needs by estimating your daily household consumption. Then, factor in the average rainfall in your area and the size of your collection surface.
Use this formula to calculate your potential harvested rainwater:
Collection area (sq ft) x Rainfall (inches) x 0.623 = Gallons of water collected.
Reflect on your dry season length and aim to store enough water to last through it. Don't forget to account for overflow during heavy rains.
Tank sizes typically range from 50 to 10,000 gallons. For a small household, a 1,000-2,000 gallon tank might suffice, while larger properties may require 5,000 gallons or more.
Choose a tank material that suits your budget and climate, such as plastic, concrete, or metal. Remember to allow for expansion if you plan to increase your system's capacity in the future.
Selecting Appropriate Gutters and Downspouts
Choosing the right gutters and downspouts is essential to set up an efficient rainwater collection system. You'll need to take into account the material, size, and slope of your gutters to make sure they can handle the volume of water from your roof.
For materials, opt for durable options like aluminum, galvanized steel, or vinyl. Aluminum is lightweight and rust-resistant, while galvanized steel offers strength. Vinyl is affordable but may crack in extreme temperatures.
The size of your gutters should match your roof's square footage and local rainfall intensity. Standard 5-inch K-style gutters work for most homes, but you might need 6-inch gutters for larger roofs or areas with heavy rainfall.
Make certain your gutters have a proper slope of at least 1/4 inch per 10 feet towards the downspouts. For downspouts, use a 2×3-inch rectangular or 3-inch round size for every 600-800 square feet of roof area.
Install downspout extensions to direct water away from your foundation and into your collection system. Don't forget to add gutter guards to prevent debris from clogging your system and contaminating your collected rainwater.
Designing the Filtration System

Crystal-clear water is the goal of any rainwater collection system, and a well-designed filtration system is key to achieving it.
You'll need to implement a multi-stage filtration process to remove debris, sediment, and potential contaminants.
Start with a first-flush diverter to redirect initial runoff, which often contains the most pollutants. Next, install a coarse mesh screen at your gutter outlets to catch large debris like leaves and twigs.
For finer particles, use a series of increasingly fine filters. Begin with a 500-micron pre-filter, followed by a 50-micron sediment filter.
Consider adding activated carbon filters to remove odors and improve taste. If you're planning to use the water for drinking, incorporate a UV sterilizer or chlorination system to eliminate harmful microorganisms.
Don't forget about maintenance. Install your filtration system in an easily accessible location and use clear housings for visual inspection.
Set up a regular cleaning and replacement schedule for your filters to guarantee peak performance.
Installing First Flush Diverters
First flush diverters play a key role in maintaining your rainwater's quality. They're designed to capture and divert the initial runoff from your roof, which often contains contaminants like dust, leaves, and bird droppings. By installing these devices, you'll guarantee cleaner water enters your storage tank.
To install a first flush diverter, start by choosing the right size for your roof area and rainfall intensity. Mount the diverter vertically on your downspout, just before it connects to your storage tank. Ascertain it's securely fastened and level.
The diverter consists of a chamber that fills with water and a floating ball that rises to seal off the chamber once it's full. Connect the chamber to your downspout using appropriate fittings and seal all joints to prevent leaks. Install a small-diameter drain at the bottom of the chamber to allow for slow release of the diverted water.
Remember to regularly clean and maintain your first flush diverter. Inspect it after each rainfall event and empty the chamber as needed. This will keep your system functioning efficiently and your collected rainwater cleaner for various uses around your property.
Implementing Overflow Protection

Implementing overflow protection is a critical step in designing your rainwater collection system. It prevents water from backing up into your gutters or flooding your collection area during heavy rainfall.
To install an overflow system, you'll need to add an outlet pipe near the top of your storage tank. Choose a pipe with a diameter large enough to handle the maximum expected water flow. Position the outlet so that excess water is directed away from your home's foundation and any other structures. You can connect this pipe to a storm drain or create a designated overflow area in your yard.
Consider adding a screen or grate to the overflow pipe's entrance to prevent debris and small animals from entering. It's also wise to install a backflow prevention device to stop contaminated water from re-entering your tank.
Don't forget to regularly inspect and clean your overflow system to guarantee it functions properly. Remove any debris that might accumulate around the outlet and check for signs of erosion in the overflow area.
Selecting a Pump System
When selecting a pump system for your rainwater collection setup, you'll need to take into account the types of pumps available, such as submersible or centrifugal pumps.
You'll also want to make certain you size your pump correctly based on your water demand and system pressure requirements.
Don't forget to factor in power source considerations, weighing options like grid electricity, solar power, or manual pumping to find the best fit for your needs.
Types of Pump Systems
Selecting the right pump system is essential for an efficient rainwater collection setup. You'll encounter several types of pumps, each suited for different purposes.
Submersible pumps are popular for their versatility and quiet operation. They're installed directly in the water tank and work well for both shallow and deep tanks.
Surface pumps, on the other hand, are placed outside the tank and are ideal for shorter distances and lower flow rates.
For high-pressure applications, you might consider a jet pump. These pumps are great for supplying water to multiple outlets simultaneously.
If you're looking for an eco-friendly option, solar-powered pumps can be an excellent choice. They're energy-efficient and perfect for remote locations without access to electricity.
Don't overlook manual pumps, which can be a reliable backup during power outages. Hand pumps and foot pumps are simple to use and require no electricity.
For larger systems, you might need a booster pump to maintain consistent water pressure throughout your home.
Sizing Your Pump
After choosing the right type of pump for your rainwater collection system, you'll need to determine the appropriate size. Pump sizing is essential for efficient operation and depends on several factors, including your water demand, the height difference between your storage tank and the point of use, and the length of your piping system.
To size your pump correctly, calculate the flow rate you'll need in gallons per minute (GPM). Take into account the maximum water demand of all fixtures and appliances that might run simultaneously.
Next, determine the total dynamic head (TDH), which accounts for the vertical lift and friction losses in your piping system. Use the manufacturer's pump curves to select a pump that can deliver your required GPM at the calculated TDH.
Don't forget to factor in pressure requirements for your end-use applications. Most household fixtures need 30-50 PSI to function properly. If you're using the water for irrigation, you'll need to take into account the pressure requirements of your sprinklers or drip systems.
It's often better to choose a slightly oversized pump to guarantee adequate performance and account for potential future expansions of your system.
Power Source Considerations
As you consider the pump system for your rainwater collection setup, it's crucial to evaluate your power source options. The most common choices are electrical, solar, and manual pumps. Each has its advantages and drawbacks, depending on your specific needs and location.
Electrical pumps are reliable and powerful, but they require a constant power supply and can increase your energy costs. Solar pumps are eco-friendly and ideal for remote areas, but they may struggle during extended periods of cloudy weather. Manual pumps are cost-effective and don't rely on external power sources, but they require physical effort to operate.
Here's a quick comparison of these power sources:
| Power Source | Pros | Cons |
|---|---|---|
| Electrical | Consistent power, high capacity | Requires grid connection, higher operating costs |
| Solar | Environmentally friendly, low operating costs | Weather-dependent, higher initial investment |
| Manual | No external power needed, low maintenance | Labor-intensive, limited capacity |
Consider your property's layout, energy availability, and budget when choosing your pump's power source. If you're off-grid, a solar or manual pump might be your best option. For properties with reliable electricity, an electric pump could provide the most convenience and power.
Setting Up Distribution Networks

Once you've collected rainwater, the next essential step is setting up an efficient distribution network. This system will guarantee that the harvested water reaches its intended destinations throughout your property.
Start by planning your distribution routes, considering factors like terrain, distance, and water pressure requirements. Choose appropriate piping materials, such as PVC or polyethylene, based on durability and cost-effectiveness.
Install a main distribution line from your storage tank, then branch out with smaller pipes to various usage points. Don't forget to include shut-off valves at key junctions for easy maintenance and repairs.
If you're dealing with elevation changes, you might need a pump to maintain adequate water pressure. Select a pump that matches your system's flow rate and pressure requirements.
Install filters at distribution points to guarantee water quality for different uses, such as drip irrigation or household applications. Consider incorporating a pressure tank to maintain consistent water pressure and reduce pump cycling.
Incorporating Water Treatment Methods
You'll need to guarantee your collected rainwater is safe for use by incorporating various treatment methods.
Consider implementing filtration techniques to remove debris and contaminants, installing UV disinfection systems to eliminate harmful microorganisms, or utilizing chemical treatment options like chlorination.
These approaches can be used individually or in combination to achieve the desired water quality for your specific needs.
Filtration Techniques
Three essential filtration techniques are crucial for guaranteeing the safety and quality of collected rainwater.
First, you'll need to implement a pre-filtration system using a first-flush diverter and leaf guards. This initial step removes large debris, preventing it from entering your storage tank.
Next, incorporate a sediment filter to remove smaller particles like sand, silt, and fine debris. You can use a multi-stage filtration system with progressively finer filters, typically starting with a 20-micron filter and ending with a 5-micron filter. This approach effectively removes suspended solids and improves water clarity.
Finally, implement an activated carbon filter to address chemical contaminants and improve taste and odor. This filter adsorbs organic compounds, chlorine, and other impurities that may have made their way into your collected rainwater.
For added protection, consider using a UV sterilizer or chlorination system to eliminate harmful microorganisms.
Remember to maintain your filtration system regularly by cleaning or replacing filters as needed. Proper maintenance guarantees peak performance and extends the life of your rainwater collection system, providing you with clean, safe water for various household uses.
UV Disinfection Systems
UV disinfection systems offer a powerful and chemical-free method for treating collected rainwater. These systems use ultraviolet light to inactivate harmful microorganisms, including bacteria, viruses, and protozoa.
By incorporating a UV disinfection system into your rainwater collection setup, you'll guarantee a higher level of water safety for various household uses.
To install a UV system, you'll need to place it after your filtration components. This guarantees that the water is clear of sediment and other particles that could shield microorganisms from the UV light.
Choose a UV system sized appropriately for your water flow rate and usage needs. Most residential systems can handle 10-15 gallons per minute.
Maintenance is essential for UV systems. You'll need to replace the UV lamp annually, even if it's still working, as its effectiveness diminishes over time.
Clean the quartz sleeve that houses the lamp every few months to remove any mineral buildup. It's also important to monitor the system's performance with a UV intensity sensor, which alerts you if the disinfection process isn't working correctly.
While UV systems are effective, they don't remove chemical contaminants or improve taste.
Consider combining UV disinfection with other treatment methods for thorough water purification.
Chemical Treatment Options
Chemical treatment offers an effective alternative for purifying collected rainwater. You'll find several options available, each with its own advantages and considerations.
Chlorination is a popular choice, using liquid chlorine or chlorine tablets to disinfect water. It's cost-effective and provides residual protection, but you'll need to monitor chlorine levels carefully.
Iodine is another option, effective against most waterborne pathogens. It's easy to use but can impart a distinct taste to the water.
For a more natural approach, you might consider hydrogen peroxide. It's environmentally friendly and leaves no residual taste, but it's less effective against certain microorganisms.
Potassium permanganate is a powerful oxidizer that can remove iron, manganese, and sulfur compounds. However, it requires precise dosing to avoid water discoloration.
Finally, silver ionization is a low-maintenance method that provides long-lasting disinfection, but it's more expensive upfront.
When choosing a chemical treatment, consider factors like effectiveness, ease of use, cost, and potential side effects.
Always follow manufacturer guidelines and local regulations to guarantee safe, potable water for your household use.
Maintaining Your Rainwater Collection System

To guarantee your rainwater collection system operates efficiently and provides clean water for years to come, regular maintenance is essential.
Start by inspecting your gutters and downspouts quarterly, removing debris and checking for leaks or damage. Clean your first-flush diverter monthly to prevent contaminants from entering your storage tank.
Inspect your storage tank annually for cracks, leaks, or algae growth. If you notice any issues, address them promptly to prevent water contamination. Clean the tank every 2-3 years, or more frequently if you live in an area with high pollution levels.
Check and clean your filters monthly, replacing them as needed. This guarantees your water remains free of sediment and other particulates. If you use a UV disinfection system, replace the bulb annually or as recommended by the manufacturer.
Test your water quality at least twice a year, or more often if you use it for drinking. This helps you identify any potential issues with your system's performance.
Regularly trim overhanging branches near your collection area to reduce debris accumulation and minimize the risk of contamination from bird droppings or leaves.
Legal Considerations and Permits
Before diving into rainwater harvesting, it's crucial to understand the legal landscape surrounding this practice. Laws and regulations vary widely by location, so you'll need to research your specific area's requirements. In some regions, rainwater collection is encouraged, while in others, it may be restricted or even prohibited.
Start by contacting your local water authority or municipality to inquire about permits and regulations. You may need to obtain a building permit for larger systems or those involving structural changes to your property. Some areas require professional installation or regular inspections to guarantee compliance with health and safety standards.
Be aware of potential restrictions on water use. Some jurisdictions limit rainwater to non-potable uses only, such as irrigation or toilet flushing. Others may have specific requirements for treatment systems if you plan to use the water for drinking.
Consider potential impacts on neighbors, such as overflow management and mosquito control. Some areas have regulations addressing these concerns.
Cost Analysis and ROI
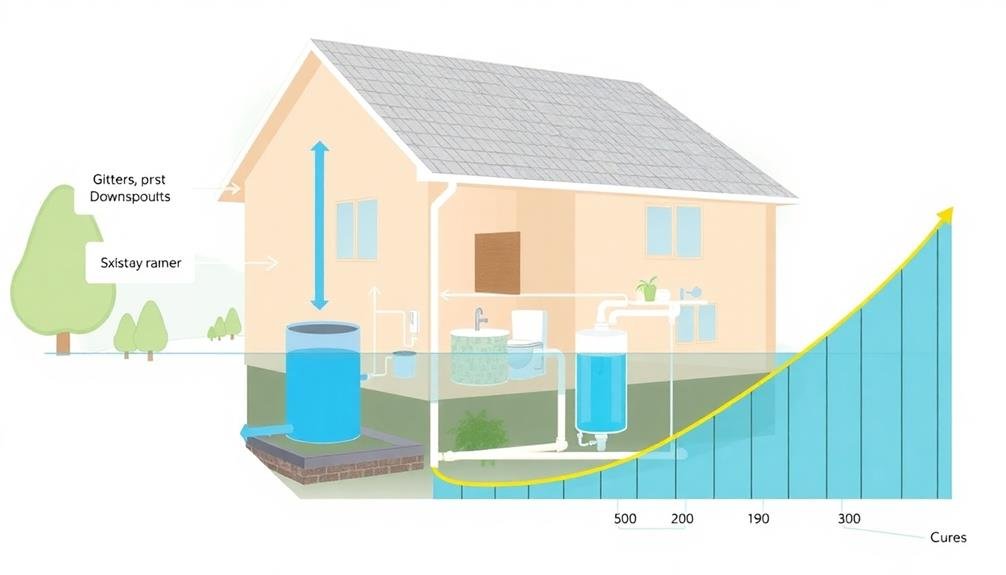
Now that you're aware of the legal aspects, let's examine the financial side of rainwater harvesting. The initial cost of setting up a rainwater collection system can vary widely, typically ranging from $1,000 to $10,000 for residential systems. Factors influencing the cost include tank size, filtration complexity, and pump requirements.
To calculate your return on investment (ROI), first estimate your annual water savings. Multiply your roof's square footage by the average annual rainfall in your area, then by 0.623 (gallons per square foot of rainfall).
Compare this to your current water bill to determine potential savings. Factor in maintenance costs, which are generally low, averaging $100-$200 per year for basic systems.
The payback period depends on your initial investment, water savings, and local water rates. In areas with high water costs or frequent droughts, you might recoup your investment in 5-10 years.
Additionally, consider non-monetary benefits like increased property value, environmental impact, and water security during shortages. Some areas offer tax incentives or rebates, further improving your ROI.
Frequently Asked Questions
Can Rainwater Collection Systems Work in Areas With Limited Rainfall?
Yes, rainwater collection systems can work in areas with limited rainfall. You'll need to maximize your collection surface and storage capacity. Consider using larger tanks and efficient guttering systems to capture every drop when it does rain.
How Do I Prevent Mosquito Breeding in My Rainwater Storage Tank?
You can prevent mosquito breeding by covering your tank with a tight-fitting lid, adding mosquito dunks, or using screens on openings. Regularly clean and maintain your tank, and consider adding fish that eat mosquito larvae.
Is Collected Rainwater Safe for Watering Edible Plants and Vegetables?
Yes, you can safely water your edible plants with collected rainwater. It's naturally soft and free from chemicals. However, verify your collection system is clean and properly maintained to prevent contamination. Consider filtering if you're concerned about pollutants.
Can I Connect My Rainwater System to My Household Plumbing?
You can connect your rainwater system to household plumbing, but it's not recommended without proper treatment. You'll need filters, UV sterilization, and regular testing. Check local regulations first, as it's often restricted or prohibited.
What Are the Best Materials for Underground Rainwater Storage Tanks?
You'll find that concrete, fiberglass, and polyethylene are top choices for underground rainwater tanks. They're durable, resistant to corrosion, and maintain water quality. Consider your budget, soil type, and local regulations when selecting the best material.
In Summary
You've now got the knowledge to build your own rainwater collection system. Remember, it's a journey that'll require ongoing maintenance and adjustments. Don't forget to check local regulations and obtain necessary permits. While there's an initial investment, you'll soon reap the benefits of lower water bills and a more sustainable lifestyle. Start small if you're unsure, and expand as you gain confidence. Happy harvesting!


Leave a Reply