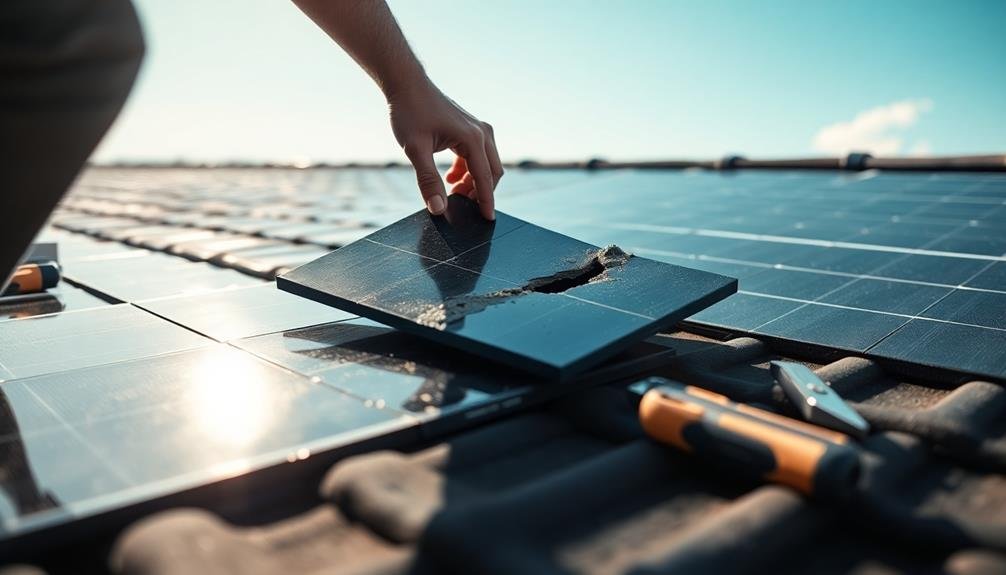
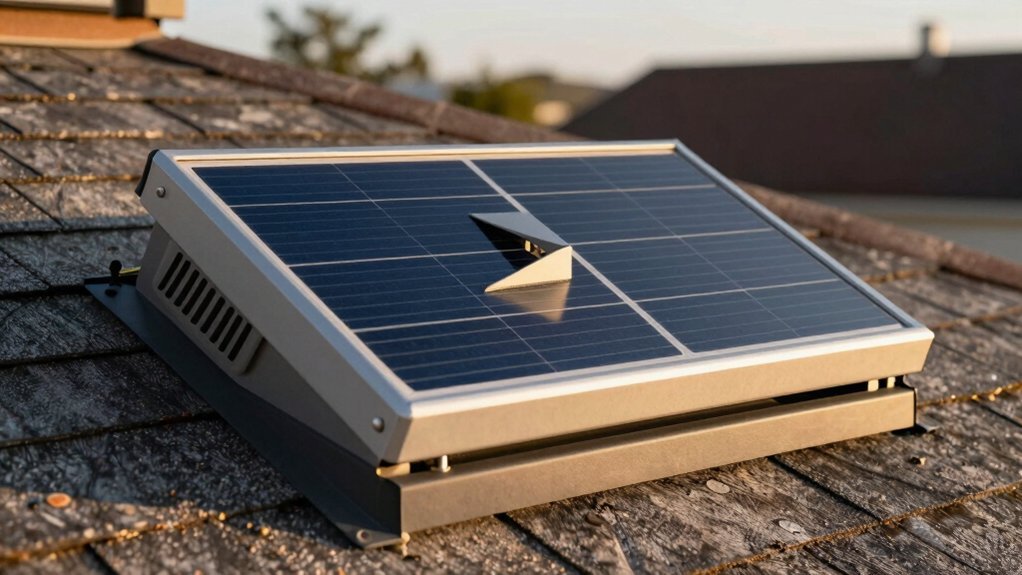
To repair photovoltaic roof tiles, prioritize safety by wearing proper PPE and disconnecting the electrical system. Identify damaged tiles through visual inspections and performance monitoring. Use essential tools like multimeters and voltage testers to assess the issue. Carefully remove surrounding tiles and extract the faulty one. Prepare and install the replacement tile, ensuring proper alignment and sealing. Reconnect the electrical system and thoroughly test the repaired setup. Regular maintenance, including bi-annual inspections and cleaning, will extend your system's lifespan. By following these steps, you'll be well-equipped to tackle solar tile repairs and keep your roof generating clean energy efficiently.
Safety Precautions

When working with photovoltaic roof tiles, your safety should be the top priority. Before you begin any repair work, guarantee you're wearing appropriate personal protective equipment (PPE). This includes non-slip shoes, safety glasses, gloves, and a hard hat.
Don't forget to use a safety harness when working at heights.
Turn off the solar system completely before starting repairs. Disconnect the main power supply and the solar inverter to prevent electrical shocks. Use a voltage tester to confirm there's no live current in the system.
Be aware that photovoltaic tiles can still generate electricity even when disconnected, so cover them with an opaque material during repairs.
Choose a dry, calm day for repairs to reduce the risk of slips and falls. Don't work alone; have someone nearby in case of emergencies. Keep your work area clean and organized to prevent tripping hazards.
Use proper lifting techniques when handling materials to avoid back injuries.
Be cautious of sharp edges on broken tiles and wear cut-resistant gloves. If you're unsure about any aspect of the repair, don't hesitate to consult a professional. Your safety isn't worth risking for a DIY repair.
Required Tools and Materials
For repairing photovoltaic roof tiles, you'll need a specific set of tools and materials. Vital tools include a multimeter to test electrical connections, a voltage tester to guarantee safety, and insulated screwdrivers for removing and replacing components.
You'll also need wire cutters, wire strippers, and crimping tools for handling electrical connections. Don't forget a ladder or scaffolding for safe roof access.
Materials required depend on the specific repair, but commonly include replacement photovoltaic cells, silicon sealant, and weatherproof tape. You may need new wiring, connectors, and junction boxes if these components are damaged. Keep spare fuses and diodes on hand for electrical repairs.
Protective equipment is essential. Wear non-slip shoes, safety glasses, and work gloves. A safety harness is vital for steep roofs. Sun protection, including a hat and sunscreen, is important for extended outdoor work.
For cleaning, you'll need a soft brush, mild detergent, and plenty of water. A portable power washer can be useful for stubborn dirt, but use it cautiously to avoid damaging the tiles.
Identifying Damaged Solar Tiles

To identify damaged solar tiles, you'll need to employ various techniques.
Start with a thorough visual inspection, looking for cracks, discoloration, or debris accumulation on the tiles.
You can then use performance monitoring methods to track energy output and efficiency, while specialized diagnostic tools will help you pinpoint specific issues within the photovoltaic system.
Visual Inspection Techniques
Visual inspection is the primary method for identifying damaged photovoltaic roof tiles. You'll need to carefully examine each tile for signs of wear, damage, or malfunction. Start by scanning the roof from ground level using binoculars, then proceed with a closer inspection if it's safe to do so.
When inspecting solar tiles, look for:
- Cracks or chips in the tile surface
- Discoloration or burn marks
- Loose or missing tiles
- Water stains or moisture buildup
- Debris accumulation blocking sunlight
As you inspect, pay close attention to the edges and corners of tiles, as these areas are more prone to damage.
You'll also want to check the wiring and connections between tiles for any signs of fraying, corrosion, or loose connections.
If you're not comfortable performing a roof inspection yourself, don't hesitate to call a professional. They'll have the proper safety equipment and expertise to thoroughly assess your solar tiles.
Performance Monitoring Methods
In addition to visual inspection, performance monitoring methods offer a reliable way of identifying damaged solar tiles. You'll need to analyze your system's performance data to spot anomalies that might indicate damage. Start by comparing the current output of your photovoltaic tiles to their historical performance. Look for sudden drops in energy production or efficiency that can't be explained by weather conditions or seasonal changes.
Use a monitoring system to track key performance indicators:
| Method | Indicator | What to Look For |
|---|---|---|
| I-V Curve Analysis | Current-Voltage Relationship | Irregular curves or shifts |
| Thermal Imaging | Heat Patterns | Hot spots or temperature anomalies |
| String Monitoring | String Output | Underperforming strings |
| Data Logging | Daily/Monthly Output | Unexpected production dips |
Pay attention to error codes or alerts from your inverter, as these can signal issues with specific tiles or strings. If you notice consistent underperformance in certain areas of your roof, it's likely that those tiles are damaged or malfunctioning. Keep in mind that some performance issues may be caused by external factors like shading or dirt accumulation, so correlate your findings with visual inspections for accurate diagnosis.
Diagnostic Tool Usage
While performance monitoring can pinpoint potential issues, using specialized diagnostic tools will help you accurately identify damaged solar tiles. These tools range from simple visual inspection devices to more advanced electronic equipment. You'll need to familiarize yourself with their operation to effectively diagnose problems.
Start with a visual inspection using a high-resolution thermal camera. This device can reveal hot spots or uneven temperature distribution, indicating potential cell damage or connection issues.
Next, employ a multimeter to check the voltage and current output of individual tiles. For more detailed analysis, use an I-V curve tracer to assess the tile's performance characteristics.
Here are some key diagnostic tools you'll need:
- Thermal imaging camera
- Digital multimeter
- I-V curve tracer
- Electroluminescence (EL) tester
- Bypass diode tester
When using these tools, always follow safety protocols and manufacturer guidelines.
Remember to document your findings for each tile, noting any anomalies or deviations from expected values. This data will be essential for determining the appropriate repair strategy and tracking the effectiveness of your interventions.
With practice, you'll become proficient in quickly identifying and diagnosing issues in your photovoltaic roof tiles.
Disconnecting the Electrical System
Before you begin any repair work on photovoltaic roof tiles, prioritize safety precautions to protect yourself from electrical hazards.
You'll need to shut off the main power supply to the solar system and guarantee all components are de-energized.
Once you've confirmed the system is safe to work on, isolate the damaged tile section by disconnecting it from the surrounding tiles in the array.
Safety Precautions First
When repairing photovoltaic roof tiles, safety must be your top priority. Before you begin any work, verify you've taken all necessary precautions to protect yourself and others.
Start by wearing appropriate personal protective equipment (PPE), including non-slip shoes, safety glasses, and insulated gloves.
Next, assess the work area for potential hazards. Check the weather forecast to avoid working in wet or windy conditions. Secure your ladder and use a safety harness if you're working at heights.
Remember, photovoltaic systems generate electricity even when disconnected from the grid, so treat all components as live unless you're certain they're de-energized.
Here are five essential safety measures to follow:
- Use insulated tools designed for electrical work
- Work with a partner who can assist and call for help if needed
- Keep a fire extinguisher nearby in case of electrical fires
- Cover the photovoltaic panels with an opaque material to reduce power generation
- Use a voltage tester to confirm all circuits are de-energized before touching them
Isolating Damaged Tile Section
Now that you've taken all necessary safety precautions, it's time to isolate the damaged tile section.
Begin by locating the main DC disconnect switch for your photovoltaic system. Turn it off to cut power to the entire array. Next, identify the specific string of tiles that contains the damaged section.
Use a multimeter to verify that no current is flowing through the system. Check both the positive and negative leads to confirm they're at zero volts.
Once confirmed, locate the connectors for the affected string. These are typically found at the end of each row or section of tiles.
Carefully disconnect the damaged string from the rest of the array. You'll need to separate both the positive and negative connections. Some systems may have quick-connect plugs, while others might require you to unscrew wire nuts or terminals.
Label these connections for easy reassembly later. If your system has microinverters or power optimizers, you'll need to disconnect these as well. They're usually attached to the back of each tile or to the mounting rails.
Once everything's disconnected, you can safely remove the damaged tile without risk of electrical shock.
Removing Surrounding Tiles

The first step in accessing a damaged photovoltaic roof tile is to remove the surrounding tiles. You'll need to carefully detach the adjacent tiles to create a clear workspace around the damaged one. This process requires precision and patience to avoid causing additional damage.
Before you begin, verify you have the necessary tools and safety equipment:
- Rubber-soled shoes for grip
- Safety harness and roof anchor
- Pry bar or specialized tile removal tool
- Soft padding to protect surrounding tiles
- Voltage tester to check for live connections
Start by disconnecting the electrical connections of the surrounding tiles. Use your voltage tester to confirm there's no live current.
Gently lift the edges of the adjacent tiles using your pry bar or removal tool. Be cautious not to apply too much pressure, as this could crack or break the tiles. As you lift each tile, place soft padding underneath to protect the roof's surface.
Work your way around the damaged tile, creating a perimeter of removed tiles. This will give you ample space to assess and repair the damaged section.
Remember to keep track of the tiles' original positions to verify proper reinstallation later.
Extracting the Faulty Tile
With the surrounding tiles removed, you're ready to extract the faulty photovoltaic tile. Begin by disconnecting the electrical connections. Carefully unplug the MC4 connectors, ensuring you don't damage the wiring.
If there's adhesive securing the tile, use a heat gun to soften it, moving the gun in a sweeping motion to avoid overheating any area.
Next, locate the mounting brackets or clips holding the tile in place. These are usually found at the top and bottom edges of the tile. Using a pry bar or specialized removal tool, gently lift the tile from its mounting points. Work slowly and methodically to prevent damaging adjacent tiles or the roof structure.
As you lift the tile, be mindful of any remaining wires or grounding connections. Disconnect these as needed, labeling them for easy reconnection later.
Once all attachments are free, carefully lift the faulty tile away from the roof. Inspect the area beneath for any signs of water damage or other issues that may have contributed to the tile's failure.
Clean the exposed area, removing any debris or old sealant to prepare for the new tile installation.
Inspecting for Underlying Issues

After extracting the faulty tile, you'll need to thoroughly inspect for underlying issues.
Start with visual inspection techniques to identify any visible damage or wear, then move on to electrical testing methods to check for connectivity problems or voltage irregularities.
Visual Inspection Techniques
Visual inspection techniques for photovoltaic roof tiles go beyond surface-level examinations. You'll need to carefully assess both the tiles and the surrounding roof structure for signs of damage or wear.
Look for cracks, chips, or discoloration on the tile surfaces, as these can indicate potential issues with the photovoltaic cells or protective coatings.
When inspecting your photovoltaic roof tiles, pay attention to:
- Loose or missing tiles
- Gaps between tiles or at the roof edges
- Debris accumulation, especially in valleys or near obstructions
- Signs of water damage or staining on the underside of the roof
- Corrosion or damage to electrical connections and wiring
Use binoculars or a drone to get a clear view of hard-to-reach areas.
Don't forget to check the attic or underside of the roof for any signs of water infiltration or structural issues.
If you notice any concerning patterns or recurring problems, it's vital to document them thoroughly.
Take clear, well-lit photos from multiple angles to help identify the extent of the damage and guide your repair efforts.
Electrical Testing Methods
Electrical testing methods dive deeper into the health of your photovoltaic roof tiles, uncovering issues that may not be visible to the naked eye. You'll need a multimeter and possibly a specialized solar panel tester to perform these checks. Start by measuring the open-circuit voltage (Voc) and short-circuit current (Isc) of each tile. Compare these values to the manufacturer's specifications to identify underperforming units.
Next, conduct insulation resistance tests to detect any moisture ingress or degradation of the panel's protective layers. Use an I-V curve tracer to assess the overall performance and efficiency of your solar tiles. This tool helps identify issues like partial shading, cell mismatch, or diode failures.
Here's a quick reference guide for electrical testing:
| Test Type | Equipment Needed | What It Detects |
|---|---|---|
| Voc/Isc | Multimeter | Underperformance |
| Insulation Resistance | Megohmmeter | Moisture, Degradation |
| I-V Curve | I-V Curve Tracer | Shading, Mismatch |
| Bypass Diode | Diode Tester | Diode Failures |
| Earth Continuity | Continuity Tester | Grounding Issues |
Remember to follow safety protocols when working with electrical systems. If you're unsure about any testing procedures, it's best to consult a professional solar technician.
Environmental Damage Assessment
Environmental factors can wreak havoc on your photovoltaic roof tiles, causing damage that's not always immediately apparent. To assess environmental damage, you'll need to conduct a thorough inspection of your solar tiles and the surrounding roof area. Look for signs of weathering, discoloration, or physical damage that might indicate underlying issues.
Start by examining the tiles for:
- Cracks or chips in the glass surface
- Discoloration or yellowing of the photovoltaic cells
- Delamination or separation of the layers
- Water stains or moisture accumulation
- Debris buildup in the gaps between tiles
Don't forget to check the roof structure beneath the tiles for any signs of water damage, mold growth, or weakened support.
Pay close attention to areas around vents, chimneys, and other roof penetrations, as these are common entry points for water and pests.
If you notice any of these issues, it's essential to address them promptly to prevent further damage and maintain your system's efficiency.
In some cases, you may need to remove individual tiles for a more detailed inspection or to access the underlying roof structure.
Always prioritize safety and consider consulting a professional if you're unsure about any aspect of the assessment process.
Preparing the Replacement Tile
With your replacement photovoltaic tile in hand, it's time to prepare it for installation. First, inspect the new tile thoroughly for any defects or damage that may have occurred during shipping. Check the solar cells, wiring, and connectors for integrity.
Clean the tile using a soft, lint-free cloth and a mild detergent solution. Avoid abrasive materials that could scratch the surface. Dry the tile completely to prevent moisture-related issues during installation.
Next, apply a thin layer of roofing sealant along the edges of the tile where it will contact adjacent tiles. This helps create a watertight seal and prevents moisture intrusion. Be careful not to apply sealant to the solar cells or electrical connections.
If your photovoltaic system requires it, attach any necessary mounting brackets or clips to the replacement tile. Verify these are securely fastened and aligned correctly.
Installing the New Tile

Installation of the new photovoltaic tile requires careful handling and precise positioning. Begin by carefully lifting the replacement tile onto the roof, guaranteeing you don't damage surrounding tiles or the new one's delicate components. Align the tile with the existing gap, making sure it's flush with adjacent tiles and properly oriented for ideal sun exposure.
Next, secure the tile using the manufacturer-recommended fasteners, typically specialized roofing nails or clips. Ensure a watertight seal by applying roofing cement or sealant around the edges. Once the tile is firmly in place, reconnect the electrical connections, following the wiring diagram provided with the replacement tile.
Before finalizing the installation, perform these essential checks:
- Verify the tile is level and properly aligned
- Test the electrical connections for continuity
- Inspect for any gaps or potential leak points
- Ensure the surrounding tiles haven't been disturbed
- Check that the new tile's power output matches specifications
After completing these checks, clean the area of any debris and tools. Finally, test the entire system to confirm the new tile is functioning correctly and integrated with the existing photovoltaic array.
Remember to document the repair for future reference and warranty purposes.
Resealing and Weatherproofing
Proper resealing and weatherproofing are essential steps to confirm your newly installed photovoltaic roof tile remains watertight and durable.
After you've secured the new tile in place, you'll need to apply a high-quality roofing sealant around its edges. Use a caulking gun to apply a continuous bead of sealant, confirming you cover all gaps and seams.
Next, you'll want to apply a weatherproofing membrane over the sealed edges. Cut the membrane to size, leaving a slight overlap on all sides. Carefully adhere it to the roof surface, pressing firmly to eliminate air bubbles.
For added protection, consider applying a second layer of sealant over the membrane's edges.
Don't forget to check the surrounding tiles for any damage that may have occurred during the repair process. If you notice any cracks or chips, apply sealant to these areas as well.
Once you've completed the resealing and weatherproofing, inspect your work from different angles to confirm you haven't missed any spots. Allow the sealant to cure fully before exposing the repaired area to heavy rain or foot traffic. This will help confirm the longevity and effectiveness of your photovoltaic roof tile repair.
Reconnecting the Electrical System

After confirming the repaired tile is properly sealed and weatherproofed, it's time to restore its electrical functionality.
Begin by carefully inspecting the wiring and connectors for any signs of damage or corrosion. If you spot any issues, address them before proceeding.
Next, reconnect the positive and negative leads to their respective terminals, making sure they're secure and properly insulated.
Before fully reconnecting the system, perform a voltage test to confirm the tile is functioning correctly. Use a multimeter to check the output voltage under sunlight. If the readings are within the expected range, you can proceed with the final connections.
To complete the reconnection process:
- Reattach the MC4 connectors, ensuring a tight and weatherproof seal
- Secure any loose wiring with UV-resistant cable ties
- Connect the repaired tile to the adjacent tiles in the string
- Verify all connections are properly aligned and seated
- Test the entire system to confirm it's operating at full capacity
Once you've completed these steps, monitor the system's performance over the next few days to confirm everything is working as expected.
If you notice any irregularities, consult a professional for further assistance.
Testing the Repaired System
Once you've reconnected the repaired photovoltaic roof tile, it's crucial to thoroughly test the system.
Begin by visually inspecting all connections to verify they're secure and properly insulated. Check for any signs of damage or wear that might've been missed during the repair process.
Next, use a multimeter to test the voltage output of the repaired tile. Compare this reading to the manufacturer's specifications and the output of other functional tiles in your system. If the readings are within the expected range, proceed to test the current flow.
Turn on the system and monitor its performance over several hours. Check the inverter display to verify that the repaired tile is contributing to the overall power generation.
Use a thermal imaging camera to detect any hot spots or abnormalities in the repaired area.
Maintenance Tips for Longevity

With your photovoltaic roof tiles repaired and tested, it's time to focus on keeping them in top condition. Regular maintenance is key to ensuring your system's longevity and peak performance.
Start by scheduling bi-annual inspections to catch potential issues early. During these checks, look for signs of wear, damage, or debris accumulation.
Keep your tiles clean to maximize energy production. You can do this yourself or hire professionals, depending on your comfort level and roof accessibility.
Use a soft brush and mild soap solution to gently remove dirt, leaves, and bird droppings. Avoid harsh chemicals or abrasive tools that could damage the tiles' surface.
Here are five essential maintenance tips to keep in mind:
- Monitor your system's output regularly to detect performance drops
- Trim nearby trees to prevent shading and reduce debris
- Check and tighten electrical connections annually
- Inspect seals and flashing to prevent water infiltration
- Keep a maintenance log to track inspections and repairs
Frequently Asked Questions
How Long Does a Typical Photovoltaic Roof Tile Repair Take?
You'll find that a typical photovoltaic roof tile repair usually takes 2-4 hours. It depends on the issue's complexity and your experience level. Don't forget to factor in time for safety precautions and gathering necessary tools.
Can I Repair Photovoltaic Tiles During Rainy or Snowy Weather?
You shouldn't repair photovoltaic tiles in rainy or snowy weather. It's unsafe and can damage the tiles. Wait for dry conditions to guarantee your safety and protect the solar panels from moisture-related issues. Patience is key here.
Are There Any Warranties That Cover Photovoltaic Tile Repairs?
Yes, you'll often find warranties covering photovoltaic tile repairs. Check your manufacturer's warranty, as it may cover defects or performance issues. Some installers also offer workmanship warranties. Always read the terms carefully before making a claim.
How Often Should Photovoltaic Roof Tiles Be Inspected for Potential Damage?
You should inspect your photovoltaic roof tiles at least annually. It's best to check them after severe weather events too. Regular inspections help you catch potential issues early, ensuring your solar system's efficiency and longevity. Don't neglect this important maintenance task.
What's the Average Lifespan of a Photovoltaic Roof Tile System?
You can expect your photovoltaic roof tile system to last about 25-30 years. However, it's essential to recognize that efficiency may decrease over time. Regular maintenance and proper care can help extend the system's lifespan.
In Summary
You've now learned how to repair photovoltaic roof tiles step-by-step. By following these instructions, you'll be able to maintain your solar system's efficiency and extend its lifespan. Remember, safety always comes first, so don't hesitate to call a professional if you're unsure. Regular inspections and prompt repairs will keep your solar tiles in top shape, ensuring you continue to harness clean energy for years to come. Stay proactive and enjoy the benefits of your solar investment!


Leave a Reply