
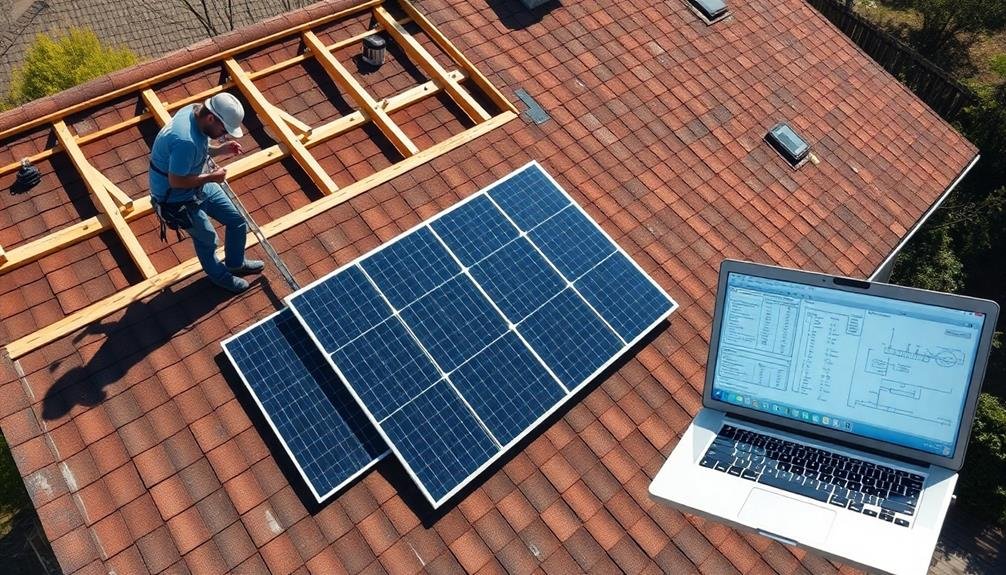
To wire solar shingles for your home's energy system, you'll need specialized tools and equipment, including wire strippers, a multimeter, and safety gear like insulated gloves and safety glasses. You must assess your roof's compatibility, considering slope and structural integrity. Understand local electrical codes and obtain necessary permits before starting. It's vital to plan the shingle layout, prepare the roof surface, and install proper underlayment. You'll connect the shingles to an inverter and integrate the system with your home's electrical panel. Proper testing and troubleshooting are essential for peak performance. Armed with the right knowledge, you can commence on this energy-saving journey.
Understanding Solar Shingle Technology

Solar shingle technology is revolutionizing the way homeowners think about roof-based energy production. These innovative products seamlessly integrate photovoltaic cells into roofing materials, offering a sleek alternative to traditional solar panels. You'll find that solar shingles function similarly to conventional panels, converting sunlight into electricity for your home.
Unlike bulky panels, solar shingles blend with your existing roof, maintaining your home's aesthetic appeal. They're designed to withstand various weather conditions and typically come with warranties comparable to standard roofing materials.
You'll need to evaluate your roof's orientation, slope, and shading when determining if solar shingles are suitable for your home. Installation requires expertise in both roofing and electrical work. You'll want to hire certified professionals to guarantee proper integration with your home's electrical system.
While the upfront costs may be higher than traditional solar panels, solar shingles can increase your property value and provide long-term energy savings. They're particularly attractive if you're already planning a roof replacement, as you can combine two projects into one.
Before committing, research available incentives and calculate potential energy savings to ascertain if solar shingles are a wise investment for your home.
Tools and Equipment Checklist
Before you begin your solar shingle installation, you'll need to gather the right tools and equipment.
Your checklist should include essential hand tools like screwdrivers and pliers, as well as vital safety gear such as gloves and safety glasses.
Don't forget to acquire the necessary electrical testing equipment, including a multimeter and voltage tester, to guarantee proper wiring and connections.
Essential Hand Tools
Equipping yourself with the right hand tools is essential for successful shingle energy wiring. You'll need a combination of basic and specialized tools to handle various tasks efficiently. A quality wire stripper is vital for removing insulation from wires without damaging the conductor.
Needle-nose pliers come in handy for gripping, bending, and manipulating wires in tight spaces. Don't forget a sturdy set of screwdrivers, both flathead and Phillips, for securing connections and mounting components.
A multimeter is indispensable for testing voltage, current, and continuity throughout your wiring project. You'll also want a utility knife for cutting sheathing and insulation. Consider investing in a crimping tool for creating secure wire connections. Finally, a fish tape or wire puller will help you route wires through walls and conduits.
Here are five key considerations when selecting hand tools for shingle energy wiring:
- Durability: Choose tools that can withstand frequent use
- Insulation: Opt for tools with proper insulation for electrical work
- Ergonomics: Select tools that are comfortable to use for extended periods
- Versatility: Look for multi-purpose tools to minimize your toolkit
- Quality: Invest in reputable brands for reliability and longevity
Safety Gear Necessities
While having the right tools is important, protecting yourself during shingle energy wiring is paramount. You'll need several key pieces of safety gear to guarantee your well-being throughout the project.
Start with a sturdy pair of work gloves to protect your hands from cuts, scrapes, and electrical hazards. Safety glasses are essential to shield your eyes from debris and potential sparks. A hard hat is vital when working on roofs or in areas where falling objects may be a concern.
For electrical safety, invest in insulated tools and a voltage tester to verify that circuits are de-energized before you begin work. Non-conductive ladders and platforms are necessary to prevent accidental electrical contact. Wear rubber-soled shoes for additional insulation against electrical shock.
When working at heights, a fall protection system is non-negotiable. This includes a full-body harness, lanyard, and secure anchor points.
For respiratory protection, use a dust mask when cutting or drilling materials. Finally, keep a well-stocked first aid kit nearby in case of minor injuries.
Electrical Testing Equipment
A well-stocked toolbox for shingle energy wiring must include essential electrical testing equipment.
You'll need a reliable multimeter to measure voltage, current, and resistance. This versatile tool is vital for troubleshooting and ensuring proper connections.
A non-contact voltage tester is another must-have, allowing you to quickly check for live wires without direct contact. An outlet tester will help you verify proper wiring in receptacles, while a continuity tester can identify breaks in circuits.
For more advanced testing, consider investing in a clamp meter to measure current without interrupting the circuit. These tools will help you maintain safety and efficiency throughout your shingle energy wiring project.
Remember to calibrate and maintain your testing equipment regularly for accurate results.
Key considerations when selecting electrical testing equipment:
- Voltage range suitable for both AC and DC circuits
- Safety ratings appropriate for your specific application
- Digital displays for easy reading and increased accuracy
- Auto-ranging capabilities for convenience
- Durability to withstand job site conditions
Safety Precautions for DIY Installation

Before starting a DIY shingle energy wiring installation, it's crucial to prioritize safety. Always turn off the main power supply to your home before beginning any electrical work.
Wear appropriate personal protective equipment, including insulated gloves, safety glasses, and non-conductive footwear. Use fiberglass or wooden ladders to avoid electrical conductivity risks.
Ensure you're familiar with local electrical codes and obtain necessary permits. Don't work in wet conditions or during thunderstorms. Keep your work area clean and well-lit to prevent accidents.
Use properly rated tools and equipment for the job, and never modify or force-fit components. When handling wires, treat all of them as live until you've confirmed otherwise with a voltage tester.
Avoid working alone; have someone nearby in case of emergencies. Install ground fault circuit interrupters (GFCIs) to protect against electric shock. Double-check all connections before restoring power, and test your work thoroughly.
If you're unsure about any aspect of the installation, consult a licensed electrician. Remember, improper wiring can lead to fires, electrical shocks, or damage to your solar system.
Your safety should always come first when working with electricity.
Assessing Roof Compatibility
Before installing solar shingles, you'll need to evaluate your roof's compatibility.
Check your roof's slope, as solar shingles typically require a minimum pitch to function effectively.
You should also assess your roof's structural integrity to guarantee it can support the additional weight of the solar system.
Roof Slope Considerations
Evaluating your roof's compatibility for shingle energy wiring starts with examining its slope. The pitch of your roof plays a vital role in determining the feasibility and efficiency of solar shingle installation.
Steeper roofs generally receive more direct sunlight, potentially increasing energy production. However, they also present installation challenges and safety concerns for workers.
Moderate slopes, typically between 15 and 40 degrees, are often ideal for solar shingles. They provide a balance between sunlight exposure and ease of installation.
Flatter roofs may require additional mounting systems to achieve suitable angles for energy generation, while very steep roofs might need specialized equipment and safety measures.
Consider these factors when evaluating your roof's slope for shingle energy wiring:
- Local climate and typical sun angles
- Potential shading from nearby structures or trees
- Wind and snow load considerations
- Accessibility for maintenance and cleaning
- Building codes and regulations specific to your area
If your roof's slope isn't suitable, don't despair. Adjustable mounting systems and alternative solar solutions can often compensate for less-than-ideal pitches.
Consult with a professional solar installer to determine the best approach for your specific roof configuration and energy goals.
Structural Integrity Assessment
The foundation of a successful shingle energy system lies in your roof's structural integrity. Before installing solar shingles, you'll need to assess your roof's ability to support the additional weight and withstand potential environmental stresses. Start by examining your roof's age, condition, and materials. If your roof is nearing the end of its lifespan, it's wise to replace it before installing solar shingles.
Next, evaluate your roof's load-bearing capacity. Solar shingles are lighter than traditional panels, but they still add weight to your roof. Consult a structural engineer to determine if your roof can handle the extra load. They'll consider factors like:
| Factor | Impact | Mitigation |
|---|---|---|
| Truss strength | Load distribution | Reinforcement |
| Sheathing condition | Weight support | Replacement |
| Roofing materials | Compatibility | Upgrade |
| Weather resistance | Durability | Weatherproofing |
Don't forget to check local building codes and regulations. Some areas have specific requirements for solar installations, including structural assessments and permits. By thoroughly evaluating your roof's structural integrity, you'll guarantee a safe and efficient solar shingle system that'll serve you well for years to come.
Calculating Energy Requirements
How much power do you really need for your shingle energy system? To calculate your energy requirements, you'll need to assess your household's electricity consumption. Start by reviewing your past utility bills to determine your average monthly usage in kilowatt-hours (kWh).
Consider seasonal variations and any planned changes in your energy habits or appliances.
Next, evaluate your roof's solar potential. Factors like orientation, shading, and available space will impact your system's efficiency. Use online solar calculators or consult with a professional to estimate your roof's energy generation capacity.
To determine the ideal system size, consider these factors:
- Your average daily energy consumption
- Peak sunlight hours in your location
- Efficiency of the solar shingles you're considering
- Available roof space for installation
- Local regulations and utility policies
Once you've gathered this information, you can calculate the number of solar shingles needed to meet your energy goals.
Remember to account for future energy needs and potential efficiency improvements. It's often wise to slightly oversize your system to guarantee adequate power generation throughout the year and accommodate any unexpected increases in energy consumption.
Planning Shingle Layout
When planning your solar shingle layout, you'll need to contemplate three key factors: roof geometry, aesthetics, and energy optimization.
First, assess your roof's shape, pitch, and orientation. South-facing slopes typically receive the most sunlight, making them ideal for solar shingles. However, east and west-facing sections can also be viable options.
Consider the visual impact of your shingle arrangement. You might prefer a uniform look across the entire roof or a more concentrated layout in less visible areas. Balance aesthetic preferences with energy production goals to achieve the best compromise.
To maximize energy generation, place shingles in areas that receive the most consistent sunlight throughout the day. Avoid shading from nearby trees, chimneys, or other structures. Use solar mapping tools to identify the most productive roof sections.
Don't forget to account for future expansions or renovations. Leave space for potential additions to your solar system as your energy needs grow.
Also, guarantee easy access for maintenance and repairs by planning walkways between shingle sections.
Lastly, consult local building codes and homeowners' association regulations, as they may influence your layout decisions.
Preparing the Roof Surface
Before installing solar shingles, you'll need to prepare your roof surface thoroughly.
Start by cleaning and inspecting the entire roof area, removing any existing shingles or roofing materials.
Once the surface is clean and bare, install a high-quality underlayment material to provide an additional barrier against moisture and improve the overall performance of your solar shingle system.
Clean and Inspect Roof
Prior to installing solar shingles, it's crucial to guarantee your roof is in ideal condition.
Begin by thoroughly cleaning the roof surface, removing any debris, leaves, or dirt. This step guarantees a clear workspace and helps identify potential issues.
Next, carefully inspect the entire roof for damage, such as cracked or missing shingles, water stains, or sagging areas. Address any problems you find before proceeding with the installation.
Check the roof's structural integrity, including the decking and rafters. They must be strong enough to support the additional weight of solar shingles. If you're unsure about your roof's condition, hire a professional inspector to assess it.
Here are key points to remember when cleaning and inspecting your roof:
- Use appropriate safety equipment, including a sturdy ladder and non-slip shoes
- Look for signs of water damage or leaks in the attic
- Examine flashing around chimneys, vents, and skylights
- Check gutters and downspouts for proper drainage
- Document any issues you find with photos for future reference
Remove Existing Shingles
To pave the way for solar shingle installation, you'll need to remove the existing roofing materials. Start by gathering the necessary tools, including a roofing shovel, pry bar, and safety equipment like gloves and goggles.
Begin at the roof's peak and work your way down, removing shingles in sections. Use the roofing shovel to lift and pry off the shingles, being careful not to damage the underlying roof deck.
As you remove the shingles, inspect the roof deck for any signs of damage or rot. Replace any compromised sections before proceeding with the solar shingle installation.
Don't forget to remove all nails and staples left behind, as these can interfere with the new installation and potentially damage the solar shingles.
Dispose of the old shingles properly, following local regulations for roofing material disposal. Many areas have specific guidelines for recycling or disposing of asphalt shingles.
Once you've cleared the roof surface, sweep it clean of any debris and verify it's smooth and even. This will provide the ideal foundation for your new solar shingle system, maximizing its efficiency and longevity.
Install Underlayment Material
With the roof deck clear and clean, it's time to install the underlayment material. This vital layer protects your roof from moisture and provides an additional barrier against the elements.
You'll want to choose a high-quality synthetic underlayment or felt paper that meets local building codes and manufacturer specifications.
Start at the bottom edge of the roof and work your way up, overlapping each row by at least 2 inches. Use roofing nails or staples to secure the underlayment, making sure it's flat and wrinkle-free.
Pay special attention to areas around vents, chimneys, and valleys, as these are prone to leaks. Don't forget to install drip edge flashing along the eaves and rakes before laying the underlayment.
Here are five key points to remember when installing underlayment:
- Always follow manufacturer guidelines for proper installation
- Use enough fasteners to prevent wind uplift
- Confirm proper overlap between rows and at seams
- Apply additional waterproofing in vulnerable areas
- Allow for proper ventilation to prevent moisture buildup
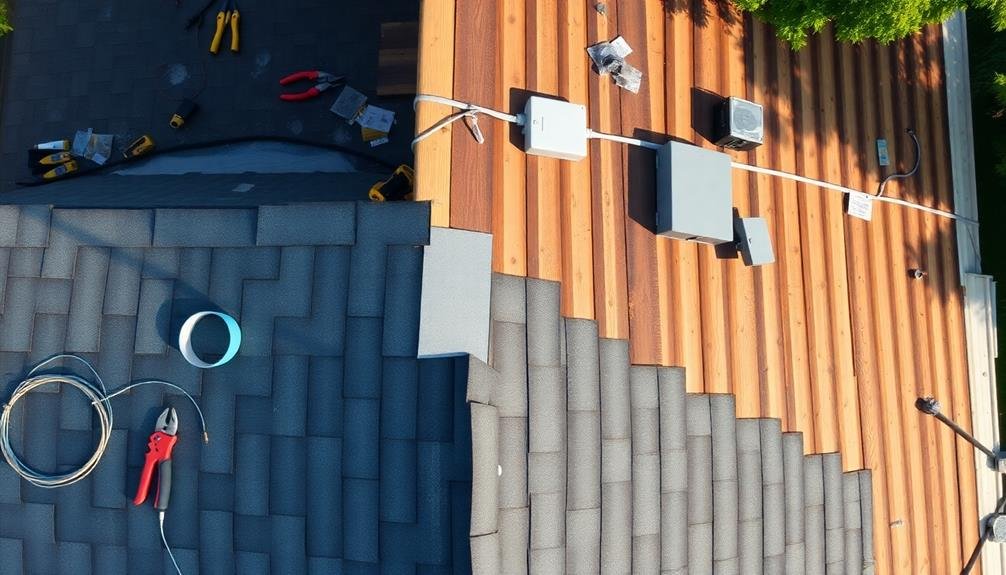
Installing Electrical Wiring Components
Electricians know that installing electrical wiring components is a critical step in setting up your shingle energy system. You'll need to carefully plan the wiring layout to guarantee efficient energy transfer from your solar shingles to your home's electrical system.
Start by installing junction boxes near your roof's edge to collect the wiring from multiple shingles. These boxes should be weatherproof and easily accessible for maintenance.
Next, run conduit from the junction boxes to your main electrical panel. Use UV-resistant wire designed for outdoor use to connect the shingles to the junction boxes.
You'll need to install a solar inverter to convert the DC power generated by the shingles into AC power for your home. Place this in a cool, dry location, typically near your main electrical panel.
Don't forget to include a disconnect switch between the inverter and panel for safety.
Connecting Solar Shingles
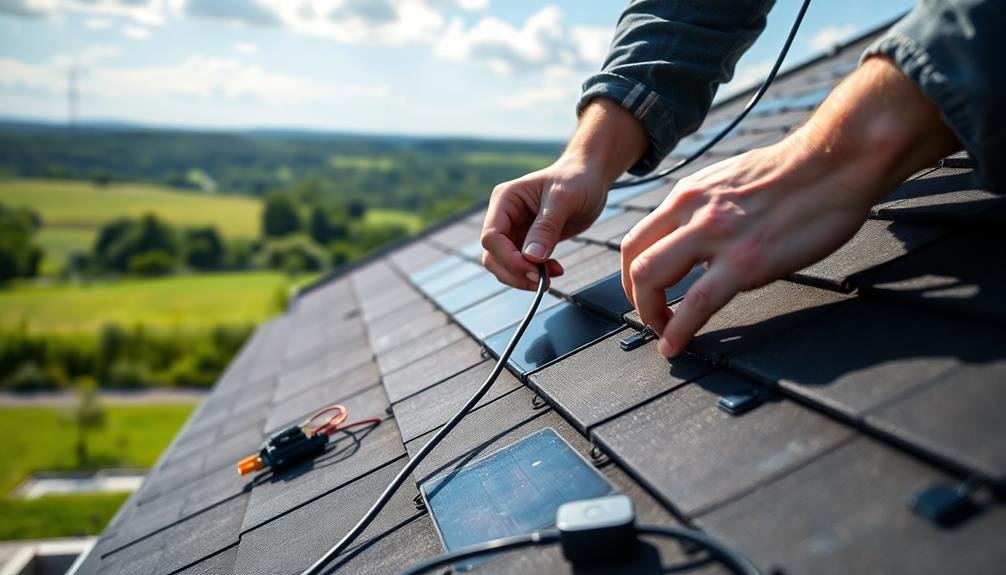
After installing the electrical components, you'll need to connect your solar shingles to the system. This process requires careful attention to detail and adherence to safety protocols. Start by identifying the positive and negative leads on each shingle, then connect them in series or parallel, depending on your system's design. You'll need to use weatherproof connectors to guarantee a secure and long-lasting connection.
Next, run the wires from the shingles to your inverter, making sure to use appropriate cable management techniques to protect the wires from environmental damage. Install a disconnect switch between the shingles and the inverter for safety and maintenance purposes. Finally, connect the inverter to your home's electrical panel through a dedicated circuit breaker.
When connecting solar shingles, keep these key points in mind:
- Always follow manufacturer instructions and local building codes
- Use proper safety equipment, including gloves and eye protection
- Double-check all connections before energizing the system
- Label all components clearly for future reference and maintenance
- Consider hiring a certified solar installer for complex systems
Remember to test the system thoroughly before relying on it for power generation. Regular maintenance and inspections will help guarantee peak performance and longevity of your solar shingle system.
Integrating With Home Electrical System
Integrating your solar shingle system with your home's electrical setup is a crucial step in harnessing renewable energy. You'll need to connect the solar shingles to an inverter, which converts the DC power generated by the shingles into AC power for your home. The inverter then connects to your main electrical panel.
You'll also need to install a bi-directional meter to measure both the electricity you consume from the grid and the excess energy you send back. This allows for net metering, where you can receive credits for surplus energy production.
Consider adding a battery storage system to store excess energy for use during nighttime or cloudy days. This enhances your energy independence and provides backup power during outages.
| Component | Function | Installation Location |
|---|---|---|
| Inverter | Converts DC to AC | Near electrical panel |
| Bi-directional Meter | Measures energy flow | Outside, replacing existing meter |
| Battery Storage | Stores excess energy | Garage or utility room |
| Main Panel | Distributes power | Existing electrical panel |
Always consult a licensed electrician for proper integration and to verify compliance with local building codes and safety standards. They'll help you determine if your existing panel can handle the additional load or if upgrades are necessary.
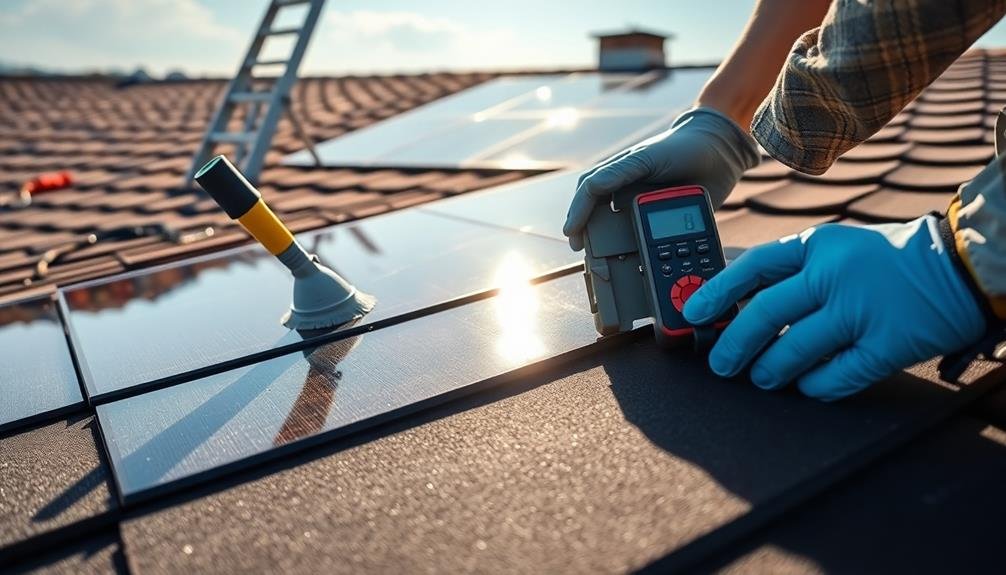
Testing and Troubleshooting

A multimeter in hand, you're ready to tackle the essential phase of testing and troubleshooting your solar shingle system. Begin by checking voltage outputs at key connection points, verifying they match the manufacturer's specifications.
Verify proper grounding and inspect for any loose connections or damaged wiring. Monitor the system's performance over time, looking for unexpected drops in energy production that might indicate underlying issues.
When troubleshooting, start with the basics. Check for shading or debris on the shingles, inspect inverters for error codes, and review your monitoring system for any alerts.
If you encounter more complex problems, don't hesitate to consult a professional. They can use specialized equipment to diagnose and resolve intricate electrical issues.
Here are five key points to remember during testing and troubleshooting:
- Safety first: Always turn off the system before inspecting or testing
- Document your findings for future reference
- Test during different weather conditions to guarantee consistent performance
- Regularly clean and maintain your solar shingles to prevent issues
- Keep manufacturer manuals and contact information readily available
Maximizing Energy Efficiency
To maximize energy efficiency with your solar shingle system, you'll need to take a holistic approach. Start by ensuring your home's insulation is up to par, sealing any air leaks, and upgrading to energy-efficient windows.
These improvements will reduce your overall energy consumption, allowing your solar shingles to cover a larger portion of your needs.
Next, consider your energy usage patterns. Try to schedule high-energy activities, like running the dishwasher or doing laundry, during peak sunlight hours.
This will maximize the direct use of solar energy and reduce reliance on grid power or battery storage.
Install smart home devices to monitor and control your energy consumption. Use programmable thermostats, smart plugs, and energy monitoring systems to optimize your usage and identify areas for improvement.
Don't forget about your solar shingle system's maintenance. Regularly clean the shingles and trim nearby trees to prevent shading.
Check for any damaged or underperforming shingles and address issues promptly.
Lastly, consider adding a battery storage system to your setup.
This will allow you to store excess energy generated during the day for use at night or during cloudy periods, further reducing your reliance on grid power.
Maintenance and Long-Term Care
Proper maintenance and long-term care are essential for keeping your solar shingle system in top shape. Regular inspections and cleaning will help guarantee peak performance and longevity. You'll need to keep your shingles free from debris, leaves, and snow to maximize sunlight absorption.
It's also important to check for any damage or loose connections that may affect the system's efficiency.
To maintain your solar shingle system effectively:
- Schedule annual professional inspections
- Clean shingles gently with water and a soft brush
- Monitor your energy production regularly
- Keep nearby trees trimmed to prevent shading
- Check for signs of wear or damage after severe weather
While solar shingles are designed to be durable, they may need occasional repairs or replacements. Keep an eye out for any cracks, discoloration, or reduced energy output, as these could indicate issues that need attention.
If you notice any problems, don't hesitate to contact a qualified solar technician.
Remember to update your homeowner's insurance to cover your solar shingle system. This will protect your investment in case of unexpected damage or accidents.
Frequently Asked Questions
How Do Solar Shingles Affect Home Insurance Premiums?
You'll likely see a slight increase in your home insurance premiums with solar shingles. However, many insurers offer discounts for eco-friendly upgrades. It's best to check with your provider for specific impacts on your policy.
Can Solar Shingles Be Installed on Historic or Landmark Buildings?
You'll face challenges installing solar shingles on historic or landmark buildings. You'll need approval from preservation boards, and they may restrict modifications. However, some options exist, like low-profile designs or removable systems, that might be acceptable in certain cases.
What Happens to Solar Shingles During Extreme Weather Events Like Hailstorms?
During hailstorms, your solar shingles can be at risk. They're designed to withstand most impacts, but severe hail may cause damage. You'll want to check them after extreme weather events and consider additional protective measures if you're in a hail-prone area.
Are There Any Tax Incentives Specific to Solar Shingle Installation?
You'll be pleased to know there are tax incentives for solar shingle installation. You can claim a federal tax credit of 30% on your installation costs. Some states also offer additional incentives, so check your local regulations for more savings.
How Do Solar Shingles Impact the Resale Value of a Home?
You'll likely see a boost in your home's resale value with solar shingles. They're attractive to buyers, offering energy savings and eco-friendly appeal. However, the exact impact varies based on your location and the housing market.
In Summary
You've now got the essentials for wiring solar shingles. Remember, safety's paramount, so don't hesitate to call a pro if you're unsure. With proper installation and maintenance, you'll harness clean energy for years to come. Keep monitoring your system's performance and stay updated on new technologies. You're not just saving money; you're contributing to a greener future. Enjoy your solar-powered home and the independence it brings!


Leave a Reply