You can build a home battery system that rivals Tesla Powerwall's capabilities at a lower cost. DIY options typically use lithium-ion or lead-acid batteries, combined with inverters and charge controllers. While initial expenses range from $5,000 to $10,000, these systems offer flexibility in sizing and scalability. You'll need to take into account safety measures, maintenance requirements, and integration with solar panels. Despite lacking professional installation and warranties, home-built systems can provide comparable energy storage and backup power. With proper planning and component selection, you can achieve grid independence and optimize energy usage. The journey to energy self-sufficiency holds many more insights.
Understanding Tesla Powerwall's Capabilities

Three key capabilities define the Tesla Powerwall: energy storage, backup power, and grid independence.
The Powerwall's energy storage capacity ranges from 13.5 kWh to 27 kWh, depending on the model. This allows you to store excess solar energy during the day for use at night or during peak hours, potentially reducing your electricity bills.
As a backup power source, the Powerwall can keep your essential appliances running during outages. It detects power losses and switches to battery power in less than a second, ensuring a seamless shift. The system can power your home for hours or even days, depending on your energy consumption and the number of Powerwalls installed.
Grid independence is another significant feature. With solar panels and a Powerwall, you can generate and store your own electricity, reducing reliance on the grid.
The Powerwall's smart technology optimizes energy usage, prioritizing stored energy during peak rate periods to maximize savings. It also offers monitoring and control through a mobile app, allowing you to track energy production, consumption, and savings in real-time.
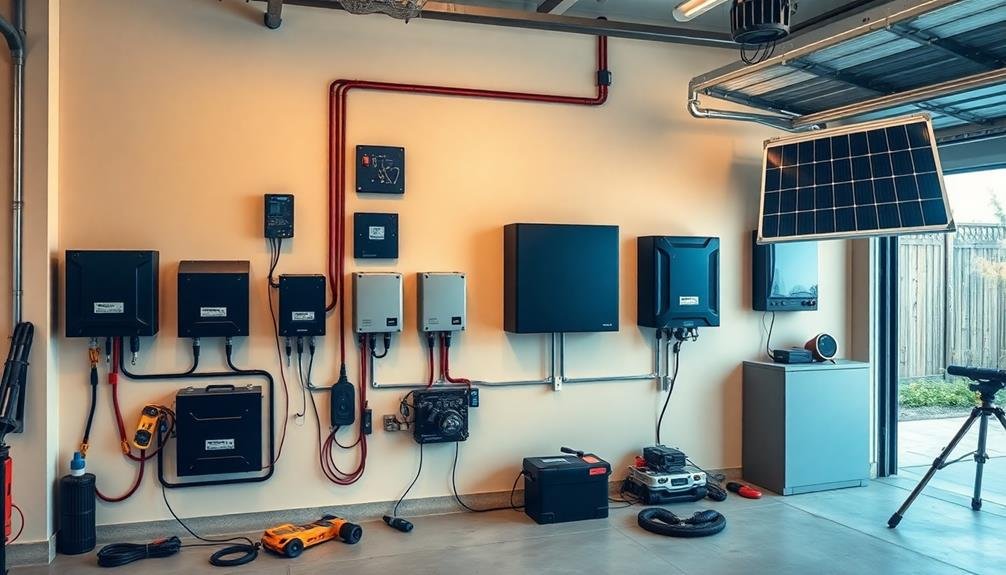
DIY Battery System Components
When building your own home battery system, you'll need to gather essential components and materials. These typically include batteries, an inverter, charge controller, wiring, and safety equipment.
You'll also require specific tools for installation, such as wire strippers, crimpers, and a multimeter to guarantee proper connections and system functionality.
Essential Parts and Materials
Building a DIY battery system requires several key components that work together to store and distribute energy efficiently. You'll need lithium-ion batteries, a battery management system (BMS), an inverter, and a charge controller. The batteries are the heart of your system, storing the energy for later use. A BMS protects your batteries from overcharging, over-discharging, and balances the cells. The inverter converts DC power from the batteries to AC power for your home appliances, while the charge controller regulates the input from your energy source, such as solar panels.
Other essential materials include:
| Component | Purpose |
|---|---|
| Copper busbars | Connect batteries |
| Fuses and circuit breakers | Protect system |
| Insulated cables | Carry current safely |
| Enclosure | House components |
You'll also need various tools like a multimeter, wire strippers, and a soldering iron. Safety equipment is vital – always wear gloves and safety glasses when working with batteries. Remember, building a DIY battery system is complex and potentially dangerous. If you're not confident in your electrical skills, consider seeking professional help or opting for a pre-built system.
Required Tools
Assembling a DIY battery system requires a specific set of tools to guarantee safe and effective construction.
You'll need a multimeter to measure voltage, current, and resistance accurately. A soldering iron and solder are essential for making secure electrical connections. Wire strippers and crimpers will help you prepare and join wires safely. A spot welder is vital for connecting battery cells, ensuring low-resistance connections.
You'll also need various screwdrivers, wrenches, and pliers for mechanical assembly. A heat gun can be useful for applying heat shrink tubing to protect connections. Safety equipment is paramount: wear protective goggles, gloves, and a fire-resistant work surface. A battery load tester will help you verify the capacity and performance of your cells.
For more advanced builds, you might consider a 3D printer to create custom enclosures or cell holders. A programmable power supply can aid in cell balancing and testing. A thermal camera can help identify potential hot spots or connection issues.
Lithium-Ion vs. Lead-Acid Options

When choosing between lithium-ion and lead-acid batteries for your home-built system, you'll need to evaluate their energy density, lifespan, and overall cost-effectiveness.
You'll find that lithium-ion batteries offer considerably higher energy density and longer lifespans, but they come with a steeper initial price tag.
To determine which option best suits your needs, you'll want to weigh these factors against your budget and long-term energy storage goals.
Energy Density Comparison
Energy density frequently plays an important role when choosing between lithium-ion and lead-acid batteries for home-built systems.
Lithium-ion batteries boast a considerably higher energy density, typically ranging from 100-265 Wh/kg, compared to lead-acid batteries' 30-50 Wh/kg. This means you'll need less space and weight for the same amount of energy storage with lithium-ion batteries.
For a home-built system, this difference can be vital. You'll be able to store more energy in a smaller footprint, making lithium-ion batteries ideal for installations with limited space. They're also lighter, which can be important if you're mounting them on walls or in elevated locations.
However, don't dismiss lead-acid batteries entirely. While they've lower energy density, they're often more affordable and can be a good choice for systems where space isn't a constraint.
You'll need to weigh the trade-offs between energy density, cost, and available space when deciding which battery type best suits your home-built system. Consider your specific needs and constraints to make the most informed decision for your project.
Lifespan and Durability
Lifespan and durability often tip the scales when choosing between lithium-ion and lead-acid batteries for home-built systems. You'll want to evaluate the long-term value of your investment, as well as the battery's ability to withstand regular use and environmental factors.
Lithium-ion batteries typically last longer and can handle more charge cycles than lead-acid batteries. They're also more resilient to temperature fluctuations and have a lower self-discharge rate. However, lead-acid batteries are often more rugged and can better withstand physical stress.
Here's a comparison of key durability factors:
| Factor | Lithium-Ion | Lead-Acid | Impact on Durability |
|---|---|---|---|
| Cycle Life | 2000-5000 | 200-1000 | Higher cycle life = longer overall lifespan |
| Depth of Discharge | 80-100% | 50% | Greater DoD = more usable capacity |
| Temperature Range | -20°C to 60°C | -20°C to 50°C | Wider range = better performance in varied climates |
| Self-Discharge Rate | 2-3% per month | 5-15% per month | Lower rate = less capacity loss when idle |
| Physical Durability | Moderate | High | Better physical durability = less risk of damage |
Evaluate your specific needs and environment when choosing between these options for your home-built battery system.
Cost-Effectiveness Analysis
In light of the initial investment and long-term operational costs, a thorough cost-effectiveness analysis is essential when choosing between lithium-ion and lead-acid batteries for your home-built system.
While lead-acid batteries typically have a lower upfront cost, lithium-ion batteries often prove more cost-effective in the long run due to their longer lifespan and higher efficiency.
Consider these factors when analyzing cost-effectiveness:
- Initial investment: Compare the upfront costs of both battery types, including necessary components and installation.
- Lifespan and replacement frequency: Factor in the expected number of cycles and years of service for each battery type.
- Efficiency and energy losses: Calculate the total energy output over time, considering the depth of discharge and charge/discharge efficiency.
- Maintenance requirements: Account for ongoing maintenance costs, including periodic inspections, water top-ups for flooded lead-acid batteries, and potential part replacements.
You'll find that lithium-ion batteries often outperform lead-acid in regards to overall cost-effectiveness, despite their higher initial price.
They require less maintenance, have a longer lifespan, and offer better efficiency.
However, for short-term or low-usage applications, lead-acid batteries may still be a viable option due to their lower upfront cost.
Sizing Your Home Battery Bank
Determining the right size for your home battery bank is crucial for meeting your energy needs. To calculate the appropriate capacity, you'll need to take into account several factors.
Start by evaluating your daily energy consumption in kilowatt-hours (kWh). Review your electricity bills or use an energy monitor to get an accurate figure.
Next, decide how long you want your battery to power your home during an outage. Multiply your daily energy use by the number of days you want to be self-sufficient. Factor in the depth of discharge (DoD) for your chosen battery type, as most batteries shouldn't be fully depleted. For example, if you use 20 kWh per day and want three days of backup with a 50% DoD, you'll need a 120 kWh battery bank.
Take into account your charging method, too. If you're using solar panels, account for cloudy days and seasonal variations.
Don't forget to factor in power inverter efficiency, which typically ranges from 90% to 95%. Finally, allow for future energy needs and potential system expansion. It's often better to slightly oversize your battery bank to guarantee you have adequate power when you need it most.
Safety Considerations for DIY Systems

When building your own battery system, safety should be your top priority.
You'll need to implement strict electrical hazard precautions, including proper insulation, grounding, and the use of appropriate personal protective equipment.
It's equally important to incorporate fire prevention measures, such as installing smoke detectors, keeping a fire extinguisher nearby, and ensuring proper ventilation in your battery storage area.
Electrical Hazard Precautions
Three critical safety considerations must be addressed when building a DIY battery system. Electrical hazards pose considerable risks, so you'll need to take proper precautions to guarantee your safety and the safety of others.
Always wear insulated gloves and use insulated tools when working with batteries and electrical connections. Avoid wearing metal jewelry or accessories that could conduct electricity.
To minimize electrical hazards, follow these essential precautions:
- Install proper fusing and circuit breakers to protect against short circuits and overloads.
- Use appropriately sized wiring and connectors rated for the system's voltage and current.
- Implement a reliable grounding system to prevent shock hazards and reduce electromagnetic interference.
- Install an emergency disconnect switch for quick power cutoff in case of emergencies.
Confirm your work area is dry and well-ventilated, as moisture can increase the risk of electrical shock.
Never work on live circuits; always disconnect power sources before making any modifications or repairs. Regularly inspect your system for signs of wear, damage, or corrosion, and address any issues promptly.
Fire Prevention Measures
Implementing robust fire prevention measures is essential when building a DIY battery system.
You'll need to install thermal runaway protection, which detects excessive heat and automatically shuts down the system. Use fire-resistant materials for enclosures and guarantee proper ventilation to dissipate heat.
Install smoke detectors and fire alarms near your battery setup. Keep a Class C fire extinguisher nearby, specifically designed for electrical fires.
Don't forget to regularly inspect and maintain your system, checking for loose connections, damaged wires, or signs of overheating.
Implement a battery management system (BMS) to monitor individual cell voltages and temperatures. This prevents overcharging and over-discharging, which can lead to thermal events. Use high-quality, matched cells from reputable manufacturers to reduce the risk of cell failure.
Create an emergency shutdown procedure and make sure all household members know how to activate it. Install clearly labeled disconnect switches for quick power isolation in case of an emergency.
Keep flammable materials away from your battery system and maintain a clear space around it for easy access and heat dissipation.
Cost Comparison: DIY vs. Powerwall
One of the most compelling reasons to reflect on a DIY battery system is the potential cost savings compared to commercial solutions like Tesla's Powerwall.
When you're evaluating the cost comparison, you'll need to factor in several components:
- Battery cells: You can often source these at lower prices than what's built into pre-made systems.
- Battery management system (BMS): This vital component guarantees safe operation and can be purchased separately.
- Inverter: You'll need this to convert DC power from your batteries to AC for home use.
- Labor: Your time and effort are valuable, so factor this into your calculations.
A typical DIY system might cost you between $5,000 to $10,000, depending on capacity and components chosen.
In contrast, a Tesla Powerwall starts at around $11,500 for a single unit, including installation.
However, it's significant to mention that the Powerwall comes with warranties and professional installation, which you won't get with a DIY system.
You'll also need to take into account ongoing maintenance costs and potential replacements for your home-built system, which mightn't be as efficient or long-lasting as professionally engineered solutions.
Energy Management Software Solutions

While building your own battery system can save you money, it's equally important to manage your energy effectively. Energy management software solutions can help you enhance your home-built battery system's performance and maximize your energy savings.
These software solutions offer various features to help you monitor and control your energy usage:
| Feature | Benefit |
|---|---|
| Real-time monitoring | Track energy production and consumption |
| Load balancing | Enhance energy distribution |
| Predictive analytics | Forecast energy needs and production |
| Remote access | Control your system from anywhere |
| Integration | Connect with smart home devices |
You'll find both open-source and commercial options available. Open-source solutions like Home Assistant and OpenEMS offer customization and community support. Commercial options such as Enphase Enlighten and SolarEdge monitoring provide user-friendly interfaces and professional support.
When choosing software for your DIY battery system, consider factors like compatibility with your hardware, ease of use, and scalability. Some solutions may require additional hardware or sensors to function effectively. It's also worth checking if the software can integrate with your existing smart home ecosystem or energy management devices. By implementing the right energy management software, you'll be able to maximize the efficiency and longevity of your home-built battery system.
Integrating Solar With Battery Storage
For ideal performance and energy independence, integrating solar panels with your home-built battery system is a smart move. This combination allows you to harness the sun's energy during the day and store excess power for use at night or during cloudy periods.
You'll need to confirm your battery system is compatible with your solar setup and has sufficient capacity to store the energy your panels generate.
When integrating solar with battery storage, consider these key factors:
- Inverter compatibility: Choose an inverter that can handle both solar input and battery charging/discharging
- Battery capacity: Size your battery system to match your energy consumption and solar production
- Charge controller: Select a charge controller that optimizes solar charging and protects your batteries
- System monitoring: Implement a monitoring solution to track energy production, consumption, and battery status
You'll also need to decide whether you want a DC-coupled or AC-coupled system.
DC-coupled systems are often more efficient but can be more complex to install. AC-coupled systems are easier to retrofit to existing solar setups but may have slightly lower overall efficiency.
Whichever option you choose, proper integration will maximize your energy independence and reduce your reliance on the grid.
Scalability of Home-Built Systems

Flexibility is a key advantage of home-built battery systems. You can easily scale your system up or down based on your energy needs and budget. Unlike commercial solutions with fixed capacities, you're not locked into a predetermined size.
Start small with a basic setup and expand as your requirements grow or your finances allow. When scaling up, you can add more batteries to increase storage capacity or incorporate additional solar panels to boost charging capabilities. You'll need to verify your inverter and charge controller can handle the increased load.
Many DIY enthusiasts opt for modular designs, allowing for seamless expansion without overhauling the entire system. Consider future-proofing your setup by choosing components that support easy upgrades. Use standardized connectors and leave room in your installation area for potential additions.
Keep in mind that as you scale up, you may need to upgrade your wiring and safety features to accommodate higher currents and voltages. Always consult local regulations and safety guidelines when expanding your system to verify compliance and protect your investment.
Maintenance Requirements for DIY Batteries
Despite their many advantages, home-built battery systems require regular maintenance to confirm peak performance and longevity.
You'll need to perform routine checks and upkeep to guarantee your DIY battery system continues to function efficiently and safely over time.
To maintain your home-built battery system effectively, you should:
- Monitor battery voltage regularly: Use a multimeter to check individual cell voltages, confirming they remain within the recommended range.
- Clean connections and terminals: Remove any corrosion or buildup that may impede electrical flow, using a wire brush and baking soda solution.
- Inspect for physical damage: Look for signs of swelling, leaks, or cracks in the battery casing, addressing any issues immediately.
- Balance cells periodically: Use a battery management system (BMS) or manually balance cells to prevent capacity loss and extend overall battery life.
You'll also need to maintain proper ventilation in your battery storage area, keep the system at ideal temperature, and periodically test capacity to identify any degradation.
Grid-Tie vs. Off-Grid Configurations

When designing your home-built battery system, you'll need to decide between a grid-tied or off-grid configuration.
Grid-tied systems remain connected to the electrical grid, allowing you to draw power when needed and sell excess energy back to the utility company. This setup provides a safety net and can reduce your electricity bills. You'll need to install an inverter that synchronizes with the grid and meets local regulations.
Off-grid systems operate independently from the electrical grid, offering complete energy autonomy. They're ideal for remote locations or those seeking self-sufficiency. You'll need to size your battery bank and solar array carefully to guarantee sufficient power generation and storage. Off-grid setups typically require a larger battery capacity and more robust inverters to handle peak loads.
Consider your energy needs, location, and budget when choosing between these configurations.
Grid-tied systems are often simpler and less expensive but rely on grid stability. Off-grid systems provide independence but require more components and careful planning. You can also opt for a hybrid system, which combines the benefits of both configurations, allowing you to switch between grid-tied and off-grid modes as needed.
Recycling and Environmental Impact
Considering the environmental impact of your home-built battery system is essential for responsible energy management. When designing and implementing your system, you'll need to account for the lifecycle of your batteries, from production to disposal.
To minimize your environmental footprint, focus on these key aspects:
- Battery chemistry: Choose batteries with lower environmental impact, such as lithium iron phosphate (LFP) or sodium-ion, which use more abundant and less toxic materials.
- Longevity: Opt for high-quality batteries with longer lifespans to reduce waste and replacement frequency.
- Recycling: Plan for proper recycling of your batteries at the end of their life. Research local recycling facilities that can handle your specific battery type.
- Second-life applications: Consider repurposing old batteries for less demanding applications before recycling.
You can further reduce your system's environmental impact by sourcing components locally, using recycled materials where possible, and optimizing your energy usage to extend battery life.
Remember that while home-built battery systems can help reduce reliance on fossil fuels, they still have an environmental cost. By making informed choices and planning for responsible disposal, you'll contribute to a more sustainable energy future.
Future-Proofing Your Battery System

The landscape of battery technology is constantly evolving. To future-proof your home-built battery system, you'll need to take into account several factors.
First, choose a modular design that allows for easy upgrades and expansions. This way, you can add capacity or replace individual components as technology improves.
Invest in a smart battery management system (BMS) that can be updated via software. This guarantees your system can adapt to new charging algorithms and efficiency improvements.
Contemplate incorporating multiple chemistry types in your setup, such as lithium-ion and flow batteries, to leverage the strengths of each technology.
Pay attention to emerging trends like solid-state batteries and advanced energy management systems. These technologies may become more accessible for DIY projects in the near future.
Keep your system's inverter and charge controller oversized to accommodate potential increases in capacity or power output.
Lastly, design your battery enclosure with ample space and ventilation to accommodate future upgrades.
Frequently Asked Questions
Can Home-Built Battery Systems Be Insured Like Commercial Products?
You can potentially insure home-built battery systems, but it's challenging. Many insurers are hesitant due to safety concerns. You'll need to prove your system meets safety standards and may face higher premiums or limited coverage options.
Are There Any Legal Restrictions on Building Your Own Battery System?
You'll face legal restrictions when building your own battery system. You must comply with local building codes, electrical regulations, and safety standards. It's essential to check with your municipality and obtain necessary permits before starting your project.
How Do DIY Battery Systems Affect Home Resale Value?
DIY battery systems can affect your home's resale value both positively and negatively. You'll likely attract eco-conscious buyers, but some may worry about safety or maintenance. It's essential you install the system properly and document everything.
Can Home-Built Systems Qualify for Government Incentives or Rebates?
You'll find that some home-built systems can qualify for incentives, but it's not guaranteed. Check your local and federal programs carefully. Often, certified installations are required, and DIY projects may not meet all criteria for rebates.
What Certifications or Qualifications Are Needed to Build a Home Battery System?
You'll need electrical certification and knowledge of local codes to build a home battery system safely. It's essential to be familiar with battery chemistry, inverter technology, and safety protocols. Consider getting professional training or certification in energy storage systems.
In Summary
You've got options for building a home battery system to rival Tesla's Powerwall. Whether you choose lithium-ion or lead-acid, remember to prioritize safety and proper sizing. Consider your grid connection and future needs when designing. Don't forget about maintenance and environmental impact. With careful planning, you can create a powerful, cost-effective energy storage solution tailored to your home's unique requirements. Stay informed about emerging technologies to keep your system cutting-edge.


Leave a Reply