Smart home energy hacks can greatly reduce your utility bills through simple DIY projects. Start with a thorough energy audit to identify inefficiencies. Install a smart thermostat to optimize heating and cooling. Seal air leaks around windows and doors to prevent drafts. Switch to LED bulbs for instant energy savings. Boost insulation in your attic and walls to maintain temperature. Choose energy-efficient appliances when upgrading. Optimize windows and doors with proper treatments and seals. Use smart power strips to eliminate phantom energy draw. Improve your water heater's efficiency by insulating and adjusting settings. These easy steps will set you on the path to a more energy-efficient home.
Energy Audit: DIY Approach

Regularly performing a DIY energy audit is the first step toward a more efficient smart home. You'll need to examine your home's energy consumption patterns and identify areas for improvement. Start by reviewing your utility bills for the past year to establish a baseline.
Next, inspect your home's exterior, looking for air leaks around windows, doors, and other openings. Use weatherstripping or caulk to seal any gaps you find.
Inside, check your insulation levels in the attic, walls, and basement. Inadequate insulation can lead to significant energy loss.
Examine your HVAC system, including air filters and ductwork, for any signs of inefficiency. Don't forget to assess your lighting setup; replace old bulbs with energy-efficient LEDs.
Evaluate your appliances and electronics, noting their age and energy ratings. Consider upgrading older models to more efficient versions.
Use a smart power strip to reduce phantom energy consumption from devices in standby mode.
Finally, install a smart thermostat to optimize your heating and cooling schedules.
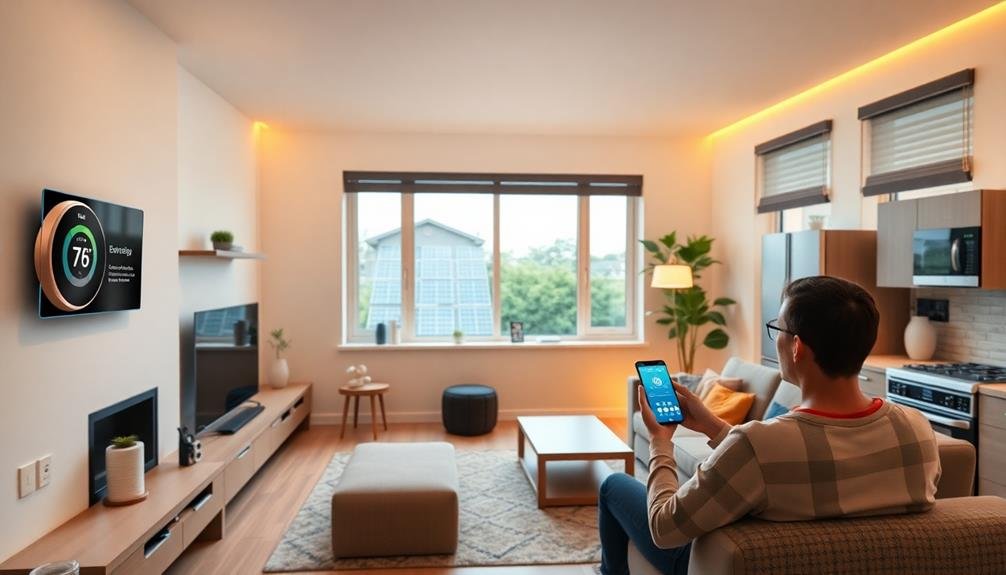
Smart Thermostat Installation
After completing your DIY energy audit, installing a smart thermostat is one of the most impactful steps you can take to boost your home's energy efficiency.
These devices learn your schedule and preferences, automatically adjusting temperature settings to optimize comfort and energy usage. You'll save money on heating and cooling costs while enjoying the convenience of remote control via smartphone apps.
To install a smart thermostat, follow these steps:
- Turn off power to your HVAC system at the circuit breaker
- Remove the old thermostat cover and take a photo of the wiring
- Disconnect and label the wires, then remove the old mounting plate
- Install the new mounting plate and connect the wires to the smart thermostat
Most smart thermostats come with detailed instructions and online support.
If you're uncomfortable working with electrical wiring, it's best to hire a professional.
Once installed, take time to set up your thermostat's features, including scheduling, geofencing, and voice assistant integration.
You'll also want to connect it to your home's Wi-Fi network for remote access and updates.
With proper installation and configuration, your smart thermostat will start saving you energy and money right away.
Sealing Air Leaks

While smart thermostats optimize your HVAC system's efficiency, they can't compensate for air leaks that let conditioned air escape. Sealing these leaks is an essential step in maximizing your home's energy efficiency.
Start by identifying common leak areas: windows, doors, electrical outlets, and gaps around pipes or vents. Use a candle or incense stick to detect drafts, watching for smoke movement near potential leak spots.
Once you've located the leaks, it's time to seal them. For windows and doors, install weatherstripping or use caulk to fill gaps. Add foam gaskets behind outlet covers and switch plates on exterior walls. Use expandable foam to seal larger openings around pipes and vents.
Don't forget to check your attic and basement, as these areas often harbor considerable air leaks.
Pay special attention to your home's envelope – the barrier between the indoor and outdoor environments. Proper insulation in walls, attics, and crawl spaces complements air sealing efforts.
Upgrading to LED Lighting
You'll find upgrading to LED lighting a game-changer for your home's energy efficiency.
LED bulbs offer significant benefits, including lower energy consumption, longer lifespan, and reduced heat output compared to traditional lighting.
Installing LED bulbs is typically straightforward, often requiring a simple swap with your existing fixtures.
Benefits of LED Bulbs
Illuminate your home with energy-efficient LED bulbs and watch your electricity bills shrink. LED technology has revolutionized home lighting, offering numerous advantages over traditional incandescent and even CFL bulbs.
You'll notice an immediate reduction in energy consumption, as LEDs use up to 90% less electricity than their outdated counterparts.
LEDs aren't just about saving money; they're also about enhancing your living space. These versatile lights come in a wide range of colors and temperatures, allowing you to create the perfect ambiance for any room.
Plus, their long lifespan means you'll spend less time changing bulbs and more time enjoying your well-lit home.
Here are four key benefits of switching to LED bulbs:
- Energy efficiency: Use considerably less power, reducing your carbon footprint
- Longevity: Last up to 25 times longer than traditional bulbs, saving you money and time
- Durability: Withstand impacts and vibrations better than fragile incandescent bulbs
- Versatility: Offer dimming options and smart home integration for ultimate control
Easy Installation Tips
Now that you've decided to upgrade to LED lighting, you might be wondering about the installation process. The good news is that it's typically straightforward and doesn't require special skills or tools. Most LED bulbs are designed to fit standard sockets, so you can simply unscrew your old bulbs and screw in the new LEDs.
For recessed lighting, you'll need to remove the old trim and bulb, then install the LED retrofit kit. These kits usually come with simple instructions and often snap into place without additional wiring.
If you're replacing fluorescent tubes, you'll need to bypass the ballast. This involves rewiring the fixture, so if you're not comfortable with electrical work, it's best to hire a professional.
When installing smart LED bulbs, verify your Wi-Fi network reaches the fixture locations. For outdoor lighting, check that the LEDs are rated for exterior use and protected from the elements.
Always turn off the power at the circuit breaker before starting any installation. If you encounter any unusual wiring or complications, don't hesitate to consult an electrician to verify safety and proper function.
Insulation Improvements

While often overlooked, proper insulation is a cornerstone of energy efficiency in smart homes. It's not just about keeping your home warm in winter and cool in summer; it's about reducing your overall energy consumption and costs.
You'll find that improving your home's insulation can lead to significant savings on your utility bills.
To upgrade your home's insulation, consider these key areas:
- Attic: Add blown-in cellulose or fiberglass insulation to reach an R-value of 38-60, depending on your climate zone.
- Walls: Use foam injection for existing walls or add batts during renovations to achieve an R-value of 13-21.
- Floors: Install rigid foam boards or fiberglass batts between floor joists for an R-value of 13-30.
- Windows and doors: Apply weatherstripping and caulk to seal gaps and reduce drafts.
Start by evaluating your current insulation levels. You can do this yourself or hire a professional energy auditor.
Once you've identified problem areas, prioritize improvements based on potential energy savings.
Energy-Efficient Appliance Selection
After improving your home's insulation, the next step in maximizing energy efficiency is selecting the right appliances. When shopping for new appliances, look for the ENERGY STAR label, which indicates products that meet strict energy efficiency guidelines set by the U.S. Environmental Protection Agency and the Department of Energy.
Focus on replacing your most energy-hungry appliances first. Refrigerators, air conditioners, and water heaters typically consume the most electricity. Opt for a refrigerator with the freezer on top, as it's more efficient than side-by-side models. Choose an air conditioner with a high Seasonal Energy Efficiency Ratio (SEER) rating, and consider a heat pump water heater for considerable savings.
Don't overlook smaller appliances. LED light bulbs use 75% less energy than incandescent ones and last much longer. Smart power strips can eliminate phantom energy usage from devices in standby mode.
When replacing your washer, select a front-loading model, which uses less water and energy. For your dryer, look for one with a moisture sensor to prevent over-drying.
Window and Door Optimization

Your windows and doors can be major sources of energy loss if not properly optimized.
Start by sealing air leaks around frames and edges to prevent drafts and maintain indoor temperatures.
Then, upgrade your window treatments with insulating options like cellular shades or thermal curtains to further improve energy efficiency.
Seal Air Leaks
To maximize your home's energy efficiency, sealing air leaks around windows and doors is essential.
These gaps allow heated or cooled air to escape, forcing your HVAC system to work harder and driving up energy costs.
You'll want to inspect your home's exterior and interior for any visible cracks or gaps, paying close attention to areas where different materials meet.
Once you've identified the leaks, it's time to seal them up.
Here are four effective methods to tackle air leaks:
- Apply weatherstripping: Use adhesive-backed foam tape or V-strip weatherstripping around movable parts of windows and doors.
- Install door sweeps: Attach these to the bottom of exterior doors to prevent drafts from sneaking in.
- Use caulk: Apply silicone caulk to seal stationary cracks and gaps around window and door frames.
- Add foam gaskets: Place these behind electrical outlets and switch plates on exterior walls to prevent air infiltration.
Upgrade Window Treatments
Windows play an essential role in your home's energy efficiency. Upgrading your window treatments can considerably reduce heat gain in summer and heat loss in winter, leading to lower energy bills.
Start by installing thermal curtains or cellular shades, which create an insulating air pocket between the window and room. These can reduce heat loss by up to 25% and block out unwanted sunlight in summer.
Consider applying reflective window film to south and west-facing windows. This film reflects solar heat while still allowing natural light in, keeping your home cooler without sacrificing brightness.
For a more permanent solution, invest in double or triple-pane windows with low-E coatings. These windows provide superior insulation and can cut energy costs by up to 15%.
Don't forget about exterior treatments. Awnings or overhangs can shade windows from intense sunlight, reducing cooling needs.
Plant deciduous trees strategically to provide natural shade in summer while allowing sunlight through in winter.
For doors, add weatherstripping and install storm doors to create an additional barrier against drafts.
These simple upgrades can dramatically improve your home's energy efficiency and comfort.
Smart Power Strip Usage
While traditional power strips offer basic surge protection, smart power strips take energy management to the next level. These intelligent devices can automatically cut power to electronics that aren't in use, eliminating phantom energy draw and saving you money on your electric bill.
You'll find various types of smart power strips, each with unique features to suit your needs.
To maximize the benefits of smart power strips, consider these tips:
- Place them strategically: Focus on areas with multiple electronics, like entertainment centers or home offices.
- Label your outlets: Clearly mark which devices are plugged into each outlet for easy management.
- Use scheduling features: Set specific times for devices to power on or off, aligning with your daily routines.
- Pair with smart home systems: Integrate your smart power strips with voice assistants or home automation hubs for seamless control.
Water Heater Efficiency Boost

When it comes to energy consumption, your water heater is often one of the biggest culprits in your home. Boosting its efficiency can lead to significant savings on your utility bills. Start by lowering the temperature setting to 120°F (49°C), which is hot enough for most household needs while reducing energy waste.
Insulating your water heater tank can cut heat loss by 25-45%, saving you 7-16% on water heating costs. Use a water heater blanket, ensuring it doesn't cover the thermostat or burner compartment.
For even greater efficiency, insulate hot water pipes to minimize heat loss as water travels through them.
Install low-flow showerheads and faucet aerators to reduce hot water usage without sacrificing comfort. These simple devices can cut water consumption by up to 60%.
Consider a timer for your water heater, allowing it to run only when you typically need hot water.
Lastly, flush your water heater annually to remove sediment buildup, which can reduce efficiency. If your unit is over 10 years old, replacing it with a modern, energy-efficient model could yield substantial long-term savings.
Frequently Asked Questions
How Do Smart Home Energy Upgrades Affect Property Value?
Smart home energy upgrades can boost your property value substantially. You'll see increased appeal to eco-conscious buyers, lower utility costs, and improved energy efficiency ratings. These improvements often translate to higher resale prices and quicker sales.
Can Renters Implement These Energy-Saving Hacks in Their Apartments?
Yes, you can implement many energy-saving hacks in your rented apartment. Focus on temporary solutions like smart plugs, LED bulbs, and programmable thermostats. Always check with your landlord before making any permanent changes to the property.
What Are the Potential Risks of DIY Smart Home Energy Projects?
You're taking risks with DIY smart home energy projects. You could damage electrical systems, void warranties, or create fire hazards. There's also potential for data breaches if you don't secure your devices properly. Always prioritize safety and consider professional help.
How Long Does It Typically Take to See Savings From These Upgrades?
You'll typically start seeing savings within a few months. Some upgrades, like smart thermostats, can show immediate results. Others may take up to a year. Your energy habits and the specific upgrades you've implemented will affect the timeline.
Are There Any Tax Incentives for Implementing Smart Home Energy Solutions?
Yes, you'll find tax incentives for smart home energy solutions. Check your local and federal programs, as they often offer credits or rebates for energy-efficient upgrades. You're likely to save money while reducing your carbon footprint.
In Summary
You've got the tools to transform your home into an energy-saving powerhouse. By implementing these DIY hacks, you'll see a significant drop in your energy bills. Remember, small changes add up to big savings over time. Stay proactive, keep learning about new energy-saving technologies, and don't be afraid to tackle these projects yourself. Your wallet and the environment will thank you for your efforts. Keep up the great work!


Leave a Reply