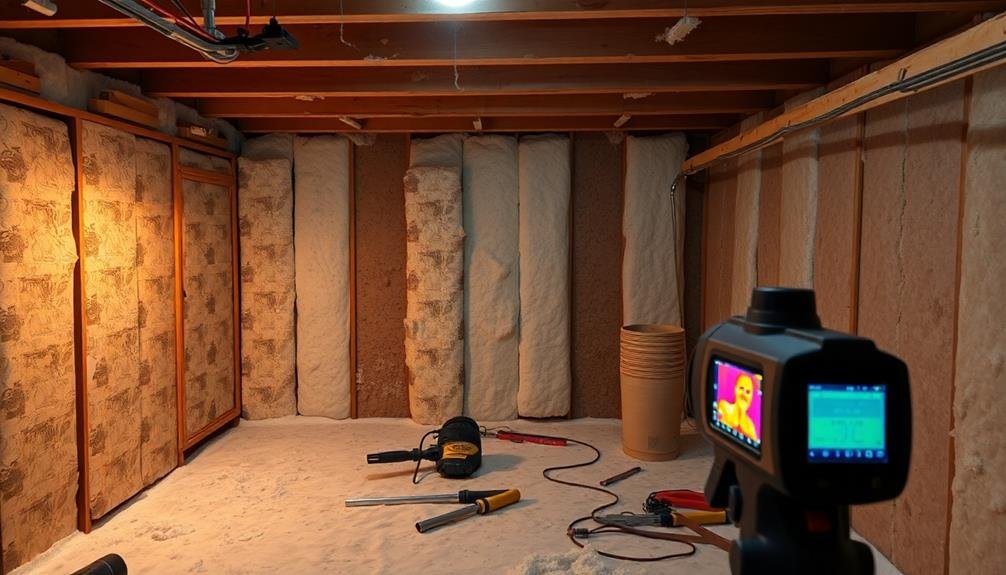
The best basement insulation methods include fiberglass batts, spray foam, rigid foam boards, blown-in cellulose, and radiant barriers. Each option has its pros and cons, so you'll need to evaluate factors like cost, moisture resistance, and R-value. Spray foam and rigid foam boards offer excellent air sealing and moisture control but are pricier. Fiberglass batts are cost-effective but require careful installation to avoid gaps. Don't forget to address air leaks and moisture issues before insulating. Proper insulation can greatly reduce your energy costs and improve comfort. There's more to explore about basement insulation techniques that can make a big difference in your home's efficiency.
Fiberglass Batts Insulation
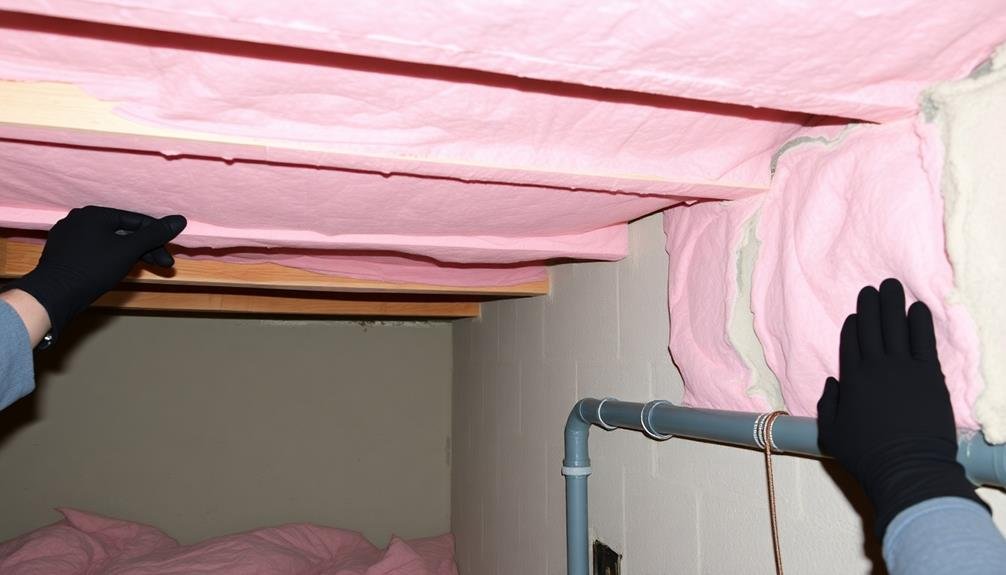
Widely used and cost-effective, fiberglass batts insulation is a popular choice for basement walls. You'll find these pre-cut panels easy to install between wall studs, providing an effective barrier against heat transfer. They're available in various thicknesses and R-values, allowing you to choose the right level of insulation for your climate and budget.
When installing fiberglass batts, make sure you wear protective gear, including gloves, a mask, and eye protection. Cut the batts to fit snugly between studs, leaving no gaps or compression. Pay special attention to areas around electrical outlets and pipes, cutting the insulation to accommodate these obstructions.
While fiberglass batts are effective, they're susceptible to moisture damage. In basements prone to dampness, consider using faced batts with a vapor barrier or installing a separate moisture barrier. This precaution helps prevent mold growth and maintains the insulation's effectiveness.
Remember to pair fiberglass batts with proper air sealing techniques. Address any cracks or gaps in your basement walls before installation to maximize energy efficiency.
With careful installation and moisture control, fiberglass batts can provide reliable insulation for your basement, helping to maintain a comfortable temperature and reduce energy costs.
Spray Foam Insulation
Spray foam insulation offers a highly effective solution for your basement, available in two main types: open-cell and closed-cell.
You'll find the application process involves spraying liquid foam that expands and hardens, creating a seamless barrier against moisture and air infiltration.
While spray foam provides excellent insulation and air sealing, you'll need to weigh its higher cost and potential for off-gassing against its superior performance and longevity.
Types of Spray Foam
When considering spray foam insulation for your basement, you'll encounter two main types: open-cell and closed-cell foam.
Open-cell foam is lighter and less dense, with a spongy texture. It's more affordable and expands considerably during application, filling gaps and cracks effectively. However, it's not as effective at moisture control and has a lower R-value per inch compared to closed-cell foam.
Closed-cell foam is denser and more rigid. It offers superior insulation properties with a higher R-value per inch, typically around R-6 to R-7. This type of foam also acts as an excellent vapor barrier, making it ideal for basement environments prone to moisture issues.
While more expensive, closed-cell foam provides better structural support and is often preferred for below-grade applications.
When choosing between the two, consider your specific needs and budget. If moisture control is a top priority, closed-cell foam is the better option. For areas with less moisture concern and where cost is a considerable factor, open-cell foam can be a suitable choice.
Some homeowners opt for a combination, using closed-cell foam for the first layer and open-cell for additional insulation.
Application Process Explained
The complexity of spray foam insulation application requires professional expertise and specialized equipment. You'll need to hire a certified contractor to guarantee proper installation and safety.
Before application, the basement walls must be clean, dry, and free of debris. The contractor will cover windows, doors, and other openings to protect them from overspray.
The application process begins with mixing the two chemical components of the spray foam in a spray gun. As the mixture is sprayed onto the surface, it expands rapidly, filling gaps and cracks. The foam adheres to the surface and hardens quickly, creating an airtight seal. Depending on the type of foam used, it may expand up to 100 times its liquid volume.
For larger areas, the contractor will apply the foam in layers, allowing each layer to cure before adding the next. This prevents overheating and guarantees proper curing throughout the insulation.
After application, excess foam is trimmed to create a smooth surface. The entire process can typically be completed in a day, but the foam may take up to 24 hours to fully cure.
Pros and Cons
As with any insulation method, spray foam comes with its own set of advantages and drawbacks.
On the positive side, spray foam insulation offers superior air sealing properties, effectively blocking air leaks and moisture infiltration. It provides excellent thermal resistance, reducing energy costs and improving your home's overall comfort. Spray foam also acts as a sound barrier and can add structural integrity to your basement walls.
However, spray foam insulation isn't without its downsides. It's generally more expensive than traditional insulation methods, which can be a significant drawback for budget-conscious homeowners.
The installation process requires specialized equipment and skilled professionals, making it less DIY-friendly. There's also a potential for off-gassing during and after application, which may cause health concerns for sensitive individuals. Additionally, if not applied correctly, spray foam can lead to moisture issues or uneven coverage.
You'll need to weigh these pros and cons carefully when considering spray foam insulation for your basement. While its performance is certainly impressive, the higher cost and potential installation complexities mightn't be suitable for everyone's needs or budget.
Rigid Foam Board Insulation
Homeowners seeking superior basement insulation often turn to rigid foam board insulation for its exceptional performance. This type of insulation consists of large, rigid panels made from polystyrene, polyisocyanurate, or polyurethane foam. You'll find it's highly effective at preventing heat transfer and moisture infiltration, making it ideal for basement walls and floors.
When installing rigid foam board insulation, you'll need to cut it to fit snugly against your basement walls and secure it with adhesive or mechanical fasteners. It's vital to seal the seams between panels with tape or foam sealant to create a continuous barrier against air and moisture.
One of the main advantages of rigid foam board is its high R-value per inch, allowing you to achieve excellent insulation with minimal thickness. This is particularly beneficial in basements where space may be limited. Additionally, it's resistant to mold and mildew growth, which is essential in potentially damp environments.
However, you should be aware that rigid foam board insulation is more expensive than some other options and may require professional installation for best results.
It's also important to check local building codes, as some types of foam board may need to be covered with a fire-resistant barrier.
Blown-In Cellulose Insulation
For those seeking an eco-friendly alternative, blown-in cellulose insulation offers an excellent option for basement insulation. This material is made from recycled paper products, making it a sustainable choice for environmentally conscious homeowners.
Cellulose insulation is treated with fire retardants, enhancing its safety profile. To install blown-in cellulose, you'll need to hire professionals who use specialized equipment to spray the material into wall cavities or atop existing insulation. The process is relatively quick and can effectively fill irregular spaces and hard-to-reach areas in your basement.
Cellulose insulation boasts a high R-value per inch, providing excellent thermal performance. One of the key advantages of cellulose insulation is its ability to reduce air infiltration, which can help lower your energy bills.
It's also resistant to mold and pests, making it a durable option for basement environments. However, it's essential to guarantee proper moisture control in your basement before installation, as cellulose can absorb water and lose its insulating properties if exposed to excessive moisture.
When installed correctly, blown-in cellulose insulation can remarkably improve your basement's comfort and energy efficiency.
Radiant Barrier Insulation
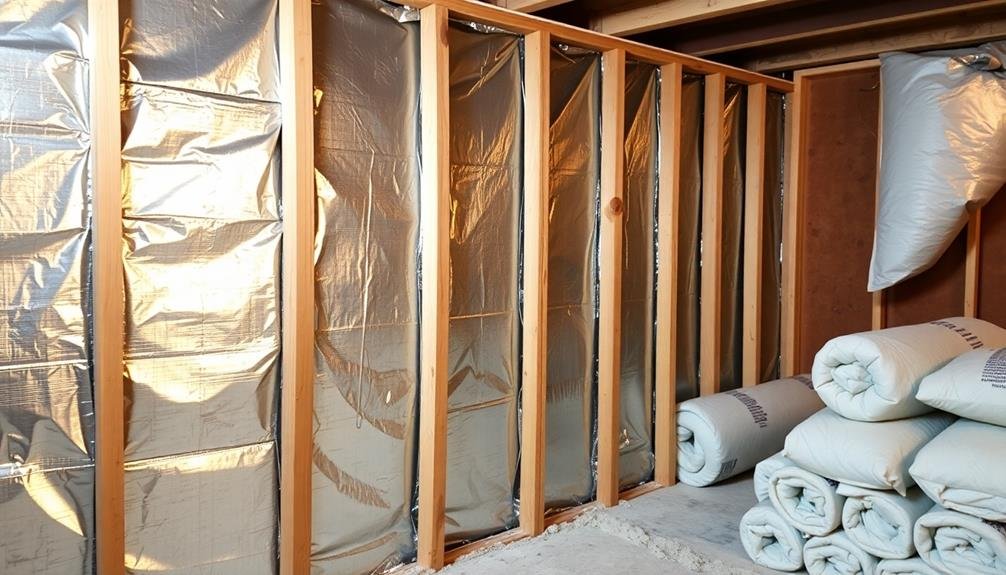
Radiant barrier insulation offers exceptional reflective heat protection for your basement, keeping it cooler in summer and warmer in winter.
You'll find this type of insulation easy to install yourself, making it a popular DIY choice for homeowners.
Reflective Heat Protection
Three key benefits make reflective heat protection, also known as radiant barrier insulation, an excellent choice for basement insulation.
First, it effectively reflects radiant heat, keeping your basement cooler in summer and warmer in winter.
Second, it's a cost-effective solution that can greatly reduce your energy bills.
Third, it's easy to install and doesn't take up much space, making it ideal for basements with limited room.
You'll find reflective heat protection typically consists of a thin layer of reflective material, such as aluminum foil, attached to a backing.
When installed correctly, it creates an air gap that further enhances its insulating properties.
This type of insulation works best when placed between your basement walls and the living space.
To maximize its effectiveness, verify there's an air space on at least one side of the reflective material.
You can achieve this by using furring strips or specialized spacers.
Remember, reflective heat protection works in conjunction with other insulation types, so don't rely on it as your sole insulation method.
Combine it with fiberglass batts or spray foam for ideal results in your basement.
Easy DIY Installation
One of the biggest advantages of radiant barrier insulation is its easy DIY installation process. You can install it yourself without professional help, saving time and money. The installation process is straightforward and doesn't require specialized tools or skills.
To install radiant barrier insulation, you'll need to measure your basement walls and cut the material to size. Then, attach it to the walls using staples, adhesive, or furring strips. Make sure to cover all exposed areas and overlap seams for maximum effectiveness.
Here's a quick guide to help you with the installation process:
| Step | Description |
|---|---|
| 1 | Measure walls and cut material |
| 2 | Clean and prepare surfaces |
| 3 | Attach insulation to walls |
| 4 | Seal seams and edges |
Remember to wear protective gear like gloves and a dust mask during installation. It's also important to address any moisture issues in your basement before installing the insulation. By following these steps, you can effectively install radiant barrier insulation in your basement, improving its energy efficiency and comfort level.
Cost-Effective Energy Savings
A significant benefit of radiant barrier insulation is its cost-effective energy savings potential. You'll find that this type of insulation reflects radiant heat rather than absorbing it, making it highly effective in basements. By installing radiant barriers, you can reduce heat transfer by up to 97%, leading to substantial energy savings over time.
You'll appreciate how radiant barriers work to keep your basement cooler in summer and warmer in winter. They reflect heat back into your living space during cold months and prevent heat from entering during hot periods. This dual functionality means you'll spend less on both heating and cooling costs throughout the year.
While the initial investment may be higher than some other insulation types, you'll recoup the costs through lower energy bills. Radiant barriers are particularly effective in hot climates or areas with high cooling demands.
You'll also find that they don't degrade over time like some traditional insulation materials, maintaining their effectiveness for years to come.
Vapor Barrier Installation
Installing a vapor barrier is an essential step in basement insulation that prevents moisture from seeping through your walls and floors. You'll want to choose a high-quality, 6-mil polyethylene sheet for best protection.
Begin by cleaning and repairing any cracks or holes in your basement walls and floor. Start at one corner of the room and unroll the vapor barrier, overlapping seams by at least 12 inches. Use a utility knife to cut around obstacles like pipes or support beams.
Secure the barrier to the walls using construction adhesive or tape designed for vapor barriers. For the floor, lay the barrier flat and smooth out any wrinkles.
When installing insulation over the vapor barrier, be careful not to puncture it. If you're using spray foam insulation, apply it directly to the barrier. For fiberglass batts, install them between the wall studs, ensuring they don't compress the vapor barrier.
Don't forget to seal all seams and edges with vapor barrier tape to create an airtight seal. This step is critical for preventing moisture from penetrating your insulation and compromising its effectiveness.
Rim Joist Insulation Techniques
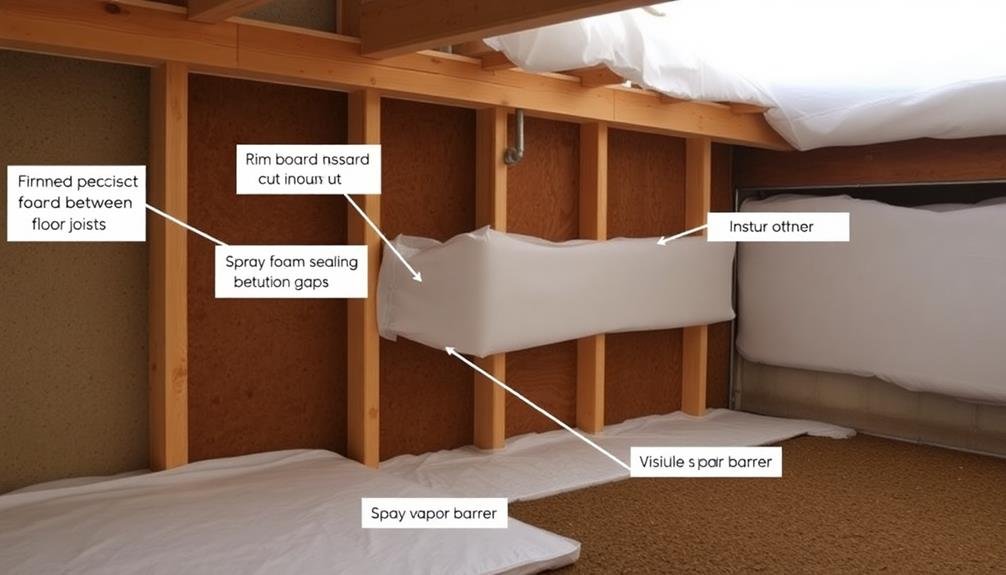
Effective rim joist insulation is essential for preventing heat loss and moisture problems in your basement. To insulate your rim joists, you'll need to choose between spray foam or rigid foam board insulation. Spray foam offers excellent air sealing and insulation in one application, while rigid foam boards provide a cost-effective solution that you can install yourself.
Start by cleaning the rim joist area and sealing any gaps or cracks. If using rigid foam, cut pieces to fit snugly between floor joists and against the rim joist. Apply a bead of caulk around the edges for an airtight seal. For spray foam, follow manufacturer instructions and wear protective gear during application.
| Method | Pros | Cons | R-value per inch |
|---|---|---|---|
| Spray Foam | Air-seals & insulates | Expensive, pro install | R-6 to R-7 |
| Rigid Foam | DIY-friendly, affordable | Requires careful cutting | R-5 to R-6 |
| Fiberglass | Cheap, easy to install | Poor air sealing | R-2.2 to R-2.7 |
| Mineral Wool | Fire-resistant, soundproof | More expensive than fiberglass | R-3 to R-4.3 |
Remember to leave electrical outlets and plumbing accessible. After insulating, consider adding a fire-resistant barrier if required by local building codes. Proper rim joist insulation will greatly improve your basement's energy efficiency and comfort.
Exterior Basement Wall Insulation
While interior insulation is common, exterior basement wall insulation offers unique advantages for moisture control and energy efficiency. It's applied to the outside of your foundation walls, creating a protective barrier against moisture and temperature fluctuations.
To install exterior insulation, you'll need to excavate around your foundation. Use rigid foam insulation boards, such as extruded polystyrene (XPS) or expanded polystyrene (EPS), which resist moisture and provide excellent R-value per inch.
Apply a waterproofing membrane to the foundation wall before attaching the insulation boards. Secure the boards with adhesive and mechanical fasteners, ensuring a tight fit.
Cover the insulation with a protective layer, like dimpled drainage mat or fiber cement board, to shield it from UV rays and physical damage. Don't forget to extend the insulation above grade by at least 8 inches, protecting it with a durable material like metal flashing or stucco.
Exterior insulation helps prevent thermal bridging, reduces the risk of condensation on interior walls, and maintains a more consistent temperature in your basement.
While it's more challenging to install in existing homes, it's an excellent option for new construction or major renovations.
Interior Basement Wall Insulation
When insulating your basement walls from the inside, you've got several effective options to evaluate.
You can choose rigid foam boards for their high R-value and moisture resistance, apply spray foam for its excellent air-sealing properties, or install fiberglass batts for a more budget-friendly approach.
Each method has its own set of advantages, and the best choice will depend on your specific basement conditions and insulation goals.
Rigid Foam Board Options
Rigid foam board insulation stands out as one of the most popular choices for insulating basement walls from the inside. It's easy to install, moisture-resistant, and provides excellent thermal performance.
You'll find three main types of rigid foam boards: extruded polystyrene (XPS), expanded polystyrene (EPS), and polyisocyanurate (polyiso).
XPS is the most common choice for basements due to its high R-value per inch and superior moisture resistance. It's available in various thicknesses and can be easily cut to fit your space.
EPS is a more budget-friendly option but offers slightly lower insulation values. Polyiso provides the highest R-value per inch but is typically more expensive and less moisture-resistant than XPS.
When installing rigid foam boards, you'll need to attach them directly to the concrete walls using adhesive or mechanical fasteners.
It's essential to seal all seams and edges with tape or spray foam to create a continuous air barrier. For added protection, consider installing a vapor barrier over the foam boards before finishing the walls.
Remember to check local building codes, as some areas require a fire-rated covering over foam insulation in living spaces.
Spray Foam Application Techniques
Spray foam insulation offers another effective method for insulating basement walls from the interior. This versatile option comes in two types: open-cell and closed-cell foam. Open-cell foam is lighter and less expensive, while closed-cell foam provides better insulation and moisture resistance.
To apply spray foam, you'll need to prepare the basement walls by cleaning and drying them thoroughly. It's essential to wear protective gear, including a respirator, goggles, and coveralls. If you're not experienced with spray foam application, it's best to hire a professional.
The application process involves spraying the foam in even layers onto the wall surface. For open-cell foam, you'll typically apply 3-4 inches, while closed-cell foam requires 2-3 inches for ideal performance. The foam expands rapidly, filling gaps and cracks as it cures.
Pay special attention to corners, joints, and areas around pipes or electrical boxes. These are common spots for air leaks and moisture intrusion.
After application, allow the foam to cure completely before covering it with drywall or other finishing materials. This typically takes 24-48 hours, depending on humidity and temperature conditions.
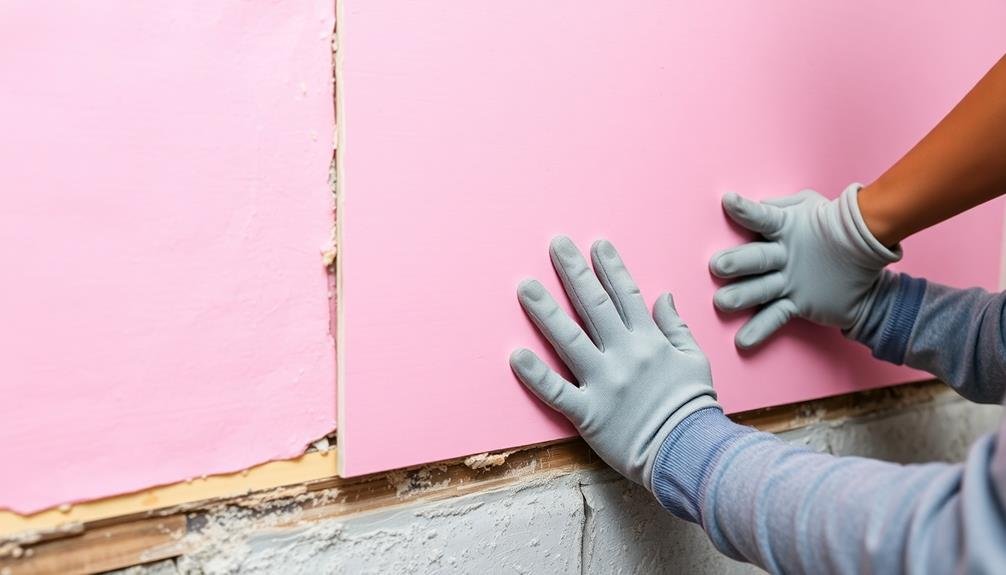
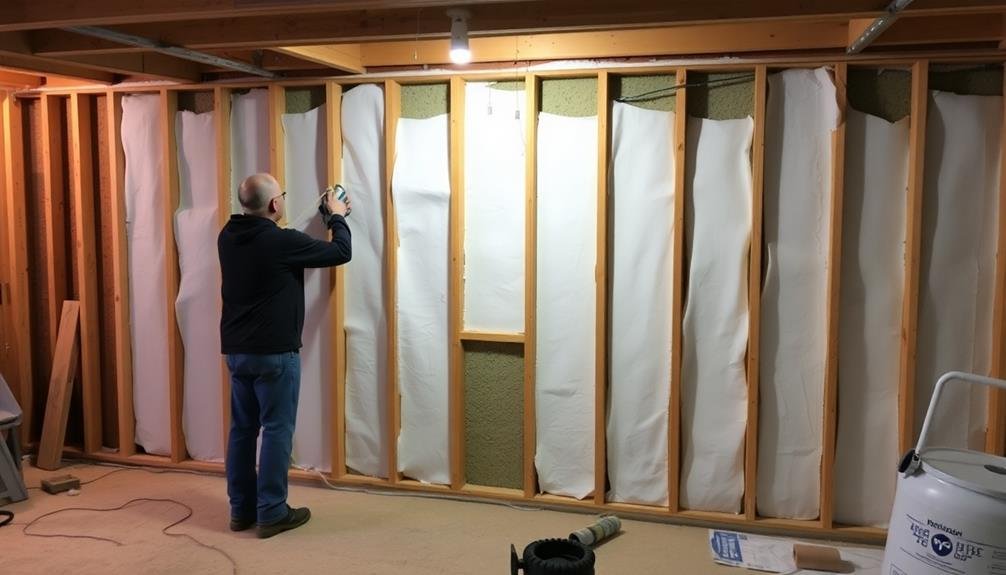
Fiberglass Batt Installation
Simplicity and cost-effectiveness make fiberglass batt insulation a popular choice for interior basement wall insulation. You'll find this method relatively easy to install, especially if you're a DIY enthusiast.
To begin, measure the height and width of each wall cavity between the studs. Cut the fiberglass batts to fit snugly, ensuring they're not compressed or bunched up.
Before installation, check that your basement walls are properly waterproofed. Install a vapor barrier on the warm side of the insulation to prevent moisture buildup.
When placing the batts, wear protective gear, including gloves, a mask, and eye protection. Start at the top of the wall and work your way down, fitting the batts tightly between the studs. Use a putty knife to tuck the edges in for a snug fit.
Don't forget to insulate around electrical outlets and pipes. Cut small pieces of insulation to fit around these obstacles.
Once all batts are in place, cover them with drywall to complete the installation.
While fiberglass batts are affordable and widely available, they're not ideal for damp basements. If moisture is a concern, consider alternative insulation methods for better results.
Floor Insulation Methods
Several effective methods exist for insulating your basement floor, each with its own advantages.
One popular option is rigid foam insulation, which you can install directly on top of the concrete slab. This method provides excellent thermal resistance and moisture protection. You'll need to cover the foam with a subfloor material like plywood before installing your finished flooring.
Another approach is to use spray foam insulation. This option creates a seamless barrier against moisture and air infiltration. It's particularly useful for uneven surfaces or hard-to-reach areas. However, it's typically more expensive and requires professional installation.
For a more budget-friendly solution, consider installing a floating floor system with built-in insulation. These interlocking panels combine a moisture barrier, insulation, and subfloor in one product. They're easy to install and can greatly improve your basement's comfort level.
If you're dealing with a dirt floor, you'll need to start by pouring a concrete slab. Once that's done, you can apply any of the above insulation methods.
Remember to address any moisture issues before insulating, as trapped moisture can lead to mold growth and reduced insulation effectiveness.
Insulating Basement Windows
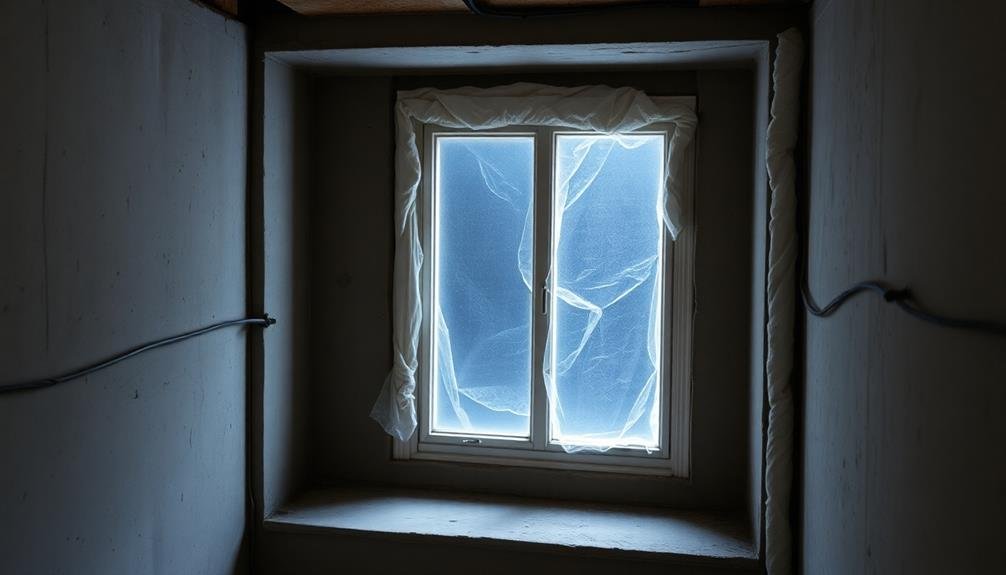
Drafty basement windows can greatly impact your home's energy efficiency and comfort. To address this issue, you'll want to focus on insulating your basement windows effectively.
Start by inspecting the windows for any gaps or cracks, and seal them using weatherstripping or caulk. This simple step can greatly reduce air leakage.
For added insulation, consider installing window inserts. These clear acrylic panels fit inside your existing window frame, creating an air gap that improves thermal performance.
Alternatively, you can opt for cellular shades or thermal curtains, which provide an extra layer of insulation when closed.
If your budget allows, replacing old single-pane windows with energy-efficient double-pane or triple-pane windows can make a considerable difference. Look for windows with low-E coatings and argon gas fills for maximum insulation.
For a more affordable option, you can create DIY window insulation using foam board or rigid foam insulation. Cut the material to fit your window frame and secure it in place during colder months.
Remember to remove it in warmer seasons to allow natural light and ventilation.
Sealing Air Leaks
Identifying and sealing air leaks is a crucial step in basement insulation. These gaps allow cold air to infiltrate your basement, reducing energy efficiency and potentially causing moisture problems.
To locate air leaks, conduct a thorough inspection of your basement's perimeter, paying close attention to areas where different materials meet, such as where the foundation wall joins the sill plate.
Once you've identified the leaks, it's time to seal them. For small cracks and gaps, use a high-quality caulk or foam sealant. Larger openings may require a combination of foam insulation and caulk.
Don't forget to check around pipes, electrical wires, and ductwork that penetrate walls or floors.
Pay special attention to the rim joist area, where the floor joists meet the foundation wall. This area is prone to air leakage and should be sealed with foam board insulation or spray foam.
Windows and doors should also be properly weatherstripped to prevent drafts.
Moisture Control Strategies
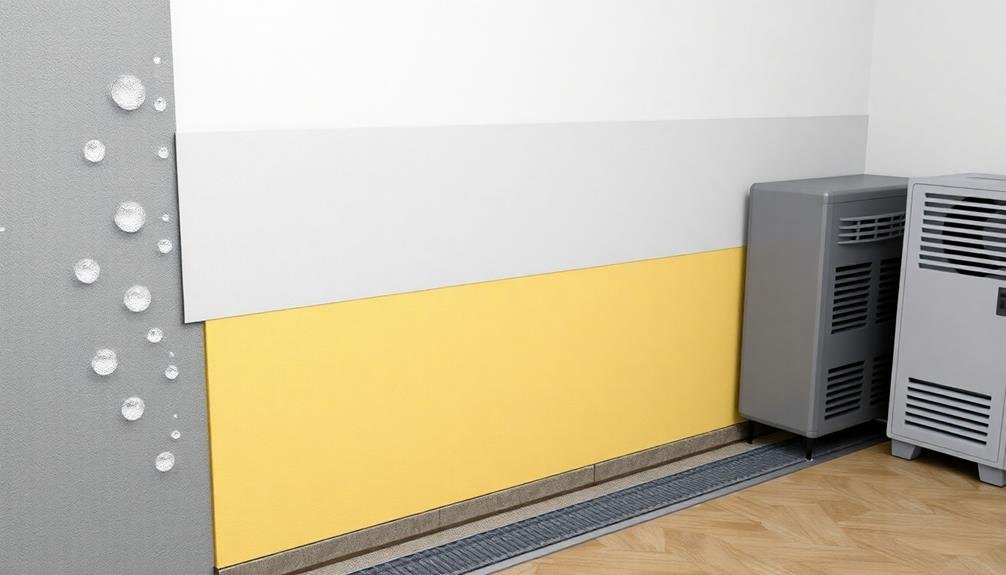
While sealing air leaks is essential, controlling moisture in your basement is equally crucial for effective insulation. Moisture can lead to mold growth, structural damage, and reduced insulation efficiency. To combat this, install a vapor barrier on the warm side of your insulation to prevent moisture from penetrating the insulation material.
Ensure proper drainage around your home's foundation by grading the soil away from the house and installing gutters and downspouts that direct water at least 5 feet from the foundation.
Inside the basement, use a dehumidifier to maintain ideal humidity levels between 30-50%. Consider applying a waterproof sealant to your basement walls and floor to create an additional barrier against moisture intrusion.
Install a sump pump if your basement is prone to flooding, and regularly inspect and clean your foundation drains. Use mold-resistant materials when finishing your basement, such as cement board or mold-resistant drywall.
Ventilate your basement properly by using exhaust fans or opening windows when weather permits. By implementing these moisture control strategies, you'll create a drier, healthier environment that enhances your basement insulation's effectiveness and longevity.
Frequently Asked Questions
How Much Does It Cost to Insulate a Basement?
You'll typically spend $1,500 to $6,000 to insulate your basement, depending on its size and the materials you choose. Spray foam's the priciest option, while fiberglass batts are more budget-friendly. Don't forget to factor in labor costs too.
Can I Insulate My Basement Myself, or Should I Hire Professionals?
You can insulate your basement yourself if you're handy and have the time. However, hiring professionals guarantees proper installation and may save you money in the long run. They'll also handle any unexpected issues that arise.
How Long Does Basement Insulation Typically Last Before Needing Replacement?
You'll find that properly installed basement insulation can last 20-30 years. However, it's not immune to damage. You should inspect it annually for signs of moisture, mold, or pests. Replace it if you notice any issues.
Will Insulating My Basement Increase My Home's Resale Value?
You'll likely see an increase in your home's resale value by insulating your basement. It improves energy efficiency, lowers utility costs, and enhances comfort. Potential buyers often view a well-insulated basement as a valuable feature when house hunting.
Are There Any Eco-Friendly or Sustainable Options for Basement Insulation?
Yes, you've got eco-friendly options for basement insulation. Consider using recycled denim, sheep's wool, or cellulose insulation. These sustainable materials provide excellent thermal performance while reducing your environmental impact. You'll also find spray foam made from soy or castor oil.
In Summary
You've got several effective options for insulating your basement. Whether you choose fiberglass batts, spray foam, rigid boards, or blown-in cellulose, each method has its benefits. Don't forget to address floor insulation, windows, and air leaks. Moisture control is essential, so incorporate proper strategies. By combining these methods, you'll create a well-insulated, comfortable basement space that's energy-efficient and protected from the elements. Choose the approach that best fits your needs and budget.


Leave a Reply