To install an energy-efficient ceiling fan, start by choosing the right size for your room and gathering necessary tools. Turn off the power at the circuit breaker and remove any existing fixture. Install a sturdy mounting bracket, then connect the wiring, matching colors and securing with wire nuts. Attach the fan blades, ensuring they're properly aligned and tightened. Finally, restore power and test the fan's operation, adjusting for ideal height and airflow direction. Remember to look for Energy Star certified models for maximum efficiency. With these steps, you'll be on your way to a cooler, more energy-efficient home in no time.
Choose the Right Ceiling Fan

Before diving into the installation process, it's crucial to pick out the right ceiling fan for your space. Consider the room size and ceiling height to determine the appropriate fan diameter and blade pitch. For rooms up to 144 square feet, choose a 42-inch fan; for larger spaces, opt for 52 inches or more. Guarantee at least 7 feet of clearance between the floor and the fan blades.
Look for Energy Star certified models, which are up to 60% more efficient than standard fans. These fans often feature reversible motors, allowing you to change the blade direction for maximum airflow in summer and winter.
Pay attention to the fan's CFM (cubic feet per minute) rating, which indicates its air-moving capacity. A higher CFM means better cooling efficiency.
Consider the fan's noise level, typically measured in sones. Quieter fans have ratings of 1.5 sones or less.
Don't forget about style and finish – choose a fan that complements your room's decor. Finally, check if the fan comes with a light kit or if you'll need to purchase one separately to meet your lighting needs.
Gather Necessary Tools and Materials
Before you begin installing your ceiling fan, it's vital to gather all the necessary tools and materials.
Start by creating an essential tools checklist, including items like a screwdriver, wire stripper, and voltage tester.
Next, compile a required materials inventory, ensuring you have the ceiling fan kit, mounting bracket, and appropriate wiring supplies on hand.
Essential Tools Checklist
An essential first step in installing a ceiling fan is gathering all the necessary tools and materials. You'll need a sturdy ladder or step stool to reach the ceiling safely.
Make certain you have a voltage tester to check for live wires and guarantee your safety. A screwdriver set, including both flathead and Phillips head options, is vital for various fastening tasks. You'll also need wire strippers and needle-nose pliers for handling electrical connections.
Don't forget to have a cordless drill with various drill bits on hand for creating pilot holes and securing mounting brackets. An adjustable wrench will help you tighten nuts and bolts.
If you're replacing an existing light fixture, you may need a hacksaw to cut the old mounting hardware. Include electrical tape and wire nuts for proper wire connections. A stud finder can help locate ceiling joists for secure mounting.
Required Materials Inventory
A thorough materials checklist is essential for a successful ceiling fan installation. Before you begin, verify you have all the necessary components and materials on hand.
You'll need the ceiling fan kit, which typically includes the fan motor, blades, mounting bracket, downrod, canopy, and hardware. Don't forget to check if your kit comes with a light fixture or remote control, as these may require additional parts.
You'll also need electrical supplies such as wire nuts, electrical tape, and a voltage tester. If you're replacing an existing fixture, you might need a fan-rated electrical box and support brace. For improved energy efficiency, consider purchasing LED light bulbs if your fan includes a light kit.
Other materials to gather include:
- Ladder or sturdy step stool
- Screwdrivers (flathead and Phillips)
- Pliers
- Wire strippers
- Drill and drill bits (if needed for new installation)
- Drywall anchors (if required)
- Silicone caulk (for outdoor installations)
- Paint or touch-up kit (to match ceiling color)
Turn Off Electrical Power

Before you begin any electrical work, you'll need to locate your home's main circuit breaker and switch off power to the room where you're installing the fan.
Use a voltage tester to confirm that no electricity is flowing to the wires in the ceiling box.
For added safety, double-check that the power is truly off by attempting to turn on lights or other devices in the room.
Locate Main Circuit Breaker
Safety comes first when installing a ceiling fan. To begin, you'll need to locate your home's main circuit breaker box. It's typically found in the basement, garage, utility room, or on an exterior wall. Once you've found it, open the panel cover to access the breakers inside.
Look for a large switch labeled "Main" or "Service Disconnect." This controls power to your entire home. If you can't find a main switch, you'll need to turn off individual circuit breakers. Identify the one that powers the room where you're installing the fan. It may be labeled with the room name or a number corresponding to a chart inside the panel door.
If you're unsure which breaker to switch off, use a circuit tester to confirm. Turn on the light in the room where you're working, then flip breakers one by one until the light goes out. This indicates you've found the correct circuit.
Always double-check that power is off before proceeding with any electrical work. Use a non-contact voltage tester on the wires in the ceiling box to verify there's no live current.
Test With Voltage Tester
Now that you've identified the correct circuit breaker, it's time to confirm that the power is truly off. This step is essential for your safety and the successful installation of your energy-efficient ceiling fan.
Before you begin working, you'll need to use a voltage tester to verify there's no electrical current flowing to the wires.
Here's how to test for voltage:
- Turn on the light switch that controls the existing fixture or fan.
- Hold the voltage tester near the wires without touching them directly.
- If the tester doesn't light up or beep, it's safe to proceed. If it does, double-check that you've turned off the correct breaker.
Double-Check for Safety
With safety as your top priority, it's vital to double-check that the power is completely off before proceeding. Even if you've already turned off the circuit breaker, take a moment to verify this important step.
Use a non-contact voltage tester to confirm there's no electrical current flowing to the wires in the ceiling box. Hold the tester close to each wire without touching them directly. If the tester doesn't light up or beep, you're safe to continue.
Don't rely solely on the light switch being off, as this doesn't guarantee the absence of live wires. Remember that some ceiling boxes may have multiple circuits running through them. Test all wires, including those that aren't immediately visible.
If you detect any voltage, stop immediately and double-check the circuit breaker. You might need to turn off additional breakers or consult an electrician if you're unsure which circuit controls the fan.
Once you're certain there's no power, test the wires again for good measure. This extra precaution can prevent severe injuries or even fatalities.
Always err on the side of caution when working with electricity, and never rush this important safety step.
Remove Existing Light Fixture
Often, replacing a ceiling fan begins with removing an existing light fixture. Before you start, verify the power is off and you've tested the wires with a voltage tester. Once you're certain it's safe, you can proceed with the removal process.
Begin by unscrewing the light fixture's decorative cover or globe. You'll likely find mounting screws holding the fixture to the electrical box. Remove these screws carefully, supporting the fixture as you do so. As the fixture lowers, you'll see the wire connections. Take note of how they're connected before disconnecting them.
To safely remove the old fixture:
- Untwist the wire nuts connecting the fixture's wires to the house wires.
- Separate the wires, making sure they don't touch each other or any metal parts.
- Gently pull the fixture away from the ceiling, being careful not to damage the surrounding area.
Once the old fixture is removed, you'll have clear access to the electrical box. Inspect it to confirm it's sturdy enough to support your new ceiling fan.
If it's not rated for ceiling fans, you'll need to install a new, fan-rated box before proceeding with the installation.
Install Mounting Bracket

After removing the old fixture, the next vital step is installing the mounting bracket. This critical component securely anchors your ceiling fan to the electrical box.
First, check if your existing box can support the fan's weight. If not, you'll need to install a new, fan-rated box.
To begin, turn off the power at the circuit breaker. Thread the wires through the center hole of the mounting bracket. Align the bracket with the screw holes in the electrical box. Use the provided screws to attach the bracket firmly, ensuring it's level and flush against the ceiling.
If your fan comes with a downrod, you'll need to attach it to the mounting bracket at this point. For flush-mount fans, you might need to adjust the bracket's position to accommodate the canopy.
Double-check that the bracket is securely fastened and can support the fan's weight. Some brackets have a hook for temporarily hanging the fan while you connect the wires. If yours doesn't, consider having a helper assist you during the next steps.
With the mounting bracket in place, you're ready to proceed with hanging the fan and connecting the wires.
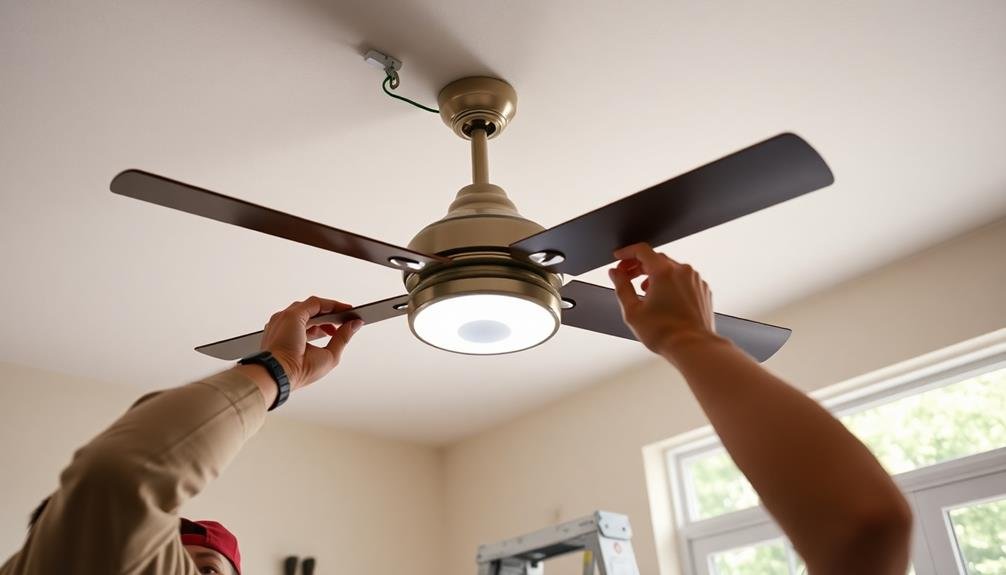
Connect Wiring and Attach Blades
Connecting the wiring and attaching the blades are essential steps in ceiling fan installation. Before you begin, verify the power is off at the circuit breaker. Carefully lower the fan's canopy to access the wiring. You'll typically see black, white, and green wires from both the ceiling and the fan. Connect matching colors using wire nuts, twisting them together securely. The green wire is for grounding and should be attached to the grounding screw on the mounting bracket.
Once the wiring is complete, it's time to attach the blades. Most fans come with pre-assembled blade brackets, making this process easier. Follow these steps:
- Align the blade with its bracket and insert the screws
- Tighten the screws, verifying the blade is secure but not over-tightened
- Attach the blade assembly to the fan motor, repeating for all blades
After attaching all blades, give them a gentle spin to verify they're balanced and don't wobble. If you notice any imbalance, double-check your work and make adjustments as needed.
With the wiring connected and blades attached, you're now ready to proceed with the final steps of your ceiling fan installation.
Test and Adjust Fan Operation

Finally, it's time to test your newly installed ceiling fan. Turn on the power at the circuit breaker and use the wall switch to activate the fan. Observe the blades' rotation to verify they're moving in the correct direction. For summer, they should spin counterclockwise to create a cooling downdraft. In winter, reverse the direction to clockwise for an updraft that circulates warm air.
Next, test all speed settings and any included light fixtures. Listen for unusual noises that might indicate loose parts or improper installation. If you notice any issues, turn off the power and address them immediately.
To enhance your fan's performance, consider the following adjustments:
| Season | Direction | Speed | Effect |
|---|---|---|---|
| Summer | Counterclockwise | High | Direct cooling |
| Summer | Counterclockwise | Low | Gentle breeze |
| Winter | Clockwise | Low | Heat circulation |
| Winter | Clockwise | Medium | Improved warmth |
Fine-tune the fan's height if your model allows for adjustments. Ideally, it should be 7-9 feet above the floor for ideal air circulation. Finally, clean the blades and housing regularly to maintain efficiency and prevent dust accumulation, which can affect the fan's balance and performance over time.
Frequently Asked Questions
How Do I Determine the Ideal Ceiling Fan Size for My Room?
To determine the ideal ceiling fan size, measure your room's square footage. For rooms up to 75 sq ft, choose a 29-36" fan. For 76-144 sq ft, go for 36-42". Larger rooms need 50-54" fans or multiple smaller ones.
Can I Install a Ceiling Fan on a Sloped or Vaulted Ceiling?
Yes, you can install a ceiling fan on a sloped or vaulted ceiling. You'll need a special downrod and adapter kit designed for angled ceilings. Make sure to choose a fan that's compatible with your ceiling's slope angle.
What's the Recommended Ceiling Height for Installing a Ceiling Fan?
You'll want a minimum ceiling height of 8 feet for ideal fan performance and safety. If you've got higher ceilings, consider using a downrod to position the fan 7-9 feet above the floor for best airflow.
Are There Smart Ceiling Fans That Can Be Controlled With a Smartphone?
Yes, you'll find many smart ceiling fans on the market. You can control these fans with your smartphone, adjusting speed, direction, and even lighting. They often integrate with home automation systems for added convenience and energy efficiency.
How Often Should I Clean and Maintain My Ceiling Fan?
You should clean your ceiling fan monthly to prevent dust buildup. Maintain it annually by tightening screws, checking blade balance, and lubricating if needed. Don't forget to wipe down blades and light fixtures regularly for ideal performance.
In Summary
You've successfully installed your energy-efficient ceiling fan! By following these steps, you've not only improved your home's comfort but also its energy efficiency. Remember to clean your fan regularly and check for any loose parts. Don't forget to switch the blade direction seasonally for peak performance. With proper maintenance, your new fan will provide years of cooling comfort and energy savings. Enjoy your upgraded space and reduced energy bills!


Leave a Reply