
To master passive solar site analysis, you'll need to understand key principles like building orientation, thermal mass, and shading solutions. Start by evaluating your site's topography, climate, and solar access. Analyze obstructions, wind patterns, and microclimates to optimize your design. Consider vegetation for natural shading and assess opportunities for thermal mass placement. Don't forget to account for seasonal variations in sun paths and wind directions. Use tools like sun charts and energy modeling software to refine your analysis. By following these steps, you'll create an energy-efficient, comfortable space that harnesses the power of the sun. Dive deeper to reveal the full potential of your passive solar design.
Understanding Passive Solar Design

The sun, our most abundant and reliable energy source, lies at the heart of passive solar design. This approach harnesses solar energy to heat, cool, and illuminate buildings without mechanical systems. You'll find that passive solar design relies on the building's orientation, materials, and architectural elements to maximize energy efficiency.
To implement passive solar design effectively, you'll need to take into account several key factors. First, orient your building to capture maximum sunlight during winter months while minimizing exposure in summer. South-facing windows are essential for this purpose.
Next, incorporate thermal mass materials like concrete, brick, or stone to absorb and store heat during the day, releasing it at night. You'll also want to focus on proper insulation and air sealing to maintain desired temperatures.
Overhangs, awnings, and deciduous trees can provide shade during hot summer months while allowing sunlight in winter. Additionally, think about using light-colored roofing materials to reflect excess heat.
Site Evaluation Basics
Several fundamental aspects of site evaluation form the foundation for effective passive solar design. You'll need to assess your site's topography, climate, and surrounding features to maximize solar potential. Start by examining the land's slope, orientation, and any natural or man-made obstructions that could impact sunlight exposure.
Next, analyze your local climate data, including temperature ranges, precipitation patterns, and prevailing winds. This information will help you determine the most effective passive solar strategies for your specific location. Don't forget to take into account seasonal variations, as the sun's path changes throughout the year.
Here's a quick reference table for key site evaluation factors:
| Factor | What to Take into Account | Impact on Design |
|---|---|---|
| Topography | Slope, elevation, landforms | Affects solar access, drainage |
| Climate | Temperature, precipitation, winds | Influences heating/cooling needs |
| Vegetation | Trees, shrubs, ground cover | Can provide shade or windbreaks |
Solar Access Assessment
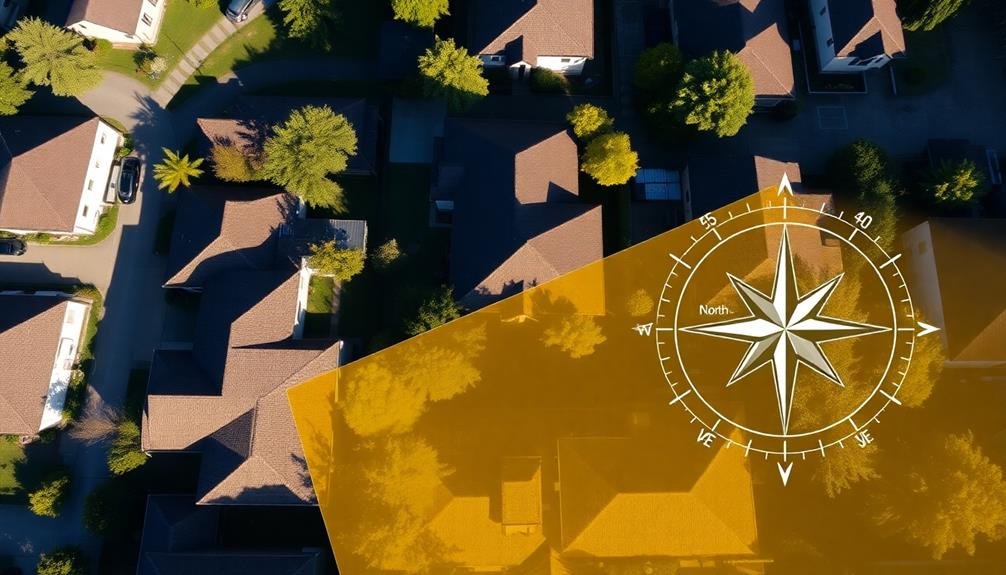
When evaluating solar access, you'll need to determine how much sunlight your site receives throughout the year.
Start by identifying potential obstructions like nearby buildings, trees, or landforms that might cast shadows on your property. You'll want to assess these obstacles during different seasons, as the sun's path changes throughout the year.
Use a solar pathfinder or sun chart to map the sun's trajectory across your site. This tool will help you visualize shading patterns and identify ideal locations for solar features.
Don't forget to take into account future developments or tree growth that could impact solar access in the coming years.
Measure the site's solar exposure during key times, such as the winter solstice when the sun is at its lowest point. This will give you a worst-case scenario for solar gain.
Also, check exposure during spring and fall equinoxes to understand year-round performance.
Analyze your findings to determine the best placement for passive solar elements like windows, thermal mass, and shading devices.
Analyzing Topography and Landforms
To analyze topography and landforms effectively, you'll need to contemplate three key aspects.
First, examine the slope orientation and exposure to determine how sunlight interacts with the terrain throughout the day.
Next, assess natural windbreaks like hills or dense vegetation that can protect your site from harsh winds.
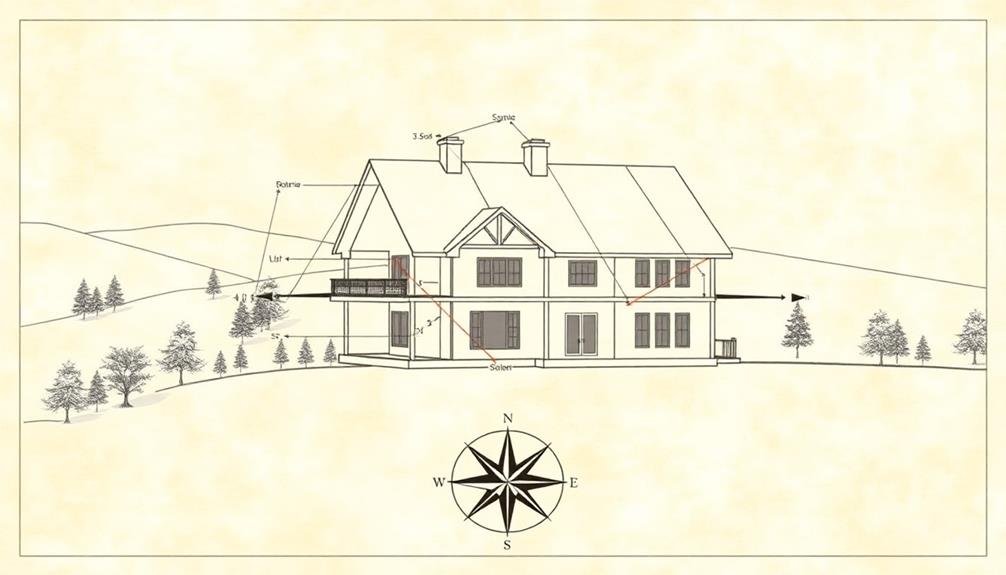
Slope Orientation and Exposure
Understanding the slope orientation and exposure of your site is essential for maximizing passive solar potential. When analyzing your property, pay close attention to the direction your slopes face and how they're exposed to sunlight throughout the day.
South-facing slopes in the Northern Hemisphere receive the most direct sunlight, making them ideal for passive solar design. They'll warm up faster in the morning and retain heat longer in the evening.
East-facing slopes catch early morning sun, which can be beneficial for warming spaces quickly after cool nights. West-facing slopes receive afternoon sun, potentially causing overheating issues in summer but providing valuable warmth in winter. North-facing slopes get the least direct sunlight and are generally cooler, which can be advantageous in hot climates but challenging in colder regions.
Consider how nearby landforms might affect your slope's exposure. Hills, mountains, or tall buildings can cast shadows that greatly impact solar access.
Use sun path diagrams or digital modeling tools to visualize how sunlight interacts with your site's topography throughout the year. This analysis will help you determine the best placement for your building and inform decisions about window sizes, shading devices, and thermal mass placement.
Natural Windbreaks Assessment
Natural windbreaks play an essential role in passive solar site analysis. These topographical features and landforms can notably impact your site's microclimate, affecting wind patterns and thermal comfort. To evaluate natural windbreaks, you'll need to carefully examine your site's surroundings.
Start by identifying any hills, ridges, or mountains near your property. These elevated landforms can deflect or channel winds, creating protected areas on their leeward sides.
Next, look for dense vegetation, such as forests or thick groves of trees. These natural barriers can reduce wind speeds and provide shelter for your building.
Don't forget to reflect on water bodies like lakes or rivers. They can influence local wind patterns and temperatures.
Also, pay attention to rock formations or large boulders, which can create small wind-protected pockets.
When evaluating these features, you'll want to observe them during different seasons and weather conditions. Wind patterns can change throughout the year, so it's vital to understand how these natural windbreaks perform in various scenarios.
Microclimate Identification Techniques
Beyond natural windbreaks, identifying microclimates through topography and landform analysis is essential for effective passive solar design.
You'll need to examine how the land's shape influences local climate conditions. Start by studying topographic maps and conducting on-site observations to identify key features like hills, valleys, slopes, and water bodies.
Pay close attention to elevation changes, as they can create temperature inversions and affect air movement. South-facing slopes receive more sunlight and are typically warmer, while north-facing slopes are cooler and shadier.
Valleys can trap cold air, creating frost pockets, while hilltops may experience stronger winds.
Look for natural depressions or bowls that can create unique microclimates. These areas often have different temperature and moisture patterns compared to surrounding terrain.
Don't forget to take into account nearby water bodies, as they can moderate temperatures and increase humidity.
Analyze how landforms interact with prevailing winds. Ridges and hills can create wind shadows or funnel air, affecting both cooling breezes and cold winter winds.
Climate Data Collection

Climate data forms the foundation of any successful passive solar site analysis. To gather this essential information, you'll need to collect both historical and current climate data for your specific location. Start by accessing reliable sources like the National Weather Service, local meteorological stations, or specialized climate databases.
You'll want to focus on key metrics such as temperature ranges, solar radiation levels, wind patterns, precipitation, and humidity.
Don't limit yourself to annual averages; gather monthly and even daily data when possible. This detailed information will help you identify seasonal variations and microclimatic trends. You can use online tools or smartphone apps to track real-time weather conditions at your site.
Additionally, consider installing a small weather station to collect site-specific data over an extended period. This will provide invaluable insights into your location's unique climate characteristics.
Remember to gather information on cloud cover patterns, as they greatly impact solar gain. Also, pay attention to the frequency and intensity of extreme weather events, as they may influence your passive solar design decisions.
Vegetation and Shading Analysis
Begin your vegetation analysis by evaluating the tree canopy on and around your site.
You'll need to contemplate how seasonal foliage changes affect sunlight penetration throughout the year.
Don't forget to assess existing landscaping and plan for strategic planting that can provide natural sun control, enhancing your passive solar design.
Tree Canopy Assessment
A lush canopy of trees can greatly impact your passive solar design. To evaluate tree canopy effectively, you'll need to take into account both deciduous and evergreen trees on your property.
Start by mapping out the location of each tree, noting its species, height, and canopy spread. This information will help you understand how trees affect solar access throughout the year.
For deciduous trees, observe their leaf patterns in different seasons. In winter, they'll allow more sunlight to reach your home, while providing shade in summer.
Evergreens, on the other hand, offer year-round shading. Use a solar pathfinder or smartphone apps to track the sun's path and determine how tree shadows will fall on your building site.
Reflect on the future growth of trees and how it might impact your passive solar design. You may need to plan for selective pruning or removal of certain trees to optimize solar gain.
Don't forget to check local regulations regarding tree removal or modification. By thoroughly evaluating your tree canopy, you'll be able to make informed decisions about placement and design elements for your passive solar home.
Seasonal Foliage Changes
The ever-changing landscape of foliage presents both challenges and opportunities for passive solar design. As you analyze your site, you'll need to evaluate how seasonal variations in leaf coverage affect solar exposure and shading patterns.
During winter, deciduous trees lose their leaves, allowing more sunlight to reach your building. This can be beneficial for passive solar heating. However, in summer, these same trees provide valuable shade, reducing cooling needs. You'll want to map out the locations of deciduous trees and estimate their shading impact throughout the year.
Evergreen trees, on the other hand, maintain their foliage year-round. They can be useful for blocking cold winter winds but may also obstruct desired solar gain. You'll need to carefully assess their placement and potential impact on your passive solar strategy.
To accurately gauge seasonal changes, conduct site visits during different times of the year. Take photographs and make detailed notes about shadow patterns.
You can also use software tools that simulate seasonal sun paths and vegetation growth to predict future shading scenarios. By understanding these cyclical changes, you'll be better equipped to optimize your passive solar design for year-round performance.
Landscaping for Sun Control
Strategically placed vegetation can greatly impact your passive solar design's effectiveness. When conducting a site analysis, you'll need to evaluate existing trees, shrubs, and other plants for their potential to provide shade or allow sunlight to pass through.
Consider both deciduous and evergreen species, as they'll affect your home differently throughout the year.
To maximize winter sun exposure, focus on the southern side of your property. You'll want to keep this area relatively clear of tall, dense vegetation that could block precious sunlight during colder months.
However, don't overlook the benefits of deciduous trees here. They'll provide shade in summer while allowing sunlight to penetrate when leaves fall.
On the east and west sides, you can use trees and shrubs to control morning and afternoon sun. This is particularly important for west-facing windows, which can lead to overheating in summer.
Consider fast-growing species or temporary shading solutions while waiting for trees to mature.
Don't forget vertical landscaping elements like trellises or pergolas with climbing plants. These can offer flexible, seasonal shading options for windows and outdoor living spaces.
Building Orientation Considerations
Three key factors guide ideal building orientation in passive solar design: sun path, prevailing winds, and site topography.
To maximize solar gain, you'll want to position your building's long axis east-west, with the majority of windows facing south (in the Northern Hemisphere). This orientation allows for maximum sun exposure during winter months when heating is needed most.
Consider prevailing winds when planning your building's orientation. You can use wind patterns to your advantage for natural cooling in summer, or shield against cold winter winds. Analyze local wind data to determine the best positioning for ventilation and protection.
Your site's topography plays an essential role in building orientation. Slopes facing south or southeast are ideal for passive solar design, as they receive more direct sunlight.
However, be mindful of potential shading from nearby hills or mountains. You may need to adjust your building's position to avoid these obstacles.
Don't forget to account for future developments or tree growth that could impact solar access.
Thermal Mass Opportunities
When evaluating thermal mass opportunities for passive solar design, you'll need to focus on three key aspects.
First, identify suitable materials with high heat capacity, such as concrete, stone, or water.
Next, consider ideal placement strategies, placing thermal mass in areas that receive direct sunlight or where heat naturally accumulates.
Identifying Suitable Materials
Selecting appropriate materials for thermal mass is essential in passive solar design. You'll want to choose materials that can effectively absorb, store, and release heat. Common options include concrete, brick, stone, and water. These materials have high thermal capacities, allowing them to store large amounts of heat energy.
When identifying suitable materials for your passive solar design, consider these key factors:
- Heat capacity: Look for materials with high specific heat capacity, which measures the amount of heat energy required to raise the temperature of a given mass by one degree.
- Density: Denser materials generally have better thermal mass properties, as they can store more heat in a smaller volume.
- Thermal conductivity: Materials with moderate thermal conductivity allow for efficient heat transfer without rapid loss or gain.
You should also consider the color and texture of the materials, as darker surfaces absorb more solar radiation.
Additionally, think about the placement of thermal mass within your design. Locating it in areas that receive direct sunlight during winter months will maximize its effectiveness.
Optimal Placement Strategies
Now that you've identified suitable materials for thermal mass, it's time to explore excellent placement strategies. To maximize the effectiveness of thermal mass in your passive solar design, you'll need to carefully consider its location within your structure.
For optimal performance, place thermal mass directly in the path of sunlight entering through south-facing windows. This allows the mass to absorb and store heat during the day, releasing it slowly at night. Consider using dark-colored flooring or walls in sunlit areas to enhance heat absorption.
Don't overlook vertical thermal mass opportunities. Interior walls perpendicular to south-facing windows can capture reflected sunlight and store heat effectively. In two-story spaces, a thermal mass wall on the north side can absorb heat rising from lower levels.
For summer cooling, position thermal mass away from direct sunlight but where it can still benefit from natural ventilation. This might include north-facing walls or floors shaded by overhangs.
Remember to balance thermal mass distribution throughout your living spaces to maintain consistent temperatures. Avoid concentrating all thermal mass in one area, as this can lead to uneven heating and cooling.
Calculating Thermal Mass Needs
Three key factors determine the amount of thermal mass needed in your passive solar design: climate, building size, and window area.
To calculate your thermal mass requirements, you'll need to assess these elements carefully. Start by examining your local climate data, focusing on temperature fluctuations and solar radiation levels.
Next, consider your building's size and layout. Larger spaces typically require more thermal mass to maintain stable temperatures.
Finally, evaluate your south-facing window area, as this directly impacts solar heat gain.
To calculate thermal mass needs:
- Determine your climate zone and corresponding thermal mass recommendations
- Measure your total floor area and multiply by the recommended thermal mass per square foot
- Adjust based on your window-to-floor area ratio, increasing thermal mass for larger window areas
Wind Patterns and Microclimate

Breezes and gusts play an essential role in passive solar site analysis. You'll need to understand local wind patterns and microclimates to optimize your passive solar design. Start by observing prevailing winds and their seasonal variations. Use weather data and on-site observations to identify wind direction, speed, and frequency.
Consider how nearby landscape features affect airflow. Hills, valleys, and vegetation can create unique microclimates that impact your site's temperature and humidity. You'll want to harness cooling breezes in summer while blocking cold winter winds.
Here's a quick guide to wind considerations in different seasons:
| Season | Wind Goal | Design Strategy |
|---|---|---|
| Summer | Cooling | Channel breezes |
| Fall | Moderate | Flexible control |
| Winter | Blocking | Windbreaks |
| Spring | Ventilation | Operable openings |
| Year-round | Air quality | Filtration |
Analyze your site's exposure to wind and sun throughout the year. Use this information to position your building, design windbreaks, and plan openings for natural ventilation. Remember, wind patterns can greatly affect your passive solar system's efficiency, so careful analysis is vital for success.
Energy Modeling Tools
Energy modeling tools have become indispensable for passive solar site analysis. These sophisticated software programs help you simulate and evaluate the energy performance of your building design before construction begins. By inputting data about your site's climate, orientation, and building specifications, you'll gain valuable insights into how your design will perform in real-world conditions.
When selecting an energy modeling tool, consider these key factors:
- Accuracy: Choose software that uses validated algorithms and up-to-date climate data for reliable results.
- User-friendliness: Opt for tools with intuitive interfaces and clear documentation to streamline your workflow.
- Compatibility: Verify the software integrates well with your existing design tools and can export data in formats you need.
Popular energy modeling tools include EnergyPlus, PHPP (Passive House Planning Package), and DesignBuilder. These programs can help you optimize building orientation, window placement, thermal mass, and shading strategies.
You'll be able to compare different design options and make informed decisions to maximize your building's passive solar performance. By leveraging these powerful tools, you'll create more energy-efficient and comfortable buildings while reducing reliance on active heating and cooling systems.
Implementing Your Site Analysis

Armed with the insights from your site analysis and energy modeling, it's time to put your findings into action. Start by prioritizing your design elements based on their impact and feasibility. Focus on optimizing building orientation, window placement, and thermal mass distribution to maximize passive solar gains.
Next, integrate your findings into your architectural plans. Adjust room layouts to align with solar exposure patterns, and incorporate shading devices where needed. Don't forget to take into account seasonal variations in sun angles and intensity.
| Design Element | Summer Considerations | Winter Considerations |
|---|---|---|
| Windows | Minimize west-facing | Maximize south-facing |
| Overhangs | Extend for shade | Retract for sun |
| Thermal Mass | Night flushing | Daytime heat absorption |
As you implement your site analysis, remember to balance passive solar strategies with other design goals. Reflect on the local climate, building codes, and client preferences. Be prepared to make trade-offs and adjustments as needed.
Frequently Asked Questions
How Much Does a Professional Passive Solar Site Analysis Typically Cost?
You'll typically pay between $500 and $2,000 for a professional passive solar site analysis. Costs vary based on property size, location, and the analyst's experience. It's a worthwhile investment for optimizing your home's energy efficiency.
Can Passive Solar Design Be Effectively Implemented in Renovations of Existing Buildings?
Yes, you can effectively implement passive solar design in existing building renovations. You'll need to assess your current structure, consider sun exposure, and make strategic modifications like adding south-facing windows or thermal mass to optimize solar gains.
What Certifications or Qualifications Should I Look for in a Passive Solar Consultant?
When seeking a passive solar consultant, you'll want to look for certifications like LEED AP, NABCEP, or RESNET. You should also check for degrees in architecture, engineering, or sustainable design, and proven experience with passive solar projects.
How Long Does It Usually Take to Complete a Comprehensive Site Analysis?
You'll typically need 1-2 weeks for an extensive site analysis. It depends on the property's size and complexity. You're looking at several site visits, data collection, and analysis. Don't rush it; detailed assessment's vital for success.
Are There Any Government Incentives for Implementing Passive Solar Design in Homes?
Yes, you'll find various government incentives for passive solar design in homes. These often include tax credits, grants, and rebates. Check with your local and federal energy offices to learn about specific programs available in your area.
In Summary
You've now got the tools to conduct a thorough passive solar site analysis. By understanding solar access, topography, climate, thermal mass, and wind patterns, you're well-equipped to make informed design decisions. Don't forget to use energy modeling tools to refine your approach. With this knowledge, you'll be able to create energy-efficient, comfortable spaces that work in harmony with their environment. It's time to put your skills into practice and revolutionize your designs.


Leave a Reply