
Zoning your radiant floor heating system enhances comfort and efficiency by allowing independent temperature control in different areas. Start by creating a detailed floor plan and grouping areas with similar heating needs. Install zone valves and thermostats for each zone, ensuring proper wiring and placement. Configure manifolds and pumps to distribute heated water effectively. Balance heat distribution by adjusting flow rates and testing each zone individually. Use programmable thermostats and consider smart controls for peak performance. Regular maintenance and seasonal adjustments will keep your system running smoothly. With careful planning and implementation, you'll enjoy personalized comfort and energy savings throughout your home.
Understanding Radiant Floor Heating Zones
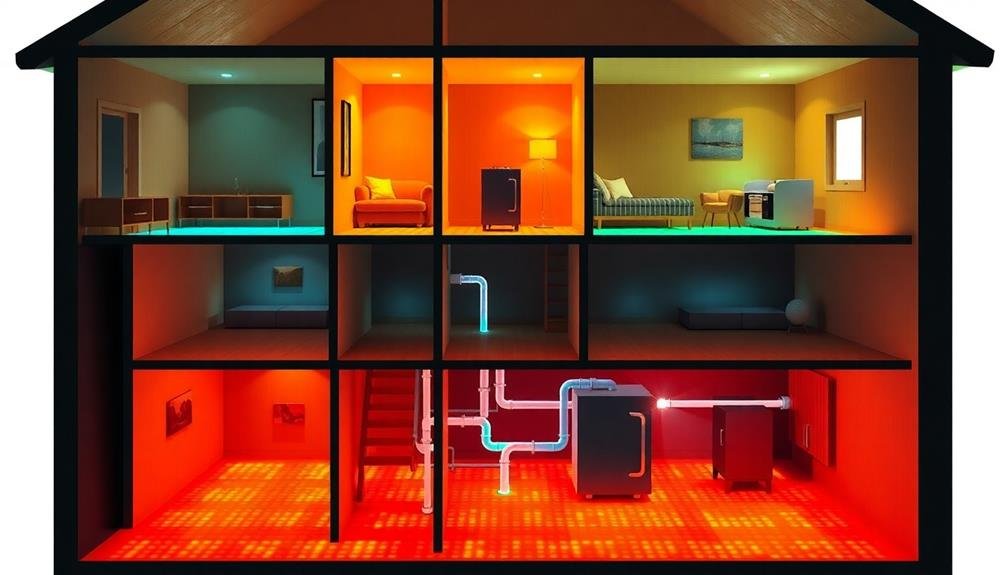
When it comes to radiant floor heating, understanding zones is essential for ideal comfort and efficiency.
Zones are separate areas within your home that can be controlled independently, allowing you to customize temperatures in different rooms or spaces. Each zone has its own thermostat and control valve, giving you precise control over heating in specific areas.
Zones are typically divided based on factors like room usage, sun exposure, and occupancy patterns. For example, you might create separate zones for bedrooms, living areas, and bathrooms. This zoning approach allows you to heat only the spaces you're using, saving energy and money.
Consider your home's layout and your family's habits when planning zones. You'll want to group areas with similar heating needs together.
For instance, north-facing rooms might be in one zone, while south-facing rooms form another. Don't forget to account for different floor coverings, as they can affect heat distribution. Hardwood, tile, and carpet all transfer heat differently.
Benefits of Zoning Systems
Zoning systems in radiant floor heating offer a range of advantages that can transform your home's comfort and efficiency. By dividing your living space into separate heating zones, you'll gain precise control over temperature in different areas. This means you can adjust the warmth in each room according to its use and occupancy, ensuring ideal comfort throughout your home.
One of the most significant benefits is energy savings. You'll no longer waste heat in unoccupied rooms, as you can lower or turn off the heat in unused areas. This targeted approach can lead to substantial reductions in your energy bills.
Zoning also allows for personalized comfort, as family members with different temperature preferences can adjust their own spaces.
Moreover, zoned systems can extend the lifespan of your heating equipment. By reducing the workload on your system, you'll experience less wear and tear, potentially lowering maintenance costs.
You'll also enjoy faster heating response times, as each zone can be controlled independently. This flexibility is particularly useful in homes with varying heat loss rates or sun exposure across different rooms, allowing you to compensate for these factors effectively.
Planning Your Zoning Layout

Before diving into the installation process, it's crucial to carefully plan your radiant floor heating zones. Start by creating a detailed floor plan of your home, including all rooms and their dimensions. Identify areas with similar heating needs and group them together.
Consider factors like room usage, sun exposure, and insulation levels when determining zones.
Next, assess your home's layout and decide on the number of zones you'll need. Typically, you'll want separate zones for living areas, bedrooms, and bathrooms.
Don't forget to account for large, open spaces that may require multiple zones for maximum comfort.
Evaluate your heating requirements for each zone, taking into account the desired temperature and occupancy patterns. This will help you determine the appropriate tubing layout and manifold locations.
Consider installing temperature sensors in each zone to guarantee accurate control.
Selecting Appropriate Control Systems
Selecting the right control systems is essential for maximizing the efficiency and comfort of your zoned radiant floor heating. You'll need to choose between programmable and smart thermostats, each offering different levels of control and convenience. Programmable thermostats allow you to set specific temperatures for different times of the day, while smart thermostats learn your habits and adjust automatically.
For multi-zone systems, consider a central control panel that manages all zones from one location. This makes it easier to monitor and adjust temperatures throughout your home.
You'll also need to decide on individual room controls, such as wall-mounted thermostats or floor sensors. Floor sensors are particularly useful in bathrooms and other areas where precise floor temperature control is important.
Don't forget about outdoor reset controls, which adjust the water temperature in your system based on outdoor conditions. This improves efficiency and reduces energy costs.
Installing Zone Valves
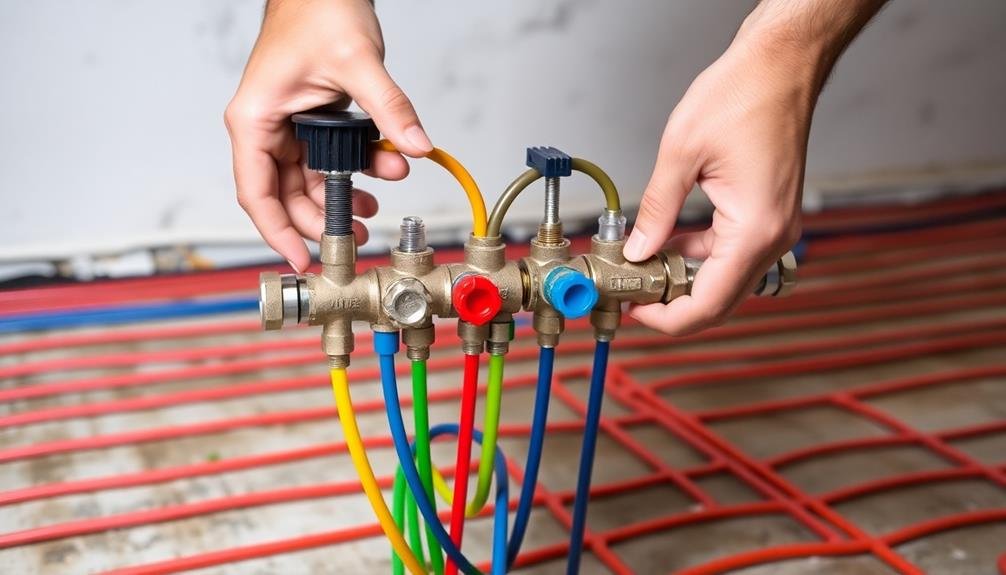
The heart of your zoned radiant floor heating system lies in its zone valves. These essential components control the flow of heated water to different areas of your home, allowing for precise temperature management in each zone. When installing zone valves, you'll need to carefully consider their placement and configuration to guarantee peak performance.
Start by identifying the ideal locations for your zone valves. They should be easily accessible for maintenance and positioned near the manifold that distributes water to your radiant floor loops.
Once you've determined the placement, follow these steps:
- Shut off the main water supply and drain the system
- Cut the supply pipes at the designated valve locations
- Install the zone valves using appropriate fittings and soldering techniques
Make sure that you're using the correct size and type of zone valves for your system. Most residential systems use 3/4-inch or 1-inch valves, but always consult your system's specifications.
It's also vital to wire the zone valves correctly, connecting them to your thermostats and control panel. This allows for seamless communication between your heating zones and the central control system, maximizing efficiency and comfort throughout your home.
Setting Up Thermostats
After installing your zone valves, you'll need to set up thermostats for each heating zone. Choose programmable thermostats for ideal energy efficiency and comfort. Mount them on interior walls, away from direct sunlight, drafts, and heat sources. Confirm they're at a comfortable height for easy access.
Wire the thermostats to their respective zone valves and connect them to your home's electrical system. Follow the manufacturer's instructions carefully, and if you're not confident in your electrical skills, hire a professional.
Program your thermostats according to your daily schedule and preferences. You can set different temperatures for various times of the day and week. Here's a sample programming schedule:
| Time | Weekday | Weekend |
|---|---|---|
| 6 AM | 68°F | 66°F |
| 9 AM | 62°F | 68°F |
| 5 PM | 70°F | 70°F |
Experiment with settings to find the perfect balance between comfort and energy efficiency. Remember, radiant floor heating systems respond slowly, so avoid frequent temperature changes. Instead, maintain a consistent temperature throughout the day for ideal performance and energy savings. Regularly check and adjust your thermostat settings to confirm they're meeting your needs and maximizing your system's efficiency.
Configuring Manifolds and Pumps
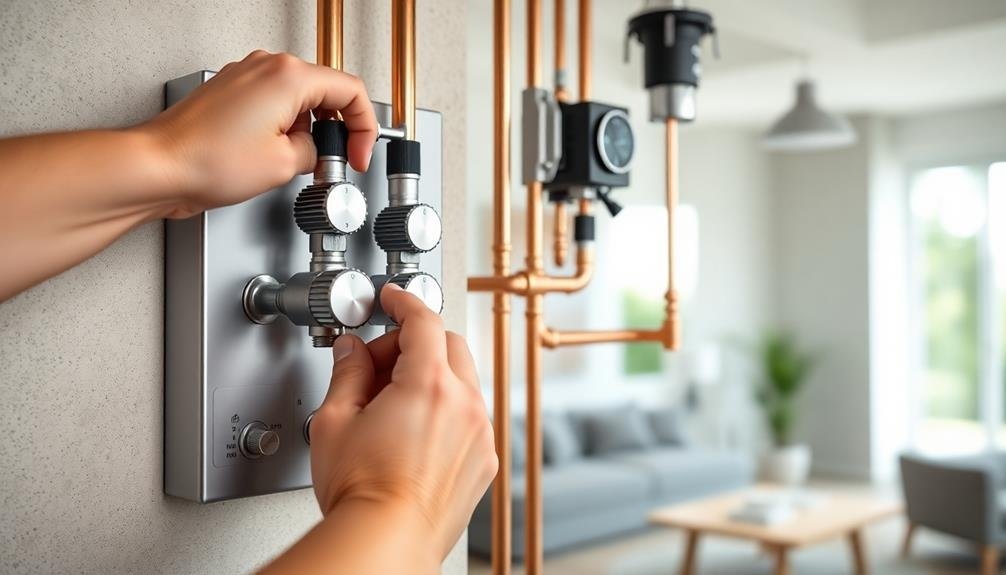
Manifolds and pumps form the heart of your zoned radiant floor heating system. They're responsible for distributing heated water to different zones and guaranteeing proper circulation. When configuring your manifolds and pumps, you'll need to take into account the number of zones, flow rates, and temperature requirements for each area.
Start by selecting the right manifold size based on the number of loops in your system. Confirm it has enough ports to accommodate all zones. Next, install the manifold in a central, accessible location, typically near your boiler or heat source. Connect the supply and return lines from your heat source to the manifold.
For peak performance, follow these steps when configuring your pumps:
- Choose the correct pump size based on your system's flow rate and head pressure
- Install a pump for each zone or use a single pump with zone valves
- Set up pump controls to work in tandem with your thermostats
Adjust the flow rates for each zone using balancing valves on the manifold. This guarantees even heat distribution throughout your home.
Remember to insulate all exposed pipes to minimize heat loss and improve efficiency. Regular maintenance of your manifolds and pumps will help keep your radiant floor heating system running smoothly for years to come.
Balancing Heat Distribution
Properly balancing heat distribution is essential for maximizing the comfort and efficiency of your zoned radiant floor heating system. To achieve this, you'll need to adjust the flow rates in each zone to guarantee even heat distribution throughout your home.
Start by setting all zone valves to their fully open position. Turn on your system and allow it to reach its normal operating temperature. Use an infrared thermometer to measure the surface temperature of each zone. Pay attention to any cold spots or areas that heat up faster than others.
Next, adjust the flow control valves on your manifold for each zone. Reduce flow to zones that heat up quickly and increase flow to cooler areas. Make small adjustments and wait for the system to stabilize before taking new measurements. Repeat this process until you achieve consistent temperatures across all zones.
Don't forget to take into account factors like sun exposure, insulation, and room usage when balancing your system. You may need to make seasonal adjustments to maintain ideal comfort.
Regular monitoring and fine-tuning will help guarantee your radiant floor heating system operates at peak efficiency year-round.
Testing and Troubleshooting Zones
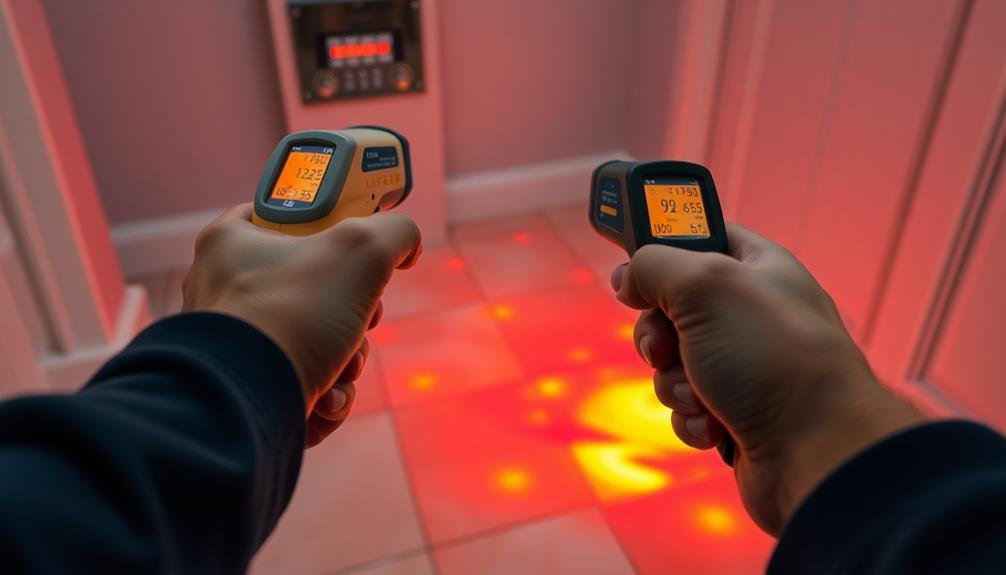
Once your radiant floor heating system is installed and balanced, it's crucial to test each zone and troubleshoot any issues.
Begin by turning on each zone individually and monitoring its performance. Use an infrared thermometer to check for consistent heat distribution across the floor surface. Pay attention to any cold spots or areas that heat up slower than others, as these may indicate problems with the tubing or insulation.
If you encounter issues, consider the following troubleshooting steps:
- Check the thermostat settings and verify they're correctly programmed for each zone.
- Inspect the manifold and valves for any leaks or blockages that could affect water flow.
- Verify that air hasn't become trapped in the system, which can impede proper circulation.
For more complex problems, you may need to consult a professional. They can use specialized equipment to detect leaks, assess flow rates, and identify any electrical issues.
Remember to document your testing process and results for future reference. Regular maintenance and prompt troubleshooting will help guarantee your radiant floor heating system operates efficiently and provides consistent comfort throughout your home for years to come.
Frequently Asked Questions
Can Radiant Floor Heating Be Installed in Existing Homes?
Yes, you can install radiant floor heating in existing homes. It's possible with both electric and hydronic systems. You'll need to take into account your flooring type, budget, and energy efficiency goals. Retrofitting may require some floor modifications.
How Long Does a Typical Zoned Radiant Floor Heating System Last?
You can expect your zoned radiant floor heating system to last 20-35 years with proper maintenance. It's durable and long-lasting, but you'll need to care for the boiler, pumps, and pipes to maximize its lifespan.
Are There Any Health Benefits Associated With Radiant Floor Heating?
You'll enjoy several health benefits with radiant floor heating. It reduces dust circulation, improves air quality, and maintains consistent humidity. You'll also experience better blood circulation and reduced joint pain due to warm, even temperatures.
Can Radiant Floor Heating Be Used With Different Flooring Materials?
Yes, you can use radiant floor heating with various flooring materials. It works well with tile, stone, and concrete. You'll also find it compatible with engineered wood, vinyl, and carpet, though they may reduce efficiency slightly.
What Is the Average Cost Difference Between Zoned and Non-Zoned Systems?
You'll typically pay 20-30% more for a zoned system compared to a non-zoned one. However, you'll save on energy costs in the long run by heating only the areas you're using. It's a smart investment.
In Summary
You've now mastered the art of zoning your radiant floor heating system. By following this guide, you've created a more efficient and comfortable home environment. Remember to regularly maintain your system and adjust zones as needed. Don't hesitate to consult a professional if you encounter any issues. With your newfound knowledge, you'll enjoy personalized warmth throughout your home for years to come. Embrace the cozy comfort of your well-zoned radiant floors!


Leave a Reply