
Installing a solar charge controller is straightforward with the right preparation. You'll need basic tools like screwdrivers, wire strippers, and a multimeter. Choose a cool, dry location near your battery bank for mounting. Connect your solar panels and batteries to the controller, ensuring proper polarity. Set the correct voltage parameters for your battery type, and attach any loads to the designated terminals. Program the controller settings, then test the system to verify everything's working correctly. Regular maintenance, including checking connections and cleaning panels, will keep your system running smoothly. With these steps, you'll be on your way to harnessing solar power efficiently.
Understanding Solar Charge Controllers

A solar charge controller is an essential component in any off-grid solar power system. It regulates the voltage and current coming from your solar panels to your batteries, preventing overcharging and extending battery life.
You'll typically find two main types: PWM (Pulse Width Modulation) and MPPT (Maximum Power Point Tracking) controllers.
PWM controllers are simpler and more affordable, best suited for smaller systems. They work by gradually reducing the amount of power going to your batteries as they approach full charge.
MPPT controllers, on the other hand, are more efficient and can extract more power from your solar panels, especially in less-than-ideal conditions.
When choosing a controller, consider your system's voltage, the total wattage of your solar panels, and your battery bank's capacity.
You'll also need to decide between a negative-ground or positive-ground controller, depending on your system's configuration.
Look for features like temperature compensation, which adjusts charging parameters based on battery temperature, and display screens that show system performance data.
Tools and Materials Needed
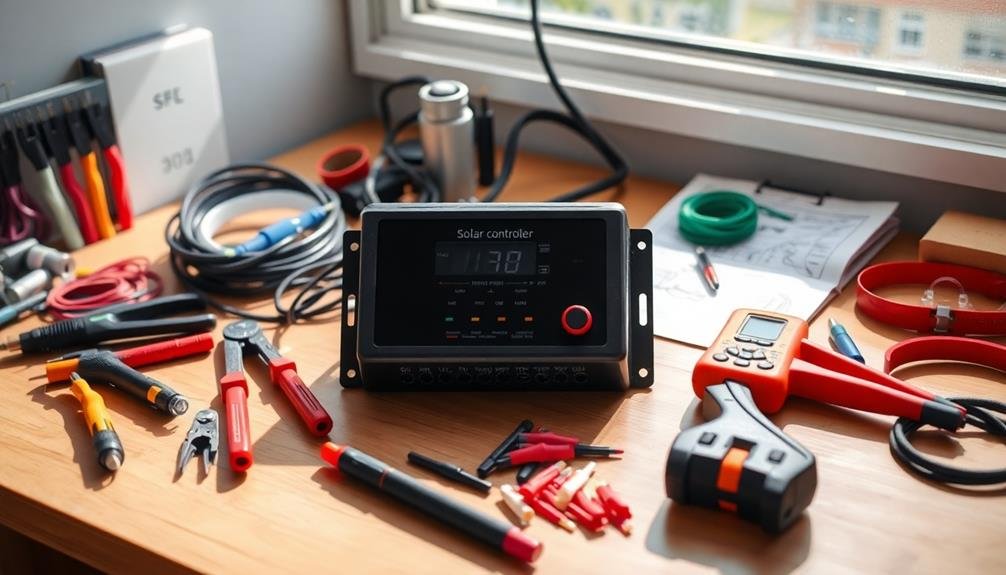
Before you begin installing your solar charge controller, gather all the necessary tools and materials.
You'll need essential hand tools like screwdrivers, wire strippers, and a multimeter, along with the controller itself and appropriate connectors.
Don't forget to prioritize safety by having protective gear such as gloves and safety glasses on hand.
Essential Hand Tools
Several essential hand tools are required for a successful solar charge controller installation.
You'll need a set of screwdrivers, including both flathead and Phillips head types in various sizes. A wire stripper is vital for preparing cable ends, while wire cutters will help you trim wires to the appropriate length.
Don't forget a pair of pliers, which come in handy for gripping and bending wires. A multimeter is indispensable for testing voltage, current, and continuity throughout the installation process.
You'll also need a crimping tool to attach connectors securely to your wires. A socket set or adjustable wrench may be necessary for mounting the controller and tightening connections.
For safety, always have electrical tape on hand to insulate exposed wires. A flashlight or headlamp will illuminate dark areas, especially when working in confined spaces.
Finally, consider having a label maker or permanent marker to clearly identify wires and connections. These tools will guarantee you can complete the installation efficiently and safely.
Remember to keep all tools organized and easily accessible throughout the process.
Controller and Connectors
Typically, you'll need a solar charge controller compatible with your system's voltage and amperage requirements. Choose between PWM (Pulse Width Modulation) and MPPT (Maximum Power Point Tracking) controllers based on your system's size and efficiency needs. Confirm you have the appropriate connectors for your specific setup, such as MC4 connectors for solar panels and battery terminals for your battery bank.
You'll also need:
| Item | Purpose |
|---|---|
| Wire strippers | Prepare cable ends |
| Cable lugs | Secure connections |
| Heat shrink tubing | Insulate connections |
| Multimeter | Test connections |
Don't forget to gather the necessary cables, which should be appropriately sized for your system's current. Use copper wire with proper insulation rated for outdoor use. If you're mounting the controller indoors, you may need conduit to protect the wires running from the solar panels.
Remember to have a circuit breaker or fuse ready to install between the controller and the battery for added safety. This protective device should be rated for your system's maximum current. Finally, confirm you have the controller's manual on hand for reference during installation.
Safety Equipment
Safety should be your top priority when installing a solar charge controller. You'll need to gather essential safety equipment before beginning the installation process.
Start with personal protective gear: wear safety glasses to shield your eyes from potential sparks or debris, and use insulated gloves to protect against electrical shocks. Don't forget sturdy, close-toed shoes for added protection.
Make certain you have a fire extinguisher nearby in case of emergencies. A multimeter is vital for testing voltage and continuity, helping you avoid electrical mishaps. You'll also need wire strippers and cutters for preparing cables safely.
Consider using a non-contact voltage tester to check for live wires before handling them. If you're working at heights, use a stable ladder and wear a safety harness. Keep a first aid kit on hand for minor injuries.
It's wise to have a partner present during installation for added safety and assistance. Finally, familiarize yourself with the local electrical codes and safety regulations before starting.
Choosing the Right Location

When installing your solar charge controller, you'll want to select an ideal location.
Position it near the battery bank for efficient wiring and reduced voltage drop.
Make certain it's away from heat sources to prevent overheating and keep it easily accessible for future maintenance and monitoring.
Near the Battery Bank
The ideal location for your solar charge controller is as close to the battery bank as possible. This proximity minimizes voltage drop and power loss in the cables connecting the controller to the batteries. By keeping these cables short, you'll maximize the efficiency of your solar charging system and guarantee that your batteries receive the full benefit of the solar energy collected.
When installing your charge controller near the battery bank, make sure there's adequate ventilation to prevent overheating. Don't place it directly above the batteries, as battery gases can corrode the controller's components. Instead, mount it on a nearby wall or shelf, making sure it's easily accessible for monitoring and maintenance.
Consider the length of the cables from your solar panels to the controller. While it's vital to keep the controller-to-battery distance short, you have more flexibility with the panel-to-controller wiring. If necessary, use larger gauge wire for longer runs from the panels to minimize voltage drop.
Lastly, protect your charge controller from the elements. If it's not rated for outdoor use, install it in a weatherproof enclosure or indoors. This will extend its lifespan and maintain peak performance.
Away From Heat Sources
Invariably, heat is the enemy of electronic devices, and solar charge controllers are no exception. When installing your controller, you'll need to choose a location that's well away from heat sources to guarantee ideal performance and longevity.
First, avoid placing the controller near windows or areas exposed to direct sunlight. The sun's rays can greatly increase the ambient temperature around the device.
Next, keep it away from heating vents, radiators, or any other heating appliances. These can cause localized hot spots that may affect the controller's efficiency.
Don't install the controller near other heat-generating equipment like inverters or batteries. These devices often produce heat during operation, which can impact the controller's performance.
If possible, mount the controller on a cool surface, such as a metal backplate, which can help dissipate heat.
Guarantee proper ventilation around the controller. Leave enough space on all sides to allow for air circulation.
If you're installing it in an enclosure, consider adding vents or a small fan to maintain airflow.
Accessible for Maintenance
Accessibility is key when choosing a location for your solar charge controller. You'll need to perform regular maintenance and occasional troubleshooting, so install it in an easily reachable spot. Avoid placing it behind heavy equipment or in tight corners that require contortions to access.
Consider mounting the controller at eye level or slightly below for easy reading of displays and indicators. This placement allows you to quickly check the system's status and make adjustments without straining. Make sure there's enough space around the controller to comfortably work with tools and connect or disconnect wires when needed.
If you're installing the controller in an enclosure, choose one with a hinged door for quick access. Leave ample room inside the enclosure for wire management and future system expansions. Don't forget to account for ventilation needs when planning the controller's location.
For outdoor installations, protect the controller from direct exposure to elements while maintaining accessibility. Use weather-resistant enclosures with lockable doors to prevent unauthorized access. Position the controller so you can easily reach it without maneuvering through mud, snow, or other obstacles that might accumulate around your solar setup.
Mounting the Charge Controller

Mounting your charge controller correctly is essential for its best performance and longevity. Choose a cool, dry location indoors, away from direct sunlight and moisture. Make certain the area has good ventilation to prevent overheating. The mounting surface should be flat, stable, and able to support the controller's weight.
Before drilling holes, use the controller or its mounting template to mark the exact positions. If you're mounting on drywall, locate the studs or use appropriate anchors. For metal surfaces, use self-tapping screws or pre-drill pilot holes. Leave enough space around the controller for wire connections and air circulation.
- Mount vertically with terminals facing down to optimize cooling
- Keep at least 6 inches of clearance above and below the controller
- Avoid mounting near flammable materials or in enclosed spaces
Once you've secured the controller, double-check its stability. Make certain it's level and doesn't wobble. If your controller has a display, make sure it's easily readable from your standing position.
Remember to leave enough slack in the wires to allow for future adjustments or maintenance. With proper mounting, you'll set the foundation for a reliable and efficient solar charging system.
Connecting Solar Panels

With the charge controller securely mounted, it's time to connect your solar panels. Begin by identifying the positive and negative terminals on your charge controller labeled for solar panel input. These are typically marked with a sun icon or "PV" (photovoltaic).
Next, locate the cables coming from your solar panels. If you have multiple panels, make certain they're wired correctly in series or parallel according to your system design. Strip the ends of these cables if necessary, exposing about 1/2 inch of wire.
Before making any connections, double-check that your solar panels are covered or disconnected to prevent live current.
Now, connect the positive (usually red) solar panel cable to the positive terminal on the charge controller. Similarly, connect the negative (usually black) cable to the negative terminal. Use a screwdriver to tighten the terminal screws securely, making sure of a solid connection.
If your charge controller has MC4 connectors, simply plug in the corresponding male and female connectors from your solar panels. Always follow the manufacturer's instructions for your specific model, as connection methods may vary slightly.
Once connected, your solar panels are ready to feed power to the charge controller.
Wiring the Battery Bank
After connecting your solar panels, you'll need to wire the battery bank to your charge controller.
Start by securely attaching the battery cables to the appropriate terminals on your controller, ensuring proper polarity.
Once connected, you'll set the voltage parameters on your charge controller to match your battery bank's specifications, optimizing the charging process.
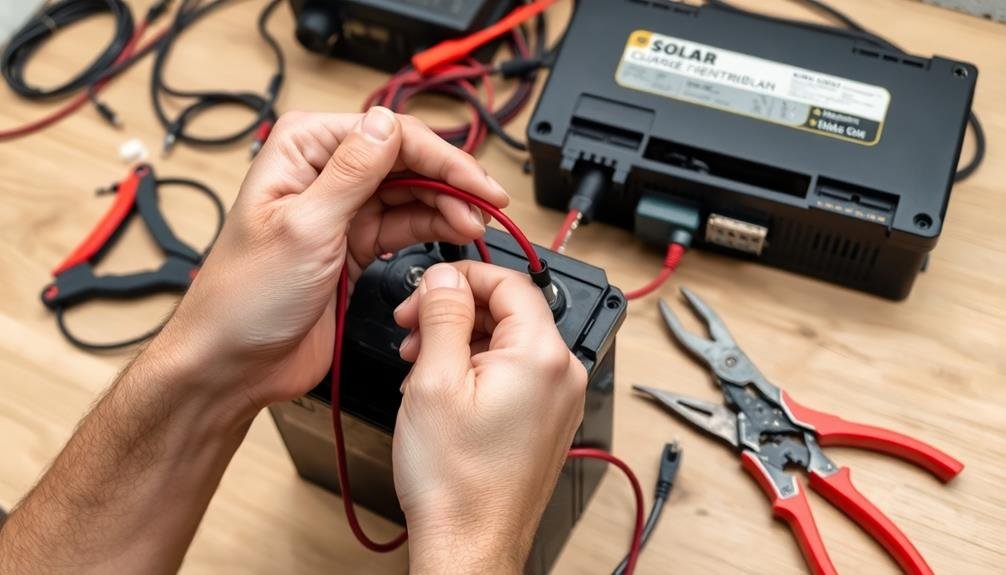
Connect Battery Cables
Once you've secured the charge controller to its mounting surface, it's time to connect the battery cables. Start by identifying the positive and negative terminals on your charge controller and battery bank. Typically, these are color-coded red for positive and black for negative.
Measure the distance between the controller and battery bank to determine the appropriate cable length, guaranteeing you have enough slack for a clean installation.
Strip the ends of your battery cables, exposing about 1/2 inch of bare wire. Attach ring terminals to these exposed ends, crimping them securely to guarantee a solid connection. Double-check that you're using the correct size terminals for your battery posts and charge controller connections.
When connecting the cables, always start with the negative (black) cable:
- Connect the negative cable to the charge controller's negative terminal
- Attach the other end to the battery bank's negative terminal
- Repeat the process for the positive (red) cable
Confirm all connections are tight and secure. Loose connections can cause resistance, leading to heat buildup and potential system failure.
After connecting both cables, verify that the charge controller powers on and displays the correct battery voltage. If it doesn't, recheck your connections and consult the manufacturer's troubleshooting guide if needed.
Set Voltage Parameters
Setting the correct voltage parameters is essential for your solar charge controller to function at its best. You'll need to adjust these settings based on your battery type and system configuration. Most controllers have adjustable voltage set points for bulk charging, float charging, and low voltage disconnect.
To set the parameters, consult your controller's manual for specific instructions. Generally, you'll use buttons or dials on the device to navigate menus and adjust values. Make certain you're setting the correct voltage for your battery type (lead-acid, AGM, or lithium-ion). Here's a quick reference table for common battery types:
| Battery Type | Bulk Voltage | Float Voltage | Low Voltage Disconnect |
|---|---|---|---|
| Flooded Lead-Acid | 14.6V – 14.8V | 13.2V – 13.5V | 11.5V – 12.0V |
| AGM/Gel | 14.2V – 14.4V | 13.2V – 13.4V | 11.8V – 12.1V |
| Lithium-Ion | 14.0V – 14.4V | N/A | 12.0V – 12.5V |
After setting the voltage parameters, double-check all values to verify accuracy. Incorrect settings can lead to battery damage or reduced system performance. If you're unsure about the correct values for your specific setup, consult a professional or the battery manufacturer's specifications.
Attaching Load Connections

With the solar panels and battery connections in place, it's time to focus on attaching the load connections. These connections power your devices and appliances through the charge controller.
First, identify the load terminals on your controller, usually labeled "LOAD" or with a lightbulb icon. Confirm your controller is switched off before proceeding.
Strip about 1/4 inch of insulation from the ends of your load wires. Connect the positive (red) wire to the positive load terminal and the negative (black) wire to the negative load terminal. Tighten the screws securely, but don't overtighten to avoid damaging the terminals.
Here are key points to remember:
- Use appropriate wire gauge for your load's amperage
- Install a fuse or circuit breaker between the controller and load
- Don't exceed the controller's maximum load current rating
Double-check all connections for tightness and proper polarity. If your controller has a separate load switch, turn it on.
Programming Controller Settings

The final step in your solar charge controller installation involves programming the device's settings. Most modern controllers come with pre-programmed default settings, but you'll want to customize them for your specific system.
Start by setting the battery type. This is essential as different battery chemistries (lead-acid, lithium-ion, etc.) require different charging parameters.
Next, adjust the charging voltages: bulk, absorption, and float. These values depend on your battery type and system voltage.
Set the low voltage disconnect (LVD) and reconnect points to protect your batteries from over-discharge. Program any temperature compensation settings if your controller has this feature. It'll help optimize charging based on ambient temperature.
If your controller has load control functions, configure the timers or light sensors as needed. Don't forget to set the date and time if your device has logging capabilities.
Finally, check for any advanced settings like equalization schedules or generator start triggers. These may require referencing your specific battery manufacturer's recommendations.
Remember to save your settings once you're done. It's a good idea to record these values for future reference or troubleshooting.
Testing the System

Once you've completed the installation and programming, it's crucial to test your solar charge controller system. Begin by verifying all connections are secure and double-checking the wiring.
Then, expose your solar panels to sunlight and observe the controller's display. You should see voltage and current readings indicating that the system is generating power.
Next, monitor the battery charging process. The controller should regulate the charging current and voltage according to the battery type and programmed settings. Verify that the charging stages (bulk, absorption, and float) are functioning correctly.
Test the load output by connecting a small appliance or light. The controller should supply power to the load while managing the battery's state of charge. If your controller has low voltage disconnect (LVD) protection, simulate a low battery condition to confirm it cuts off the load at the preset threshold.
Key points to remember during testing:
- Always prioritize safety and use appropriate personal protective equipment
- Document your test results for future reference
- Be patient, as some functions may take time to activate
If you encounter any issues during testing, consult the controller's manual or contact the manufacturer's support team for assistance.
Regular system checks will help maintain peak performance and extend the lifespan of your solar setup.
Maintenance and Troubleshooting Tips

Proper maintenance and troubleshooting are essential for keeping your solar charge controller system running smoothly. Regularly inspect your system for loose connections, corrosion, or damage. Clean the solar panels and verify they're free from debris or shading. Check the battery's water levels if you're using flooded lead-acid batteries, and top them up with distilled water when necessary.
If you encounter issues, start by verifying all connections are secure and corrosion-free. Check fuses and circuit breakers, replacing them if needed. Monitor your battery voltage; if it's consistently low, you may have a faulty battery or insufficient charging. Verify your solar panels are producing the expected voltage; low output could indicate panel damage or excessive shading.
For charge controller-specific problems, consult the user manual for error codes and troubleshooting steps. If you're experiencing unexpected system shutdowns, it could be due to overload protection or high-temperature cutoff. Reduce the load or improve ventilation as needed.
If you can't resolve an issue, don't hesitate to contact the manufacturer's support team or a professional solar technician for assistance. Regular maintenance and prompt troubleshooting will help maximize your system's efficiency and lifespan.
Frequently Asked Questions
Can I Use a Solar Charge Controller With Wind Turbines?
Yes, you can use a solar charge controller with wind turbines. They're often called hybrid controllers and can manage both solar and wind energy. You'll need to guarantee it's compatible with your wind turbine's voltage and current output.
How Often Should I Replace My Solar Charge Controller?
You should replace your solar charge controller every 5-10 years, depending on usage and environmental conditions. However, if you notice decreased performance or malfunctions, don't wait. Regular maintenance can extend its lifespan. Check it annually for peak function.
What's the Difference Between PWM and MPPT Charge Controllers?
PWM and MPPT charge controllers differ in efficiency and cost. You'll find PWM is simpler and cheaper, but less efficient. MPPT controllers are more expensive but maximize power output, especially in varying light conditions. They're better for larger systems.
Can I Connect Multiple Batteries in Parallel to a Single Controller?
Yes, you can connect multiple batteries in parallel to a single controller. You'll increase your storage capacity while maintaining the same voltage. Make certain the batteries are of the same type, capacity, and age for best performance and longevity.
Is It Possible to Upgrade My Charge Controller's Firmware?
You can often upgrade your charge controller's firmware. Check the manufacturer's website for available updates. You'll need to follow their specific instructions, which may involve downloading software or using a mobile app. Always verify compatibility before proceeding.
In Summary
You've now successfully installed your solar charge controller! Remember to regularly check connections, clean solar panels, and monitor battery levels for peak performance. If you encounter any issues, consult your manual or a professional. With proper maintenance, your system will provide reliable solar power for years to come. Don't forget to adjust settings as needed and stay up-to-date with the latest solar technology. Enjoy your sustainable energy solution!


Leave a Reply