Grounding your solar panels is essential for safety and peak performance in DIY installations. It protects against electrical hazards by providing a safe path for excess electricity, reducing risks of shocks, fires, and equipment damage. Proper grounding also stabilizes voltage levels, minimizes electromagnetic interference, and improves system efficiency. You'll need to use high-quality grounding equipment, select the right wire, and follow local electrical codes. By understanding the step-by-step grounding process and common mistakes to avoid, you can guarantee a safe and effective solar panel setup. Exploring advanced techniques can further enhance your system's protection and longevity.
Understanding Solar Panel Grounding
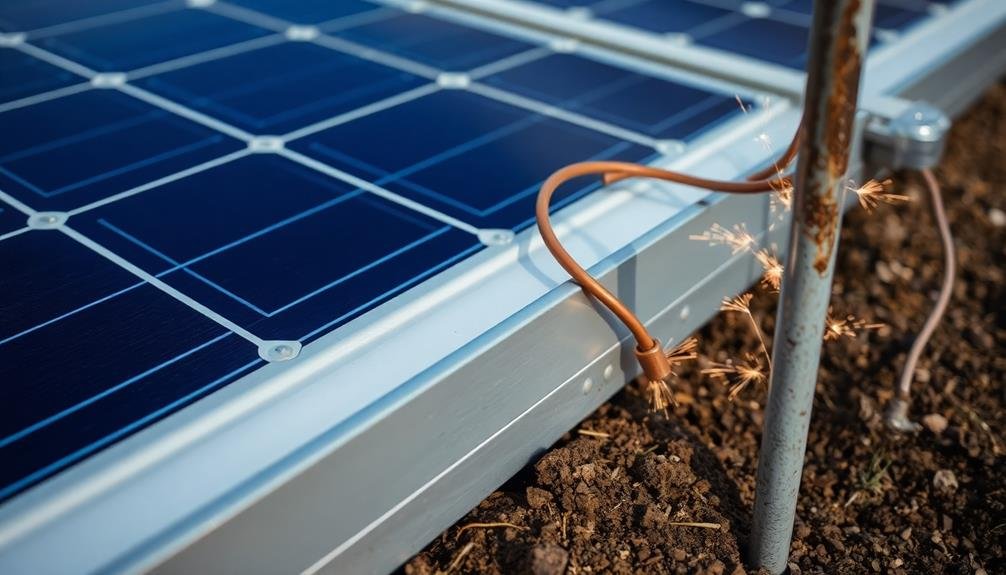
Why is grounding solar panels vital for safety? Grounding protects you, your home, and your solar system from electrical hazards. It provides a safe path for excess electricity to flow into the earth, preventing shocks, fires, and equipment damage.
When you install solar panels, you're creating an electrical system exposed to the elements. Lightning strikes, power surges, and equipment malfunctions can lead to dangerous voltage buildups. Proper grounding dissipates this excess energy, reducing risks.
Grounding also helps your solar system operate at its best. It stabilizes voltage levels, minimizes electromagnetic interference, and can improve overall efficiency.
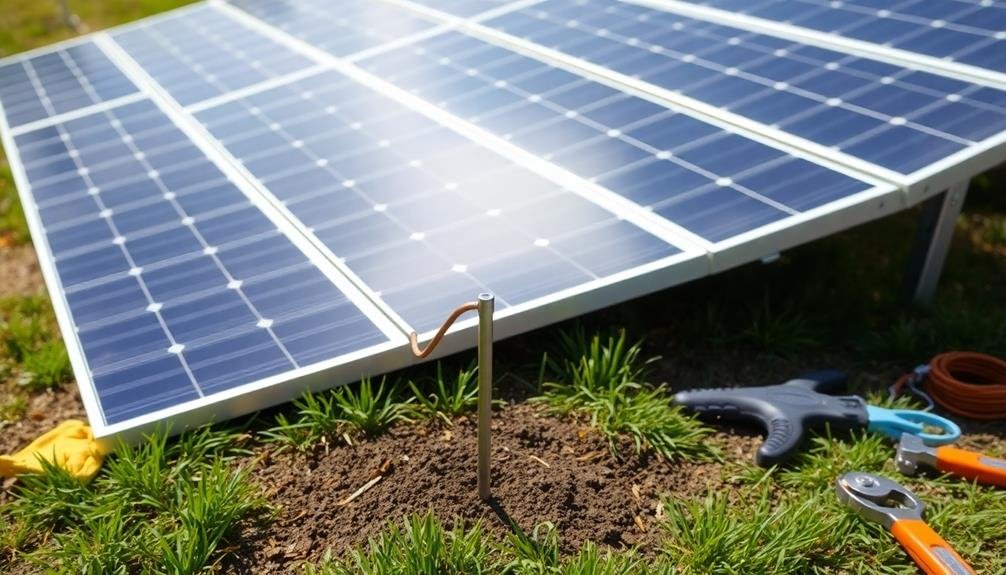
You'll need to connect all metal components of your solar array to a grounding electrode, typically a copper rod driven into the ground.
Understanding local electrical codes is important, as grounding requirements vary by region. You'll need to use appropriate materials, like copper wire and corrosion-resistant connectors.
It's critical to create a continuous grounding path from your panels to the earth. If you're unsure about any aspect of grounding, consult a licensed electrician to verify your DIY solar project is safe and compliant.
Electrical Safety Basics

When working with ground solar panels, you'll encounter various electrical hazards and risks, including electric shock, short circuits, and fire.
It's vital to understand these dangers and implement proper protective measures to guarantee your safety.
You'll need to familiarize yourself with essential safety equipment, correct wiring practices, and appropriate insulation techniques to mitigate potential risks effectively.
Electrical Hazards and Risks
Electrical safety is paramount when working with DIY ground solar panels. You're dealing with potentially dangerous electrical currents that can cause severe injury or even death if mishandled. It's essential to understand the specific hazards and risks associated with solar panel installations.
The main electrical risks you'll encounter include:
- Electric shock from live wires or components
- Arc flash burns from high-voltage discharges
- Fire hazards due to faulty wiring or connections
- Electrocution from water contact with live electrical parts
You must always treat solar panels as if they're energized, even in low light conditions. They generate DC electricity, which can be more dangerous than AC because it's harder for your body to let go of a live DC conductor.
Improper grounding can lead to unexpected voltage differences, increasing shock risks. Short circuits can cause rapid temperature increases, potentially damaging equipment or starting fires.
When working with batteries, you'll face additional risks from acid leaks and hydrogen gas emissions. Always use proper personal protective equipment, including insulated gloves and tools.
Never work alone, and make certain you have a safe way to disconnect the system in an emergency.
Protective Measures Overview
To safeguard yourself against these electrical hazards, you'll need to implement a range of protective measures.
Start by wearing proper personal protective equipment (PPE), including insulated gloves, safety glasses, and non-conductive footwear. Always use insulated tools designed for electrical work to minimize the risk of shock.
Before beginning any work, turn off the main power supply and use a voltage tester to confirm the absence of electricity. Install ground fault circuit interrupters (GFCIs) to protect against ground faults and potential electrocution.
Assure all wiring is correctly sized and rated for the current it'll carry, and use weatherproof junction boxes for outdoor connections.
Keep your work area dry and clean, avoiding water accumulation near electrical components. Regularly inspect your equipment for signs of wear, damage, or corrosion, replacing any compromised parts immediately.
When working with batteries, handle them carefully and provide proper ventilation to prevent the buildup of explosive gases.
Lastly, familiarize yourself with local electrical codes and obtain necessary permits before starting your project. If you're unsure about any aspect of the installation, don't hesitate to consult a professional electrician.
Grounding Equipment and Tools
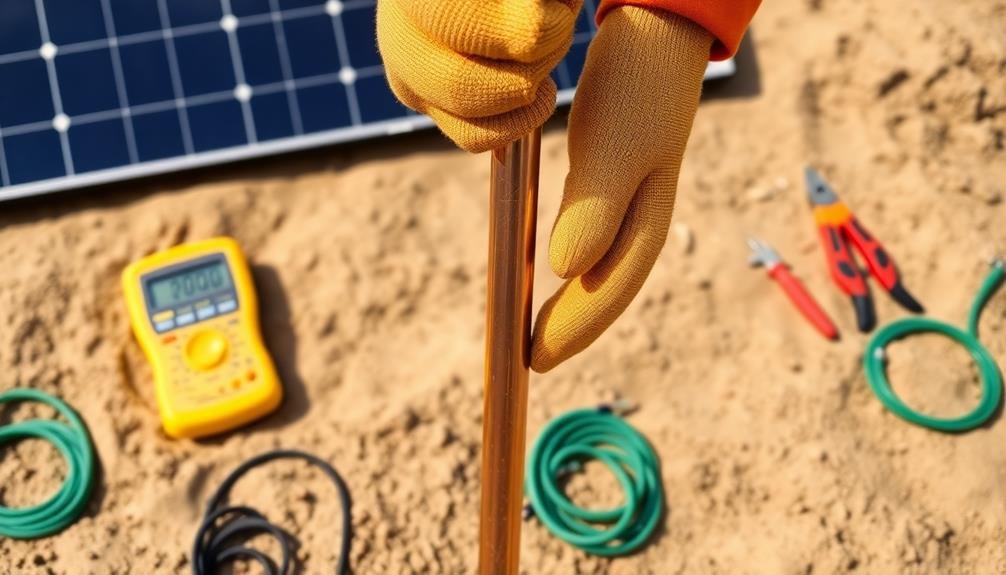
When installing ground solar panels, you'll need essential grounding equipment like copper wire, ground rods, and clamps to guarantee proper electrical safety.
You should also have specialized solar tools on hand, including a solar pathfinder, multimeter, and MC4 connector crimpers.
Don't forget to wear the required safety gear, such as insulated gloves, safety glasses, and non-conductive footwear, to protect yourself during the installation process.
Essential Grounding Equipment
Proper grounding equipment is essential for ensuring the safety and efficiency of your DIY ground solar panel installation. You'll need several key components to create a reliable grounding system.
First, invest in high-quality grounding rods, typically made of copper-bonded steel, which should be at least 8 feet long and 5/8 inches in diameter. These rods are driven into the ground to provide a low-resistance path for electrical currents.
Next, you'll need grounding wire, usually bare copper, to connect your solar panels and other equipment to the grounding rod. Choose the appropriate gauge based on your system's requirements. Grounding clamps are vital for securing the wire to the rod and ensuring a solid connection.
Don't forget about these additional essential items:
- Grounding lugs for attaching wires to your solar panels and equipment
- Weatherproof wire connectors to protect connections from the elements
- A ground fault protection device to detect and interrupt ground faults
- A multimeter to test your grounding system's resistance and continuity
Specialized Solar Tools
Specialized tools make grounding your DIY solar panel system easier and more efficient. You'll need a combination of electrical and solar-specific equipment to guarantee proper grounding. A digital multimeter is essential for measuring voltage, current, and resistance in your system. You'll also want wire strippers and crimpers for preparing cables and connectors.
For solar-specific tasks, invest in MC4 connector tools to safely disconnect and reconnect solar panel wiring. A solar panel tilt meter helps you optimize panel angles for maximum efficiency. Don't forget safety gear like insulated gloves and safety glasses to protect yourself during installation.
| Tool | Emotion |
|---|---|
| Digital Multimeter | Confidence |
| Wire Strippers | Precision |
| MC4 Connector Tools | Security |
| Solar Panel Tilt Meter | Optimization |
| Safety Gear | Protection |
Safety Gear Requirements
Safety-first enthusiasts know that grounding equipment and tools are essential for DIY solar panel installations. When working with electrical systems, you'll need to protect yourself and guarantee proper grounding.
Start by investing in a high-quality multimeter to test voltage and continuity. You'll also need insulated gloves rated for the voltage you're working with, typically Class 00 or Class 0 for residential solar systems.
Don't forget about proper footwear – rubber-soled shoes provide additional insulation. A ground fault circuit interrupter (GFCI) is vital for preventing electric shocks. Make sure you have a grounding rod, copper wire, and clamps to create a solid earth connection.
When installing ground-mounted solar panels, you'll need:
- Safety glasses to protect your eyes from debris
- Hard hat to guard against falling objects
- Work gloves for handling rough materials
- Steel-toed boots for foot protection
Remember to use fiberglass or wooden ladders instead of metal ones to reduce the risk of electrical conductivity.
Always have a first aid kit nearby and keep a fire extinguisher rated for electrical fires within reach. By prioritizing safety gear, you'll minimize risks and guarantee a successful DIY solar panel installation.
Proper Grounding Wire Selection

Grounding wire selection plays an important role in guaranteeing the safety and efficiency of your DIY ground solar panel installation. When choosing the right grounding wire, you'll need to take into account several factors, including wire gauge, material, and length.
For most residential solar installations, you'll want to use copper wire, as it's highly conductive and resistant to corrosion. The wire gauge should be based on the size of your solar array and the maximum current it can produce. Generally, a 6 AWG (American Wire Gauge) copper wire is suitable for most home solar systems.
Verify the wire is long enough to reach from your solar panels to the grounding rod without any splices. It's vital to use a continuous length of wire to maintain ideal conductivity. When installing, make sure the wire is securely attached to both the solar panel frame and the grounding rod.
Don't forget to check local building codes and National Electrical Code (NEC) requirements, as they may have specific guidelines for grounding wire selection.
Step-by-Step Grounding Process

To properly ground your solar panels, you'll need specific tools and materials.
Your toolkit should include a grounding rod, grounding clamps, and appropriate connectors.
Once you've gathered these essentials, you can begin the step-by-step process of installing the grounding wire to guarantee your system's safety and compliance with electrical codes.
Tools and Materials Needed
Proper tools and materials are vital for safely grounding your DIY solar panel system. You'll need a combination of electrical components and hand tools to complete the job effectively.
First, gather your grounding equipment, including copper grounding rods, grounding wire, and grounding clamps. These components form the backbone of your grounding system.
For tools, you'll want to have a hammer or mallet for driving the grounding rod, wire strippers for preparing your cables, and a wrench set for tightening connections. Don't forget safety gear like gloves and safety glasses to protect yourself during installation.
When selecting materials, consider these key factors:
- Use copper wire that's at least #6 AWG in size
- Choose grounding rods that are at least 8 feet long
- Verify all components are UL-listed for safety
- Select weather-resistant materials for outdoor use
It's essential to use high-quality, corrosion-resistant materials to guarantee your grounding system remains effective over time.
If you're unsure about any component, consult with a local electrical supplier or professional electrician. They can guide you in choosing the right materials for your specific solar panel setup and local regulations.
Grounding Wire Installation Steps
Now that you've gathered all the necessary tools and materials, it's time to start the grounding wire installation process.
Begin by identifying the grounding lug on your solar panel frame. Clean the area around the lug with a wire brush to guarantee good contact. Next, strip about 3/4 inch of insulation from both ends of your grounding wire using wire strippers.
Attach one end of the wire to the grounding lug using a ring terminal. Secure it tightly with a wrench. Run the wire along the frame to your grounding rod location, keeping it as short and straight as possible. Avoid sharp bends that could damage the wire.
At the rod, wrap the wire around it tightly, making at least two full turns. Use pliers to crimp a ground clamp over the wire and rod.
Drive the grounding rod into the earth using a sledgehammer. Aim for at least 8 feet deep or until you hit bedrock.
Finally, test the connection using a multimeter to confirm proper grounding. Check local codes for any additional requirements specific to your area.
Remember to inspect and maintain your grounding system regularly for peak safety and performance.
Common Grounding Mistakes

Overlooking essential grounding steps can lead to dangerous and costly mistakes in DIY solar panel installations. You'll want to avoid these common errors to guarantee your system's safety and efficiency.
One frequent mistake is using the wrong type or size of grounding wire. Always use copper wire that's appropriately sized for your system's amperage.
Another error is failing to properly connect the grounding wire to all metal components. This includes not just the solar panels but also mounting racks, inverters, and other equipment.
You might also forget to install a ground rod or place it incorrectly, reducing its effectiveness.
To prevent these mistakes, follow these key steps:
- Research local electrical codes and regulations
- Use the correct grounding equipment for your specific installation
- Double-check all connections for tightness and continuity
- Have a professional inspect your work if you're unsure
Don't underestimate the importance of proper bonding between components. Loose connections can lead to increased resistance and potential safety hazards.
Additionally, make sure you're using approved grounding methods for your region, as requirements may vary. By avoiding these common mistakes, you'll create a safer and more reliable solar panel system.
Local Codes and Regulations

Numerous local codes and regulations govern the installation of ground-mounted solar panels, and it's vital to familiarize yourself with them before starting your DIY project.
These rules vary by location and can impact everything from panel placement to wiring methods. Start by contacting your local building department to obtain the specific requirements for your area. You'll likely need to secure permits and undergo inspections throughout the installation process.
Many jurisdictions have setback requirements, dictating how far your panels must be from property lines and structures. Height restrictions may also apply, limiting how tall your ground-mounted system can be.
Electrical codes are particularly significant for safety. The National Electrical Code (NEC) provides guidelines for proper grounding, but local amendments may exist. You'll need to make certain your system meets these standards, including using appropriate grounding methods and equipment.
Zoning laws can affect where you're allowed to install panels on your property. Some areas may restrict front yard installations or require screening. Homeowners' associations might've additional rules to take into account.
Testing Grounding Effectiveness

To confirm the safety of your DIY ground solar panel installation, testing the grounding effectiveness is vital. You'll need to use a ground resistance tester to measure the resistance between the grounding electrode and the earth. A lower resistance value indicates better grounding. Aim for a resistance of 25 ohms or less, as recommended by the National Electrical Code.
When testing your grounding system, follow these steps:
- Disconnect the grounding electrode conductor from the grounding electrode.
- Connect the ground resistance tester to the electrode and two auxiliary probes.
- Place the probes in a straight line, with equal spacing between them.
- Take multiple readings at different distances to confirm accuracy.
If your readings are consistently above 25 ohms, you'll need to improve your grounding system. This might involve adding more grounding rods, treating the soil around the electrode, or using a different grounding method.
Don't skip this vital step – proper grounding protects your solar panel system and your home from electrical hazards and lightning strikes. Regularly retest your grounding system to maintain its effectiveness over time.
Maintenance of Grounding Systems

A grounding system's effectiveness can diminish over time, making regular maintenance essential. You'll need to inspect your solar panel grounding system at least once a year, or more frequently in areas with extreme weather conditions.
Check for signs of corrosion, loose connections, or physical damage to wires and grounding rods. Tighten any loose connections and replace corroded components immediately.
Clean the grounding connections to remove dirt, debris, or oxidation that can interfere with conductivity. Use a wire brush or sandpaper to gently clean metal surfaces, guaranteeing a solid electrical connection. If you've used grounding clamps, verify they're still securely attached to the panel frames and grounding wire.
Test the grounding system's resistance annually using a ground resistance tester. If readings are higher than when initially installed, you may need to add grounding rods or improve soil conductivity. In dry climates, you might need to moisten the soil around grounding rods periodically to maintain effectiveness.
Keep vegetation away from your grounding system to prevent interference and potential damage. Trim plants and remove any debris that could compromise the system's integrity.
Troubleshooting Grounding Issues

Even well-maintained grounding systems can develop issues over time.
When troubleshooting grounding problems in your DIY solar panel setup, you'll need to be methodical and safety-conscious. Start by visually inspecting all grounding connections for signs of corrosion, loose wires, or physical damage. If you notice any issues, address them immediately.
Use a multimeter to test the continuity between the ground rod and various system components. A lack of continuity indicates a break in the grounding path that needs to be fixed. Check the resistance between the ground rod and earth; it should be less than 25 ohms. If it's higher, you may need to add another ground rod or improve soil conductivity.
If you're experiencing frequent ground faults, consider these common causes:
- Damaged wire insulation
- Water ingress in junction boxes
- Faulty solar panel frames
- Loose connections in the grounding system
Advanced Grounding Techniques

While basic grounding techniques are sufficient for most DIY solar panel installations, some situations call for more sophisticated approaches. One advanced method is the use of a ground ring, where you'll install a conductive wire or rod around the perimeter of your solar array. This technique provides multiple grounding points, enhancing protection against lightning strikes and electrical surges.
Another advanced technique is the implementation of equipotential bonding. You'll connect all conductive parts of your solar system, including frames, mounting structures, and metal conduits, to guarantee they're at the same electrical potential. This reduces the risk of voltage differences and stray currents.
For areas with poor soil conductivity, you might consider using ground enhancement materials. You'll mix these conductive substances with the soil around your grounding electrodes to improve their effectiveness.
In some cases, you'll need to install separate grounding systems for AC and DC components. This approach helps prevent potential interactions between different electrical systems.
Lastly, consider using surge protection devices (SPDs) at key points in your solar installation. You'll place these devices to divert excess voltage safely to the ground, providing an extra layer of protection for your equipment.
Lightning Protection Considerations

Lightning strikes pose a considerable threat to DIY ground solar panel installations. To protect your system, you'll need to implement specific lightning protection measures. Start by installing a lightning rod or air terminal at the highest point of your solar array. This will intercept potential strikes and redirect them safely to the ground.
Connect the lightning rod to a dedicated grounding system separate from your solar panel's main ground. Use thick copper wire (at least 6 AWG) to create a direct path for the lightning current. Confirm this grounding system is at least 10 feet away from your solar panel's ground to prevent interference.
Consider adding surge protection devices (SPDs) to safeguard your equipment:
- Install SPDs on the DC side between the panels and inverter
- Place SPDs on the AC side between the inverter and main electrical panel
- Add SPDs to communication lines connecting your monitoring systems
- Use SPDs on any auxiliary power supplies
Regularly inspect and maintain your lightning protection system. Check for corrosion, loose connections, or damage to components.
Upgrading Existing Grounding Systems

As your DIY ground solar panel system grows, you may need to beef up your existing grounding system. Start by evaluating your current setup, checking for signs of wear, corrosion, or inadequate connections.
If you're adding panels or increasing system capacity, you'll likely need to upgrade your grounding components. Consider installing additional ground rods to improve your system's connection to earth. Space them at least 6 feet apart and connect them with heavy-gauge copper wire.
Upgrade your grounding conductor to a larger size if necessary, confirming it can handle the increased current from your expanded system. Inspect and replace any worn or damaged grounding clamps, making sure they're properly tightened and free from corrosion.
If you've added new equipment, such as inverters or charge controllers, verify they're properly bonded to the grounding system.
Don't forget to update your lightning protection measures as well. Install surge protectors on both AC and DC sides of your system, and consider adding a dedicated lightning rod if you're in a high-risk area.
Frequently Asked Questions
Can I Ground Solar Panels to a Metal Fence or Shed?
You shouldn't ground solar panels to a metal fence or shed. It's not a safe or proper grounding method. Instead, you'll need to use a dedicated grounding rod or follow local electrical codes for proper grounding techniques.
How Often Should I Inspect My Solar Panel Grounding System?
You should inspect your solar panel grounding system at least twice a year. Check for corrosion, loose connections, and damaged wires. It's also wise to examine it after severe weather events or any system modifications you've made.
Does Grounding Affect the Efficiency or Power Output of Solar Panels?
Grounding doesn't directly affect your solar panels' efficiency or power output. It's a safety measure, not a performance enhancer. You'll still generate the same amount of electricity, but you'll be protected from potential electrical hazards.
Are There Alternative Grounding Methods for Off-Grid or Portable Solar Setups?
For off-grid or portable solar setups, you can use alternative grounding methods. Consider using a grounding rod, connecting to a vehicle's frame, or employing a floating ground system. Always guarantee you're following safety guidelines for your specific setup.
Can I Use the Same Grounding System for Both AC and DC Components?
You shouldn't use the same grounding system for AC and DC components. They require separate grounding methods due to different electrical characteristics. It's vital to install distinct grounding systems to guarantee safety and proper operation of your solar setup.
In Summary
You've now learned why grounding solar panels is essential for safety and how to do it properly. Remember, it's not just about following regulations—it's about protecting yourself and your property. Don't skimp on proper equipment or rush the process. If you're unsure, consult a professional. With the right knowledge and precautions, you'll guarantee your DIY solar setup is safe and efficient for years to come.

Leave a Reply