Renting spray foam insulation gear for DIY installation can save you money while providing professional-grade results. You'll need a spray foam kit, protective gear, and additional tools. Safety is vital, so wear a full-body suit, respirator, goggles, and chemical-resistant gloves. Prepare the area by clearing the space, sealing off non-insulated areas, and ensuring proper ventilation. Mix and load foam components carefully, maintaining equal flow rates and pressure. Apply the foam in consistent layers, allowing for expansion and curing. Clean the equipment thoroughly after use. While DIY can be cost-effective, consider your skill level and time availability. The following guide will equip you with essential knowledge for a successful project.
Benefits of Spray Foam Insulation

Spray foam insulation stands out from among other insulation options due to its impressive range of benefits. When you choose spray foam, you're opting for superior air sealing and moisture control. It expands to fill gaps and cracks, creating an airtight barrier that prevents drafts and reduces energy loss. This translates to lower heating and cooling costs, potentially saving you hundreds of dollars annually on utility bills.
You'll also appreciate the improved indoor air quality. Spray foam's air-sealing properties help keep out allergens, pollutants, and moisture that can lead to mold growth. It's an excellent choice for those with allergies or respiratory issues.
The insulation's durability is another key advantage. It doesn't sag or settle over time, maintaining its effectiveness for decades. Spray foam also adds structural strength to your home, particularly in walls and roof assemblies. It's resistant to pests and won't provide a food source for rodents or insects.
Additionally, spray foam's sound-dampening properties can create a quieter living environment, reducing noise transfer between rooms and from outside sources. By choosing spray foam insulation, you're investing in long-term comfort, energy efficiency, and home value.
Necessary Equipment for DIY Installation
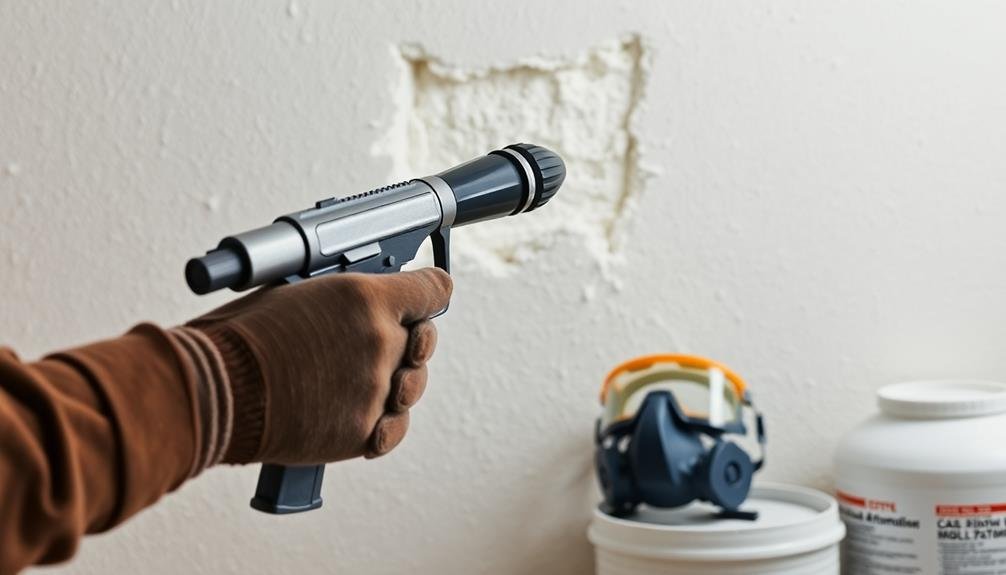
While the benefits of spray foam insulation are impressive, you'll need the right tools to tackle a DIY installation. The most vital piece of equipment is the spray foam kit, which includes the foam components, spray gun, and hoses.
You'll also need protective gear: a full-body suit, gloves, and a respirator mask with the appropriate filters. Don't forget safety goggles to protect your eyes from overspray.
You'll need plastic sheeting to cover surfaces and a sharp utility knife for trimming excess foam. A ladder or scaffolding may be necessary for reaching high areas.
For surface preparation, gather cleaning supplies, caulk, and a caulk gun to seal gaps. A moisture meter is essential to guarantee the area is dry enough for application.
You'll want a thermometer to check ambient temperature, as spray foam requires specific conditions for proper curing. Consider renting or purchasing a portable air compressor if your kit doesn't include one.
Safety Precautions and Protective Gear
When working with spray foam insulation, your safety is paramount.
You'll need proper respiratory protection, full-body coveralls, and adequate eye and hand safety gear to protect yourself from harmful chemicals and fumes.
These essential precautions will help guarantee you complete your DIY project without compromising your health.
Proper Respiratory Protection
Before you even open a can of spray foam insulation, it's crucial to prioritize proper respiratory protection. The chemicals in spray foam can be harmful if inhaled, so you'll need to wear a respirator designed specifically for this purpose. Choose a full-face or half-mask respirator with organic vapor cartridges rated for isocyanates, the main chemical component in spray foam.
Ensure your respirator fits properly and create a tight seal against your face. You'll need to be clean-shaven for the best protection. Replace the cartridges regularly, following the manufacturer's recommendations. Don't rely on disposable dust masks, as they won't provide adequate protection against chemical vapors.
Here's a quick guide to selecting the right respirator:
| Type | Protection Level | Recommended Use |
|---|---|---|
| N95 | Low | Not suitable |
| Half-mask | Medium | Short-term use |
| Full-face | High | Extended use |
| PAPR | Highest | Professional use |
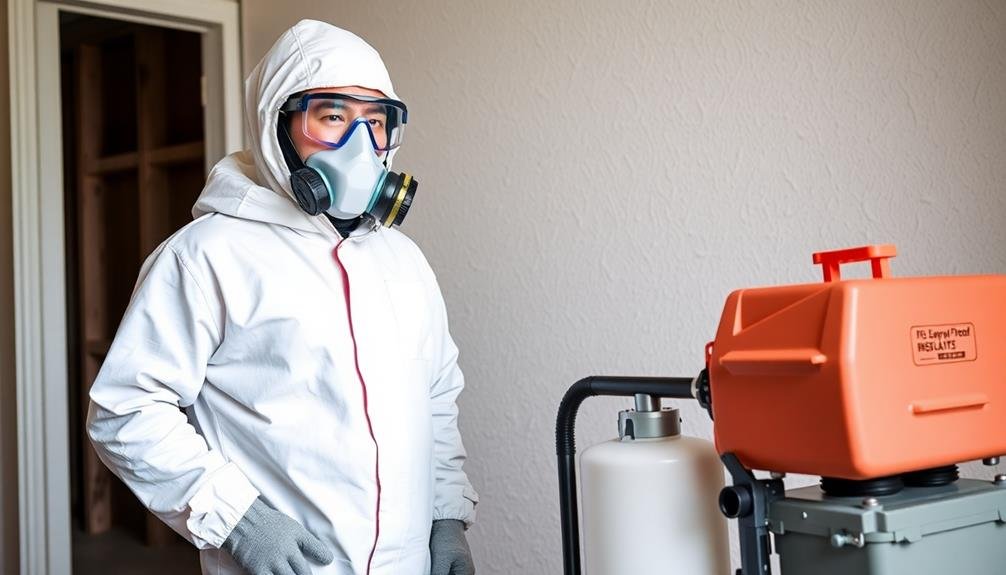
Full-Body Coveralls Essential
Protecting your skin is just as essential as safeguarding your lungs when working with spray foam insulation. You'll need to wear full-body coveralls to shield yourself from harmful chemicals and irritants. These protective suits create a barrier between your skin and the spray foam, preventing potential allergic reactions or chemical burns.
When choosing coveralls for your DIY spray foam project, consider the following:
- Material: Opt for disposable coveralls made of breathable, chemical-resistant materials like Tyvek or polypropylene.
- Fit: Verify the coveralls are loose-fitting to allow for easy movement and ventilation.
- Closure: Look for suits with a zipper front and elastic wrists and ankles for maximum protection.
- Additional features: Choose coveralls with attached boots or hood for complete coverage.
Don't forget to wear chemical-resistant gloves and boots that overlap with your coveralls to prevent any exposed skin.
Eye and Hand Safety
In addition to full-body protection, you'll need to safeguard your eyes and hands when working with spray foam insulation. Your eyes are particularly vulnerable to chemical splashes and fumes, so wear safety goggles or a full-face shield that provides a tight seal around your face. Regular glasses or sunglasses won't offer adequate protection.
For your hands, choose chemical-resistant gloves made of nitrile or neoprene. These materials provide excellent barrier protection against the chemicals in spray foam. Verify the gloves fit properly and extend past your wrists to prevent gaps between your gloves and sleeves.
When selecting eye and hand protection, look for equipment rated for use with isocyanates, the main chemical component in spray foam. Replace your gloves immediately if they become torn or contaminated, and never reuse disposable gloves.
Remember to remove your gloves and wash your hands thoroughly before touching your face or eyes, even if you're wearing eye protection. This precaution helps prevent accidental transfer of chemicals to sensitive areas.
Preparing the Area for Application
Proper preparation is vital before applying spray foam insulation. Start by clearing the area of any furniture, belongings, or debris. You'll want a clean, unobstructed workspace to guarantee efficient and safe application.
Next, seal off any areas you don't want the foam to reach, such as electrical outlets, light fixtures, and windows. Use plastic sheeting and painter's tape to create protective barriers.
Inspect the surfaces where you'll apply the foam. Verify they're clean, dry, and free from dust, grease, or mold. If necessary, clean and dry the surfaces thoroughly before proceeding. It's essential to check for any existing moisture issues and address them before insulating.
To complete your preparation, follow these steps:
- Set up proper ventilation by opening windows or using fans
- Cover the floor with drop cloths or plastic sheeting
- Mark studs or joists to guide your application
- Check the temperature of both the area and the spray foam kit, confirming they're within the manufacturer's recommended range
Mixing and Loading Foam Components
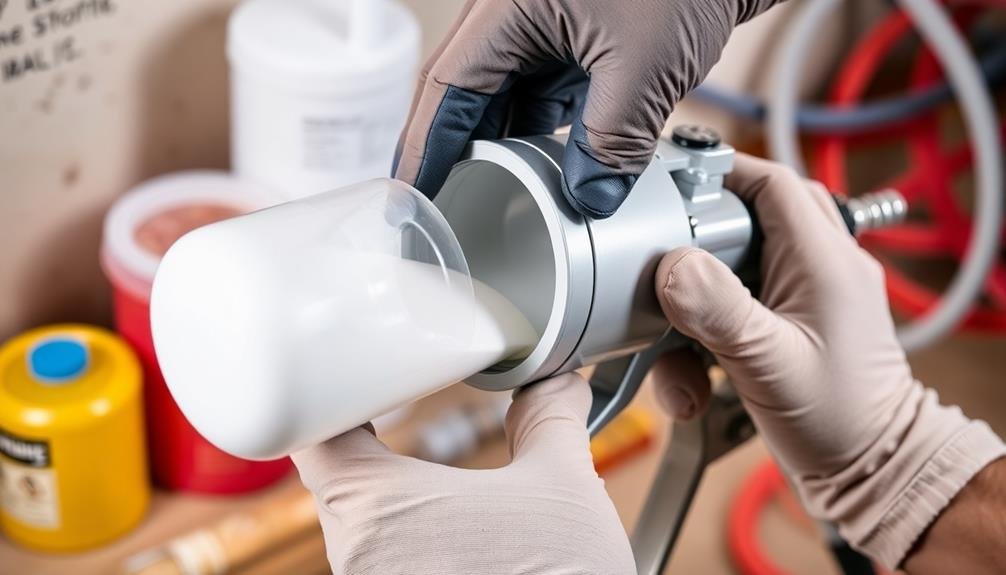
Before you can start spraying, you'll need to mix and load the foam components correctly. Most DIY spray foam kits come with two separate containers: one for the isocyanate (A-side) and another for the polyol resin (B-side). Verify both components are at the recommended temperature, typically between 70-80°F (21-27°C), for ideal mixing.
Start by shaking each container vigorously for about 30 seconds to mix the contents thoroughly. Next, attach the color-coded hoses to their corresponding tanks, making sure the connections are tight and secure.
If your kit includes a mixing nozzle, attach it to the spray gun according to the manufacturer's instructions.
When you're ready to begin, open the valves on both tanks simultaneously. This allows the components to flow through the hoses and mix in the nozzle just before spraying.
It's essential to maintain an equal flow rate from both tanks to achieve the correct foam mixture. If your kit has a pressure gauge, monitor it closely to guarantee consistent pressure throughout the application process.
Proper Spraying Techniques and Coverage
As you spray foam insulation, you'll need to maintain a consistent pattern for even coverage.
You should adjust the nozzle and pressure settings to control the foam's flow and thickness.
Apply the foam in layers, allowing each to expand and cure before adding the next, to achieve ideal insulation and adherence to surfaces.
Maintain Consistent Spray Pattern
Maintaining a consistent spray pattern is essential for achieving ideal insulation coverage. As you apply the foam, keep your spray gun at a consistent distance from the surface, typically 18-24 inches away. Move the gun in a smooth, steady motion, overlapping each pass by about 50% to guarantee even application.
To maintain a consistent spray pattern:
- Practice your technique on a test surface before starting the actual project.
- Use a side-to-side motion, starting at the bottom of the area and working your way up.
- Maintain a constant speed as you move the spray gun.
- Adjust the gun's nozzle and pressure settings as needed for maximum coverage.
Keep an eye on the foam's expansion rate and adjust your application speed accordingly. If you're spraying too quickly, you'll end up with thin spots; too slowly, and you'll waste material and create an uneven surface.
Remember that foam expands rapidly, so don't overapply in any one area. If you need to build up thickness, it's better to apply multiple thin layers rather than one thick coat. This approach will help you achieve a more uniform insulation barrier and maximize the foam's effectiveness.
Adjust Nozzle and Pressure
For ideal spray foam application, you'll need to adjust your nozzle and pressure settings. The nozzle determines the spray pattern, while pressure affects the foam's density and coverage. Start with a low pressure and gradually increase it until you achieve the desired output. Test the spray on a piece of cardboard before applying it to your project area.
Here's a quick reference guide for nozzle and pressure adjustments:
| Nozzle Size | Pressure Range (PSI) | Application |
|---|---|---|
| Small | 800-1000 | Cracks and small gaps |
| Medium | 1000-1200 | Wall cavities |
| Large | 1200-1400 | Large open areas |
| Fan | 1000-1200 | Broad surface coverage |
| Cone | 800-1000 | Precise application |
Remember to adjust your settings based on the foam's manufacturer recommendations and environmental conditions. Higher temperatures may require lower pressure, while colder conditions might need increased pressure. As you spray, maintain a consistent distance from the surface, typically 18-24 inches. If you notice uneven application or drips, reduce the pressure or increase your spraying speed. Regularly clean the nozzle to prevent clogging and guarantee a smooth, continuous flow of foam.
Layering for Optimal Coverage
Now that you've mastered nozzle and pressure adjustments, it's time to focus on proper layering techniques for ideal coverage. Layering is essential for achieving an even, effective insulation barrier. Start by applying a thin, initial layer of foam to the surface, allowing it to expand and set slightly before adding subsequent layers.
For best coverage and insulation performance, follow these key steps:
- Maintain a consistent distance: Keep the spray gun 18-24 inches away from the surface to guarantee uniform application.
- Use smooth, overlapping passes: Move the gun in a steady, side-to-side motion, overlapping each pass by about 50% to avoid gaps.
- Build up thickness gradually: Apply multiple thin layers rather than one thick layer, allowing each to expand and cure partially before adding the next.
- Monitor foam temperature: Check the foam's temperature regularly, as it can affect expansion and curing rates.
Remember to pay extra attention to corners, joints, and hard-to-reach areas. These spots often require additional passes to guarantee complete coverage.
As you layer the foam, periodically check the overall thickness to ensure you're meeting the required R-value for your project.
Cleaning and Maintaining Rental Equipment

Proper care of rental equipment is essential for both safety and effectiveness when working with DIY spray foam insulation. After completing your project, you'll need to clean and maintain the gear before returning it. Start by depressurizing the system and disconnecting all hoses. Flush the spray gun and hoses with a cleaning solvent recommended by the equipment manufacturer.
Pay special attention to the mixing chamber and nozzle, as these are prone to clogging. Use a wire brush or specialized cleaning tools to remove any hardened foam. Don't forget to clean the exterior of the equipment, wiping down surfaces with a damp cloth.
Here's a quick guide for cleaning and maintaining key components:
| Component | Cleaning Method | Maintenance Tip |
|---|---|---|
| Spray Gun | Solvent flush, wire brush | Lubricate moving parts |
| Hoses | Solvent flush, air purge | Check for wear or damage |
| Pump | Wipe down exterior | Inspect seals and fittings |
Before returning the equipment, verify all parts are dry and properly reassembled. Check that you've removed all traces of foam and cleaning solvents. By taking these steps, you'll help maintain the equipment's longevity and verify it's ready for the next user.
Troubleshooting Common Application Issues
When applying spray foam insulation, you're bound to encounter some challenges. Knowing how to troubleshoot common issues will help you achieve the best results. Here are some problems you might face and how to address them:
- Uneven application: If you notice gaps or inconsistent coverage, adjust your spraying technique. Maintain a consistent distance from the surface and move at a steady pace. Overlap each pass slightly to guarantee full coverage.
- Poor adhesion: If the foam isn't sticking properly, check the surface temperature and cleanliness. Confirm the substrate is above 60°F and free from dust, oil, and moisture. You may need to use a primer for certain surfaces.
- Off-ratio mix: If the foam isn't expanding correctly or has a sticky consistency, stop immediately. The chemical components may not be mixing properly. Check the temperature of the tanks and hoses, and verify they're within the recommended range.
- Clogged nozzle: If you experience reduced flow or sputtering, replace the nozzle. Always keep spare nozzles on hand and change them regularly to maintain consistent application.
Cost Comparison: Rental Vs Professional

After addressing common application issues, it's important to contemplate the financial aspects of your insulation project. Let's compare the costs of renting spray foam equipment versus hiring professionals:
| Aspect | DIY Rental | Professional Service |
|---|---|---|
| Equipment Cost | $200-$500/day | Included in service |
| Material Cost | $1-$2/sq ft | $3-$5/sq ft |
| Labor | Your time | Included in service |
| Project Duration | 2-3 days (avg) | 1 day (avg) |
As you can see, renting equipment offers potential savings, especially for larger projects. However, consider these factors:
- Time investment: You'll need to dedicate several days to the project.
- Skill level: Proper application requires practice and knowledge.
- Warranty: Professional services often include warranties.
- Quality: Experienced contractors guarantee consistent coverage.
If you're confident in your abilities and have the time, renting can save you money. For a 1,000 sq ft area, you might spend around $2,000 on a DIY project, compared to $3,000-$5,000 for professional services. However, if you value time and guaranteed results, hiring professionals might be worth the extra cost. Weigh these factors carefully before making your decision.
Frequently Asked Questions
How Long Does Spray Foam Insulation Take to Cure Completely?
You'll find that spray foam insulation typically cures fully in 24 to 48 hours. However, it's mostly cured within minutes. You can usually trim excess foam after about an hour, but it's best to wait a full day.
Can Spray Foam Insulation Be Applied Over Existing Insulation?
You can apply spray foam insulation over existing insulation, but it's not always recommended. It's best to remove old insulation first for better adhesion and effectiveness. If you do apply it over, guarantee the existing insulation is dry and clean.
What Temperature Range Is Ideal for Applying Spray Foam Insulation?
You'll want to apply spray foam insulation when it's between 60°F and 80°F (15°C to 27°C). It's essential to maintain this temperature range for ideal expansion and curing. Don't forget to check the manufacturer's specific guidelines too.
Is It Possible to Remove Spray Foam Insulation After Installation?
Yes, you can remove spray foam insulation, but it's not easy. You'll need to cut or scrape it out manually. It's a messy, time-consuming process that may damage surrounding surfaces. Consider hiring professionals for large-scale removal jobs.
How Often Should Spray Foam Insulation Be Inspected or Replaced?
You should inspect your spray foam insulation annually for any signs of damage or deterioration. However, if properly installed, it doesn't typically need replacement. It's long-lasting and can often last for the lifetime of your home.
In Summary
You've now got the knowledge to tackle your own spray foam insulation project. Remember to prioritize safety, follow proper techniques, and maintain your rented equipment. While DIY can save money, weigh the pros and cons against hiring professionals. If you're confident in your skills, go for it! But if you're unsure, it's okay to call in the experts. Either way, you'll enjoy the benefits of improved insulation in your home.
Leave a Reply