The best way to weatherstrip doors and windows is to first identify areas prone to air leaks and measure them accurately. Choose the right materials based on durability and specific gaps, such as foam tape for irregular spaces or rubber for door bottoms. Clean surfaces thoroughly before installation and use appropriate tools like a utility knife and caulking gun. Cut weatherstripping to size, allowing extra for overlap, and apply firmly. For adhesive strips, peel the backing and press into place. Don't forget to maintain your weatherstripping annually and replace when worn. With the right approach, you'll considerably improve your home's energy efficiency and comfort.
Understanding Weatherstripping Benefits
Weatherstripping can dramatically improve your home's energy efficiency and comfort. By sealing gaps around doors and windows, you'll prevent air leaks that waste energy and create drafts. This simple upgrade can reduce your heating and cooling costs by up to 15%, saving you money on utility bills year-round.
Beyond energy savings, weatherstripping offers several other benefits. It helps maintain a consistent indoor temperature, eliminating cold spots near windows and doors.
You'll also notice reduced outdoor noise infiltration, creating a quieter living environment. Weatherstripping acts as a barrier against dust, pollen, and insects, improving your home's air quality and reducing allergens.
In humid climates, proper weatherstripping can prevent excess moisture from entering your home, reducing the risk of mold and mildew growth. It also protects your home's structural integrity by preventing water damage during heavy rains.
Additionally, weatherstripping can enhance your home's security by making it more difficult for intruders to manipulate door and window gaps. With these benefits in mind, investing in quality weatherstripping is a smart decision for any homeowner looking to improve their living space.
Types of Weatherstripping Materials
Now that you understand the advantages of weatherstripping, let's explore the various materials available for this home improvement task.
You'll find several options to choose from, each with its own strengths and best applications.
Foam tape is a popular choice for its ease of use and affordability. It's self-adhesive and works well for irregular-shaped gaps.
Rubber weatherstripping is durable and flexible, making it ideal for door bottoms and window sashes.
V-strip, also known as tension seal, is made of plastic or metal and springs open to seal gaps when the door or window is closed.
For a more robust solution, consider felt weatherstripping. It's inexpensive but may need frequent replacement.
Vinyl is another option that's resistant to moisture and withstands temperature changes well.
Metal weatherstripping, typically made of bronze, copper, or stainless steel, offers superior durability but can be more challenging to install.
Silicone weatherstripping provides excellent insulation and flexibility, making it suitable for oddly shaped gaps.
Measuring Doors and Windows

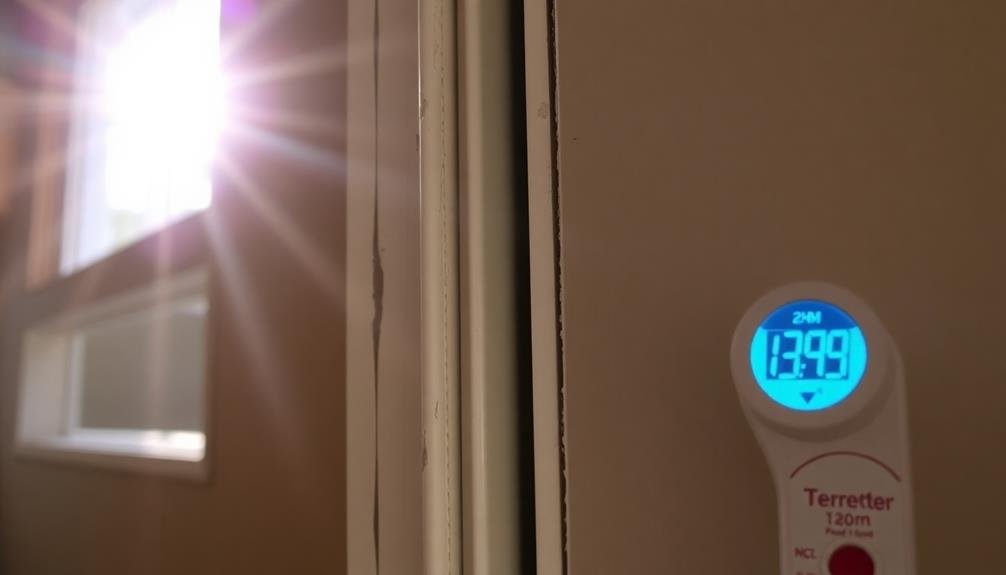
Before you purchase any weatherstripping materials, it's crucial to accurately measure your doors and windows. Start by examining the areas where air leaks are most likely to occur, such as the sides, top, and bottom of doors and windows.
For doors, measure the width of the top and bottom, as well as the height of both sides. Don't forget to measure the threshold if you're planning to install a door sweep.
For windows, measure the width of the sill and the height of each side. If you have double-hung windows, measure the meeting rail where the two sashes come together. Add an extra inch to each measurement to guarantee you have enough material to work with.
When measuring, use a metal tape measure for accuracy. Take multiple measurements along each edge, as older homes may have settled, causing uneven gaps. Record the largest measurement for each area to ensure proper coverage.
For irregular gaps, use a compressible foam tape to get an accurate impression of the space. By taking precise measurements, you'll avoid wasting materials and guarantee a snug fit for your weatherstripping, maximizing its effectiveness in preventing drafts and energy loss.
Choosing the Right Weatherstripping
Selecting the appropriate weatherstripping is vital for effectively sealing your doors and windows. You'll need to take into account factors like material, durability, and the specific gaps you're trying to fill. Different types of weatherstripping work best for various applications, so it's important to choose wisely.
For doors, you'll typically want to use more durable options like metal, vinyl, or silicone. These materials can withstand frequent opening and closing while maintaining a tight seal.
Window weatherstripping often requires more flexible materials like foam tape or rubber gaskets, which can conform to irregularities in the frame.
When choosing weatherstripping, keep these key points in mind:
- Climate considerations: Select materials that can withstand your local weather conditions
- Gap size: Measure the gaps you're sealing to guarantee proper fit
- Ease of installation: Some types are simpler to install than others
Don't forget to think about the aesthetics of your weatherstripping, especially for visible areas. Many options come in various colors to match your doors and windows.
Installation Tools and Techniques

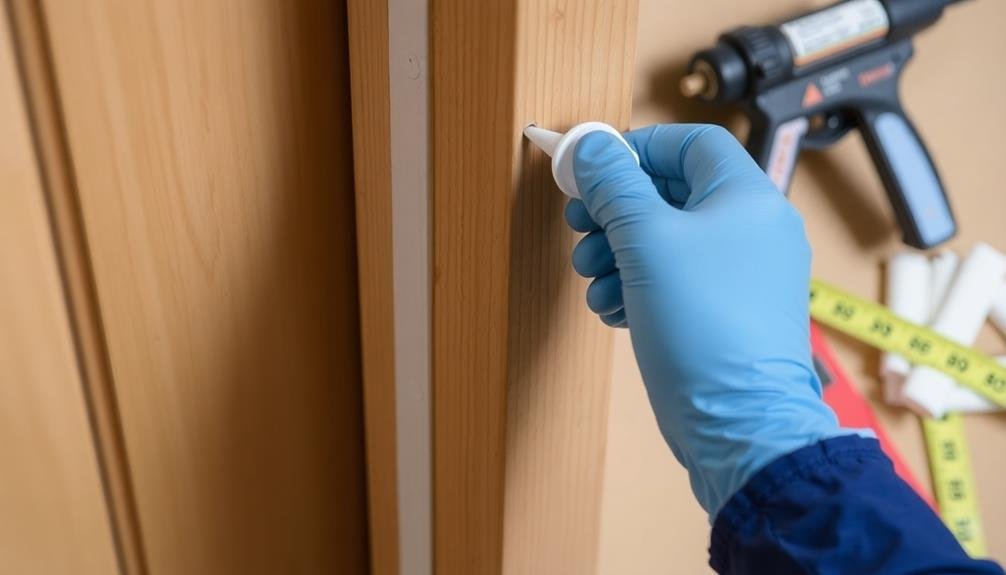
Once you've chosen the right weatherstripping, you'll need the proper tools and techniques for installation. Essential tools include a tape measure, utility knife, scissors, screwdriver, and caulking gun. For a clean installation, you'll also want a putty knife, cleaning supplies, and possibly a drill.
Begin by thoroughly cleaning the surfaces where you'll apply the weatherstripping. Remove any old caulk, dirt, or debris. Measure the areas carefully, then cut your weatherstripping to size, allowing a bit extra for overlap.
For adhesive-backed strips, peel off the backing and press firmly into place, starting at one end and working your way across. For nail-on weatherstripping, pre-drill small pilot holes to prevent splitting.
With V-strip or tension-seal types, carefully slide them into the door or window jamb. When installing door sweeps, position them so they just touch the threshold without dragging.
For gaps larger than 1/4 inch, consider using foam backer rod before applying caulk. Apply caulk in a smooth, continuous bead, then use a wet finger or tool to smooth it out. Allow sufficient drying time before closing doors or windows.
Maintenance and Replacement Tips
Regular maintenance is key to keeping your weatherstripping effective. Inspect your weatherstripping annually, preferably before the cold season begins. Look for signs of wear, such as cracks, gaps, or compression. Clean the weatherstripping with mild soap and water to remove dirt and debris that can compromise its performance.
When it's time to replace your weatherstripping, follow these tips:
- Choose the right type for your specific door or window, considering factors like material, durability, and climate.
- Remove old adhesive residue completely before installing new weatherstripping.
- Confirm the surface is clean, dry, and at room temperature for ideal adhesion.
To extend the life of your weatherstripping, avoid painting over it, as this can reduce its flexibility and effectiveness.
If you have metal weatherstripping, lubricate it occasionally with silicone spray to prevent rust and maintain smooth operation.
For doors, adjust the threshold periodically to maintain a tight seal. If you notice drafts or light coming through closed doors or windows, it's time to replace the weatherstripping.
Frequently Asked Questions
Can Weatherstripping Affect the Operation of My Doors and Windows?
Yes, weatherstripping can affect your doors and windows' operation. If it's too thick or improperly installed, you might experience difficulty opening or closing them. However, when done correctly, weatherstripping shouldn't hinder their functionality but rather improve their efficiency.
Is It Possible to Weatherstrip Sliding Glass Doors?
Yes, you can weatherstrip sliding glass doors. You'll need specialized weatherstripping designed for sliding doors. It's usually a V-shaped strip that fits into the track. This helps seal gaps and reduces drafts, improving energy efficiency in your home.
How Often Should Weatherstripping Be Inspected and Replaced?
You should inspect your weatherstripping annually, typically before winter. Replace it if you notice gaps, cracks, or brittleness. It's usually good for 5-10 years, but factors like climate and usage can affect its lifespan. Don't wait for drafts!
Can Weatherstripping Help Reduce Outside Noise Entering My Home?
Yes, weatherstripping can help reduce outside noise entering your home. It seals gaps around doors and windows, blocking sound waves. You'll notice a significant decrease in street noise, traffic, and other outdoor sounds after installing proper weatherstripping.
Are There Any Eco-Friendly or Sustainable Weatherstripping Options Available?
Yes, you'll find several eco-friendly weatherstripping options. Look for natural materials like cotton, wool, or cork. You can also choose recycled rubber or silicone products. These sustainable alternatives effectively seal gaps while minimizing environmental impact.
In Summary
You've now learned the essentials of weatherstripping your doors and windows. With the right materials, measurements, and installation techniques, you'll be well-equipped to tackle this home improvement project. Remember to maintain your weatherstripping and replace it when necessary. By following these steps, you'll create a more energy-efficient home, reduce drafts, and save on heating and cooling costs. Don't hesitate to get started – your cozier, more cost-effective home awaits!


Leave a Reply