
To prepare for insulation, focus on these seven effective air sealing methods: caulk gaps and cracks, apply weather stripping to windows and doors, use foam sealant for large openings, install gaskets for electrical outlets, seal chimney and flue dampers, insulate the attic hatch, and seal and insulate ductwork. You'll want to pay special attention to areas where different materials meet, such as window frames and pipe penetrations. Don't forget to address often-overlooked spots like electrical outlets and the attic hatch. By implementing these techniques, you'll greatly improve your home's energy efficiency and comfort. Discover how each method can maximize your insulation's effectiveness.
Caulking Gaps and Cracks
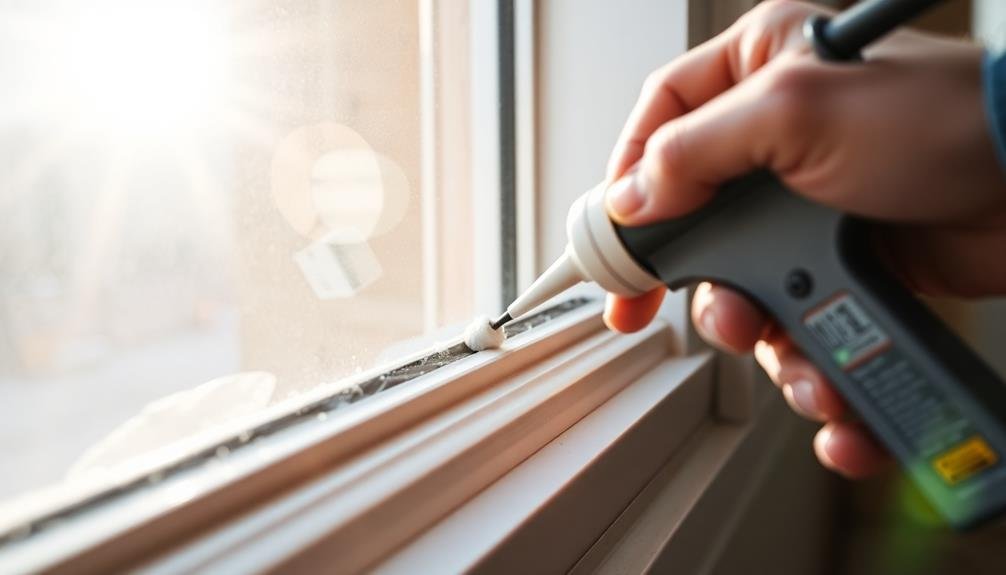
Caulking is one of the most effective and affordable methods for sealing gaps and cracks in your home. It's a simple yet essential step in air sealing that can greatly improve your home's energy efficiency.
You'll want to focus on areas where different materials meet, such as where window frames join the wall or where pipes enter your house.
To begin, clean the area thoroughly and make sure it's dry. Choose the right type of caulk for the job – silicone for areas exposed to moisture, acrylic latex for general indoor use, and polyurethane for exterior applications.
Cut the nozzle at a 45-degree angle and load it into a caulk gun. Apply the caulk in a smooth, continuous bead, maintaining steady pressure. For wider gaps, you may need to apply multiple layers.
Use a wet finger or caulk smoothing tool to create a neat finish. Pay special attention to common problem areas like baseboards, crown molding, and electrical outlets.
Don't forget often-overlooked spots like attic hatches and basement rim joists. With careful application, you'll create an effective barrier against air leaks, enhancing your home's comfort and energy efficiency.
Weather Stripping Windows and Doors
Weather stripping is an essential step in air sealing your home, focusing on windows and doors where considerable air leaks often occur. You'll find various types of weather stripping materials available, each suited for different applications. For doors, you can use adhesive-backed foam tape, V-strip, or door sweeps. Windows benefit from V-strip, foam tape, or tubular rubber gaskets.
To apply weather stripping, first clean the surface thoroughly. Measure the areas you'll be sealing and cut the material to size. For doors, install the stripping along the jamb, ensuring a snug fit when closed. For windows, apply it to the sash or frame, depending on the window type.
| Material | Pros | Cons |
|---|---|---|
| Foam Tape | Easy to install, inexpensive | Less durable, visible |
| V-Strip | Durable, nearly invisible | Harder to install, more expensive |
| Door Sweep | Effective for large gaps | May affect door operation |
Remember to check your weather stripping annually for wear and tear. Replace it as needed to maintain an effective air seal. Proper weather stripping can considerably reduce drafts, improve energy efficiency, and enhance your home's comfort level.
Foam Sealant for Large Openings

In addition to weather stripping, foam sealant is an essential tool for addressing larger gaps and openings in your home's envelope.
You'll find it particularly useful for sealing around window and door frames, electrical outlets, and plumbing penetrations. Expanding foam comes in both open-cell and closed-cell varieties, with closed-cell offering better insulation and moisture resistance.
To use foam sealant, first clean the area you're treating and remove any loose debris. Shake the can well and apply the foam in a controlled manner, filling about 50% of the gap as it will expand.
Be careful not to overfill, as excess foam can be difficult to remove and may cause doors or windows to stick.
For larger gaps, you may need to apply the foam in layers, allowing each layer to cure before adding the next. Once the foam has fully expanded and cured, trim any excess with a utility knife.
For a neater finish, you can cover the cured foam with caulk or paint. Remember to wear gloves and work in a well-ventilated area when using foam sealant.
Gaskets for Electrical Outlets
While foam sealant tackles larger gaps, you shouldn't overlook the small openings around electrical outlets. These seemingly insignificant spaces can contribute to significant air leakage and energy loss in your home. Gaskets for electrical outlets are an easy and effective solution to this problem.
You'll find these gaskets readily available at hardware stores or online. They're typically made of foam or rubber and fit snugly behind the outlet cover plate. To install them, simply remove the cover plate, place the gasket over the outlet, and reattach the plate. It's a quick process that can make a noticeable difference in your home's energy efficiency.
When selecting and installing outlet gaskets, keep these points in mind:
- Choose gaskets that match your outlet size and shape
- Guarantee a tight fit to maximize air sealing effectiveness
- Don't forget to seal switch plates as well as outlet plates
Chimney and Flue Damper Sealing
When sealing your chimney and flue damper, you'll first need to identify common leakage points around the damper and flashing.
Apply a high-temperature sealant to these areas, ensuring you've chosen a product specifically designed for chimney use.
You'll also want to maintain your damper regularly, checking for proper closure and replacing worn seals to maximize energy efficiency.
Identifying Leakage Points
To effectively seal your home's air leaks, you'll need to identify key leakage points, especially around chimneys and flue dampers.
Start by inspecting your chimney's exterior and interior for visible gaps or cracks. Pay close attention to the area where the chimney meets the roof and walls, as these junctions are prone to separation over time.
Inside, check the damper's seal when it's closed, looking for any light penetration or feeling for air movement.
For flue dampers, verify they're closing completely when not in use. Test this by holding a lit candle or incense stick near the damper when it's closed; if the smoke wavers, you've found a leak.
Don't forget to examine the flue pipe connections for any loose fittings or corrosion that could lead to air leakage.
Common leakage points to check include:
- The chimney crown or cap
- Mortar joints between bricks
- The damper's metal-to-metal contact surfaces
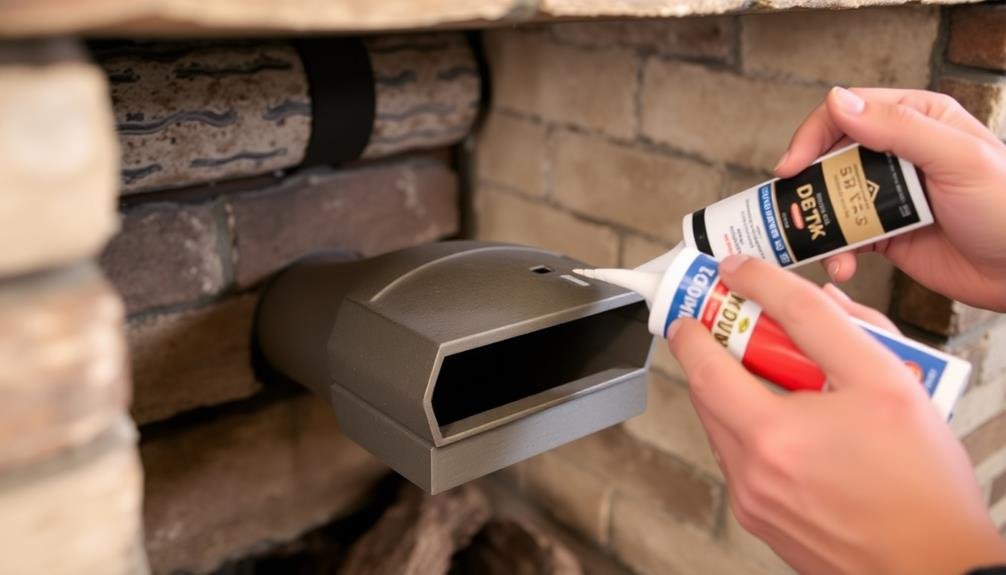
High-Temperature Sealant Application
Sealing your chimney and flue damper requires the use of high-temperature sealants designed to withstand extreme heat. These specialized products can endure temperatures up to 2000°F, ensuring a durable seal even in the hottest conditions.
Before applying the sealant, thoroughly clean the area around your chimney and flue damper. Remove any debris, soot, or old sealant to create a smooth surface.
Next, apply the high-temperature sealant using a caulking gun, focusing on gaps and cracks where air might escape. Pay special attention to the junction between the chimney and the roof, as well as around the flue damper.
When working with high-temperature sealants, wear protective gear such as gloves and safety glasses. Apply the sealant in a continuous bead, smoothing it out with a putty knife for an even finish. Allow the sealant to cure according to the manufacturer's instructions, which typically takes 24 to 48 hours.
For added protection, consider installing a chimney cap to prevent water infiltration and animal entry. This extra step will complement your air sealing efforts and enhance your home's energy efficiency.
Damper Maintenance Tips
Regular maintenance of your chimney and flue dampers guarantees peak performance and prolongs their lifespan. To keep your dampers in top condition, clean them thoroughly at least once a year, removing any soot, creosote, or debris that may have accumulated.
Inspect the damper's seal and moving parts for signs of wear or damage, and replace any worn components promptly.
When sealing your dampers, use high-temperature silicone caulk or fireproof rope gaskets to create an airtight seal. Verify the damper opens and closes smoothly, and lubricate hinges and pivot points with a heat-resistant lubricant.
Don't forget to check the damper's position regularly, keeping it closed when the fireplace isn't in use to prevent heat loss.
For peak damper maintenance, follow these tips:
- Test the damper's operation before each heating season
- Clean the flue and chimney to prevent damper obstruction
- Install a chimney cap to reduce debris accumulation on the damper
Attic Hatch Insulation
You'll want to focus on two key aspects when insulating your attic hatch: weatherstripping and adding rigid foam board.
Start by applying weatherstripping around the hatch's perimeter to create an airtight seal when closed.
Then, cut a piece of rigid foam board to fit snugly on top of the hatch, providing an extra layer of insulation to prevent heat loss.
Weatherstripping the Hatch
One of the most overlooked areas for energy loss in homes is the attic hatch. Weatherstripping this often-forgotten access point is essential for maintaining your home's energy efficiency.
You'll want to choose a durable weatherstripping material that can withstand temperature fluctuations and frequent use. Start by thoroughly cleaning the hatch frame and door to guarantee proper adhesion. Measure the perimeter of the hatch and cut your weatherstripping to fit.
For best results, use a compression-style weatherstripping that creates a tight seal when the hatch is closed. Apply the weatherstripping to the frame, making sure it's evenly distributed and free of gaps.
When selecting weatherstripping, consider these options:
- Foam tape: Easy to install and effective for irregularly shaped hatches
- Felt strips: Inexpensive and suitable for less frequently used hatches
- Silicone or rubber gaskets: Durable and ideal for high-traffic areas
Test the seal by closing the hatch and feeling for any air leaks. If necessary, adjust the weatherstripping or add additional layers to achieve a snug fit.
Remember to inspect and replace the weatherstripping annually to maintain its effectiveness and prevent energy loss through your attic hatch.
Adding Rigid Foam Board
Insulating your attic hatch with rigid foam board greatly boosts its energy efficiency.
To add this insulation, you'll need to measure your hatch's dimensions and purchase rigid foam board that's slightly larger. Cut the foam board to fit snugly inside the hatch frame, leaving about 1/4 inch of clearance on all sides.
Before installing, apply a bead of caulk around the hatch frame's inner edge to create an airtight seal. Press the foam board into place, ensuring it sits flush against the frame.
For ideal insulation, use multiple layers of foam board, staggering the seams to minimize air leakage. Secure the foam board using construction adhesive or foil tape.
If your hatch is particularly thick, you can create a box-like structure with foam board to fill the entire depth. Don't forget to insulate the top of the hatch as well.
For added insulation, consider attaching weatherstripping to the hatch's edges where it meets the frame.
This combination of rigid foam board and weatherstripping will greatly reduce heat loss through your attic hatch, improving your home's overall energy efficiency and comfort.
Ductwork Sealing and Insulation

When it comes to efficient home heating and cooling, your ductwork plays an essential role. Properly sealed and insulated ducts guarantee that conditioned air reaches its intended destination without leaking or losing temperature along the way.
To air seal your ductwork, start by inspecting for any visible gaps, cracks, or disconnected sections. Use mastic sealant or metal-backed tape to seal these areas, avoiding cloth-backed duct tape as it degrades over time.
Once sealed, insulate your ductwork, especially in unconditioned spaces like attics, crawl spaces, and garages. This step prevents heat loss in winter and heat gain in summer. Use fiberglass duct wrap or rigid foam board, guaranteeing a snug fit around the ducts.
Pay special attention to:
- Joints and connections between duct sections
- Areas where ducts pass through walls or floors
- Return air ducts, which are often overlooked
Remember to seal and insulate your HVAC system's air handler cabinet as well. This often-neglected area can be a significant source of air leakage.
Frequently Asked Questions
How Long Does Air Sealing Typically Last Before Needing to Be Redone?
You'll find that properly done air sealing can last 10-20 years or more. However, it's not a one-and-done task. You should regularly inspect and maintain sealed areas, addressing any new gaps or cracks as they appear over time.
Can Air Sealing Help Reduce Outdoor Noise Infiltration Into the Home?
Yes, air sealing can greatly reduce outdoor noise infiltration into your home. It'll close gaps and cracks where sound can enter, creating a more peaceful indoor environment. You'll notice a decrease in traffic, neighborhood, and other external noises.
What's the Average Cost Difference Between DIY and Professional Air Sealing?
You'll typically save 50-70% by DIYing air sealing compared to hiring professionals. For an average home, expect to spend $200-$500 on materials for DIY, while professional services can cost $1,000-$2,500 or more.
Are There Any Health Risks Associated With Air Sealing Materials?
You should be aware of potential health risks from air sealing materials. Some foam sealants can emit volatile organic compounds (VOCs), which may cause respiratory issues. It's essential to use proper ventilation and follow manufacturer's safety guidelines when applying these products.
How Much Can Air Sealing Reduce Energy Bills on Average?
You can expect to save 15-20% on your energy bills through air sealing. It'll reduce drafts, improve comfort, and increase your HVAC system's efficiency. Results vary based on your home's initial condition and climate.
In Summary
You've now learned about seven effective air sealing methods to prepare your home for insulation. By tackling these areas, you'll greatly reduce energy loss and improve your home's comfort. Remember, it's not just about adding insulation; proper air sealing is essential for maximizing efficiency. Take the time to address these key points, and you'll be well on your way to a more energy-efficient, comfortable living space. Don't hesitate to start sealing today!


Leave a Reply