You can easily assess your home's energy efficiency using a variety of simple, affordable tools. Energy usage meters and smart thermostats help you track electricity consumption and optimize heating and cooling. Infrared thermal cameras and air leak detectors pinpoint areas of heat loss, while insulation testers evaluate your home's thermal barrier. Water flow rate meters and appliance energy trackers identify potential savings in water and electricity use. Solar potential assessment tools help you explore renewable energy options. Home energy audit checklists guide you through a thorough evaluation. By understanding these tools, you'll reveal the secrets to a more energy-efficient home.
Energy Usage Meters

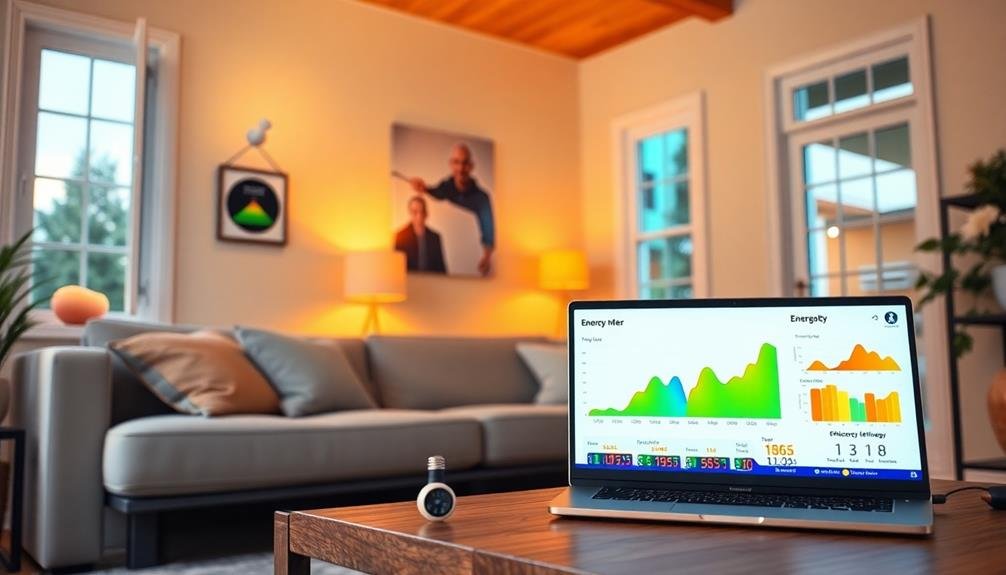
In light of rising energy costs, energy usage meters have become essential tools for homeowners. These devices allow you to monitor your electricity consumption in real-time, helping you identify energy-hungry appliances and adjust your usage accordingly.
You'll find various types of energy meters on the market, ranging from simple plug-in devices to more advanced whole-house monitoring systems.
Plug-in meters are affordable and easy to use. You simply plug them into an outlet, then connect your appliance to the meter. They'll display the energy consumption, often in both kilowatt-hours and cost.
Whole-house energy monitors provide a more thorough view of your home's energy usage. They're typically installed in your electrical panel and can track consumption across all circuits.
Many modern energy meters come with smartphone apps, allowing you to track your usage remotely and receive alerts when consumption spikes. Some even integrate with smart home systems, enabling automated energy-saving routines.
Smart Thermostats
Among the most impactful home energy efficiency tools, smart thermostats stand out for their ability to optimize heating and cooling. These devices learn your habits and preferences, automatically adjusting temperatures to save energy without sacrificing comfort.
You'll find that smart thermostats can notably reduce your energy bills while providing convenient control through smartphone apps.
To maximize the benefits of your smart thermostat, consider these key features:
- Geofencing: Automatically adjusts settings based on your location
- Learning algorithms: Adapts to your schedule and preferences over time
- Energy usage reports: Provides insights into your consumption patterns
- Integration with other smart home devices: Allows for coordinated energy-saving efforts
When choosing a smart thermostat, verify it's compatible with your HVAC system and home's wiring. Installation is often straightforward, but you may want to consult a professional if you're unsure.
Once set up, take time to familiarize yourself with the device's features and app interface. You'll be able to create custom schedules, set energy-saving targets, and even receive alerts about potential HVAC issues.
Infrared Thermal Cameras

Thermal imaging technology has revolutionized home energy audits through the use of infrared thermal cameras. These devices allow you to visualize temperature differences in your home, helping you identify areas of heat loss or gain. By detecting infrared radiation emitted by objects, they create a color-coded image that reveals hidden energy inefficiencies.
When using an infrared camera, you'll see warm areas in red or orange and cooler spots in blue or purple. This visual representation helps you pinpoint air leaks, insufficient insulation, and moisture problems that might otherwise go unnoticed. You can scan walls, windows, doors, and even electrical systems to find potential issues.
To get the most accurate results, use the camera on a day with a significant temperature difference between indoor and outdoor environments. Focus on areas where you suspect energy loss, such as around windows, doors, and attic hatches.
Don't forget to check your HVAC system and ductwork for leaks or poor insulation. By identifying these problem areas, you can prioritize energy-saving improvements and potentially reduce your utility bills.
Air Leak Detectors
Air leak detectors are essential tools for identifying energy-wasting gaps in your home's envelope.
You'll find various types of detectors available, from simple smoke pens to more advanced ultrasonic devices.
If you're on a budget, you can also try DIY detection methods using household items like candles or incense sticks to spot drafts and air leaks.
Types of Detectors
In spite of your best efforts to insulate your home, sneaky air leaks can still drive up energy costs. To combat these elusive drafts, you'll need the right tools. Air leak detectors come in various types, each with its own strengths and applications.
Here are four common types of air leak detectors you can use:
- Thermal cameras: These high-tech devices create a visual heat map of your home, highlighting temperature differences that indicate air leaks. They're pricey but incredibly accurate.
- Smoke pencils: These handheld tools emit a thin stream of smoke that you can use to detect air movement around windows, doors, and other potential leak points. They're affordable and easy to use.
- Digital pressure gauges: These devices measure the pressure difference between the inside and outside of your home, helping you identify areas where air is escaping. They're ideal for whole-house assessments.
- Ultrasonic detectors: By picking up high-frequency sounds produced by air leaks, these detectors can pinpoint even the smallest drafts. They're particularly useful for finding leaks in hard-to-reach areas.
DIY Detection Methods
Homeowners on a budget needn't worry about expensive equipment to detect air leaks. You can easily create your own detection tools using common household items. One simple method is the smoke test. Light an incense stick and slowly move it around potential leak areas like windows, doors, and electrical outlets. If the smoke wavers or is drawn outward, you've found a leak.
Another DIY technique is the dollar bill test. Close a door or window on a dollar bill, then try to pull it out. If it slides out easily, you've got a gap that needs sealing.
For larger areas, you can use a damp hand to feel for drafts or temperature changes near suspected leak points.
At night, you can perform a flashlight test. Have someone shine a bright light from outside while you inspect from inside. Any visible light indicates a potential air leak.
Finally, consider using a piece of tissue paper attached to a coat hanger. Move this homemade tool around windows and doors to detect air movement.
These DIY methods are cost-effective alternatives to professional equipment and can help you identify areas needing attention in your home's energy efficiency efforts.
Insulation Testers

Thermal detectives in the world of home energy, insulation testers are essential tools for identifying weak spots in your home's protective barrier. These devices measure the effectiveness of your insulation by detecting temperature differences and heat loss.
You'll find various types of insulation testers on the market, ranging from simple infrared thermometers to more advanced thermal imaging cameras.
To use an insulation tester effectively, follow these steps:
- Choose a cool day or evening when there's a significant temperature difference between indoor and outdoor air.
- Turn on your heating system to create a consistent indoor temperature.
- Scan walls, ceilings, floors, and potential problem areas like windows and doors.
- Look for unexpected temperature variations, which may indicate insulation gaps or thermal bridges.
Infrared thermometers are affordable and easy to use, providing spot temperature readings.
For a more thorough view, thermal imaging cameras create color-coded heat maps of your home's surfaces. While more expensive, they offer detailed insights into insulation performance.
Wattage Calculators
Every savvy energy-saver needs a wattage calculator in their toolkit. These handy devices help you measure and manage your home's electricity consumption, giving you valuable insights into your energy usage patterns.
By understanding how much power your appliances and devices draw, you'll be better equipped to make informed decisions about energy conservation.
Wattage calculators come in various forms, from simple plug-in devices to more advanced smart home systems. The basic models allow you to plug an appliance directly into the calculator, which then displays the power consumption in watts.
More sophisticated versions can track usage over time, providing detailed reports on energy consumption and costs.
You'll find these tools particularly useful for identifying energy hogs in your home. They can help you pinpoint which appliances are responsible for unexpected spikes in your electricity bill.
Armed with this information, you can take targeted action to reduce your energy use, such as replacing inefficient appliances or adjusting your usage habits.
Some wattage calculators even estimate your carbon footprint, helping you make environmentally conscious decisions about your energy consumption.
Home Energy Monitors

You'll find various types of home energy monitors available, from simple plug-in devices to whole-house systems that connect to your electrical panel.
Installing these monitors typically involves attaching sensors to your main power lines or individual circuits, followed by connecting to a display unit or smartphone app.
Once set up, you can interpret the data to track your energy consumption patterns, identify power-hungry appliances, and make informed decisions to reduce your energy usage.
Types of Energy Monitors
Home energy monitors are essential tools for tracking and managing your household's electricity consumption. They come in various types, each offering different features and capabilities to suit your specific needs.
Here are the main types of energy monitors you'll encounter:
- Plug-in monitors: These simple devices plug directly into individual appliances, measuring their energy usage. They're affordable and easy to use but limited to monitoring one device at a time.
- Whole-house monitors: These systems connect to your home's main electrical panel, providing an all-encompassing view of your entire household's energy consumption. They often come with user-friendly apps for real-time monitoring and analysis.
- Smart meter displays: If you have a smart meter installed, you can request a display unit from your utility company. These devices communicate directly with your smart meter, showing real-time energy usage and costs.
- Advanced monitoring systems: These high-end solutions combine whole-house monitoring with additional features like appliance-level tracking, solar integration, and home automation capabilities.
When choosing an energy monitor, consider your budget, technical expertise, and specific monitoring needs.
Some systems require professional installation, while others are DIY-friendly.
Remember that the most effective monitor is one you'll actually use consistently to track and reduce your energy consumption.
Installation and Setup Process
Once you've chosen the right energy monitor for your home, it's time to get it up and running. Most modern energy monitors are designed for easy installation, often requiring just a few simple steps.
Start by locating your home's electrical panel and identifying the main power cables. Clip the monitor's sensor around these cables, guaranteeing a secure fit. Don't worry; you won't need to cut or modify any wires.
Next, plug in the display unit and connect it to your home's Wi-Fi network. Follow the manufacturer's instructions to pair the sensor with the display. Some models may require you to download a smartphone app for setup and ongoing monitoring.
Once connected, you'll need to input basic information about your energy rates and usage patterns.
Give the system time to collect data and establish baseline readings. This usually takes a few days to a week. During this period, use your appliances as you normally would.
After the initial setup, you can start exploring the monitor's features, such as real-time energy consumption tracking, historical data analysis, and customized alerts.
Remember to regularly check for software updates to maintain peak performance and access to new features.
Data Interpretation and Usage
After setting up your home energy monitor, you'll need to explore the wealth of data it provides. These devices collect detailed information about your home's energy consumption, allowing you to make informed decisions about your usage patterns and potential areas for improvement.
To effectively interpret and use the data from your home energy monitor:
- Familiarize yourself with the dashboard or app interface
- Identify your baseline energy consumption
- Look for patterns in daily, weekly, and monthly usage
- Set energy-saving goals based on your findings
Pay attention to spikes in energy usage, which often indicate high-consumption appliances or activities. You'll likely notice patterns related to your daily routines, such as increased usage during meal preparation or evening hours when more devices are in use.
Use this information to adjust your habits and make energy-efficient choices. For example, you might decide to run energy-intensive appliances during off-peak hours or replace outdated devices with more efficient models.
HVAC Performance Analyzers
One of the most valuable tools for enhancing your home's energy efficiency is an HVAC performance analyzer. This device helps you assess the effectiveness of your heating, ventilation, and air conditioning system. It measures key parameters like airflow, temperature differentials, and system pressures to determine if your HVAC is operating at peak performance.
You'll find that HVAC analyzers come in various forms, from simple handheld devices to more complex systems with multiple sensors. They typically include features like digital manometers, temperature probes, and airflow meters.
By using these tools, you can identify issues such as inadequate airflow, refrigerant leaks, or dirty coils that may be compromising your system's performance.
To use an HVAC analyzer effectively, you'll need to take measurements at different points in your system. This includes supply and return vents, outdoor units, and ductwork. The data collected will help you pinpoint areas for improvement, whether it's adjusting fan speeds, cleaning components, or addressing refrigerant levels.
Lighting Efficiency Tools

You'll find light meters invaluable for measuring illumination levels in different areas of your home, helping you identify spaces that might be over or under-lit.
Smart bulb analyzers can provide detailed data on your lighting usage patterns and energy consumption, allowing you to make informed decisions about upgrading to more efficient options.
These tools empower you to optimize your home's lighting setup, potentially leading to significant energy savings and improved comfort.
Light Meter Usage
Light meters are essential tools for measuring illumination levels in your home, helping you optimize lighting efficiency and energy consumption. These handheld devices provide accurate readings of light intensity in various units, typically lux or foot-candles.
By using a light meter, you can identify areas that are over-lit or under-lit, allowing you to make informed decisions about lighting adjustments.
To effectively use a light meter in your home:
- Take measurements at different times of day to account for natural light variations.
- Hold the meter at the height where tasks are typically performed (e.g., desk level for office spaces).
- Point the sensor towards the light source for direct measurements or towards the task area for ambient light readings.
- Record readings in multiple locations within each room for a thorough assessment.
Armed with this data, you'll be able to determine where you can reduce artificial lighting, potentially saving energy and lowering your electricity bills.
You might find that some areas benefit from task lighting rather than general overhead illumination. Additionally, light meter readings can help you choose the right bulb wattage or lumens for specific areas, ensuring you're not using more energy than necessary while maintaining adequate lighting for comfort and safety.
Smart Bulb Analyzers
Designed to revolutionize home lighting efficiency, smart bulb analyzers are cutting-edge tools that provide detailed insights into your light bulbs' performance and energy consumption.
These devices connect to your smartphone or tablet, allowing you to monitor and analyze your home's lighting in real-time.
To use a smart bulb analyzer, you'll need to install the accompanying app and connect the device to your home's Wi-Fi network.
Once set up, you can scan individual bulbs or entire rooms to gather data on energy usage, color temperature, and brightness levels.
The analyzer will identify inefficient bulbs and suggest energy-saving alternatives.
Many smart bulb analyzers also offer features like scheduling, dimming controls, and integration with smart home systems.
You can create custom lighting scenes, set timers, and even control your lights remotely.
Some advanced models use machine learning to optimize your lighting based on your habits and preferences, automatically adjusting brightness and color temperature throughout the day.
Water Flow Rate Meters
Water flow rate meters are essential tools for homeowners looking to monitor and reduce their water consumption. These devices attach to your faucets, showerheads, or main water line to measure the volume of water flowing through them over time.
By using a flow rate meter, you'll gain valuable insights into your household's water usage patterns and identify areas where you can conserve.
To make the most of your water flow rate meter, follow these steps:
- Install the meter on the fixture you want to monitor
- Run the water at different pressures to observe varying flow rates
- Record readings over time to establish a baseline
- Compare your results to efficiency standards
You'll be surprised at how much water you're using in different areas of your home. Armed with this information, you can make informed decisions about upgrading to low-flow fixtures, fixing leaks, or adjusting your water usage habits.
Some advanced meters even connect to smartphone apps, allowing you to track your consumption in real-time and set conservation goals.
Appliance Energy Consumption Trackers

While monitoring water usage is important, keeping tabs on your electrical consumption is equally essential for home energy efficiency. Appliance energy consumption trackers are invaluable tools that help you identify which devices are consuming the most power in your home. These trackers come in various forms, from simple plug-in meters to sophisticated whole-house monitoring systems.
You'll find plug-in meters particularly useful for individual appliances. Simply connect the meter between the appliance and the wall outlet to measure its energy usage. For a broader view, consider installing a whole-house energy monitor, which connects to your main electrical panel and tracks overall consumption.
Here's a comparison of common appliance energy consumption trackers:
| Type | Pros | Cons |
|---|---|---|
| Plug-in Meter | Affordable, easy to use | Measures one appliance at a time |
| Smart Power Strip | Monitors multiple devices | Limited to connected appliances |
| Whole-House Monitor | extensive data, real-time tracking | Higher cost, professional installation |
Solar Potential Assessment Tools
Harnessing the sun's power for your home's energy needs begins with understanding your property's solar potential. Solar potential assessment tools help you evaluate your home's suitability for solar panels, estimating potential energy generation and cost savings. These user-friendly tools typically use satellite imagery and local climate data to provide accurate assessments.
To get started with solar potential assessment tools, follow these steps:
- Input your address: Most tools begin by asking for your property's location to access relevant geographical and climate data.
- Outline your roof: You'll often need to trace your roof's outline on a satellite image, identifying areas suitable for panel installation.
- Adjust roof characteristics: Input details like roof pitch, shading, and orientation to refine the assessment.
- Review results: Examine the generated report for estimated energy production, cost savings, and system size recommendations.
Popular solar assessment tools include Project Sunroof by Google, PVWatts by NREL, and SolarReviews' calculator. These tools offer valuable insights into your home's solar potential, helping you make informed decisions about investing in solar energy.
Home Energy Audit Checklists

Empowering homeowners to assess their energy usage, home energy audit checklists serve as invaluable tools for identifying areas of inefficiency and potential improvements.
These detailed lists guide you through a systematic evaluation of your home's energy consumption, helping you pinpoint where energy is being wasted.
A typical checklist covers key areas like insulation, air leaks, heating and cooling systems, water heating, and lighting.
You'll examine your attic, walls, and basement for proper insulation, check windows and doors for drafts, and assess the efficiency of your HVAC system.
The checklist will prompt you to inspect your water heater's age and settings, evaluate your appliances' energy ratings, and review your lighting choices.
Frequently Asked Questions
How Much Can I Save Annually by Implementing Energy-Efficient Measures?
You can save hundreds or even thousands annually by implementing energy-efficient measures. Your exact savings depend on your current energy usage, home size, and specific improvements. Start with a home energy audit to identify potential savings areas.
Are There Government Incentives for Home Energy Efficiency Upgrades?
Yes, you'll find various government incentives for home energy upgrades. They often include tax credits, rebates, and grants. Check with your local and federal energy departments to discover available programs that can help offset your improvement costs.
What's the Average Payback Period for Energy-Efficient Home Improvements?
You'll find payback periods vary widely for energy-efficient home improvements. On average, you're looking at 3-5 years for simpler upgrades like LED lighting, while more extensive projects like insulation or HVAC systems can take 5-10 years.
How Do Seasonal Changes Affect Home Energy Efficiency Assessments?
You'll notice seasonal changes greatly impact your energy efficiency assessments. In winter, you're likely to spot more heat loss issues. During summer, you'll focus on cooling efficiency. It's best to assess your home in different seasons.
Can Renters Perform Energy Efficiency Assessments Without Landlord Permission?
You can perform many energy efficiency assessments as a renter without landlord permission. You're free to check for drafts, monitor energy usage, and inspect appliances. However, you can't make structural changes or replace major systems without approval.
In Summary
You've now got a toolkit of easy-to-use self-assessment tools for boosting your home's energy efficiency. From energy meters to thermal cameras, you're equipped to identify problem areas and track improvements. Don't forget to use checklists and smart devices to maintain your progress. With these tools, you'll be well on your way to a more efficient, comfortable, and cost-effective home. Take charge of your energy use and start saving today!


Leave a Reply