
You can tackle several insulation upgrades yourself to boost your home's energy efficiency. Start by evaluating your current insulation and identifying problem areas. In the attic, you can add fiberglass batts or blown-in cellulose insulation. For walls, consider blown-in insulation or installing foam board. Weatherstripping doors and windows is a simple yet effective project. Don't forget to insulate pipes and ductwork in unconditioned spaces. Basements and crawlspaces can benefit from rigid foam insulation and vapor barriers. For eco-conscious homeowners, sustainable options like recycled denim or sheep's wool are available. With the right tools and knowledge, you'll be well-equipped to improve your home's comfort and reduce energy bills.
Assessing Your Home's Insulation Needs
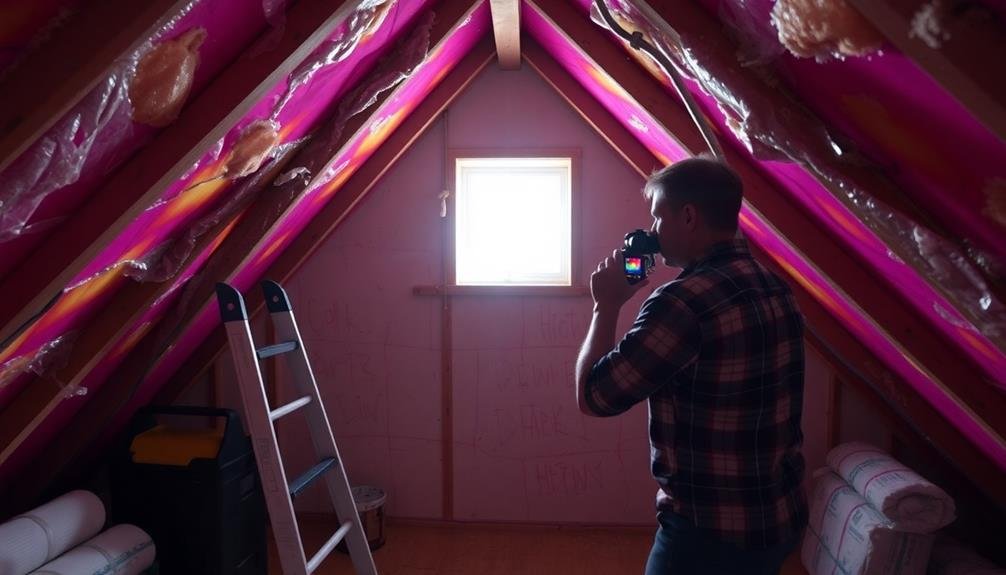
Before diving into any insulation project, you'll need to evaluate your home's current insulation status. Start by inspecting your attic, walls, and floors for existing insulation. Check its type, thickness, and condition. Look for gaps, compressed areas, or signs of moisture damage.
Next, assess your home's energy efficiency. Look for drafts around windows and doors, and note any rooms that feel particularly cold or hot. Review your energy bills to identify unusually high costs, which may indicate poor insulation.
Use an infrared thermometer to detect temperature differences in your walls, which can reveal areas lacking insulation. You can also hire a professional for a thorough energy audit, including blower door tests and thermal imaging.
Determine your home's recommended insulation R-value based on your climate zone. Compare this to your current insulation levels to identify areas needing improvement.
Don't forget to check less obvious spaces like crawl spaces, basements, and around pipes and ductwork.
Attic Insulation Upgrades
The attic is one of the most critical areas for insulation in your home. Poor attic insulation can lead to significant heat loss in winter and heat gain in summer, driving up your energy bills.
Fortunately, upgrading your attic insulation is a relatively straightforward DIY project.
Start by ensuring your attic floor is air-sealed to prevent warm air from escaping. Use caulk or expanding foam to seal gaps around pipes, electrical wires, and light fixtures.
Next, determine the type and amount of insulation you need. Fiberglass batts or blown-in cellulose are popular choices for attics. Aim for an R-value of R-38 to R-60, depending on your climate zone.
If you're using batts, lay them between the joists, making sure not to compress them. For blown-in insulation, rent a blowing machine from a home improvement store and follow the manufacturer's instructions carefully.
Don't forget to insulate the attic hatch or door, and install baffles near the eaves to maintain proper ventilation.
Always wear protective gear, including a respirator, gloves, and eye protection. If you encounter any old insulation that might contain asbestos, don't disturb it and consult a professional.
Wall Cavity Insulation Options
When it comes to insulating your wall cavities, you've got several effective options to choose from.
You can opt for blown-in cellulose insulation, which is eco-friendly and provides excellent coverage, or install fiberglass batts for a more traditional approach.
For maximum insulation and air-sealing properties, you might consider applying spray foam, though it's typically more expensive and requires specialized equipment.
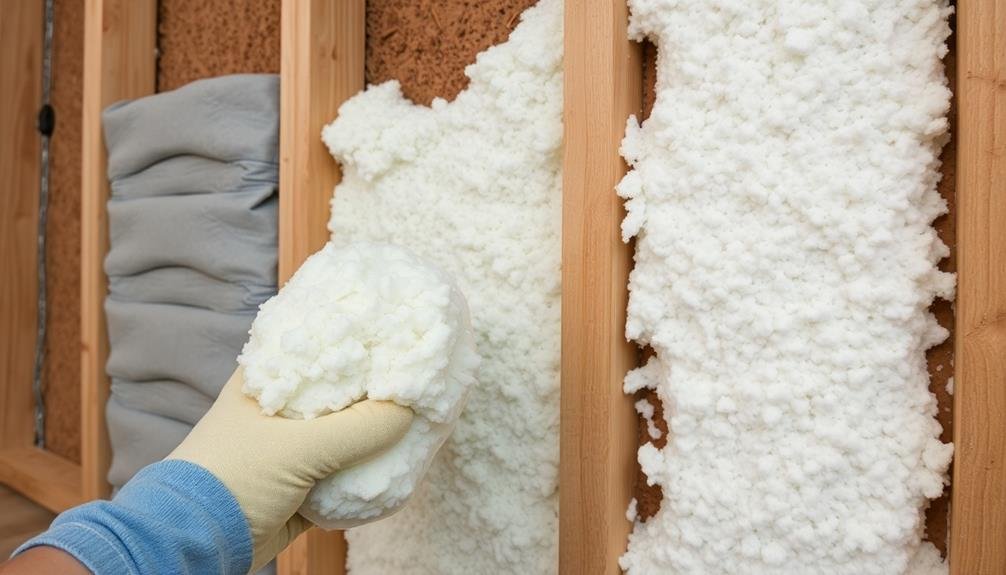
Blown-In Cellulose Insulation
If you're looking to improve your home's energy efficiency, blown-in cellulose insulation is an excellent option for insulating wall cavities. This eco-friendly material is made from recycled paper products treated with fire-retardant chemicals, making it both sustainable and safe.
To install blown-in cellulose, you'll need to rent a blowing machine from a home improvement store. Start by drilling small holes in your walls, typically at the top of each cavity between studs. Then, insert the blowing machine's hose into these holes and fill the cavities with cellulose. The material will settle and compact over time, so it's important to overfill slightly.
Blown-in cellulose offers several advantages. It can easily fill irregular spaces and conform around obstacles like wiring and pipes. It also provides good sound insulation and has a higher R-value per inch than fiberglass batts.
However, be aware that cellulose can absorb moisture, so it's vital to guarantee your walls are properly sealed against water intrusion.
While DIY installation is possible, it can be messy and time-consuming. If you're not confident in your abilities, consider hiring a professional to guarantee proper installation and maximum energy efficiency benefits.
Fiberglass Batts Installation
Another popular option for wall cavity insulation is fiberglass batts. These pre-cut panels of fiberglass insulation are designed to fit snugly between wall studs. You'll find them easy to handle and install, making them a great choice for DIY projects.
To install fiberglass batts, you'll need to remove any existing drywall or paneling. Measure the spaces between studs and cut the batts to fit, leaving a slight overhang. Wear protective gear, including gloves, a mask, and safety glasses, as fiberglass can irritate your skin and lungs.
Start at the top of the wall and work your way down, pressing the batts firmly into place. Don't compress them, as this reduces their insulating effectiveness. Use a utility knife to cut around outlets, pipes, and other obstacles. Secure the batts with insulation supports or staples if necessary.
Once you've filled all the cavities, cover the insulation with a vapor barrier if required by local building codes. Finally, replace the drywall or paneling.
Remember to seal any gaps or cracks around windows, doors, and other openings to maximize your insulation's effectiveness.
Spray Foam Application
For those seeking a more advanced DIY insulation option, spray foam insulation offers excellent coverage and air-sealing properties. It's available in two types: open-cell and closed-cell foam. While both can be applied as a DIY project, you'll need to be comfortable using specialized equipment and following safety precautions.
To apply spray foam, you'll need a foam gun kit, protective gear, and the foam components. Start by preparing the work area, ensuring it's clean and dry. Wear appropriate safety equipment, including a respirator, goggles, and protective clothing. Mix the foam components according to the manufacturer's instructions, then apply the foam in even layers, allowing each layer to expand and cure before adding the next.
| Spray Foam Type | R-Value per Inch | Best Use Case |
|---|---|---|
| Open-Cell | R-3.6 to R-3.8 | Interior walls |
| Closed-Cell | R-6 to R-7 | Moisture-prone areas |
| Hybrid | R-5 to R-5.5 | Versatile application |
Remember that spray foam expands greatly, so be cautious not to overfill cavities. Trim excess foam once it's cured. While DIY spray foam application can save money, it's essential to follow safety guidelines and consider professional installation for large-scale projects or if you're unsure about the process.
Weatherstripping Doors and Windows
Weatherstripping your doors and windows is an effective DIY project to improve your home's insulation.
You'll need to choose the right type of weatherstripping material, gather the necessary tools, and follow a step-by-step installation process.
Let's explore these key aspects to help you successfully complete this energy-saving upgrade.
Types of Weatherstripping Materials
When it comes to sealing gaps around doors and windows, you'll find a variety of weatherstripping materials available. Each type has its own advantages and is suited for different applications. Let's explore some common options:
| Material | Best For | Durability |
|---|---|---|
| Foam Tape | Irregular gaps | Low to medium |
| V-Strip | Windows, tops of doors | Medium to high |
| Door Sweeps | Bottom of doors | High |
| Tubular Rubber | Door frames | Medium |
| Felt | Low-traffic areas | Low |
Foam tape is inexpensive and easy to install, making it ideal for DIY projects. It's best for sealing irregular gaps but may need frequent replacement. V-strips, made of plastic or metal, are durable and work well for windows and the tops of doors. They're virtually invisible when installed.
Door sweeps attach to the bottom of doors and effectively block drafts. They're highly durable but may require some adjustments for a proper fit. Tubular rubber weatherstripping is flexible and provides a tight seal for door frames. Felt is the most budget-friendly option but wears out quickly, so it's best for low-traffic areas or temporary solutions.
Tools and Supplies Needed
Now that you're familiar with different weatherstripping materials, let's focus on the tools and supplies you'll need to get the job done.
For most weatherstripping projects, you'll require a tape measure, utility knife, scissors, screwdriver, hammer, and cleaning supplies. A caulking gun is crucial if you're using adhesive-backed weatherstripping or need to apply caulk.
Don't forget safety gear like work gloves and safety glasses. You'll also need a putty knife or flathead screwdriver to remove old weatherstripping.
For metal door thresholds, you might need a hacksaw to cut them to size. A drill with various bits can be helpful for installing certain types of weatherstripping.
Depending on the specific project, you may need additional supplies like nails, screws, or staples. If you're working with foam weatherstripping, a staple gun can be useful.
For door sweeps, you might need a door bottom seal and screws. Always have a pencil and notepad handy to mark measurements and make notes.
Step-By-Step Installation Process
Let's plunge into the step-by-step process of weatherstripping your doors and windows.
Begin by thoroughly cleaning the surfaces where you'll apply the weatherstripping. Remove any old weatherstripping, dirt, or debris.
Next, measure the perimeter of your door or window frame to determine how much weatherstripping you'll need.
For doors, start with the sides and top. Cut the weatherstripping to size and peel off the adhesive backing. Press it firmly into place, ensuring there are no gaps.
For the bottom of the door, install a door sweep by screwing it into place.
For windows, focus on the sashes where they meet when closed. Apply weatherstripping to both the top and bottom sashes. If you have single-hung windows, only weatherstrip the bottom sash.
When applying adhesive-backed foam tape, start at one end and work your way across, pressing firmly as you go.
For V-strip weatherstripping, nail it into the frame using small finishing nails.
Test your work by closing the door or window. If you feel any drafts, adjust the weatherstripping accordingly.
Insulating Pipes and Ductwork
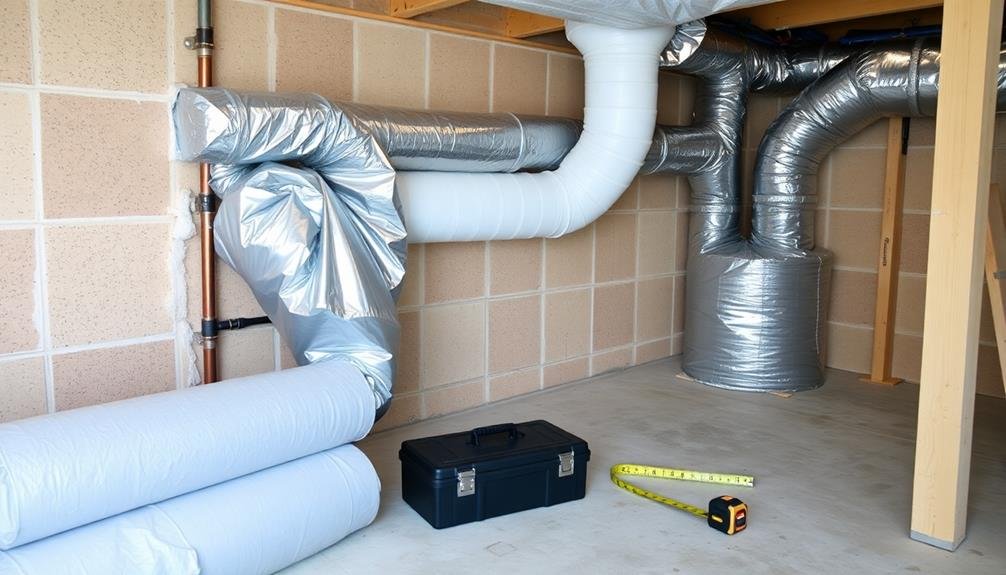
The unsung heroes of your home's energy efficiency are often hidden behind walls and under floors. Your pipes and ductwork play an essential role in maintaining comfort and reducing energy waste. Insulating these components can lead to significant savings on your utility bills and improved overall home performance.
For pipes, start by measuring their circumference and length. Purchase pre-slit foam pipe insulation that matches these measurements. Clean the pipes thoroughly before installation. Slip the insulation over the pipes, ensuring a snug fit. Use duct tape to secure the seams and ends.
When it comes to ductwork, focus on areas in unconditioned spaces like attics, crawl spaces, and basements. Use foil-faced fiberglass insulation wrap or rigid foam board. Measure and cut the insulation to fit around the ducts, leaving no gaps. Secure it with aluminum foil tape or wire ties.
Don't forget to insulate your water heater tank as well. Use a water heater blanket, following the manufacturer's instructions carefully. Avoid covering the thermostat, top, bottom, or burner compartment.
Basement and Crawlspace Insulation
Moving from pipes and ducts to larger spaces, basement and crawlspace insulation can dramatically impact your home's energy efficiency. These areas often act as thermal weak points, allowing heat to escape in winter and enter during summer. By insulating them properly, you'll reduce energy costs and improve comfort throughout your home.
For basements, start by sealing any visible cracks or gaps in the walls and floor. Then, install rigid foam insulation against the walls, followed by a vapor barrier. If you're finishing the space, add fiberglass batts between the wall studs for extra insulation.
In crawlspaces, begin by addressing moisture issues. Ascertain proper drainage and lay down a vapor barrier over the soil. Then, insulate the walls with rigid foam or fiberglass batts, depending on your climate and local building codes.
When insulating these areas, remember to:
- Wear protective gear, including gloves and a mask
- Check for and address any electrical or plumbing issues before insulating
- Leave adequate space around HVAC equipment and water heaters for safety
Eco-Friendly Insulation Materials

In light of growing environmental concerns, eco-friendly insulation materials have gained popularity among homeowners and contractors alike. These materials offer excellent insulation properties while minimizing environmental impact. You can easily incorporate them into your DIY insulation projects.
One popular eco-friendly option is cellulose insulation, made from recycled paper products. It's treated with fire retardants and can be blown into wall cavities or attics.
Another choice is sheep's wool, a natural and renewable resource that's excellent at regulating humidity and temperature.
Recycled denim insulation is another sustainable option. It's made from post-consumer blue jeans and doesn't contain harmful chemicals.
Cotton insulation, derived from recycled textile fibers, is also a great eco-friendly alternative.
For those seeking plant-based options, hemp insulation offers excellent thermal and acoustic properties. Cork insulation, harvested from cork oak trees, is naturally fire-resistant and repels insects.
When choosing eco-friendly insulation, consider factors like R-value, moisture resistance, and installation method.
Many of these materials can be installed using similar techniques as traditional insulation, making them suitable for DIY projects. Always wear protective gear and follow manufacturer guidelines when handling any insulation material.
Frequently Asked Questions
How Long Does DIY Insulation Typically Last Before Needing Replacement?
You'll find that DIY insulation typically lasts 20-30 years before needing replacement. However, it depends on the material you've used and how well you've installed it. Regular inspections can help you extend its lifespan.
Can Insulation Upgrades Affect My Home's Resale Value?
Yes, insulation upgrades can boost your home's resale value. You'll likely see a return on investment through increased energy efficiency and comfort. Potential buyers often appreciate well-insulated homes, which can lead to higher offers and faster sales.
What Safety Gear Is Essential When Working With Insulation Materials?
When working with insulation, you'll need safety goggles, a dust mask, gloves, and long-sleeved clothing. Don't forget a hard hat if you're in tight spaces. It's essential to protect your skin, eyes, and lungs from irritants.
Are There Any Tax Incentives for DIY Home Insulation Projects?
You might qualify for tax credits when upgrading your home's insulation. Check with your local government or the IRS for current incentives. Keep receipts and documentation of your DIY project to claim potential deductions on your taxes.
How Soon After Insulating Can I Expect to See Energy Bill Savings?
You'll likely notice savings on your energy bills within the first month after insulating. However, the full impact may take a few months to a year, depending on seasonal changes and your energy usage patterns.
In Summary
You've got plenty of DIY insulation options to improve your home's energy efficiency. From adding attic insulation to sealing gaps around doors and windows, you're now equipped to tackle various projects. Don't forget about insulating pipes, ductwork, and your basement. With eco-friendly materials available, you can make sustainable choices too. By taking on these upgrades yourself, you'll save money on both installation costs and future energy bills. Stay warm and enjoy your cozier, more efficient home!


Leave a Reply